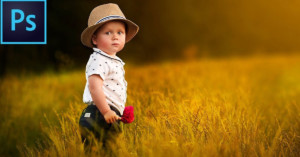
Add Depth and Drama to Landscape Photos Using Lightroom
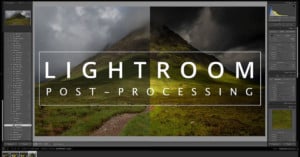
Here's a 24-minute video from Andrew Marr that looks at how he adds depth and drama to landscape photos during post-processing in Adobe Lightroom.
Here's a 24-minute video from Andrew Marr that looks at how he adds depth and drama to landscape photos during post-processing in Adobe Lightroom.
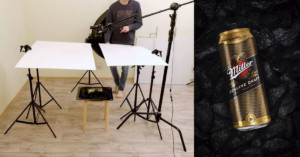
Here's a 6-minute video from Andrew Mikhaylov that looks at how you can easily shoot beer can photos using 4 light sources for that signatory reflection on the can.

There has been a wave of updates to raw processors recently, including new releases this week from Topaz and ON1. Consequently, it has been difficult for me to finish this review, but developers updating their software is a good problem. Finally, here it is!
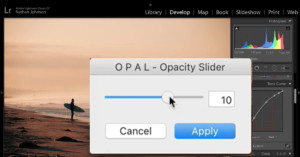
Have you ever wanted to adjust the strength of a Lightroom Preset with a simple slider? Opal is a new plugin that lets you do just that. It allows you to turn down or crank up any Lightroom preset in just seconds.

If you're starting to spend a lot of time inside Lightroom, keyboard shortcuts and hotkeys can help speed up your workflow and save you precious seconds that add up over time. Toronto-based photographer Lucy Martin put together this helpful 3-minute video to share the handy Lightroom shortcuts that she finds herself using all the time.

Here's a 5-minute tutorial from Evan Ranft that shows you why and how you can easily split tone your photos for better colors using Adobe Lightroom.

The Droste effect is when a photo recursively appears within itself -- the photo within the photo within the photo, "tunneling" forever. Here's a 12-minute video by photographer and retoucher Antti Karppinen that shows you can create a Droste effect photo for yourself.
Here's a 14-minute tutorial from photographer and retoucher Zoë Noble that shows you how you can use dodging and burning to retouch skin in Adobe Photoshop.
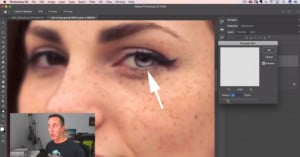
Photographer and retouching expert Matt Kloskowski made this 14-minute video that introduces on technique for adding life back into a portrait subject's eyes using Photoshop.
If you want to quickly and easily use your Lightroom presets in Adobe Photoshop, there's a new tool that can help you do so. It's called Preset Brewery, and it hopes to fill a small gap in the needs of photographers.

Want to get a good grasp of Photoshop's Blend modes? Here's an 8-minute crash course on the subject by the Photoshop Training Channel. They may be one of the least understood features, but blending modes can be extremely useful when creating composites and retouching.
Want to retouch your photos to look just like Pam Dave Zaring's amazingly bad family photos that have been going viral? Photoshop expert Antti Karppinen has just released a tutorial showing how you can achieve the exact same look in Photoshop.
Want to improve your selection game in Photoshop? Here's an 8-minute video from PiXimperfect that points out some "secret" sliders in Adobe Photoshop that will help you to make fast and smooth selections.
Photographer Sean Tucker made this 36-minute video that walks through editing dramatic portraits in Photoshop. Watch Tucker's entire process from start to finish as he brings his portraits to life.
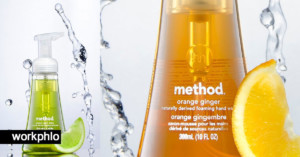
Here's an informative 18-minute tutorial by photographer Dustin Dolby of workphlo that teaches how to blend speedlight exposures for water splash product photos. Dolby is shooting a pair of advertising posters.

There are different techniques you can use in Photoshop to brighten up a dark and dull portrait. This 4-minute tutorial by PHLEARN shows a 2-minute technique that avoids desaturated, unnatural skin tones.
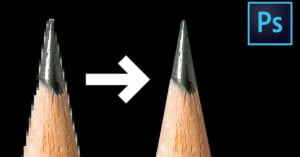
Photoshops High Pass filter can be an effective photo sharpening tool, but its effect can be too drastic for certain areas of your photo. Here's a 9-minute tutorial from photoshopCAFE that looks at how to more effectively use Photoshop's "High Pass" filter for sharpening.

Here's a 24-minute tutorial by photographer Ian Norman of Lonely Speck that looks at how you can stack and stitch panoramas of the night sky. Norman says these are his two favorite techniques for maximizing the image quality of astrophotos.
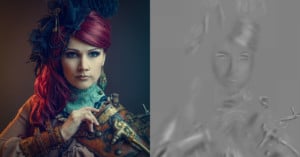
Photographer and visual artist Antti Karppinen dodges and burns his photos using a single 50% natural gray layer in Overlay blending mode. By sharing these gray "dodge and burn layers" separately, Karppinen can easily show exactly what he did to each of his photos.
Adobe just released this helpful 2-minute video that shares 10 handy shortcuts you can use in Photoshop when working with layers.

Here's a 5-minute tutorial by photography artist Antti Karppinen that shares a technique for effectively dodging and burning your photo using the Gaussian Blur adjustment in Photoshop.

Retouching eyes unnaturally is a great way to ruin a good portrait. Here's a 14-minute tutorial by photographer Dani Diamond that shows how you can easily retouch eyes with a natural look using Photoshop.

Here's a 20-minute tutorial from Dustin Dolby of workphlo that looks at how you can shoot high-end product photos using just one speedlight by painting light. Dolby also looks at how to composite and enhance the shot to produce the final image.
RGB Curves can be an intimidating photo editing tool that's difficult to wrap your mind around, but they're powerful and worth learning. Photographer Conner Turmon made this helpful 8.5-minute video that explains how tone curves work and how you can use them to create professional-looking photos.
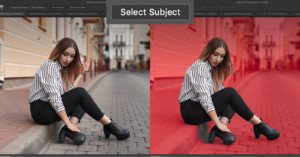
Adobe just revealed a powerful new tool that's coming soon to Photoshop CC. Called "Select Subject," it uses machine learning to detect subjects in your photos to help you isolate them from the backgrounds.
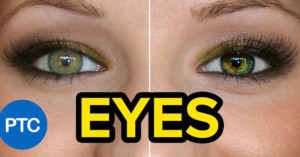
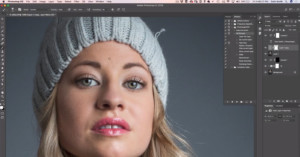
Here's an in-depth 28-minute tutorial from the Photoshop Training Channel that will show you how to enhance and create amazing eyes in portrait photos using Photoshop.
Here's a 47-minute tutorial from PiXimperfect about how to create those soft, dreamy portrait photos of children using Photoshop.
Once you've matched the color tones in a composite photo, you can then move on to matching the saturation for proper realism. Here is a 5-minute tutorial from Antti Karppinen that shows how you can do so using Photoshop.
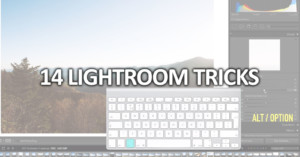
Adobe Lightroom is an app that's filled with all kinds of helpful features that can make life easier for you once you learn they exist. Here's a 10-minute video by photographer Evan 5ps with 14 different tips and tricks that he uses on a daily basis.

One of the most common difficulties with compositing photos is having the color tones of the different parts of the image match. This can be tricky to achieve, but this 10-minute tutorial by Photoshop expert Antti Karppinen shows a powerful way you can do it using a Selective Color adjustment mask.
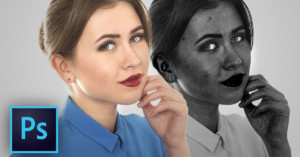
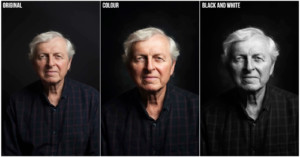
There are many tips and tricks in Photoshop that can make editing life easier if you know how to use them. Here's a 13-minute tutorial by PiXimperfect that teaches how you can easily identify and remove blemishes in portraits using a black-and-white adjustment layer.

Adobe has just announced its October 2017 update of Photoshop CC, which comes with a number of new features and improvements to the photo editing program. Big ones in this release include a brand new Curvature Pen Tool and improved brush preset management.

It's amazing what can be done with Photoshop these days with simple techniques and a lot of patience. Case in point: UK-based photographer Denyer shared this 4-minute timelapse of an edit he did for fun, removing a large crane covering a busy building over 2-hours of retouching.
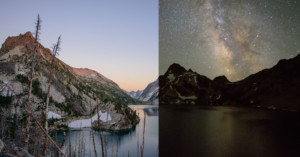
This 10-minute tutorial by nature photography site Nature TTL teaches how to create a day to night time-lapse from sunset to a starry night sky. While it can be a tricky technique to pull off, the effects can be totally mesmerizing if done correctly.

Here's a 20-minute video in which Serge Ramelli shows how he captured some beautiful fine-art photos of hot air balloons at a festival, even though the photo opportunities were initially looking bleak. Faced with a poor foreground full of spectators and bright yellow buses, Ramelli had to think outside the box.
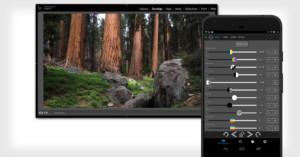
Control Room is a new app that turns your smartphone or tablet into an external control panel for Lightroom photo editing. This means you can control adjustments through the screen on your phone while watching those adjustments affect the large photo open in Lightroom on your computer.
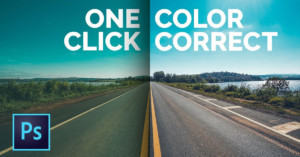
Is there an unwanted color cast spoiling your photo? Correcting this is really simple when you use the curves tool, as demonstrated by PiXimperfect in this 7-minute tutorial.
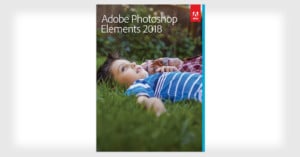
Adobe has just announced the release of Photoshop Elements 2018. With this latest version, Adobe is moving away from using version numbers and will instead begin naming the software version after the upcoming year.

When photographer Scott Kelby posted photos of Atlanta's new $1.6 billion Mercedes-Benz Stadium, a lot of his viewers started wondering about his workflow. In response, he just shared an entire 11-minute walkthrough of his Lightroom editing process.

Hello, photographers. Here's a giant list of 194 photo editing tools and photography apps you can use in your photography.
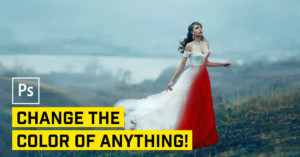
Changing the color of an object using Photoshop is a typical use case for the software, and there are many ways to do it. This 20-minute video from Nathaniel Dodson of tutvid that examines 5 separate ways to re-color or add color to objects.

Google today rolled out the latest version of its Snapseed photo-editing application. Version 2.18, available for Android and iOS users, features a fresh new user interface and new presets.
The LAB color space is particularly useful for boosting colors and definition in images due to the way it handles colors when compared to RGB and CMYK. Rather than describing how colors should appear on a screen or in print, LAB is designed to approximate human vision. Colin Smith of photoshopCAFE shows in this video how this color space can be utilized in Photoshop to easily improve your images.

Focus stacking is a technique typically used in macro shots to achieve a large depth of field. It’s a relatively simple concept: take many images focused at slightly different distances and combine the sharp portions to a single image in post. This 6-minute video from landscape photographer Mark Denney will show you how to utilise the technique in landscape photography.
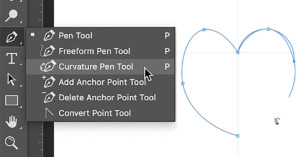
Adobe just announced that there's a powerful new Curvature Pen Tool coming to Photoshop CC later this year. The 1-minute video above is a sneak peek at how this upcoming tool works.
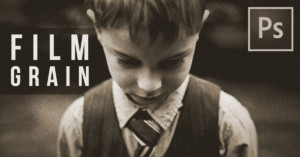
Here's a 10-minute video tutorial by PiXimperfect that teaches how to add artificial film grain to your photos. Learn three ways to give your digital photos a film look.
Lightroom is a fairly straightforward and simple piece of software to get your head around. But, like anything, there are always shortcuts and tricks you can use to improve and streamline your workflow. In this 6-minute video from Travis Transient, try out these 3 top tips for making Lightroom life flow more smoothly.
In this 9-minute video tutorial from Serge Ramelli, learn how to easily swap out an unattractive white sky from a photo for a more dramatic one using Photoshop. Utilizing the power of the multiply blend mode, it's possible to convincingly change the sky in the shot in minutes.
An important part of developing your own editing style is the way that you color grade your images. Photographer Sean Tucker explains his approach in this 15-minute video, showing how he uses edits his photos while adhering to a consistent color palette.

In this 20-minute tutorial by PiXimperfect, learn how to use Photoshop to create a realistic bokeh effect in your photo. Creating a shallow depth of field after you've taken the shot can be tricky to do convincingly, but this tutorial will show you one method for how to do it.