How to Photograph Mysterious Floating Scrabble Letters

This past month, a student showed me an Instagram post with floating scrabble letters and asked me how it was done. After a few moments of reflection, I decided there was a number of ways to photograph floating letters and it would be a great idea for a student lab. To explore different techniques would be a great lab. The students evaluated the techniques to see which was best for creating floating letters.
After several other experiments were tested, the best results were obtained by the “trapdoor” technique. This experiment was the students favorite and the technique I will explain here.
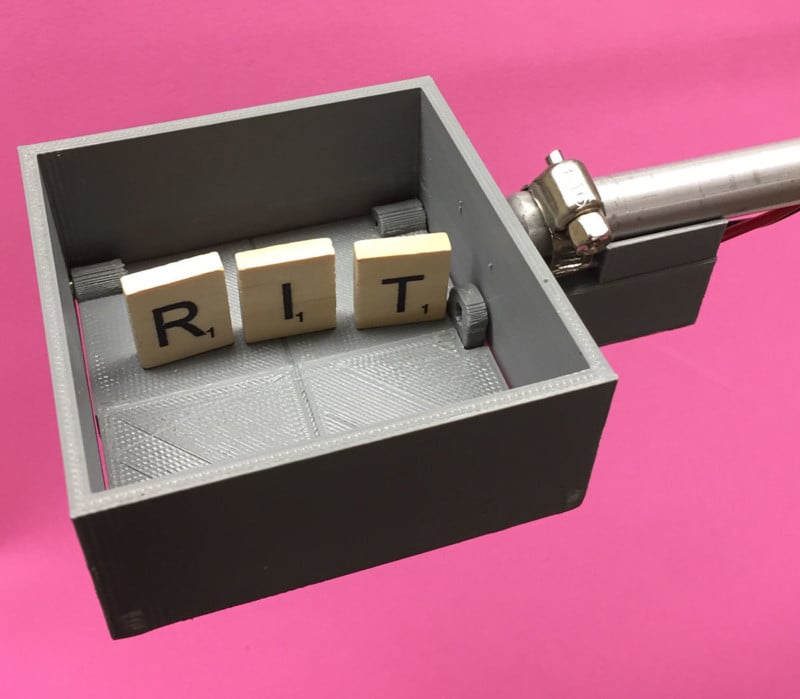
In the trap-door technique, the scrabble letters are arranged in a specially built box that has two doors on the bottom that swing open when a solenoid is energized. The trap door is an easy device to manufacture and the one I use was 3D printed, by eBay seller talos_crete. He sells the 3D printed drop box or trap door for around 50 dollars. The current arrangement only allows four letters to be dropped at a time. For larger groups of letters, a larger apparatus would be better.
The process is controlled by programming an Arduino processor to use a push button to start a clock and energize the solenoid which in turn opens the trap-door. After the letters fall the desired distance the high-speed flash is triggered to stop the motion. On this apparatus, the camera is set to bulb mode to catch the action, but future systems will be controlling a camera to take a picture at the correct time. This improvement will allow the system to operate in a room with the lights on.
The process is so stable that one of the students Ashley Crichton made a GIF:
The trap door ready to drop scrabble letters:
The circuit:

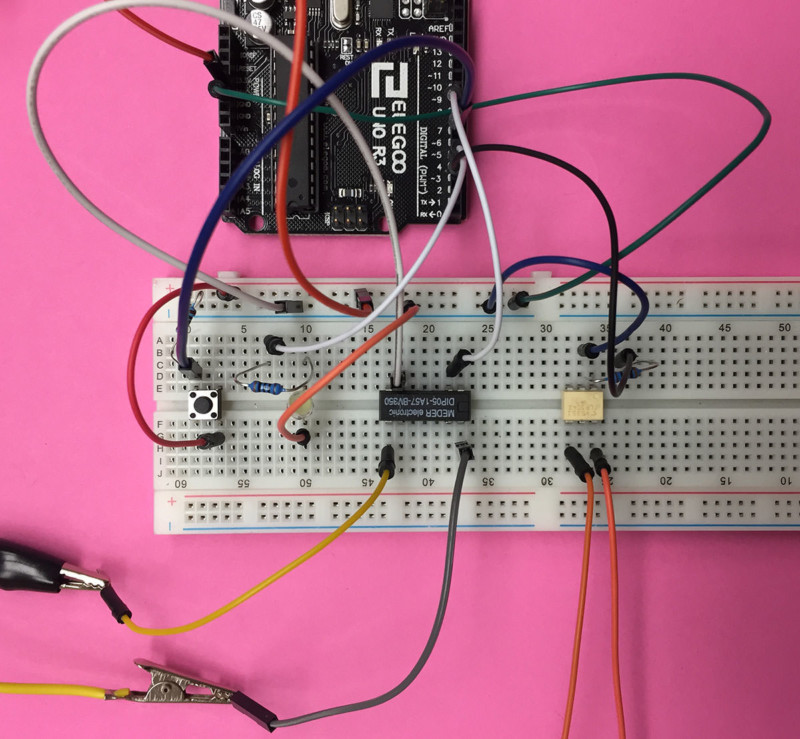
The switch resides on an electrical breadboard for this demonstration. When the switch is pressed, the Arduino pin 7 goes to a +5volt (high) value and this triggers the program to start.
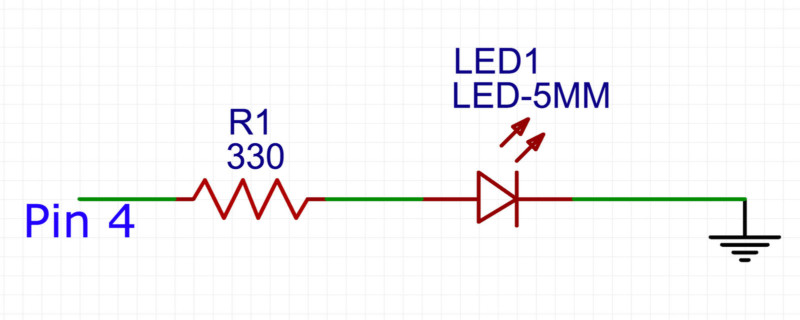
I like to stress the power of a glowing LED to indicate the experiment is. This project is no exception. When the program starts up, the LED is turned on to show that something is working.
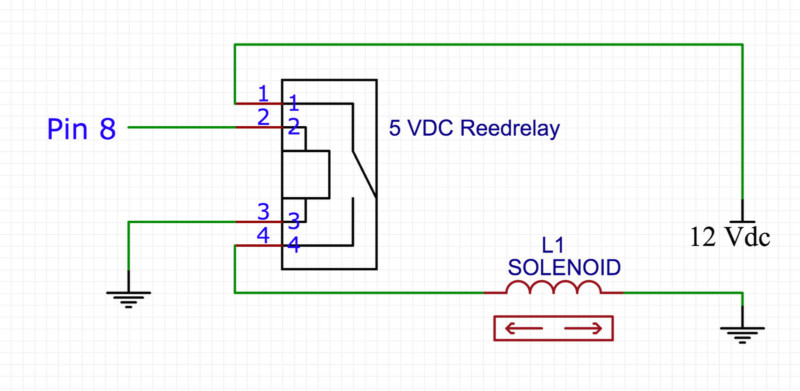
The next step that the program does is open a reed relay. This is basically a switch that allows the Arduino to control more voltage and current than can go through the microprocessor. Here the 5v DC reed relay opens a switch that allows the 12 VDC that the solenoid needs to open the trap-door. The reed relay also has the advantage that it isolates the 12VDC supply from the Arduino circuitry. The reed switch is not super-fast, but it is sufficient for this application.
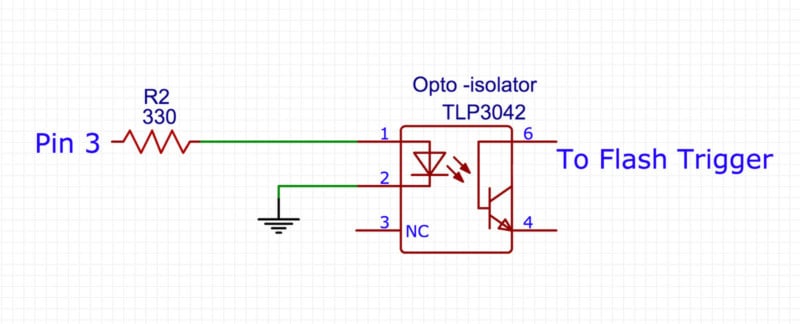
To trigger the flash, I used an optical isolator that keeps the circuits from the flash trigger separate from the circuits for the Arduino. I could use a reed relay for this application, however, the opto-isolator is much faster. This also a nice way for students to be introduced to an optical isolator.
In conclusion, the students decided that the trapdoor technique of dropping letters was the easiest and yielded the best results. The elimination of trial and error from the process allowed the students to get the letters in the exact position they desired every time.

During the day, the students were experimenting, Chris Marquardt from the podcast Tips From The Top Floor made the following video of the process:
You can find the code here.