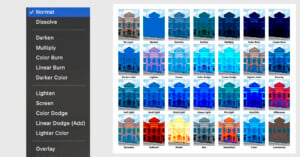
Blending Modes in Photoshop: A Comprehensive Guide
Photoshop can feel infinite. It’s a lot like a high-tech espresso machine or a sports car: you don’t have to use all of its features for it to be functional, but when you can, it’s a powerful tool.
Photoshop can feel infinite. It’s a lot like a high-tech espresso machine or a sports car: you don’t have to use all of its features for it to be functional, but when you can, it’s a powerful tool.

One of the single most worthwhile investments you can make as a photographer is paying for a bespoke website. Whether you’re a commercial assignment photographer looking to showcase your best work, a batch shooter wanting to create a home for your purchase galleries, or anything in between, an online presence outside of social media is a crucial component of any creative’s toolkit.
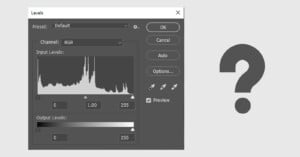
Levels often seems like a boring old tool in photo-editing programs. Maybe you’d use it to quickly fine-tune contrast by dragging the left and right sliders inwards. But it’s good for much more than that.

Drones are awesome. Much more than just being fun novelties you might see buzzing around your neighbor’s backyard piloted by a young child, they are amazing creative tools that allow for camera shots that you simply cannot get in any other way, and are used in everything from music videos to live sports to the biggest blockbuster films.
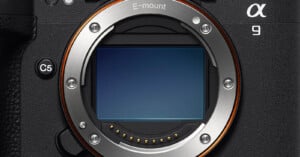
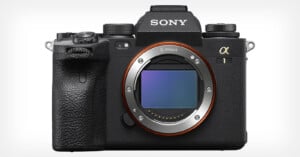
It is difficult to overstate just how big of a deal the Sony a9 III is, at least on paper. As is always the case with press events, and especially ones where hands-on time is limited, pre-production firmware is installed, and shooting opportunities are cultivated, you should consume pre-release content with (many) grains of salt. Hypertension be damned.

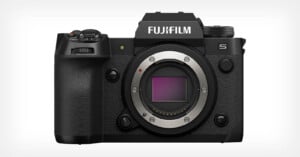
This year marks the 10th anniversary of the first Sony Alpha 7, the first Alpha full-frame interchangeable lens mirrorless camera. Sony is marking the occasion by announcing a breakthrough advancement in imaging technology -- the Sony a9 III, the first full-frame ILC to incorporate a global shutter image sensor.

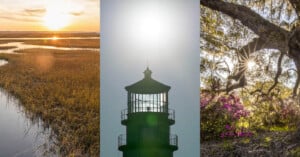
Autumn has officially begun in the northern hemisphere, meaning foliage season is just around the corner. Much of New England, a popular region in the United States for fall photography, experiences peak foliage in early-to-mid October, but what about other places? Where can photographers find the best information to plan their leaf-peeping adventures?
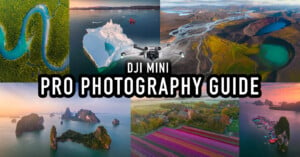
It’s been a while since my last article on drone photography (2019 to be precise). Since then I’ve used lots of DJI drones. Earlier this year I bought a Mini 3 Pro to see if this could potentially replace bigger drones for my travels. And I have to be honest: I didn’t like it at first.
We don’t often extensively cover video gear here at PetaPixel, but we thought it might be helpful to cover some of the best hybrid cameras out there -- those cameras geared toward both photographers and videographers.
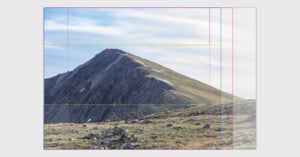
With the recent excitement surrounding the release of the film Oppenheimer, there have been lengthy discussions about the best way to watch it – mostly because of something called an aspect ratio and the way that it affects the viewing experience. This is a term that is used widely in film, and it’s just as important for photographers to understand.
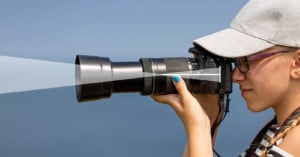
Many photographers will say that your camera lens is as important (or even more important) than your camera body. All of the light that your camera body captures has to go through some sort of lens, which affects sharpness, distortion, amount of light, perspective, and many other variables.
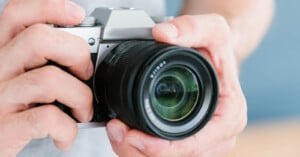
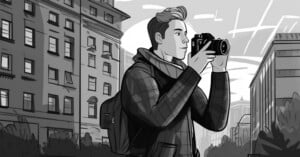
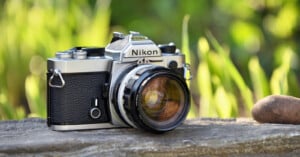
Determining the "best" camera for photography depends heavily on what someone intends to photograph. The best camera for portraits may differ drastically from those for landscape photography, sports, wildlife, or event photography.

Finding subjects for wildlife photography in summer is a challenge. As I look forward to arguably my favorite time of the year – the fall mating season for big mammals such as elk, moose, bighorn sheep, and so on – I first have to make it through the summer. Long days filled with harsh light provided by the sun directly overhead and heat, that unbearable heat.

One of the most exciting things to photograph is a live concert. Rock concerts in particular have an air of electricity about them that you can feel. When you are hired to photograph one you automatically feel like you are a part of that excitement.

Photographers and filmmakers know lighting matters, and that can extends to both light as a method of exposure and light as a way to convey a scene's vibe.
So you’ve found your perfect spot to capture the night sky. The weather is perfect and you’ve been tracking the stars and planets for weeks to capture this moment. But, when that perfect moment comes, the pictures you’ve captured end up hazy and soft. Why? Likely due to excessive light pollution from the surrounding area, especially if you’re nearby a larger city.
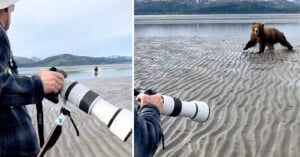
A group of photographers shooting photos in Alaska bravely stood their ground as they were charged by a brown bear.

Product photography is a major branch of commercial photography that is ubiquitous in our world, as product photos are used for everything from billboards and print ads to catalogs and store displays. If you'd like to learn how to become a product photographer, you've come to the right place.
Lens flare can appear as spots or streaks of light and color or as a washed-out hazy look in your photographs. Some photographers and filmmakers like to use it creatively, but it usually shows up as an unpleasant surprise that can ruin your picture.
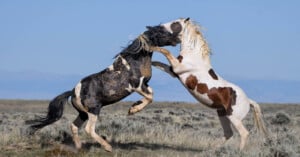
Growing up in the crowded European country of Belgium, few things symbolized the American Dream as much as the iconic Mustang. No, not the Ford muscle car. The wild horse!
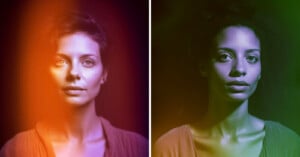
According to some spiritual beliefs, an aura, sometimes called an energy field, is an atmosphere or quality surrounding something, often a person or other living thing.
Amazingly, in the age of AI image creation, film photography is not only popular but it's growing again after an initial decline. More and more, people are finding value in timeless, handcrafted imagery.

It's a common problem — dozens of nearly identical photos on your iPhone, eating up your storage and making it difficult to find what you're looking for. How does this happen, and, more importantly, how can you delete or merge those duplicate photos?
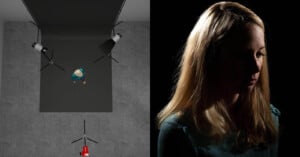
In this article, we are going to take a look at rim lighting. As you might guess, rim lighting is used to light a portion of the edge of your subject. While it is most often used as part of a multi-light setup, it can be used on its own for dramatic effect.

When it was first introduced, many people sharply believed that autofocus would never have a clear place in the photography industry, puns intended. Why have a machine guess where to focus when you can just turn the focusing ring yourself? Today, autofocus systems are among the primary selling points for new camera and lens technology.

Facebook is one of the largest social media networks in the world, with about three billion active users. That equates to a massive demand for Facebook support. Like most prominent internet companies, Facebook tries to handle support with automated systems to reduce the burden on its representatives.
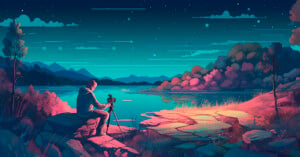
Milky Way season is the best time to learn how to plan and shoot an astrophotography timelapse, capturing the majestic galactic core in motion!

Snapchat is a popular social media app that makes it easy to keep in touch with friends and quickly share selfies, photos, and videos. With 382 million daily active users, it's also a great place to get brand exposure.

Loop lighting is a very common style of portrait lighting that is seen very often in portrait photography. In fact, if you’ve spent much time at all shooting in a studio, you’ve probably employed loop lighting without specifically trying to.

One of the greatest things about film photography is its friendliness toward do-it-yourself approaches. Want to hack together a working camera out of discount hardware store supplies? All the power to you! Want to shoot on art paper coated in a home-concocted emulsion, contact-printed using authentic techniques from the 1800s? Why not?
If you want to get a rise from fellow photographers, hop onto any online photography forum and discuss ultraviolet (UV) lens filters. You can say they're excellent or that they're worthless. Either way, you're sure to kickstart a less-than-friendly debate. Like most online debates, there'll be no winners.

Food photography is one of the easiest photography disciplines to start out with. You can arrange food however you like. It doesn’t scamper away mid-shoot and doesn’t get tired. It’s also relatively contained and easy to practice.
Film is not making a comeback, it has come back. Photography students I teach are always so excited to start their journey in shooting, developing, and enlarging film, until they start.

DALL-E is the AI image generation app that shocked the world by creating high-quality portraits and artistic paintings without using a camera, film, canvas, or brush.
Zone focusing (ZF) is a great way to pre-set your camera's focus and aperture, then use that setting for multiple shots. Street shooters love it. And it's also great for sports, pets, jumpy kids, parties, or any subjects in motion.

PictureThis is the most popular plant identifier app, and it works with the camera on your iPhone or Android phone. While the recognition of PictureThis isn't perfect, it generally proves to be remarkably accurate thanks to its well-trained AI.

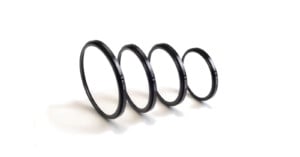
Lenses are big business: while we have seen the value of camera shipments nose-dive year-on-year, lens value has slowly increased and is now equal to about a third of the camera market. It's for this reason that third-party manufacturers have increased their stake in this market and particularly at the low-cost end where Chinese manufacturers proliferate. Who are these companies and what does their appearance presage in terms of the camera market as a whole?
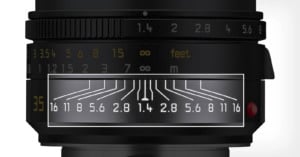
One of the most basic and common terms in the world of photography is the focal length of a lens. In this guide, we will dive down deep into what focal length is and how it works.

Physical photographs can be scanned with an iPhone and it's easy to get good results with a little preparation and attention to detail. There are several apps that you can use to speed up and simplify the process, each with a different approach. The app that's best depends on your particular needs.

Reverse image search is an incredibly useful technology, allowing you to locate online photos that are an exact match or similar in some way to your own. It can also be used to search for products and places just by supplying a picture, even if it's an image that you found online. With the right app, it's possible to get a live result from your smartphone's camera.