Product Photography: A Complete Guide
Product photography is a major branch of commercial photography that is ubiquitous in our world, as product photos are used for everything from billboards and print ads to catalogs and store displays. If you’d like to learn how to become a product photographer, you’ve come to the right place.
Table of Contents
What is Product Photography?
Product photography is first and foremost about images that sell items. The photos are not the end in themselves as they might be in other genres. Unless they help to sell the objects pictured, they haven’t fulfilled their function. That’s not to say that they can’t be artistic or that people might not want prints of adverts as artwork, but this isn’t their ultimate goal or purpose.
A product photographer works with sales and marketing to create interest and inspire purchases.
As with other forms of photography, of course, anyone can simply point any old camera at something and press a button. However, to get results that do their job well, there are various techniques, skills, and knowledge involved. Consistent, reliable product photography is based on a good understanding of light and how to shape it. You need to be able to anticipate how different surfaces will reflect light and know how to get hard edges to your light or soft gradients when required. Retouching is all but indispensable these days and for an image to be used commercially without any post-production is about as rare as hen’s teeth.
Having a good grasp of the elements of visual communication helps you to design images with your audience in mind. This can extend from emotions and ideas implied by our use of color to lifestyle associations created by props in the scene. Yes, you can create product photos without knowing all this, but if you want to increase your chances of doing well then it can make a difference. If you can add useful input to the planning stages and ideas for execution, then you can bring more to the table than simply following a brief.
There are so many different products out there to photograph that it is common for photographers to specialize. We will look at a few possible avenues in this guide, along with the kit that you might need to get the job done. Finally, we’ll round things off with a look at some aspects of running a successful product photography business.
Photographic Skills for Product Photography
Setting yourself apart as a professional product photographer is similar to being a competent professional in any other genre such as portraits or weddings; you need a certain level of photography skills and technique. Although you can take a photo of an object almost anywhere under any lighting with your phone and use software to cut it out and change the background, you will get superior results if you understand light and know how to shape it.
Creative use of depth of field and being able to freeze action or cause motion blur are just some of the camera skills that you are likely to need. If you work regularly with tiny items such as jewelry, you may need to be able to use tilt-shift lenses or make focus-stacked images. In short, if you rely on automatic exposure then you will be limited as to what results you can produce. The ability to manipulate aperture, shutter speed, ISO, and other functions gives you more control and more options.
Understanding Reflections
As well as understanding how the various functions of your camera affect the images you create, as a product photographer you need to be able to analyze your subject and its surroundings so that you can build a lighting setup and troubleshoot anything that doesn’t look right. One of the key areas to master is, therefore, the law of reflection. If your product or prop is glossy, then the light will reflect off it differently than if it has a matte finish.
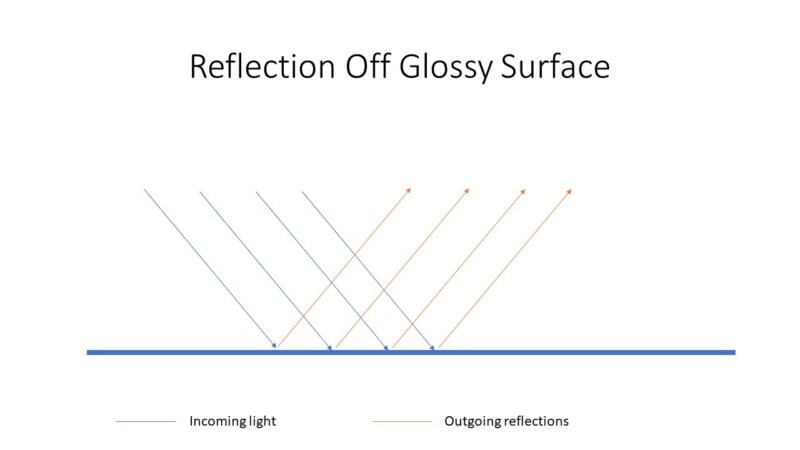
The law of reflection is that when there is a flat surface, the angle at which light bounces off it is the same as the angle at which it hit it (the angle of reflection = the angle of incidence):
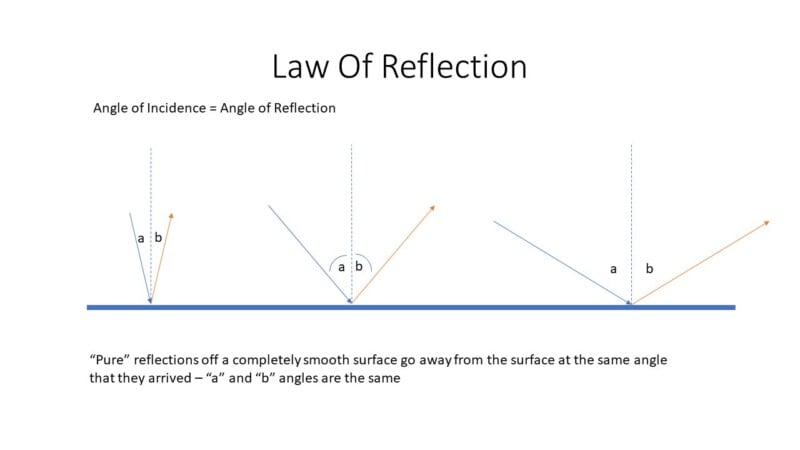
When you are working with glossy surfaces such as polished metal, plastic, and glass, the angle of reflection is reasonably pure. No surface is 100% flat, but it can be close enough for the reflection to appear at the expected angle. This means that most of the light will bounce off your surface at an angle equal to how it hit that surface. You will lose a little light due to it scattering because of slight imperfections and in some cases, you may lose light through a surface or by absorption by the object’s surface (such as with glass or semi-transparent plastic, for example). But the majority of the light will bounce off and be seen at the expected angle.
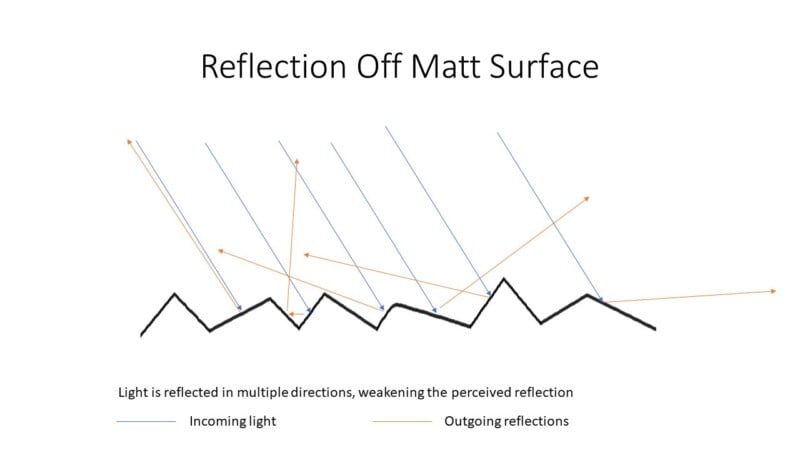
Matte surfaces are uneven, so they scatter the light much more. This means that we get less light sent in the expected direction in reflection off our object. So, highlights will often be less bright than they would on a glossy surface. The reflections also tend to have softer edges rather than a hard line because the matte surface is scattering the light more.
The law of reflection helps us to predict what our product will look like when we light it. For example, if we use a hard-edged round light source such as a beauty dish, then we would expect to see a hard-edged round reflection in a glossy surface. There may still be a round shape to our light off a matte surface, but it will be less hard-edged and a less bright reflection according to how matte that surface is.
Lighting: Hard/Soft, Key, Fill, Rim
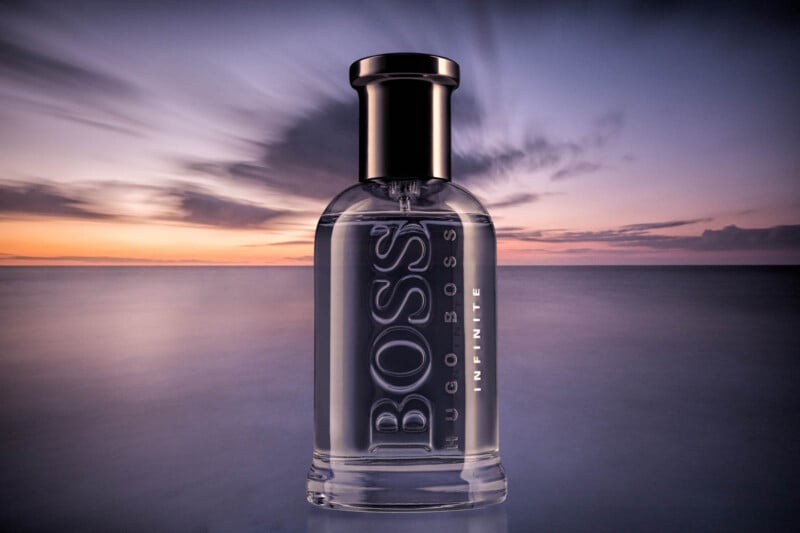
There is a huge range of lighting modifiers out there to choose from. So, which should you use for product images? For portraits we would use something like a large softbox if we wanted soft light on our subject. But, if your product is a glossy object such as a bottle of aftershave or wine, this might not be a good choice. Skin and clothing are mainly matte rather than glossy. So, although you still in some sense get a softer light than you would with a bare bulb, the reflection off a glossy surface is not going to be the same as it would off a matte one such as a face.
With portraits, a softbox can give you a soft transition between the shadows and highlights and that happens partly because the subject’s surface is matt. When you look at the eyes, you see a hard-edge highlight showing the shape of the modifier. It doesn’t look soft in the reflection in the pupil. Products with glossy surfaces behave much more like this than skin. Yes, the size of the light source is still important, but if we want a soft-edged light source then our usual methods aren’t reliable for glossy surfaces.
If you have a main light illuminating the subject, then as with other genres we can call this the “key light”. Adding another light source (whether that is a light or a reflector) to add some light into the shadows can be thought of as a “fill light”. There isn’t really a difference between how these terms are used for lighting products as opposed to people.
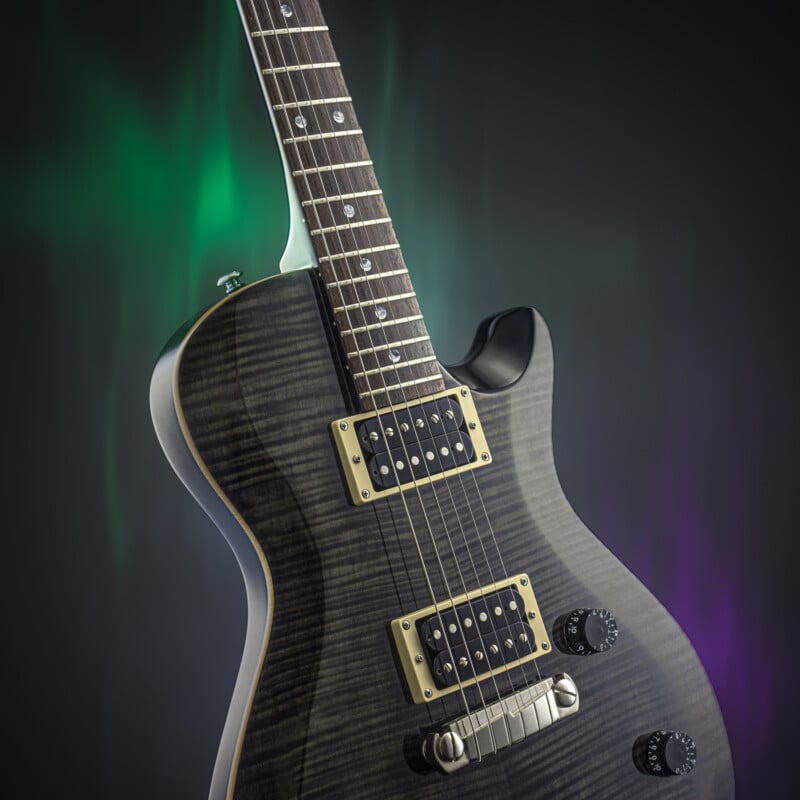
Rim lighting is a common way of adding separation between the product and the background, particularly if the background is dark. This essentially consists of adding one or more lights to illuminate the edge of the product. It is often done with stripboxes similarly to studio portraiture. Again, the usual soft/hard light distinctions aren’t quite the same here when dealing with a glossy surface. Matte will give a more diffused look; shiny surfaces will give you a hard-edged highlight unless you use the technique described below for creating gradients on glossy surfaces.
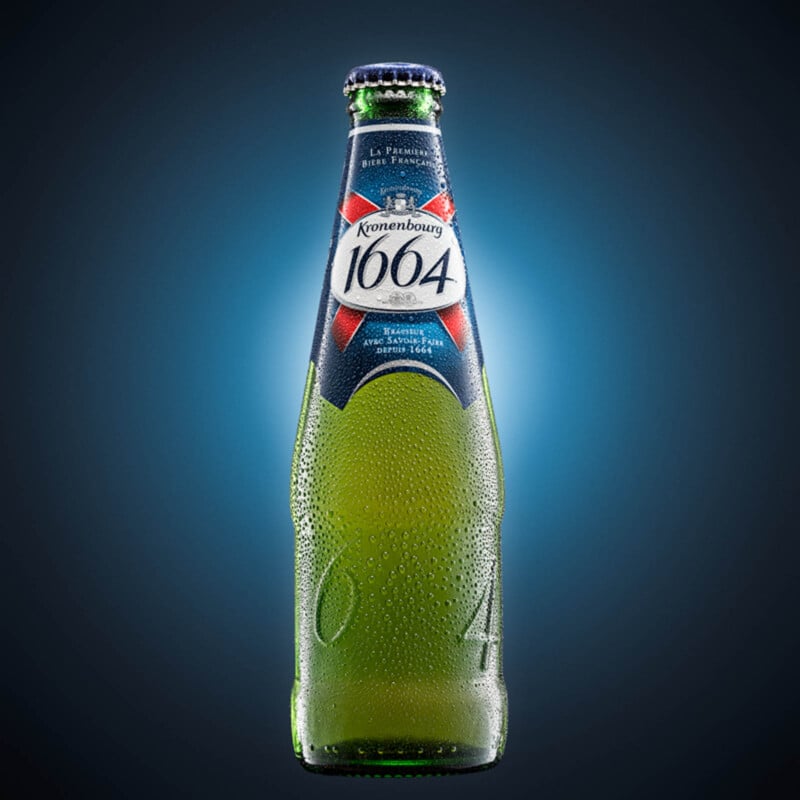
Before we look at how to create soft gradients on your items, there is one type of lighting that sometimes crops up in product photography that you don’t tend to find elsewhere. This is lighting through the subject – either from behind or from the sides making use of translucent or transparent materials and diffraction. It is a technique that is mainly used for drinks photography and other liquid products. Illuminating from behind can be a good way to light up a drink in a glass or bottle without causing a reflection on the glass.
Applying The Theory
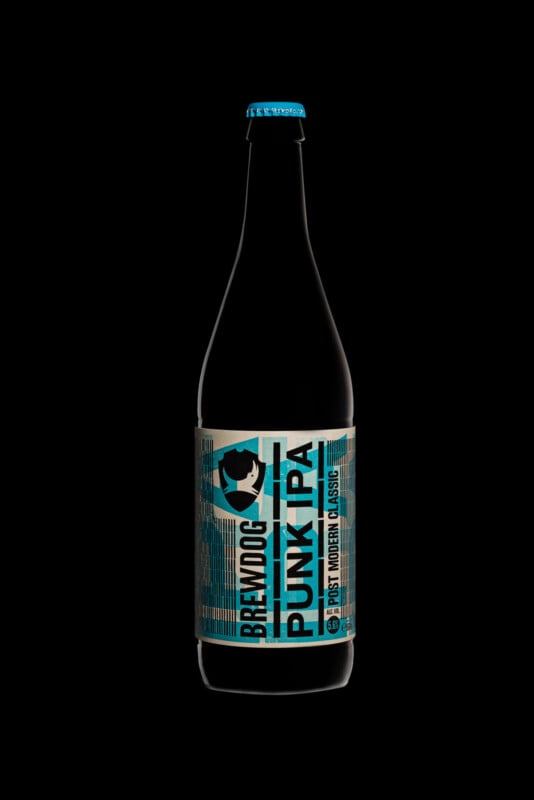
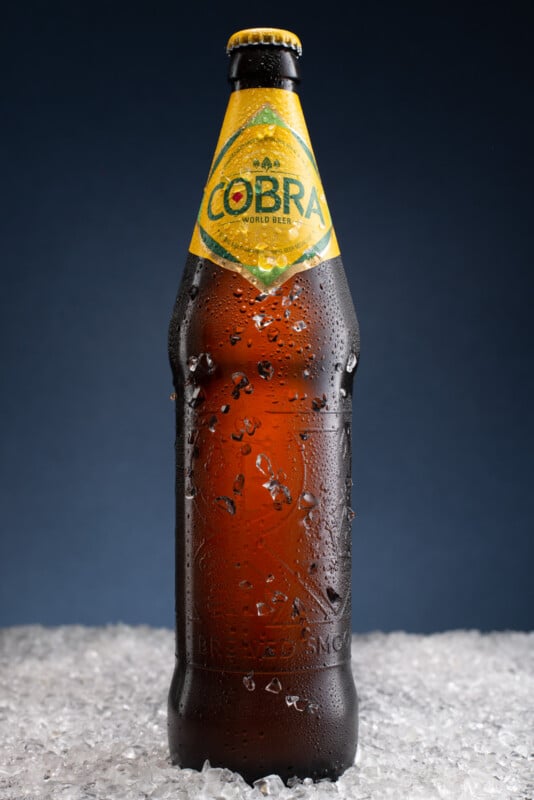
Let’s suppose we wanted a clean image of a pint of beer next to a bottle. We want to see the color of the beer and also have a tidy, hard-edged highlight running the length of the bottle and the glass. We can apply the principles we’ve looked at so far and design a lighting setup accordingly. One light goes behind the bottle and glass to light through them both and show us their color. Another goes through a stripbox to the left of the camera. The result is in the image below.
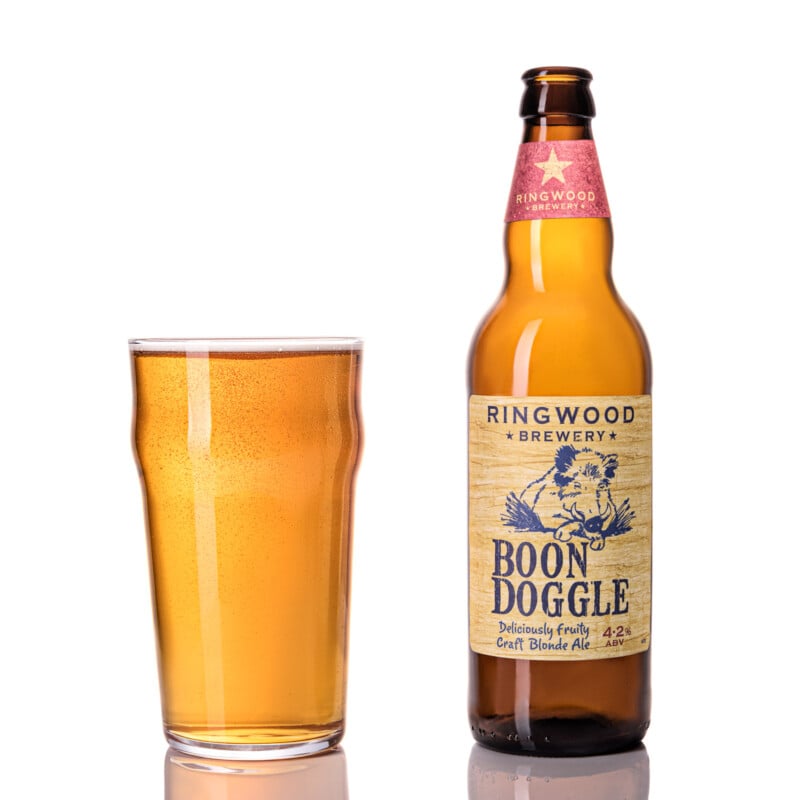
Using the law of reflection, we can also work out why there is a gap in the highlight on the bottle – that bit of the glass reflects an area that is above our light source, so doesn’t have a highlight.
Creating Gradients of Light: Radial and Linear
When photographing a very reflective surface, we need to reflect a light source that already has soft edges if we want a soft-edged look to the highlights on our subject. It can only reflect what it “sees”. So, we need to create a gradient of light that the glossy surface can “see” and reflect. We need to soften the edges of our light source so that they don’t cut off abruptly. This is where diffusion material comes in.
Normally we use diffusion material as part of a soft-box/octa-box, etc. But, for product photography, we have an extra layer of it between the softbox and the subject. If you place a sheet of diffusion material in front of a softbox (with a gap between the two), then you will see that the light coming through it no longer has straight edges. It has been diffused to give you more of a gradient.
There are various types of material we can use, but they tend to be some form of plastic. A smoother surface tends to work much better than a textured fabric. Many of us have 5-in-1 reflectors that have an inner core that you can use as a diffuser. This can be a good place to start and keep costs down. You can buy ready-made sets of frames fitted with diffusers, but that can be an expensive approach. Many professionals buy a roll of plastic that they can then cut panels from as needed. This is a very cost-effective method, and it means that you can make smaller or larger panels to suit the job. You just need to find something to act as a frame to provide some rigidity and keep the material still.
If we cover the angles that the reflection from our surface reveals to the camera with a sheet of diffusion material, then we can create a soft gradient on that material which will then appear on the surface as our camera sees it. We can easily create a radial gradient (from circular to elliptical) or a linear gradient, depending on what would look best on our product. For a circular or radial gradient use a light with a reflector cone on it (maybe also with grids to control the size of the spot) or perhaps a beauty dish. For linear gradients use a stripbox or softbox. Control the gradient by angling the light so that it goes across the diffusion material instead of being completely head-on.
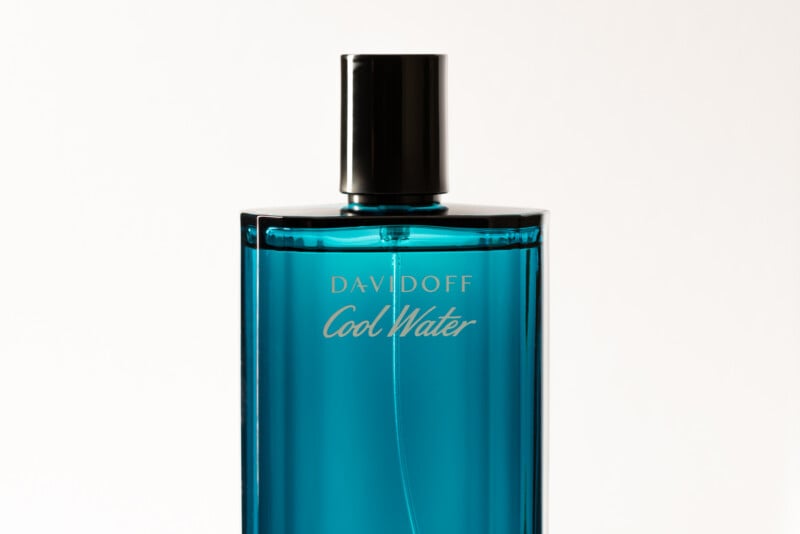
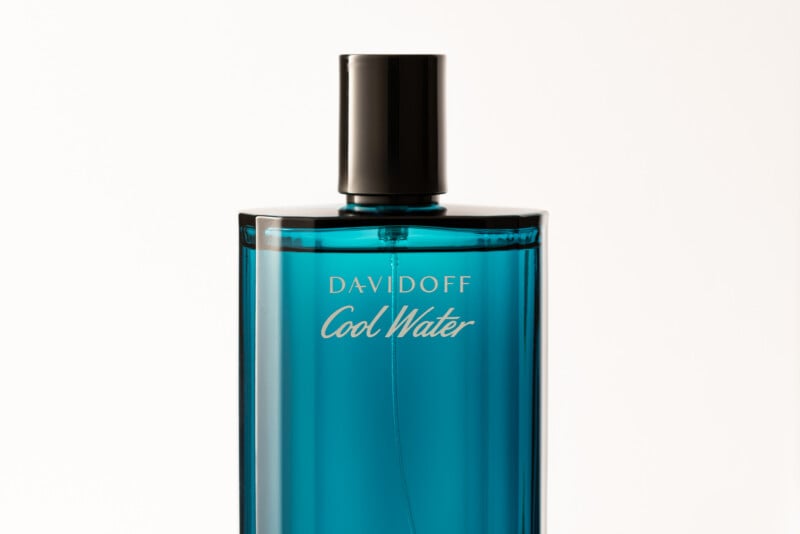
The images below show the difference between a straight reflection from a stripbox and the reflection from a stripbox angled across a sheet of diffusion material. The images haven’t been retouched so you can also see some slight anomalies caused by the shape of the plastic lid.
Retouching
Love it or loathe it, retouching is an important part of product photography and you’ll either need to get very good at it yourself or find someone to work with who can do it for you. From clipping out packshots with the pen tool to removing dust or changing colors, retouching is the finishing stage of the photography process. Images need to be clean, distraction-free, and with the products looking their very best, and this is rarely possible to do completely in-camera.
Even brand-new products can have minor defects that would spoil the final image. There might be a slight spillage of glue, dust may have stuck to some surfaces, or the polish may have slightly lost its sheen. Sometimes you can clean things up before shooting, but it isn’t easy or even possible 100% of the time to get it perfect. If you are adding special effects or compositing several elements together then retouching is even more important. Don’t think that you can get by as a product photographer without it.
You may well find that you develop your own editing style. For me, it is part of the overall look that a client expects when booking me for their shoot. I may outsource some of the pen tool work as it can be laborious to do it all myself. But in the main, I like having the ability to retouch my own work. It also means that if I want to enter any industry competitions or work towards qualifications I can because all the work must be your own for qualification and competition entries.
Types of Product Photography
There are a few types of product images, and a product photographer might reasonably be expected to do any of them, although you may choose to specialize more in one than another. Some photographers prefer having a setup that they don’t need to change and can have a very rapid throughput of products, so they might gravitate toward budget-level packshots. Others prefer something more creative so might aim for more hero shots or lifestyle images.
Packshots
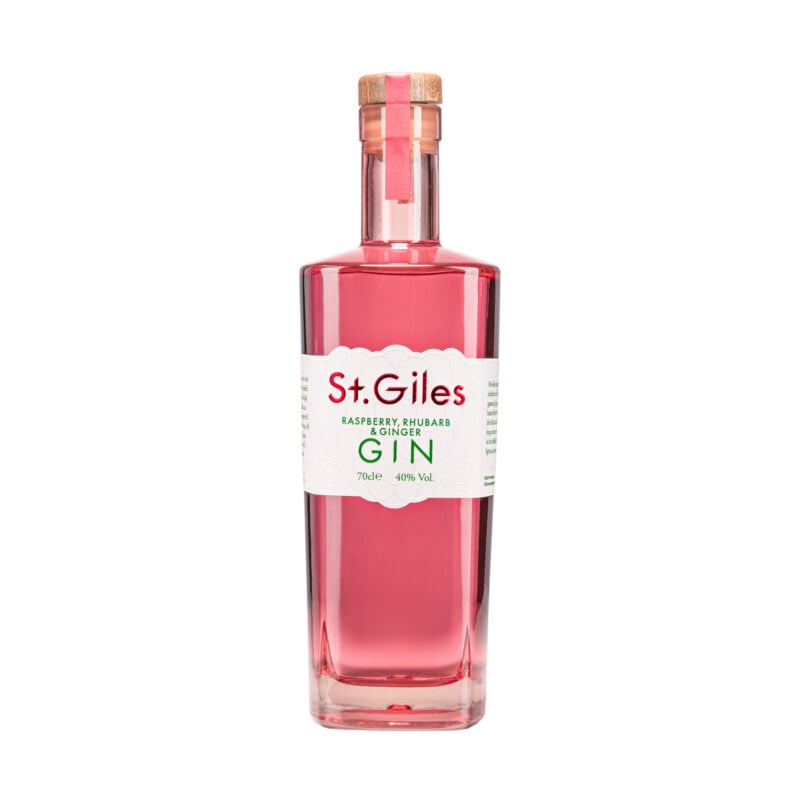
Packshots are those images of products on a white background that we have got so used to seeing on e-commerce websites. Large online retailers issue their own guidelines on how the images must be when submitting them, so make sure you are aware of any requirements. The idea of a packshot is to show just the product (with its packaging if appropriate) without any props or additional styling.
The white background acts to level out the playing field a bit between different brands of products as it can be harder to differentiate without a full-on advert. However, there is still room for good, bad, or great packshots. If you churn out cheap ones, then the lighting won’t change between items. Alternatively, you could choose to use more tailored lighting to show the product off better and this can still help it to stand out from the competition even without further styling or props.
Normally packshots are created in a plain white environment so that there is as little work to do to them as possible in post-production. For small items, a sheet of white plastic underneath may be enough. Larger items might benefit from a white infinity cove if you have access to one.
Lifestyle Images
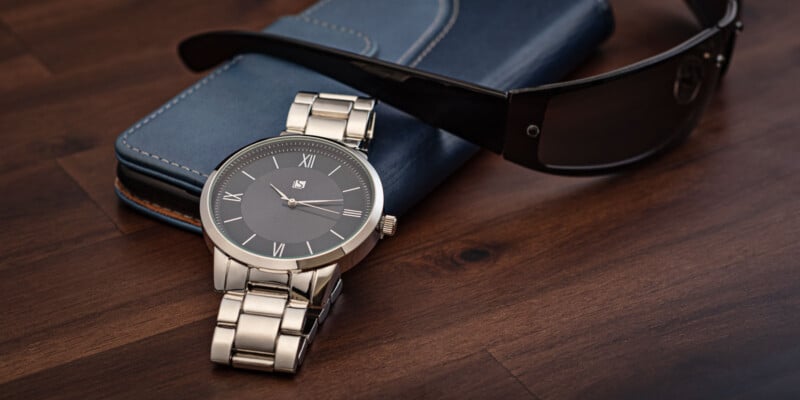
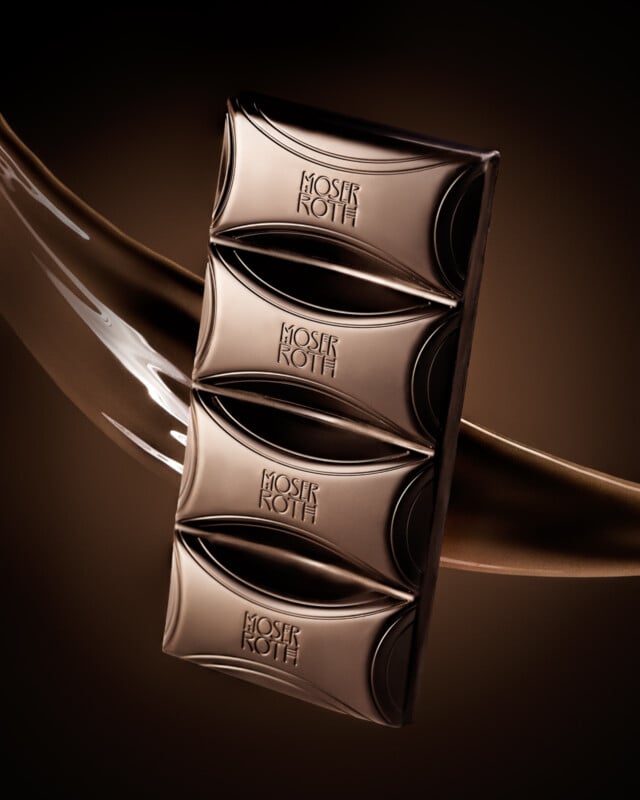
A lifestyle image is one that puts the product into a context. This is typically related to how the product might be used and helps the potential customer visualize how it could fit into their life. As such, we have to be careful what props and styling we use as we don’t want to put off our target audience. If people can’t relate to the lifestyle image, then it loses its effectiveness. In some sense, lifestyle product photography is about showing someone an aspirational lifestyle – a way of living and being that they might aspire to. This is obviously especially the case for luxury products.
Hero Shots
A hero shot is the main product shot used in key places such as a website homepage or on printed advertising. Sometimes it might have lifestyle elements to it if that suits the product and the intended audience. It may be a more artistic viewpoint, creating an interesting image that draws the viewer in. In brief, it is a striking image where the product itself is the “hero”.
In connection with this, you may also hear people speak about a “heroic angle”. This means that the product is shot with the camera slightly lower, pointing up a little to the product. It is a visual device for making the product look more important and “powerful”. The viewer is looking up to it and it is visually on a pedestal above us. It is a psychological trick that can enhance the overall “hero” feel.
Communication Skills for Product Photography
As a commercial photographer, I’m in the business of visual communication. My job is to get a message across to a target audience. If I can understand how that audience thinks and what kinds of symbols and concepts make sense to them, I can craft my images to give them a better chance of success. You can never fully control how a picture will be seen and interpreted, but you can increase the likelihood that people will see and take away what you want to show them. This means studying various vehicles of meaning in the target culture, such as colors, shapes, and other symbolic elements.
Communicating Through Composition
Composing an advertising image is a bit like writing a message. We need to structure things so that they point us in a particular direction. This means choosing carefully where in the frame we place something, how big it is, and what else is functioning as a prop in the scene. Adding other items as props is common when we want to create an implied lifestyle, as we saw earlier. Their presence helps to steer the expectations of the audience and transfers some level of meaning to the product itself.
Use of Color
Colors can have powerful associations with emotions as well as traditional symbolic meanings. So, for example, red might convey heat, passion, love, blood, warning, etc. depending on the context. We can, of course, deliberately use an unexpected combination to make a point. But we risk the audience not getting what we intended from it. For images to have a wider appeal, the symbolic elements need to be widely used and accepted.
Much of the design work is often done in advance and prescribed to the photographer in the brief. However, being able to contribute to this process can be beneficial to the client and possibly flag up something that might have been missed by others. Looking at the image as a piece of visual communication helps us to know if we can justify including or excluding something from our composition. If we work on our own without a marketing or design team, then these skills can be even more valuable for creating powerful product photos for our clients.
Specialities Within Product Photography
Choosing to become a product photographer still leaves you with plenty of options when it comes to specializing. Yes, it might seem that you are already a specialist at that stage, but you can niche down further if you want to go after the more lucrative contracts.
Liquids and Splashes
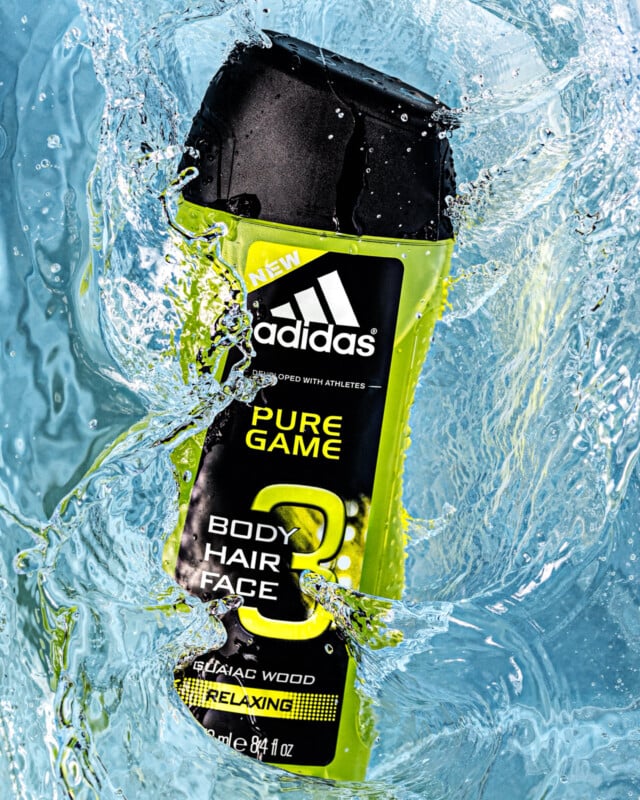
Photographing liquid products often involves some kind of splash photography. For this, you will need lighting that can freeze motion. It is very difficult to do this effectively with a fast shutter speed. The usual approach is to have a studio light that has a short flash duration, say 1/4000th of a second or so. The camera is usually set up for the required aperture with the shutter speed at the usual synchronization speed (typically 1/160th or 1/200th of a second). You should be able to get a completely black image with your camera settings before adding flash as any light spillage from other sources risks giving you blur in your splash.
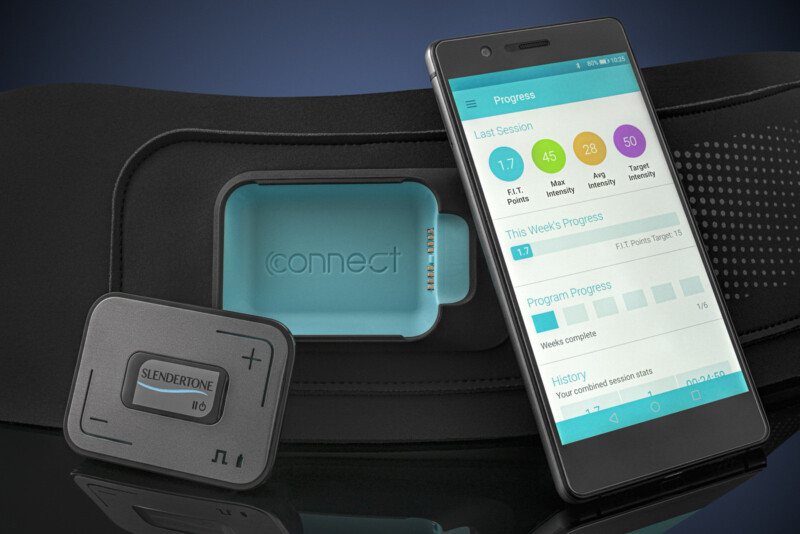
360 Spins
At one stage it looked like 360 product spins, especially the interactive types would really take off and help stand in for being able to handle a product in-store. So far, this hasn’t quite happened, but 360 product photography has nevertheless found a place in e-commerce. Although you can create animations using a video, if you want to work with the interactive versions then you often need to shoot still frames. Your frame rate will dictate how smooth the final animation is and how many frames you need to shoot.
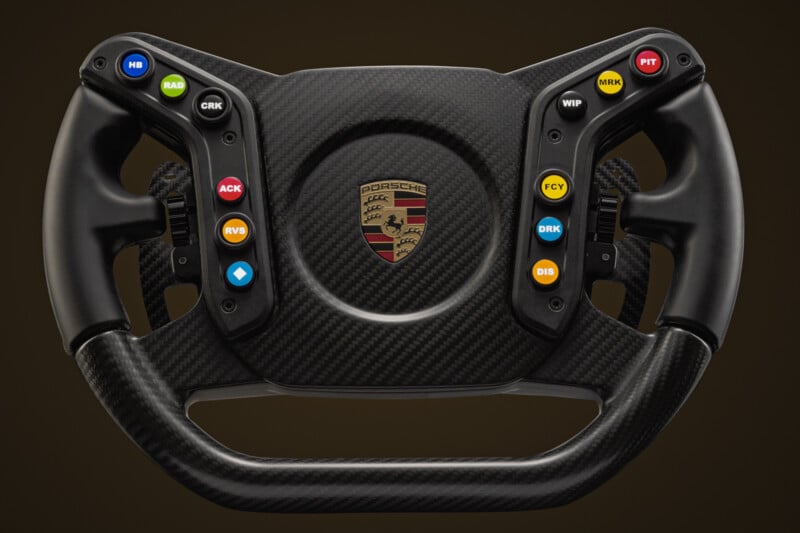
This is a 180 variation on the usual 360:
There is some specialist equipment needed for this, which ranges from inexpensive to eye-watering prices depending on the setup you go for. Small items can be photographed on a small turntable. For larger items, you obviously need a bigger one, but it also needs to be able to cope with a good amount of weight. It is important to get a turntable that turns in adjustable increments if shooting a set of stills as otherwise your frames may not be evenly spaced out. If you want to automate the whole process, then there are full rigs that you can buy that include the lighting, turntable, and a robotic arm to swing the camera for multi-angle spins.
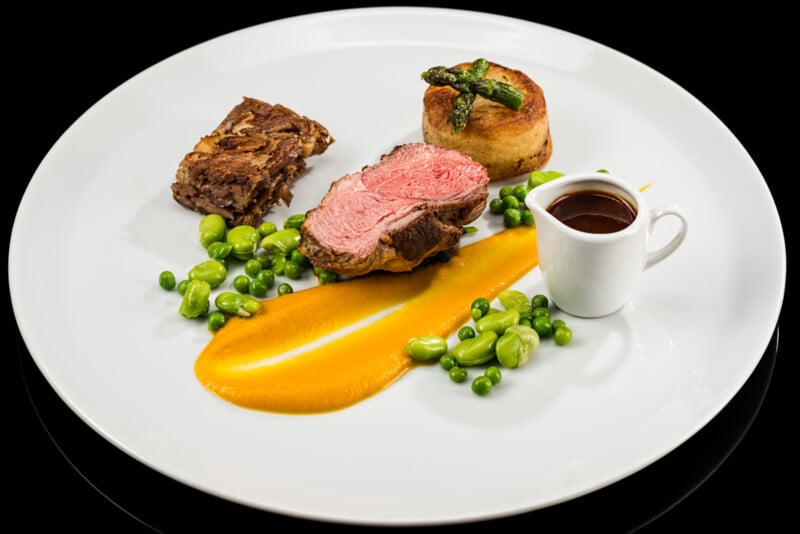
Food
Given the obvious perks, some product photographers choose to specialize in food. However, don’t always assume that all is as it seems…! Food photographers sometimes work with food stylists, while others prefer to learn the tricks of the trade themselves. There are many ways to enhance the look of food, often including inedible additions such as glue or glass beads and sprays of various kinds. If you want to conquer this niche then start making a note of any clever tricks that you come across.
Some people think that food should be photographed only using natural light. This can potentially save you from buying lighting equipment, but it puts you at the mercy of the weather and generally forces you to set up by a window. For more flexibility, I would definitely recommend learning to use flash and/or continuous lighting as well. Product photographers ideally need to know how to manipulate light from any source to make it do what they want to create the desired look.
Jewelry
Jewelry is another specialty that is quite popular. For less expensive jewelry you will often get batches of numerous items to shoot, and this can be fairly lucrative. High-end expensive jewelry requires excellent photography technique and very high standards of retouching. Attention to detail is very important if you want to work in this niche.
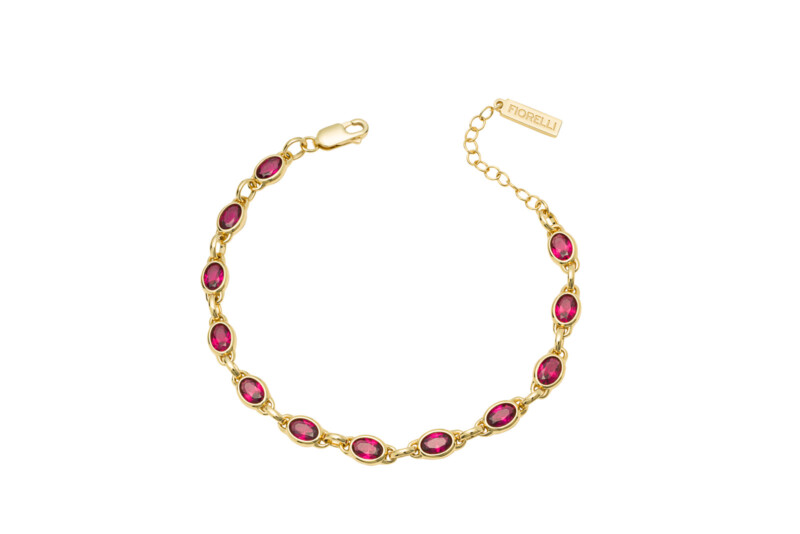
Due to the size of the products, you will often need to shoot focus-stacked sets or work with tilt-shift lenses and possibly extension tubes or bellows to get sufficient depth of field to show off gemstones and the craftsmanship that has gone into the items. As they are so reflective, you need good control of your lighting and to find ways of reducing unwanted reflections that can spoil the final look.
Still Life
Still life is a more generic type of product photography. This could include almost any product that we’ve not covered so far. There are also some other specialisms, such as automotive photography which may or may not come under still life, depending on your view. It can be used as a fairly catch-all term for anything product-related and is generally done in a studio, although it can also be on location. It is sometimes used as an alternative to “product photographer” (still life photographer) and doesn’t include people photography such as portraits, etc.
Kit Required for Product Photography
Sometimes you can get great results with very little kit. For other shots, you can end up needing lots of lights and props as well as specialist lenses. The kit you use is influenced by your personal style and the genre(s) you shoot. You can’t get away without a macro lens for small things and you need the right type of lights for special effects that freeze moving items. Overall, however, the key thing is not to think too much about the kit. Instead, learn the principles of how to manipulate light and you will often find a DIY solution if you haven’t got the specialist lighting modifier to hand.
Cameras and Lenses for Product Photographers
Some high-end clients might stipulate that you use a high-megapixel medium-format camera so that they have the necessary resolution to use the images at enormous print sizes. But most of the time, that isn’t really a concern. Most DSLRs and mirrorless cameras have a good amount of resolution and software allows a certain amount of upscaling without noticeable degradation of image quality.
You need equipment that does all the jobs your business requires. You don’t need kit that can do absolutely anything. Product photographers are not likely to need 500mm lenses or bodies that can shoot blisteringly fast frame rates. We do need a reliable, fully controllable camera with the right kind of lenses and accessories to go with it. For example, if you want to shoot with tilt-shift lenses as I do then you should check that the camera body you want to use has tilt-shift lenses available for it or that there is an adapter that you can use.
Generally speaking, product photography is expected to make the products look true to life and minimize any distortion. So, wide-angle lenses are rarely used. Normally something around 50-100mm is a good range and it needs macro capabilities. Extension tubes can be a useful asset for shooting very small products.
Props and Other Kit
Keep an eye out for interesting items that could make good backgrounds or props for the type of images you shoot. That could be kitchen utensils and pans for food photography, for example, or old bits of wood and slate for other products. You can often find things used or even in reclamation yards. You can’t have an exhaustive props cupboard, but having a few things available can be handy.
No, I’m not going to go into more detail and name “the best” brands or items. This is simply because you can do a lot with very little (and inexpensive) kit. Home-made modifiers can do the job. Expensive equipment can make it quicker, easier, and more reliable if you are doing the same thing regularly. Figure out what you need to shoot your style. You won’t need every modifier under the sun. Buy things that make it easier and cheaper to do your day-to-day work. Other things are luxuries. I add to my kit if I need a tool for a job that wouldn’t make sense to rent. Otherwise, I work with what I have and rent anything else for a one-off.
Running a Product Photography Business
Whatever type of professional photography business you run there will be common things that you need to put in place: accounts, branding, website, etc. Commercial photographers might consider networking with marketing or advertising agencies to help them get work in. Your pricing will be influenced by the type of clients you are interested in. If you want to work with small local businesses, then you will be limited to cheaper packages or day rates. In some countries, you may not be able to charge much (if any) licensing fees on top of that for really small companies. Bigger brands will expect to pay more and will negotiate the rights they want from you. So, be prepared accordingly.
Must haves (in no particular order):
- If your retouching isn’t great, then make sure you have a reliable retoucher that you can send your work to.
- Use a graphic designer and/or branding expert to help brand your business – especially important if you are aiming for high-end clients.
- Provide clients with clear terms and conditions, including supply and return (where needed) of items to be photographed and ownership of any props purchased.
- You need a strong understanding of lighting and how to manipulate light.
- Insurance – You should have liability cover as well as damage and replacement policies for your kit. If you have other staff, e.g. assistants, make sure that they are covered too.
- Focus – avoid dipping in and out of portraits, sport, nature, etc. unless you are just doing it for fun. Commercial clients don’t want to be confused by a huge range of image styles.
- Patience – Clients may ask for a re-shoot just to try a slightly different angle because you can if it is a product that isn’t going anywhere! Unlike events, advertising images may have a few rounds of shooting or retouching over hours/days/weeks to get to the final image.
Is Product Photography for You?
Far from being a small niche with limited opportunities, product photography encompasses a wide range of styles and offers scope for plenty of work as a professional. Certain genres need more equipment than others, so you may need to invest more to get started in those. Technique is very important for product photographers. For all but the most basic images, you will need to develop a strong grasp of lighting and be able to refine your final images to perfection. If you are happy working in the studio a lot and often on your own, then you may enjoy it. Those who enjoy the more social forms of photography may find it less interesting!
The law of reflection needs to become your friend. You will be working out what works and what doesn’t by considering reflections on a moment-by-moment basis. Understanding how images communicate visually is a great asset. The more you can learn from artists, other photographers, designers, etc. about the use of color, shape, symbolism, and composition the better. As with other genres, there is room to grow your skills and work at higher levels as well as taking entry-level jobs. Personally, I like the challenge of making potentially mundane products look great!
Image creditsAll images by Joe Lenton. All rights reserved. Reproduced here by permission.