Food Photography: A Complete Guide
![]()
Food photography is one of the easiest photography disciplines to start out with. You can arrange food however you like. It doesn’t scamper away mid-shoot and doesn’t get tired. It’s also relatively contained and easy to practice.
In this article, we will cover the basics of food photography, from composition to gear to the business side of the niche.
Table of Contents
Composition Basics for Food
Once you are comfortable with the basics of photography, it’s time to work on food photography compositions. There are many different approaches, from pared-down minimal images focused on a single item to maximalist imagery with multiple dishes, lots of props, and textures.
Ideally, over time you’ll develop a distinct style, but it’s also good to be flexible and capable of shooting in a couple of different styles. When you’re starting out, you can say yes to lots of different types of projects but selectively pick and choose the sort of work you enjoy most to showcase in your photography portfolio.
45-Degree Angle Images
Start your composition practice with 45-degree angle images. This angle is ubiquitous because it’s extremely flexible and works with just about every dish. Bowls, layered things, and fine dining dishes with lots of small elements all look good when photographed at a 45-degree angle.
Additionally, you don’t have to worry about losing details. This is also a good spot to start your composition practice because you can start off with one dish, and then you can build out your frame with additional props or dishes without changing the key focus of the frame.
If you have a tripod, you can additionally play around with your aperture to see how the feel of the image changes with different depths of field. 45-degree angle shots are forgiving, work with many different types of dishes and give you additional opportunities to practice composition basics and photography fundamentals.
![]()
Overhead Food Photography
Food photography is hugely popular on social media, and top-down tablescapes really proliferated on Instagram. These shots are not much more difficult than 45-degree images, but they require a bit more care.
You need to make sure that your camera is perfectly parallel to your countertop. This is relatively easy with a small smartphone but gets a bit more difficult with a camera body and lenses, particularly if you’re photographing a larger layout.
It’s also best to use a 50mm lens. With wider lenses, the edges of the frame will look stretched. You can use a wider lens and make sure to crop each image, but it’s an additional post-processing step. If you’re doing a long shoot, it’s better to get as close to your ideal shot from the get-go to save on editing time.
![]()
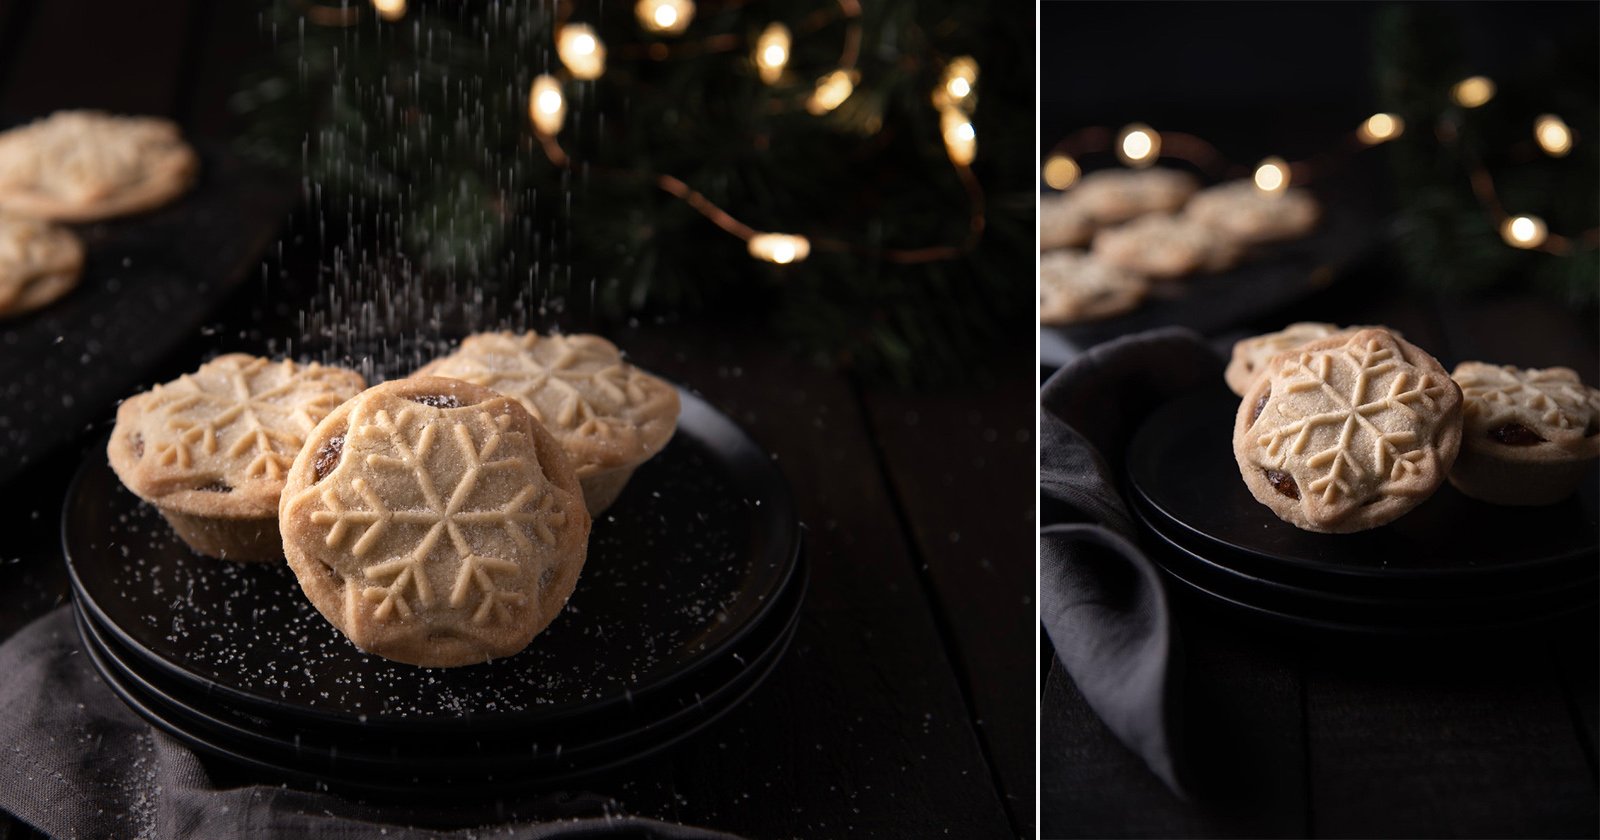
Straight-On Food Photos
Finally, there are straight-on images. These work well for steam or process shots. While no more difficult to set up than a 45-degree photo, capturing the process bit is usually the additional complication.
For example, to capture steam, you’ll need a dark background and good side light. For photos with flour or powdered sugar, you’ll need to be sure you’re paying attention to your shutter speed. All of these angles and compositions are really easy to start with, and as you progress as a photographer, you’ll figure out your specific style.
![]()
Lighting Your Food Photos
A common way to light food photographs is with a large light source to the side and at a slightly elevated angle.
The easiest way to achieve this is with natural light by finding a large window or a brightly-lit space. Avoid direct sunlight, as this can create too much contrast and harsh shadows.
If the light is too harsh or the shadows are too black, you can use a reflector — whether it’s a commercial product or even something as simple as a poster board or sheet of printer paper — to bounce some light back onto the food from the opposite side of the primary light source. Properly controlling the shadows and highlights will result in a much stronger photo.
Soft, diffuse lighting is often the goal, so if you use a flash, it is a good idea to diffuse the light with a modifier such as a large softbox.

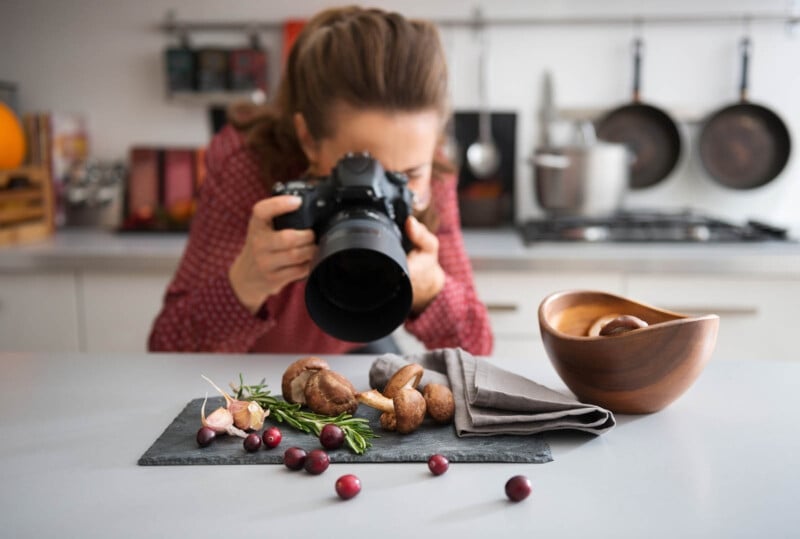
Gear You’ll Need for Food Photography
Another reason food photography is a great area to start is that you don’t need a huge arsenal of photography equipment at the beginning. When I was first starting out, I had one camera body and a 35mm lens that I used for almost every shoot. This gear combo was perfectly adequate for almost all of my shoots for my first year. The few times I needed something additional, I either borrowed equipment from photographer friends (one of the many reasons it’s helpful to have a community of photographer friends) or rented equipment.
When I was starting out, most of my shoots were for a publication that did restaurant reviews. The shoots were usually an hour or two at most and generally in the afternoon before the restaurant opened. For the most part, I was able to depend on natural light. Eventually, as I built up my client list and faced more complicated shooting setups, I began to build out my gear.
![]()
It’s important to balance gear investments with your business growth so you’re not overspending at the tenuous beginning stages of your photography career. A camera body and a decent lens are a must if you’re to be a professional food photographer. From there, though, there are a number of routes you can take, from buying additional lenses to getting lighting equipment. Personally, I got a nicer tripod once I felt that I had enough work to sustain such a purchase. Then instead of getting any sort of lighting equipment, I got a reflector.
After a year or two of working as a food photographer, you’ll likely be ready to make additional gear investments as your client list grows and your range of shoots expands. One method I found for making gear decisions without regret was to rent equipment initially. If I rented a specific piece of equipment more than three times, I added it to a list of equipment to acquire.
Each year, I mapped out what to purchase. This process helped pace my gear purchases and ensured I was happy and comfortable with each purchase. A professional full-frame camera and high-quality lenses do make a difference in the overall quality of your photography, but investing in a lot of gear all at once won’t rapidly increase your skill level. The best way to get the maximum utility out of your gear is time and practice. Take the time to get familiar with each piece of equipment.
A professional camera body, prime lens, tripod, and reflector carried me through my first few years. After that, I purchased additional lenses, lighting equipment, studio equipment, backdrops, and some props. Many of your gear decisions will revolve around your work, so stay patient. It may feel slow at first, but after a few years, you’ll be in great shape.
Food Styling Tips and Tricks
In addition to capturing authentic photos of real food exactly as they are, there are some common tricks used in the food photography world to make for easier and/or better photos:
- Browning liquid can be applied to raw poultry to make it look roasted without actual cooking.
- Cardboard can be used as spacers to create volume by separating various layers of food such as burgers and desserts.
- Deodorant sprayed on fruit and vegetables can produce a shiny look.
- Dish soap is used to create longer-lasting bubbles in fizzy drinks such as sodas.
- Fabric protector can be sprayed on food such as pancakes to make them less absorbent.
- Fake ice made of acrylic or silicone can be used as a melt-free alternative.
- Glue, the white multipurpose kind, is used as a milk substitute that doesn’t turn cereal into a soggy mess.
- Glycerin can be mixed with water in a spray bottle and spritzed onto glassware.
- Mashed potatoes can be an ice cream lookalike that does not melt.
- Motor oil can be used as a syrup substitute that doesn’t absorb into waffles and pancakes like actual syrup does.
- Ramekins can be placed immediately below the surface of a soup to keep garnishes floating at the top.
- Salt can be shaken into a beer and then stirred to restore the head of foam.
- Shaving cream is a great substitute for whipped cream as it does not melt away.
- Shoe polish can be used to paint grill marks on meat and vegetables.
- Tampons or cotton balls can be a great way to create steam when soaked and microwaved.
- Toothpicks are a useful tool for fixing various parts of a dish in place.
- Vegetable oil can be used on meats to give them a shiny, juicy look.
Working on Location or in Studio
A lot of food photographers get started out by working with restaurants in some form. This can be an easy route to get started because there’s no need for props or a food stylist. There are a few caveats.
For example, photo shoots for restaurant openings tend to be a bit more intensive since they usually have a larger shot list and may include interior and staff imagery as well. Shoots for restaurant cookbooks, depending on the scope, can get complicated – often involving publishers and other parties who may have a say in the direction.
I initially started out doing social media photography for a restaurant group with 8 locations, each with its own identity, target audience, and level of formality.
Working on Location
Getting started with on-location photography, whether it be with a restaurant, hotel, or some sort of food hall, is great! Many restaurants put substantial care and effort into appealingly presenting their food. All of the recipe research and development, plate sourcing, and cooking take up a huge amount of work, and that’s all effort that, as a photographer, you’ll significantly benefit from.
Two of the hardest aspects of shooting on location are coordinating a time that works for all stakeholders and timing the dishes coming out during the photo shoot. There’s a food influencer approach of just going to a location and taking photos, but for publications and more official shoots, you’ll want to coordinate with the restaurant.
Most restaurants have a long list of daily to-dos and processes that make each day possible for them. Photo shoots disrupt the flow of all the work that needs to happen, so coordinating is important. In my experience, slower days such as Mondays or Tuesdays are often better, though occasionally, some places will want to do a busier day because they’ll have more staff around to help. Also, I found the pre-dinner time was usually the most doable for everyone involved.
![]()
Some restaurants will have a PR company or person, and they’ll do most of the coordinating. Occasionally, the PR person will also be on hand during the photo shoot, which is often hugely helpful since they know the relationship dynamics of the staff and decision-makers involved. If there isn’t a PR person, you’ll want to contact the restaurant directly. Confirm with the chef that they have prepped for all the dishes you’ll need to shoot and that they’ll be ready at the scheduled time.
Once everything is coordinated, the second thing that can get tricky is dish timing. Often, you’ll get asked about pacing. I generally like having dishes come out one at a time, with about 5 minutes or so between each dish. This gives me enough time to ensure I get a good single image of each item, but it’s fast enough that everything looks good enough to photograph different combinations.
Many foods have a window of time when they’ll look their best. If there’s a shot list, it’s best to push any items with a limited window toward the end of the shoot. For example, frozen desserts, foods with rich sauces, and things with melted cheese must be photographed quickly. If you want a photo with multiple dishes, you must work with the restaurant to course things out correctly.
Working in Studio
Moving from on-location photography to a studio setting gives you much greater control but also adds many production complications. For food photography, you’ll ideally need a studio space with a kitchen or, at the very least, some sort of ability to reheat or stage food. A studio shoot will also require a lot more creative direction versus taking advantage of whatever a restaurant space has. All plates, cutlery, and glassware need to be sourced. Someone will need to cook and stage each dish.
![]()
Food Photography Business Basics
While food photography is an approachable and very masterable discipline, the business portion can be tricky. Food photography is incredibly popular, which means there is a lot of competition in getting into the field and also in getting your imagery noticed. Understanding the range of clients and their budget limitations, business basics, and how to market your work will be incredibly helpful in establishing a successful food photography business.
Clients
Restaurant photography might be an easy gateway into food photography, but it’s not always the best path toward building a successful photography business. Restaurants have high operating costs and small profit margins and, thus, often don’t have large budgets for marketing and photography, especially if they’re mom-and-pop places. Restaurant groups, hotel restaurants, and restaurants backed by large investment firms are more likely to have budgets for photo shoots.
A personal pet peeve of mine is how often I see food photography courses that advocate for a career in restaurant photography. Most of the time, the person selling the course makes a living off course sales, not restaurant photography. I like restaurant photography because I think of chefs as fellow creatives and want to be supportive and supplemental to their craft, but it is a small piece of my overall photography work.
Publications also tend to have more limited budgets. A lot of publications have standardized rates, especially larger ones. Sometimes you can ask for expense reimbursements, so keep that in mind if it seems the budget is really limited, but the assignment requires travel or some other expenses directly related to the shoot.
Overall, editorial work is often very fun because you tend to get a lot of creative freedom and interesting assignments. Being published in a newspaper, magazine, or book also seems to legitimize you in many people’s eyes, often eliciting the “Ohhh, you’re a professional photographer response.”
![]()
Fear not. It’s possible to work as a food photographer while avoiding the starving artist cliche, sometimes literally, since shoots often result in tons of leftovers. Aside from leftovers, food brands often do have budgets for professional photo shoots. From product photography to marketing campaigns, the highest-paid food photography work will generally be for brands. Knowing the possible budget limitations of various types of clients should help you decide how to market yourself and what sort of work to aim towards.
![]()
Business Operations
Once you’re comfortable with photography fundamentals, have some gear, and have a couple of clients, you’ll have to get used to all the responsibilities of being a small business owner. Professional photographer associations, photographer friends, and small business groups can be hugely helpful here. You’ll need to familiarize yourself with how to bid for work. Pick how you’ll want to deliver projects. Last of all, you’ll need to create processes for invoicing and accounting for everything you do. You can also outsource pieces of your business. For example, I personally hate accounting and find it to be absolute misery. Thankfully, through photographer friends, I was able to find an accountant that has helped me with incorporating and setting up QuickBooks and taxes.
As you progress, you might also consider working with a representative or getting marketing help. There are lots of different service providers. The nice thing about working as a photographer is that there’s no absolutely correct way to do it, so structure your work in a way that compliments your skillset and what you enjoy doing. Outsource the portions that are difficult or cause you misery.
Long-Term Sustainability
When I was starting out as a photographer, I had this thought that I would work on some project that would do really well and it would magically make the rest of my creative career easy. Building a creative career requires frequent tending.
Think of it more like gardening than playing the lotto. Some days you have to pull weeds. Other days you plant seeds that you hope will bear fruit in the future, and if you’re lucky enough, one day you might end up with so many tomatoes that you can share them with friends.
Find the marketing channel that works for you. Develop processes to share your work regularly. Be professional, and stay in touch with clients. Over time you’ll find your footing, build your business and create work that reflects your abilities and tastes.