How to Scan Photos on iPhone
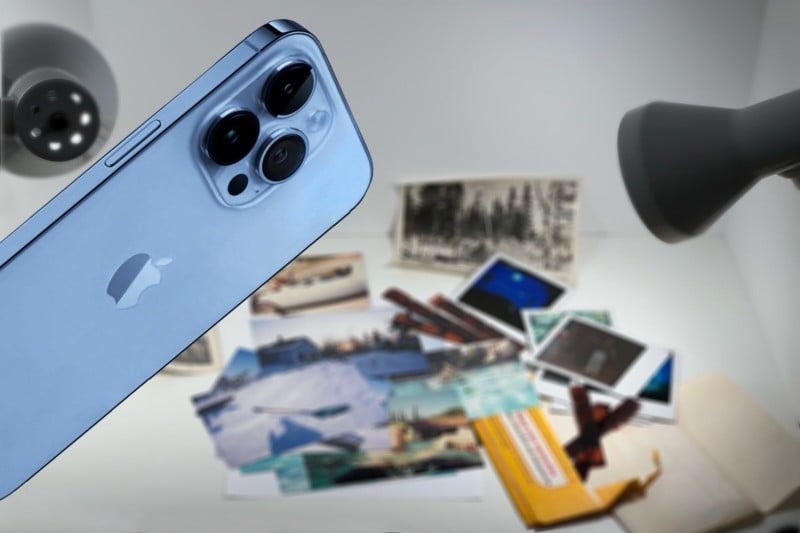
Physical photographs can be scanned with an iPhone and it’s easy to get good results with a little preparation and attention to detail. There are several apps that you can use to speed up and simplify the process, each with a different approach. The app that’s best depends on your particular needs.
Table of Contents
Take Photos of Pictures
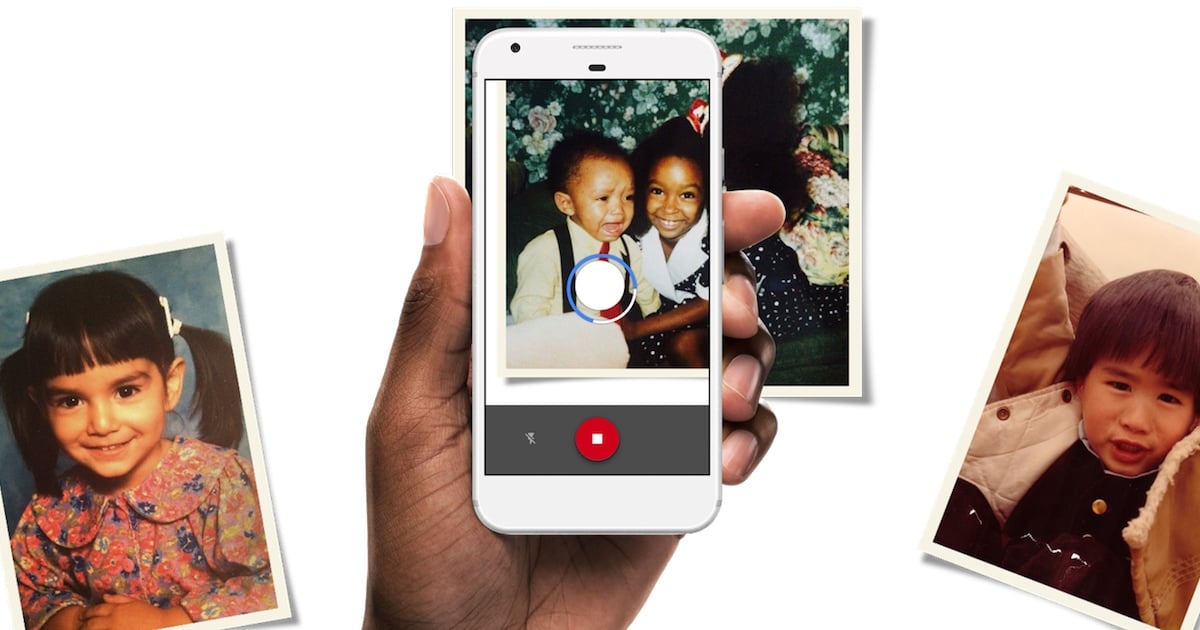
It might be tempting to just snap a handheld photo with the iPhone’s camera. It’s a super quick way to grab a digital copy at a moment’s notice. Sometimes that might be good enough but the few minutes that you save at the start of the scan often leads to a much greater loss of time spent trying to correct problems in post-processing.
A tripod or other iPhone stand is invaluable when capturing a photo of physical prints. With the iPhone locked in place, motion blur from hand-shake is eliminated and it’s easier to align the picture and the iPhone to prevent skew.
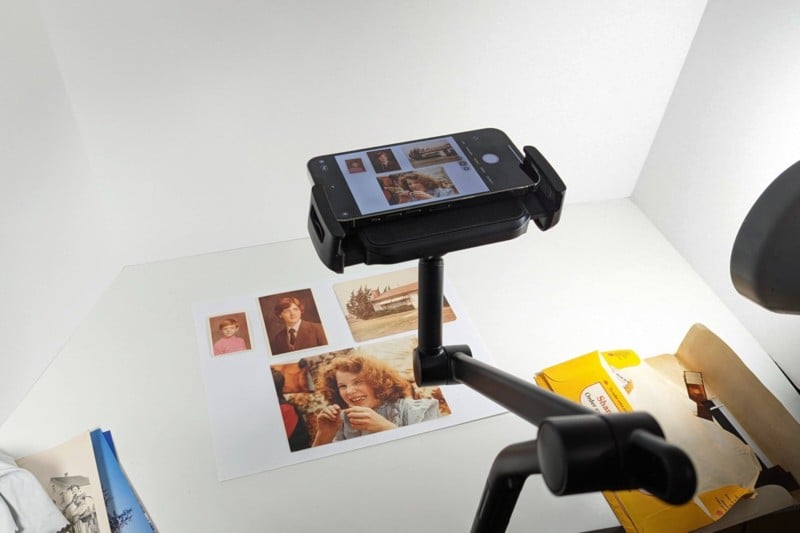
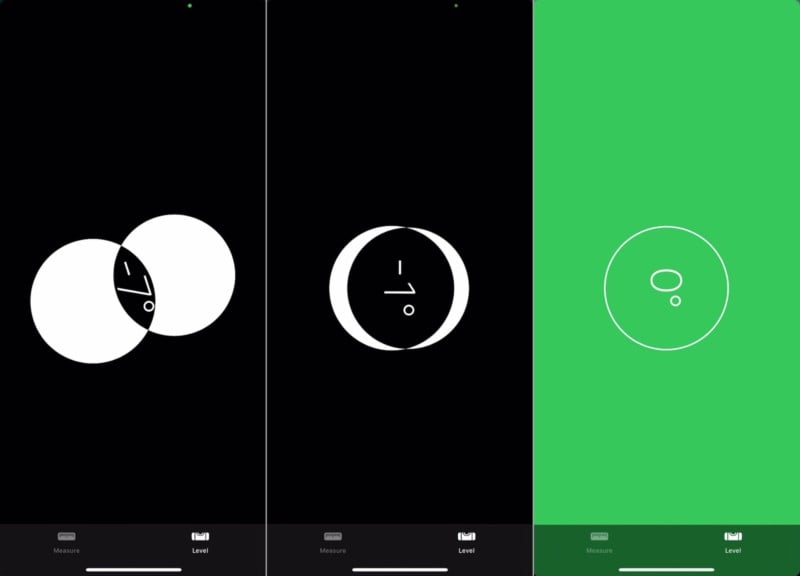
With your iPhone secured in place, open the Camera app to roughly align the picture in the viewfinder. To make sure the iPhone is level, open the Measure app and switch to the Level tab. A bubble level appears and you need to adjust your tripod or stand to make it read zero.
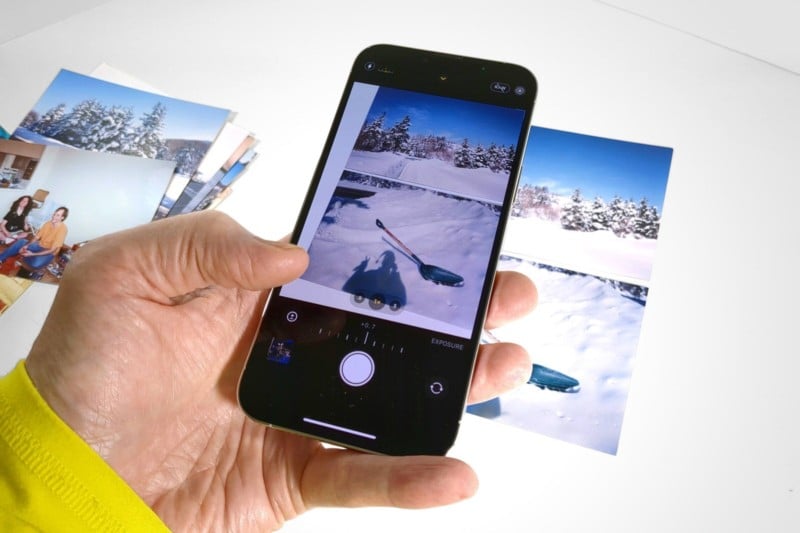
Go back to the Camera app to prepare to capture the picture as a digital photo. If a significant amount of white space is visible, you might want to raise the exposure a little. It’s also a good idea to use a three-second self-timer so vibration caused by triggering the shutter stops before the photo is taken. An Apple Watch or Bluetooth shutter can be used instead to speed up the process.
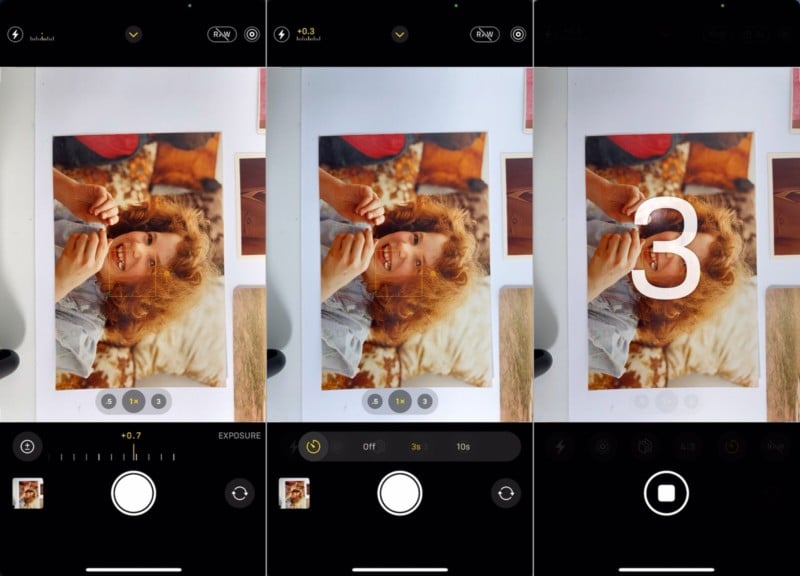
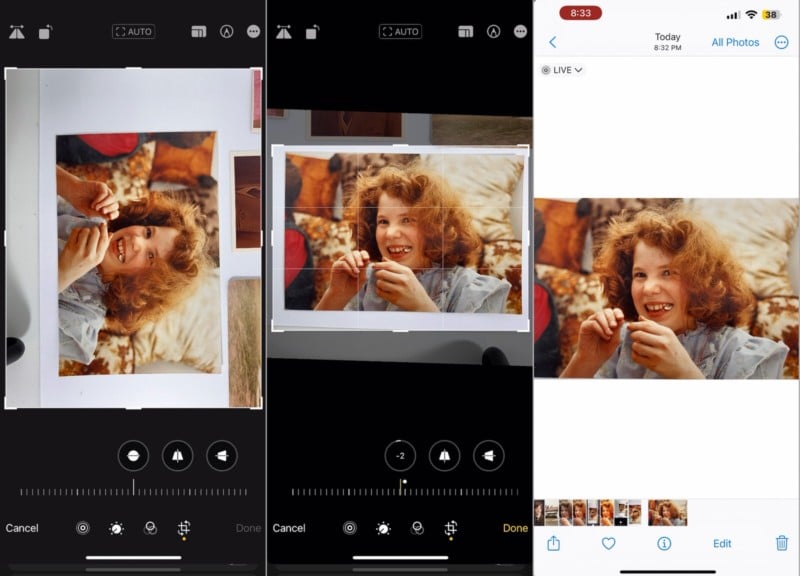
Tap the preview at the lower-left to see the digital photo. Select the edit button to fine-tune the edges, straighten them, and make other adjustments as needed. The iPhone’s crop controls include horizontal and vertical perspective corrections to compensate for any alignment errors. If you crop into the picture slightly, minor curling of the edges or corners of old photographs can be hidden.
Scan Photos to a PDF File
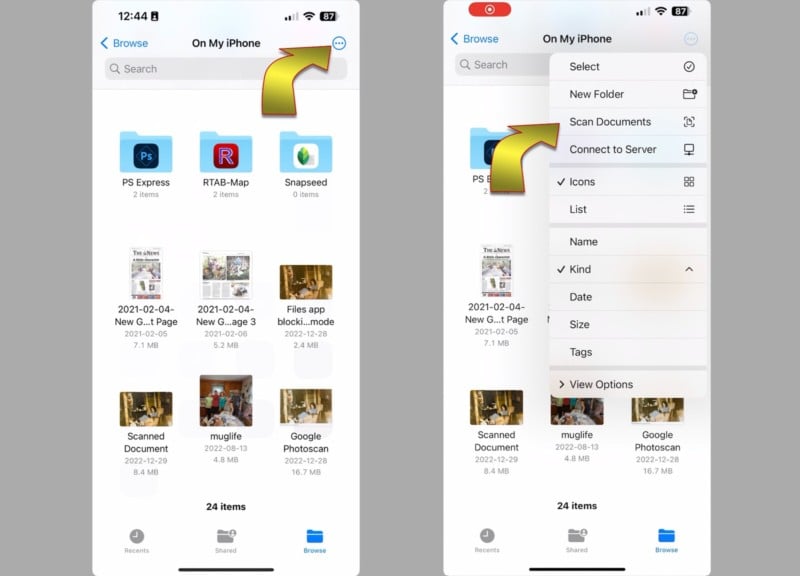
One of the quickest ways to scan photos with an iPhone is to use the scan feature built into the Files app. Scanning pictures this way is quick and easy. The Files app accurately identifies the corners of each photo and can be set to trigger the shutter automatically. This speeds up the process and can be convenient when scanning several pictures.
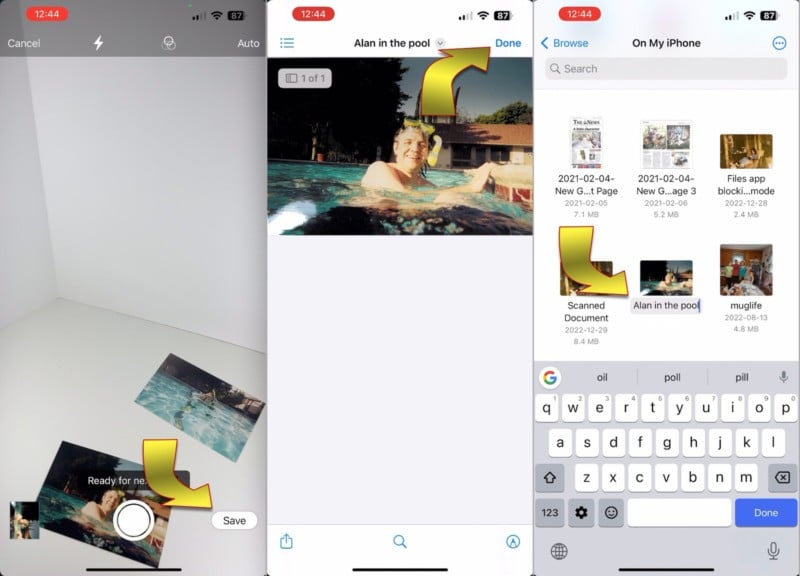
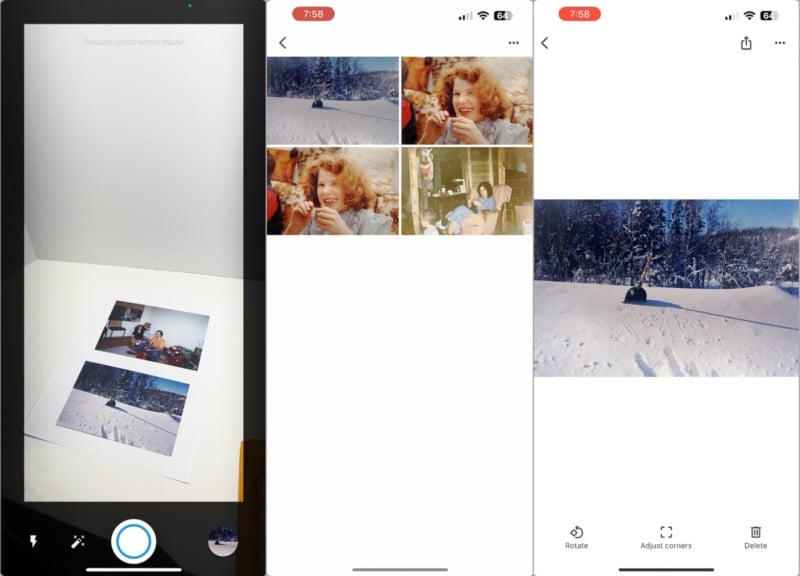
Open the Files app by tapping the blue folder icon on your Home page or swiping down and typing “Files” if you don’t see the app. Next, tap the three dots in the upper right of the screen to open a menu of more options. Selecting Scan Documents will open a camera preview to line up the scan.
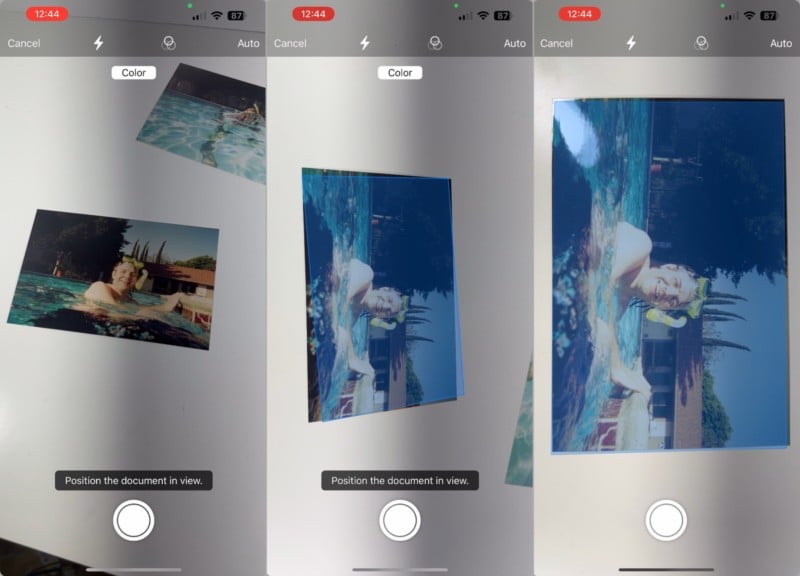
By default, the iPhone will start searching for the corners of a photo, highlighting the area it will capture. If you hold the iPhone still for a few seconds, the shutter will snap automatically, making a shutter sound and showing a thumbnail image of the captured picture at the lower left.
You can continue to capture more photos by replacing that picture or moving the iPhone until another photo is in the preview.
At any time, you can tap the thumbnail to review what has been captured so far and make adjustments. Swipe left or right to scroll through the pictures that have been scanned. If the scan is bad, you can tap the trash button at the lower right to delete it.
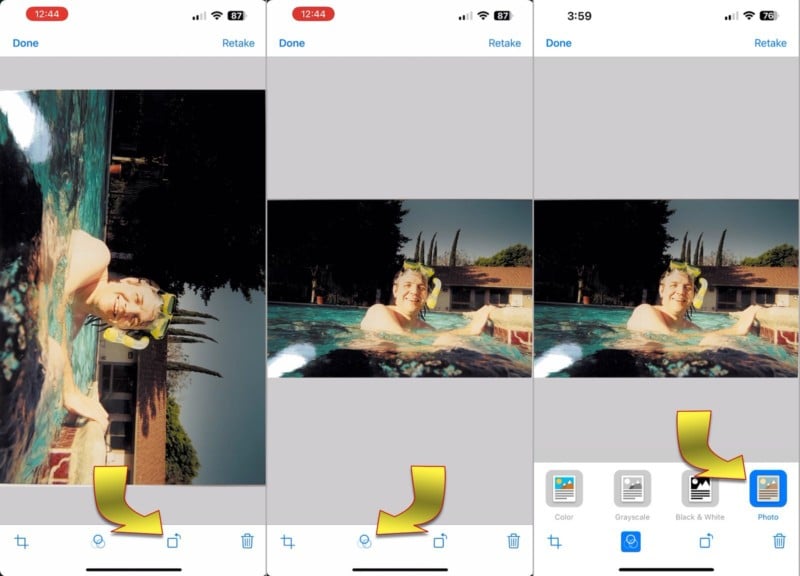
If any pictures are upside-down or sideways, tap the rotate button at the bottom one or more times until the photo is upright. The filter button, to the left of rotate, lets you select from the default color document scan or change the image to grayscale, black and white, or optimize for a photo, which is usually the best choice for pictures.
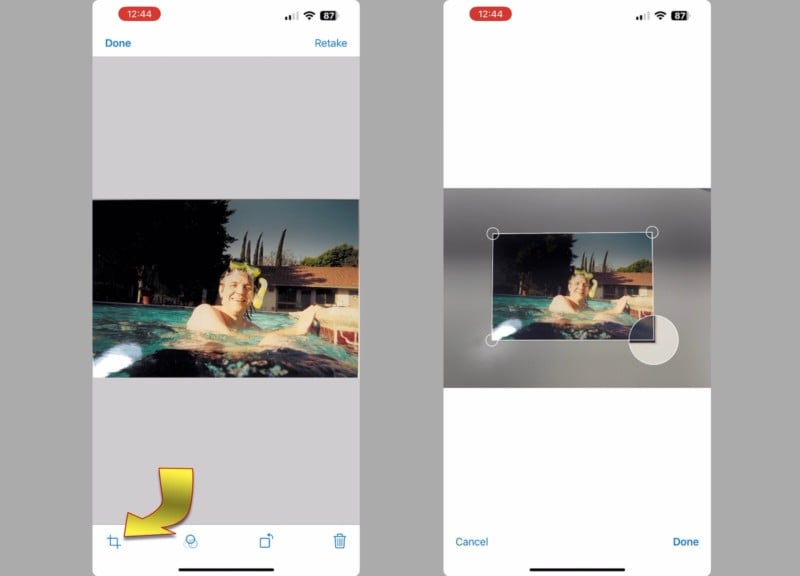
Sometimes it’s necessary to tap the crop button at the lower left to adjust the corners if the scan makes an error. The complete uncropped image capture will be shown along with a box with an outline showing the automatic crop marks. Drag any corner to adjust it. If you press near the corner but not directly on one, you’ll see a magnified view for more precise positioning. When satisfied with the corners, tap done.
When editing is complete, you can save and rename the file. It’s important to note that the output is a PDF file. This works okay for print but limits the uses of the picture.
Scan with the Notes app
You can also start a scan from the iPhone’s built-in Notes app. This is useful if you want to keep and share pictures via Notes. The Notes app can extract the JPEG scans contained inside a note, making it a more versatile option than the Files app.
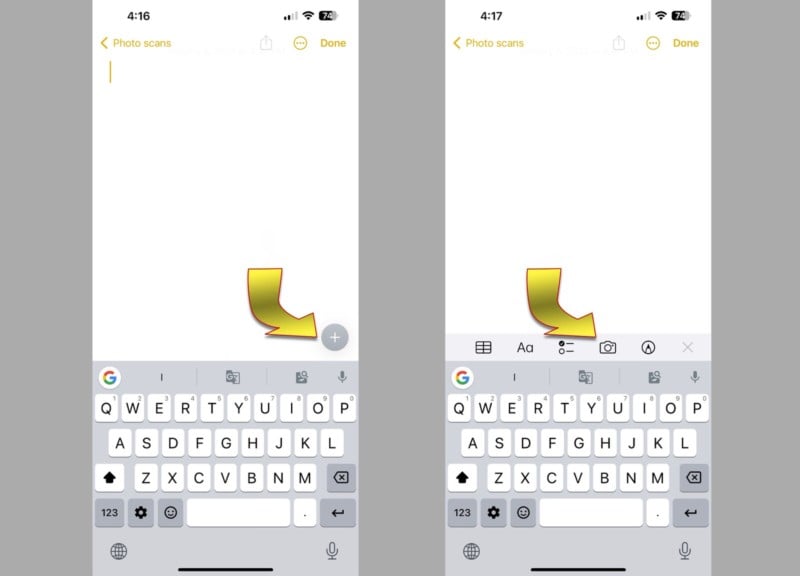
The Notes app’s scanning process is basically the same as that of the Files app. Create a new note, then tap the camera button that appears above the onscreen keyboard. If you don’t see a camera icon, hit the plus button at the upper right to open the toolbar, then select the camera button.
When you choose Scan Document from the menu, a camera preview will be shown. Align your iPhone with the picture and the corners will be detected. A digital photo will be taken as soon as you’re holding the iPhone still and a thumbnail will appear in the lower-left corner of the screen.
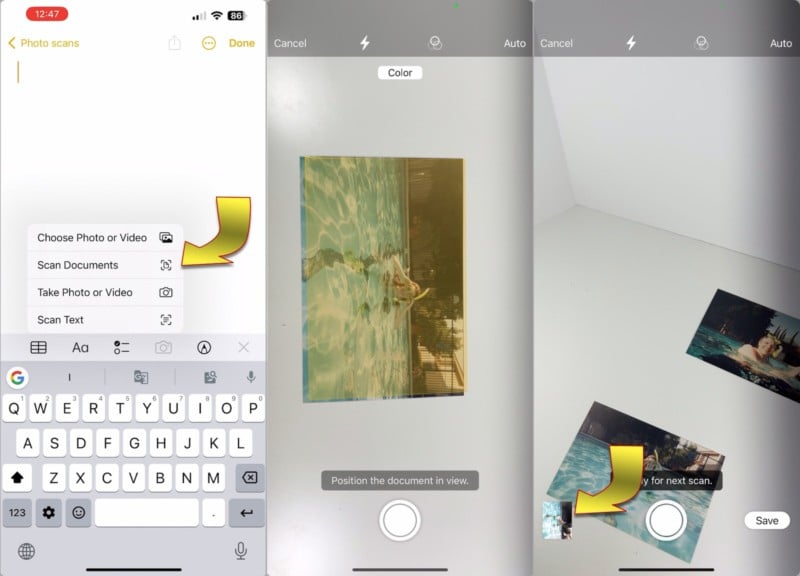
After capturing one or more digital scans, tap the Save button at the lower-left corner of the screen. The pictures are automatically cropped and appear side-by-side in a window within the note. You can slide the images right and left to see more photos. Tap any image to open it in a larger view and swiping works in this mode as well.
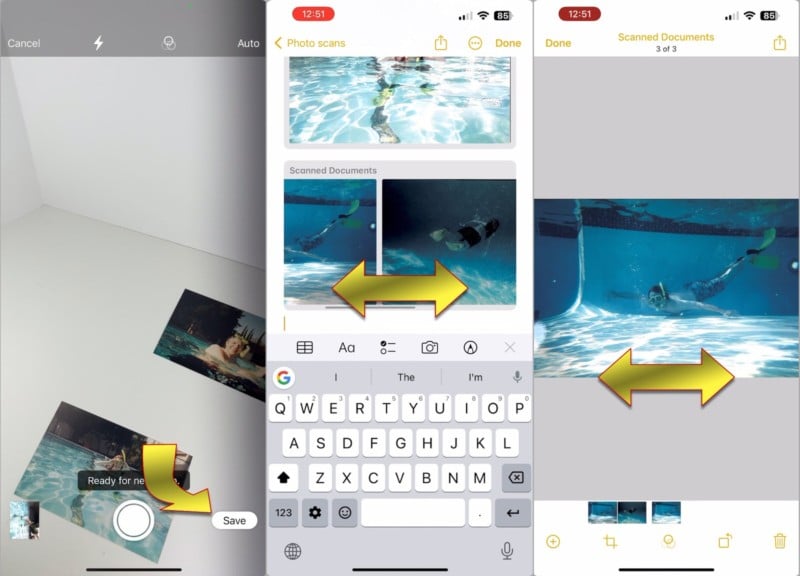
When viewing a scanned photo in full-screen view editing options will appear in a toolbar at the bottom. You can change the crop, choose to save in color or black and white, capture more scans, or delete the current image. The scanned pictures are contained within the Notes app and synced to iCloud if that feature is enabled.
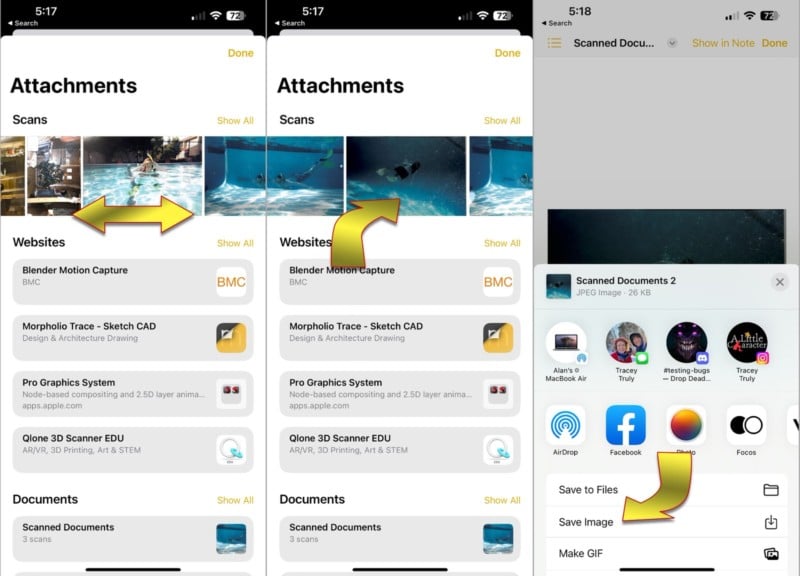
To extract the JPEG format files to use elsewhere, go back to the Notes folder view, tap the three dots at the upper right, and select View Attachments to see your scans.
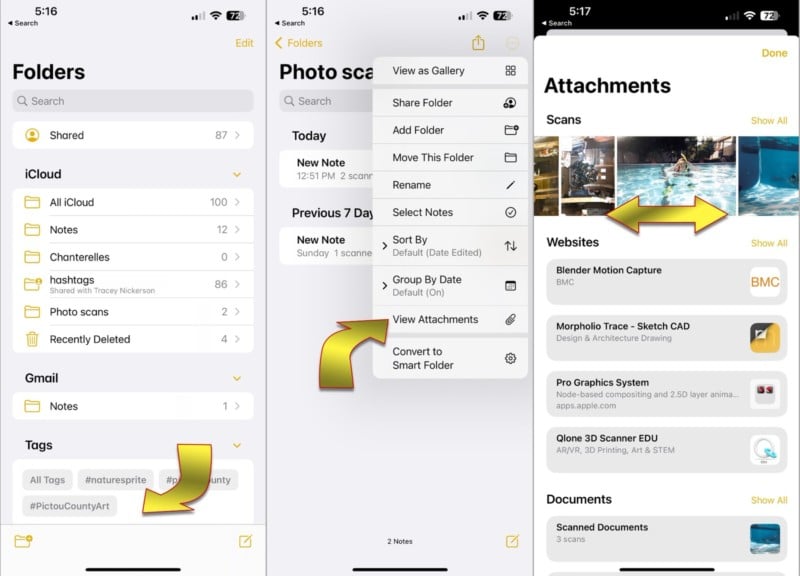
Tap any one photo, then hit the share button at the button-left, and choose Save Image to send it to the iPhone’s photo gallery. You can also share directly to social media or another app from the share menu.
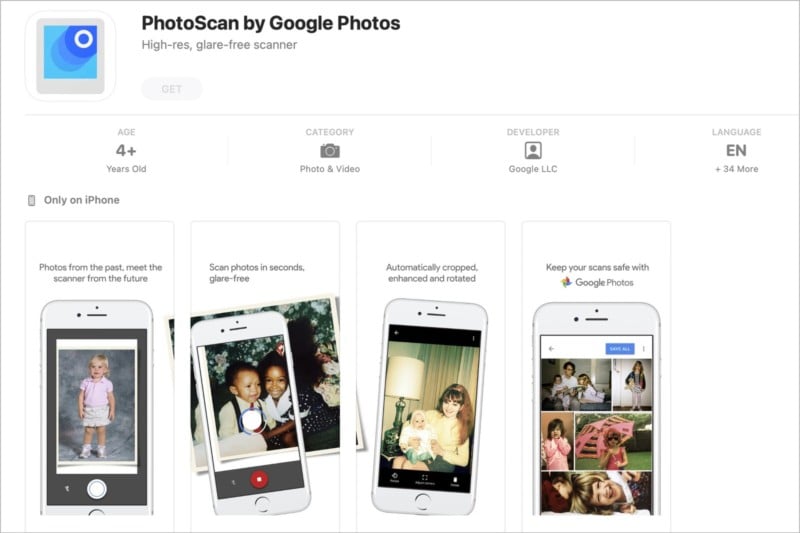
Scan with Google PhotoScan
Bright light helps to get a good digital photo but glare can be a problem when you don’t have time to set up lights or move to the best location. Google PhotoScan is a clever app that’s available for free in the iPhone App Store. It snaps multiple photos of a single physical picture, then aligns and combines them to eliminate any glare. This makes it easy to avoid one of the biggest issues with capturing a quick scan of a photo print.
To use Google PhotoScan, open the app, align the physical picture in the viewfinder, and tap the shutter button. Four white dots will appear with an arrow directing you to move the white circle to align with those dots. Hold steady for a couple of seconds then follow the arrow to the next.
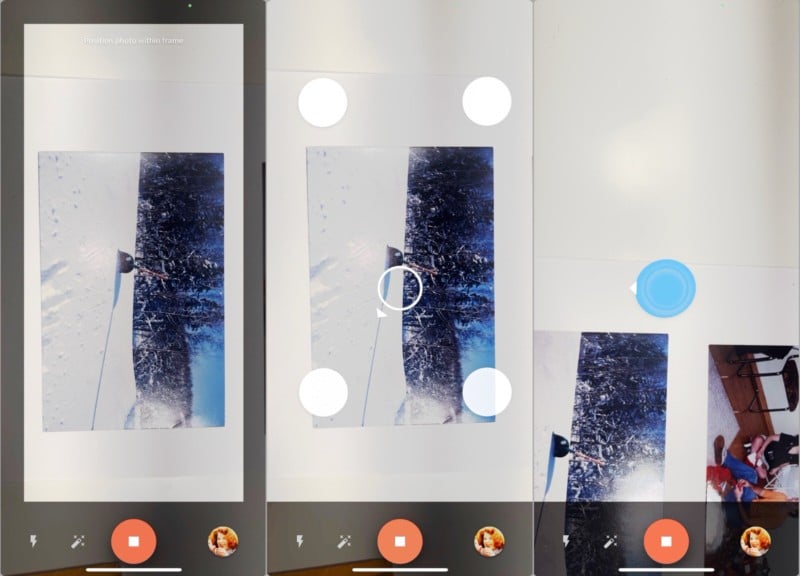
Don’t worry about any glare you see in these photos. After all four corners are captured, PhotoScan will work its magic to remove the glare and give you a nice digital scan of the print. Tap the thumbnail to see the image fullscreen. Rotation and corner adjustments are available for fine-tuning after the scan.
PhotoScan is great for quick capture when you can’t control the lighting. Be aware that the end result might not be as crisp as if you use a tripod or stand. You can also set PhotoScan to capture a single photo by tapping the magic wand button to the left of the shutter button. The digital photo can be saved to Google Photos or your iPhone photo library as JPEG files.
Scan with Microsoft Lens
Microsoft also makes a free document scanner that outputs JPEG files. It automatically finds the corners of a physical photo in a way that’s quite similar to Apple’s Files and Notes apps. There is no glare elimination but digital pictures tend to be sharper than those captured with Google PhotoScan’s default setup. It can save JPEG files to OneDrive or your iPhone’s Photos app, an advantage over the iPhone’s built-in photo-scanning apps.
Microsoft Lens is easy to use and after opening the app, you’ll immediately see a preview of the picture and what the automatic crop will look like. Tap the shutter to capture a scan and you get a chance to adjust the corners before saving. This workflow is a nice time saver when processing a batch of physical pictures since most apps make small errors with corner placement.
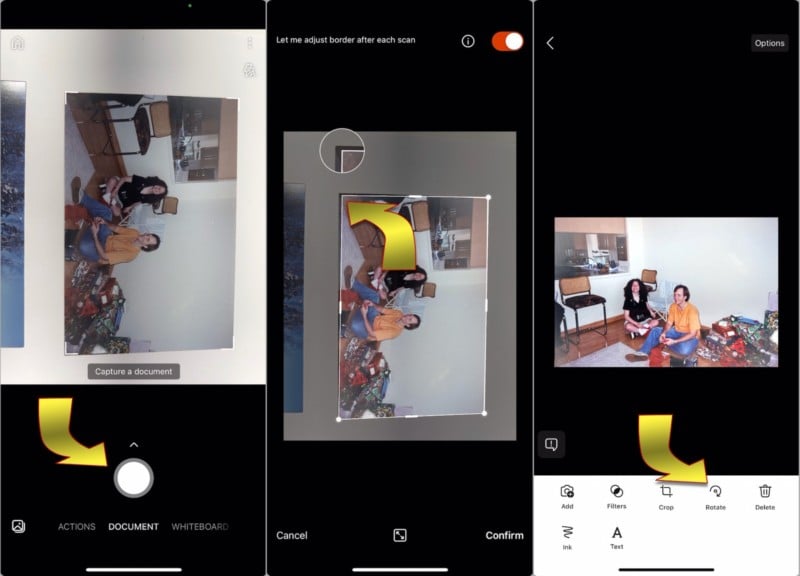
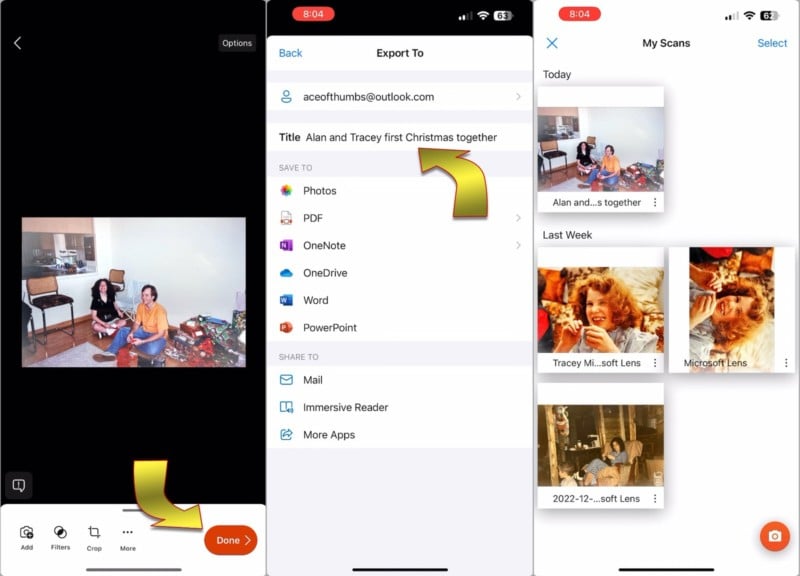
If you tap More, there are options to adjust the crop, rotate, and filter the digital capture. Simple drawing and text annotation tools are available also. When you’re satisfied with the photo scan, tap Done to name and export the image to your iPhone’s photo library
Scan Multiple Photos at Once
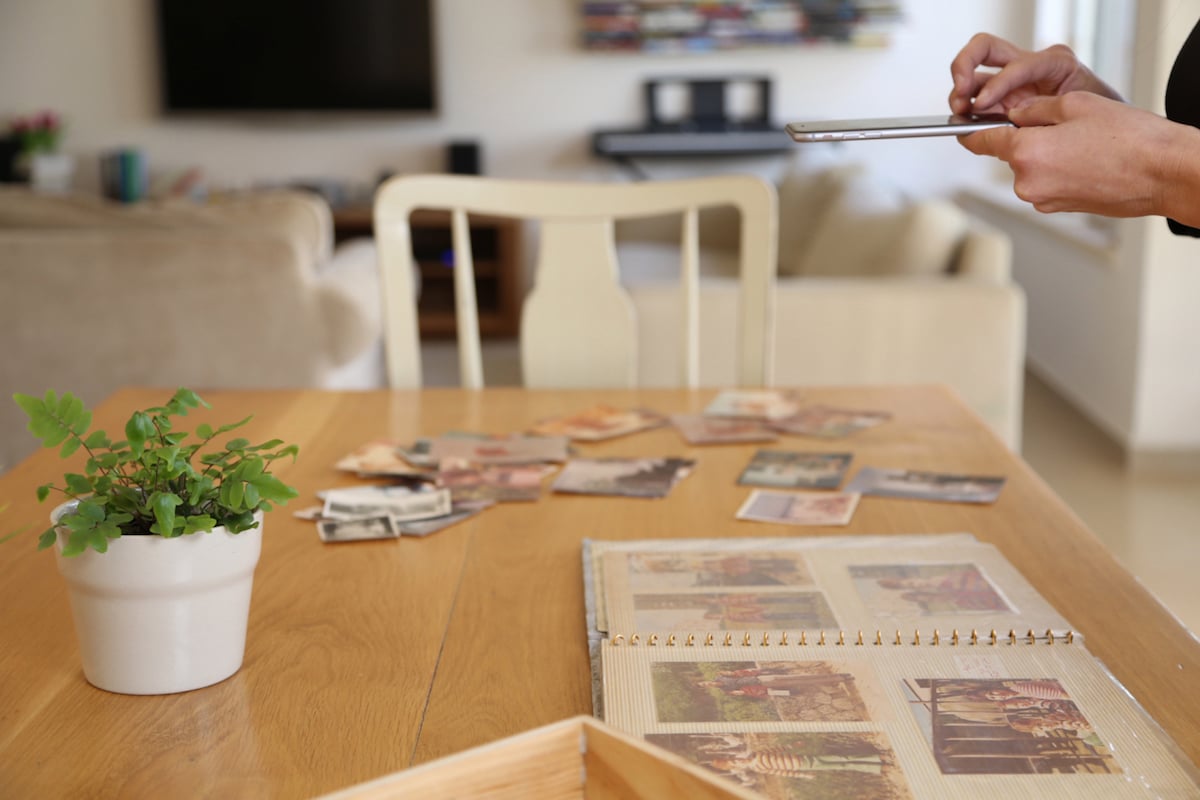
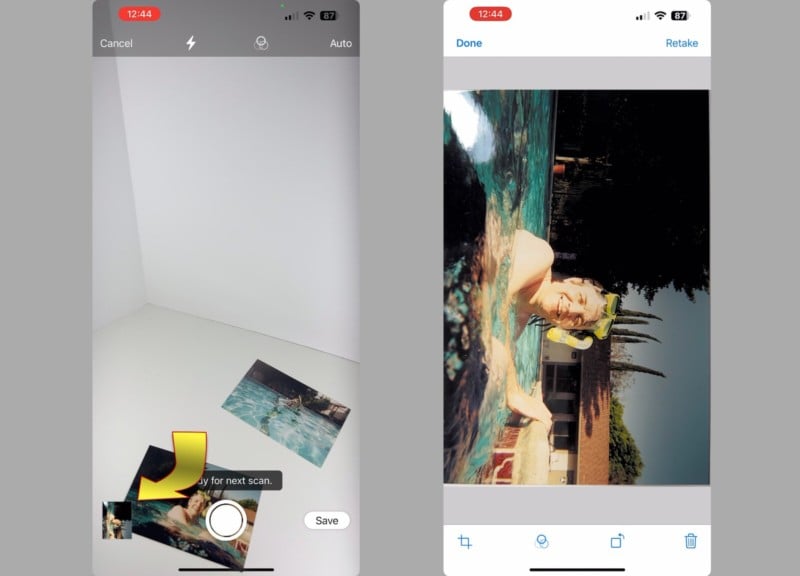
There are a few apps that can dramatically speed up the process of scanning a stack of photos. Instead of capturing one picture at a time, some third-party apps can automatically crop and separate multiple photos from a single scan. Naturally, the quality of each image will be lower than if you captured one at a time since a smaller portion of the iPhone’s image sensor is devoted to each picture.
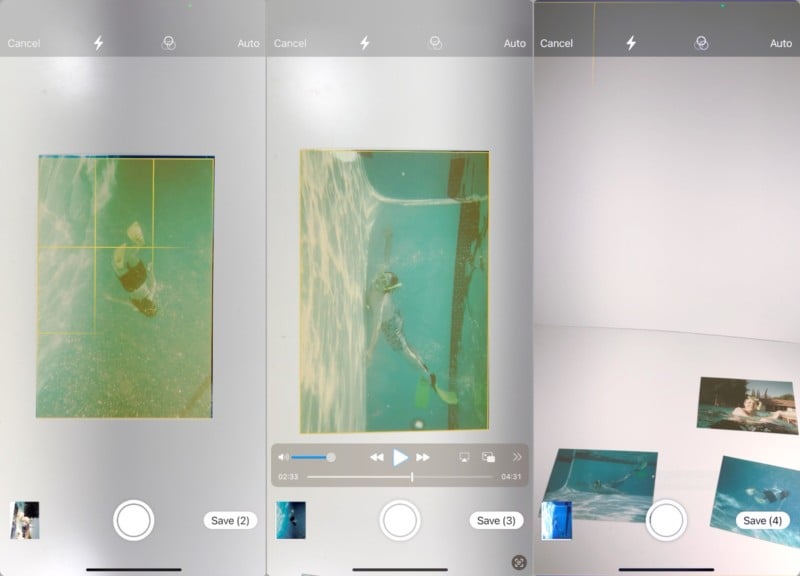
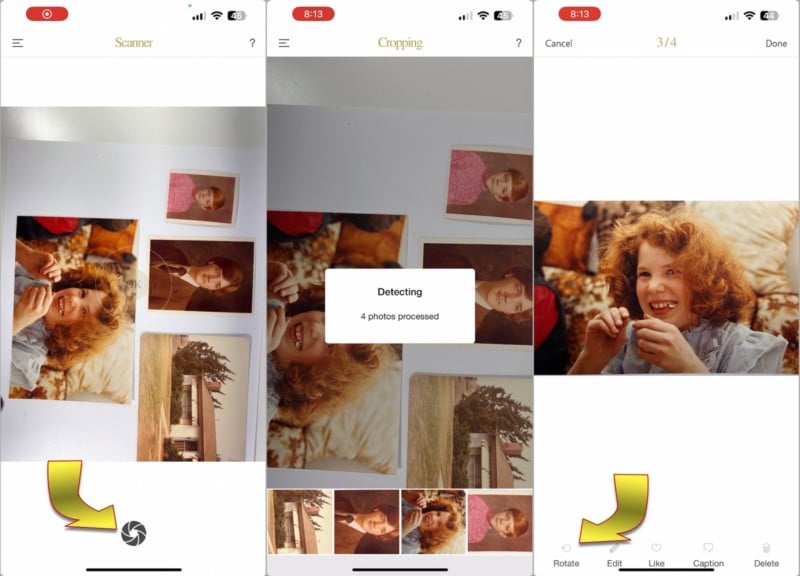
Photo Scan by Photomyne is one of the most popular apps, with the ability to scan photographic prints and negatives. It can identify up to three photos, then automatically align and crop them for you. You can try the app for free, but a subscription of $10 per month is required to save digital scans in the best quality.
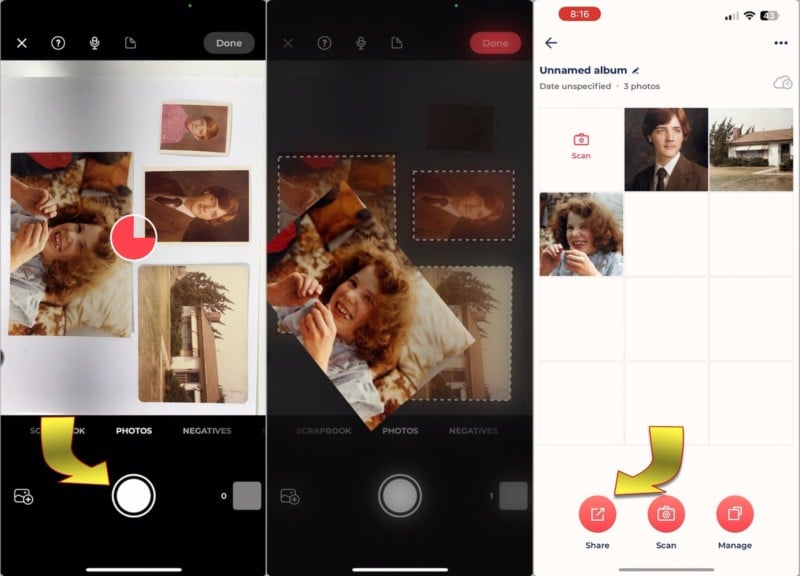
A lower-cost option is the Pic Scanner Gold app, which offers many of the same features and can align and crop four physical photos in a single scan. There isn’t an option to adjust the crop when there’s an error, but for a one-time purchase of $8, it’s a great tool to add to your iPhone to quickly capture prints.
Scanning Negatives
It’s also possible to scan negatives with an iPhone. You’ll need a nice, even white backlight to do this. A light box designed for film works best, but if you are in a pinch and need a quick scan without optimal results, you can also place the negative on a spare smartphone or tablet. Set the screen brightness to maximum and open a paint app and create a large white rectangle. A high-density display will work best and prevent the possibility of capturing screen pixels as a grid of dots in the scan.
Do note that using a screen may result in uneven colors in your scan as well as visible pixels when the scan is magnified and examined closely.
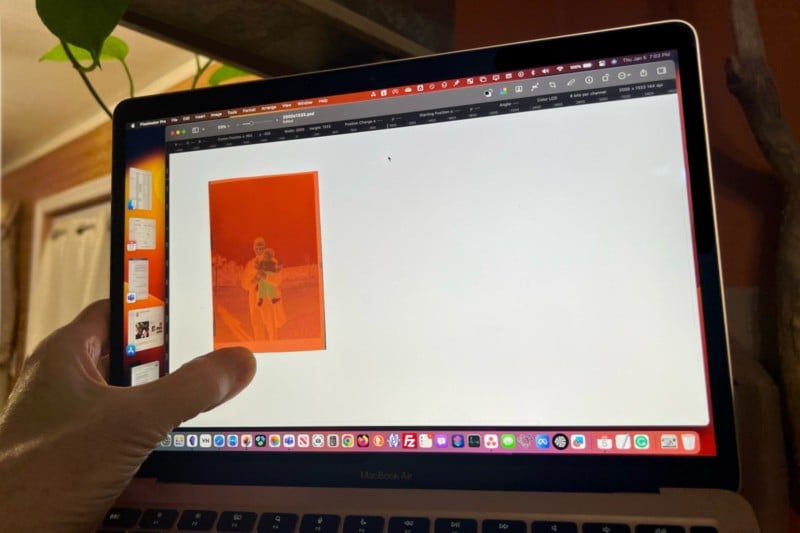
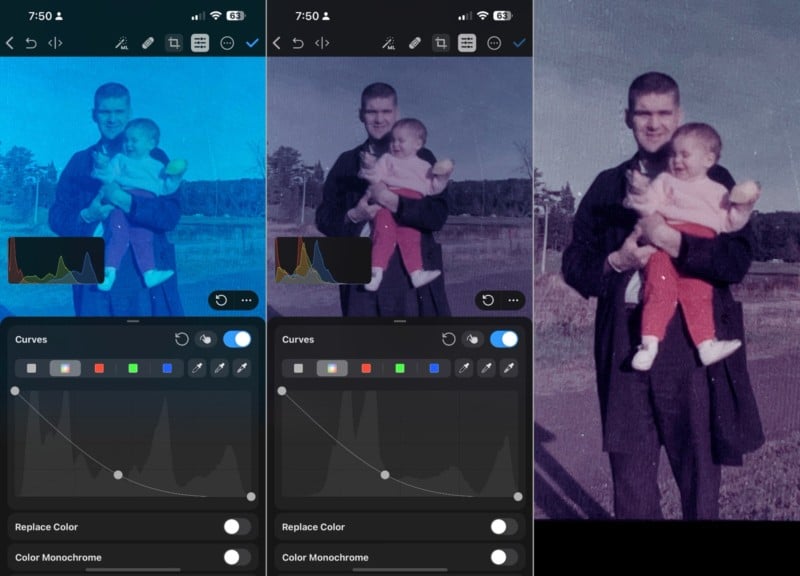
You’ll need to invert the image and tweak the colors and exposure to get a good positive photo. If your photo editor doesn’t have an invert option, you can use levels or curves tools instead. Just move the left side all the way to the top and the right side to the bottom, making black into white and vice versa. Some color correction and exposure adjustments help refine the result.
Conclusion
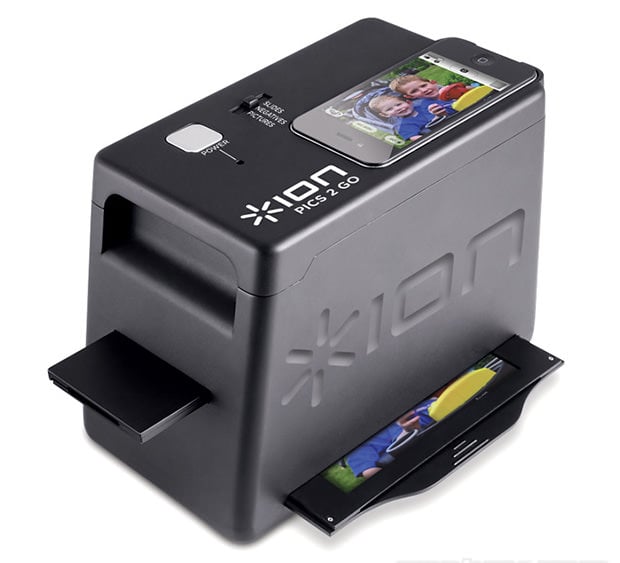
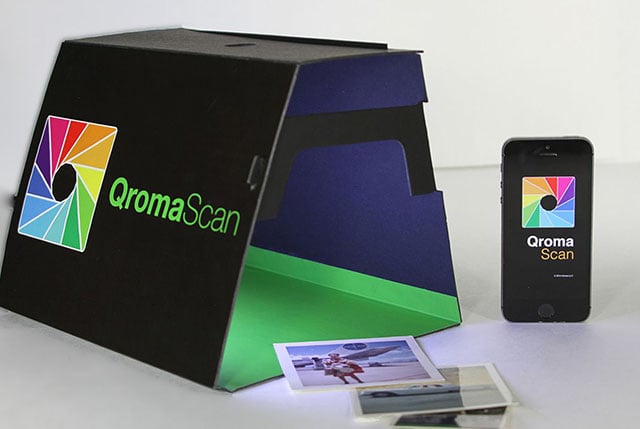
While a third-party scanning service is an easy way to get a large collection of photographic prints and negatives converted to digital format, it might take longer than you’d like to get the scans and the originals back. There’s also a risk with sending cherished photos to a bulk processing service, where damage or loss could occur. If shipping the pictures, they’ll need to make a round trip, adding to the chance of something going wrong. A dedicated machine designed for scanning photos is another option but they can be quite expensive, costing hundreds to thousands of dollars for a large format high-resolution scanner.
Ultimately, the decision of which route to take is very personal and depends on how long you have access to the pictures, whether they are too precious to risk handing over to strangers, and the amount of time and money you have available to spend on the project. With the help of a few apps, your iPhone makes it possible to test out the DIY approach at home in a few minutes and at a low cost. As Apple always says, “there’s an app for that.”