What is Rim Lighting and How to Use It for Portrait Photos
In this article, we are going to take a look at rim lighting. As you might guess, rim lighting is used to light a portion of the edge of your subject. While it is most often used as part of a multi-light setup, it can be used on its own for dramatic effect.
Table of Contents
What is Rim Lighting Used For?
The primary purpose of rim lighting is to create a more distinct separation between your subject and the background. By placing a strong light source behind the subject, you can wrap your subject with light, creating a rim (hence the name) or halo effect around the person’s outline.
Here is a list of four main reasons a photographer may include a rim light in their lighting setup:
1. Separation and Depth: Rim lighting helps to separate the subject from the background, adding depth and dimension to the image. By illuminating the edges of the subject, it creates a clear distinction between the two and prevents the subject from blending into the background.
2. Visual Interest: The halo effect created by rim lighting adds visual interest and can draw attention to the subject. It creates a sense of drama and highlights the contours and shape of the subject, enhancing their features.
3. Emphasizing Silhouette: Rim lighting can also be used to emphasize the silhouette of the subject. When the main light source is placed behind the subject, it outlines their shape, making them stand out and creating a striking visual effect.
4. Adding a Sense of Mystery or Drama: Rim lighting can evoke a sense of mystery, particularly when used in low-key or dramatic lighting setups. It can create a captivating and moody atmosphere, enhancing the overall impact of the portrait.
Rim lighting is usually one component of a lighting setup in which the contribution of each light is balanced for the desired look. We will look at both using only rim lighting as well as using it as part of a more complex setup.
Rim Lighting Only
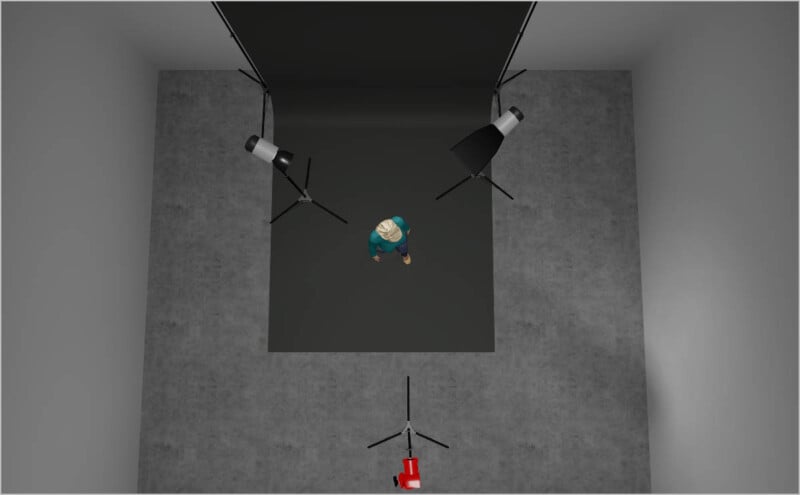
To start with, let’s look at a photo that is strictly using rim lighting. Figure 1 demonstrates rim lighting using two lights. To camera left, I have a strobe in a 7” reflector aimed at Leslie’s hair. At camera right is a 24” strip box with a grid.
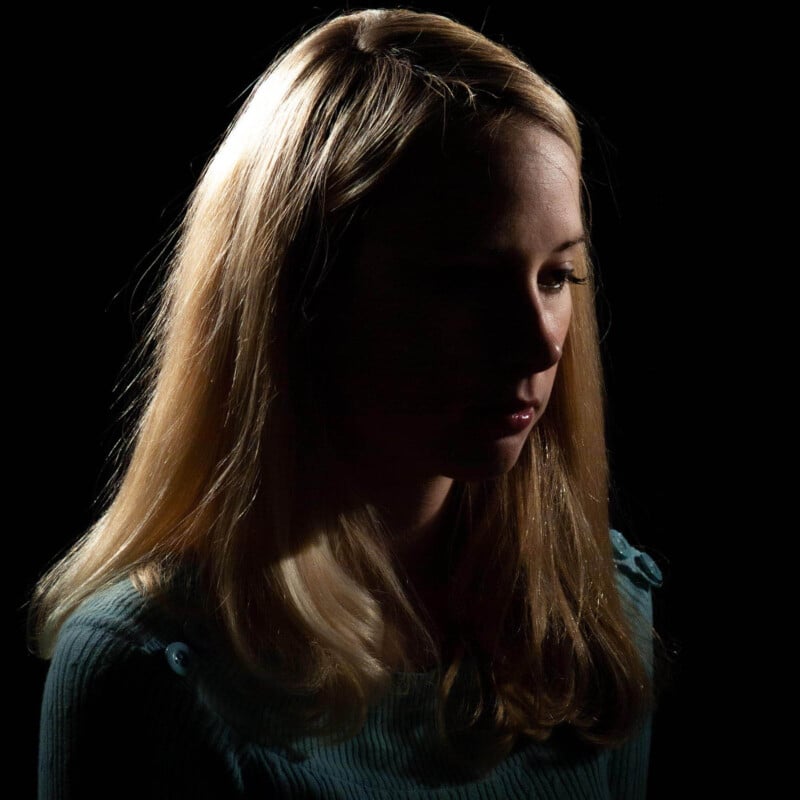
The resulting somber image goes along with Leslie’s pensive expression in Figure 1. It certainly achieves the goal of creating a mood, but for my own style, I’d prefer a bit more detail in the shadow areas. This shot does, however, serve as a good example of how this style of lighting can create a sense of isolation in a photo.
Figure 2 shows the positioning of the lights used in Figure 1. Both light sources are placed so that most of the light is striking Leslie from behind. However, due to the round nature of the human head, some of the light will still illuminate “around” the sides. That’s why, even with the lights placed several degrees behind Leslie, we still see a lot of lit hair on camera left, and we have well-defined facial features at camera right.
Rim Lighting as a Hair Light
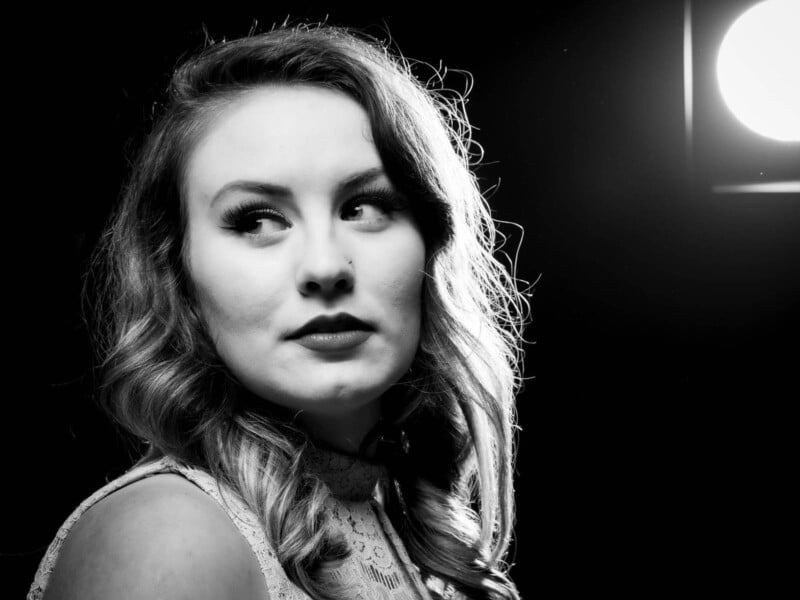
If you’re thinking that hair lights are basically rim lighting, you’d be correct. Most types of accent lights that require light placement behind the subject would fall into the rim lighting category. Hair lights help create depth and create separation from the background. In Figure 3 I’m shooting with Alison in a low-key setting.
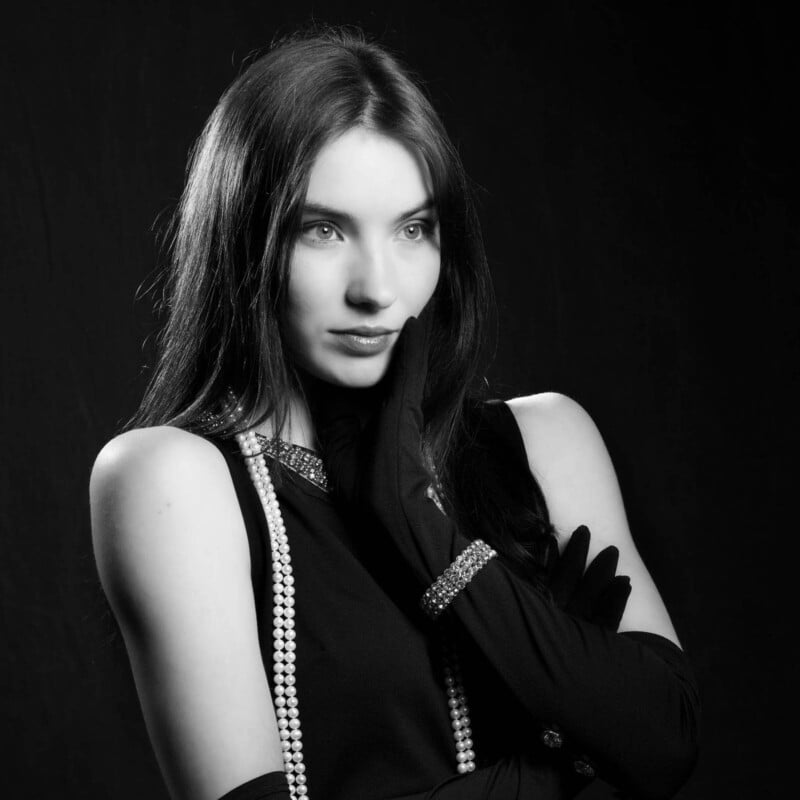
With Alison being lit from camera right with a gridded beauty dish, her face and arms are well-lit and the use of a grid on the beauty dish keeps any light from spilling on the background. If I didn’t have the hair light coming from behind her at camera left, her dark hair would disappear into the black backdrop. That same hair light is providing some rim light to her right arm to her “pop” out of the dark backdrop, as well as on her left shoulder.
Rim Light as a Main Light
Where Figure 3 demonstrates rim lighting being used as a secondary (or accent) light with a main light from in front of the subject, Figure 4 flips this and uses rim lighting as the main light source.

In Figure 4 I’ve placed a light with a 22” beauty dish and grid behind and above Marie to camera left. This creates a nice rim light along her hair that flows down her face, highlighting the bridge of her nose, lips, and chin. It also has added definition to the viola strings and created a lovely glow to the strings of her bow, which are fully backlit in this instance.
Initially, this shot, using only the rim light, left out a lot of detail in deep shadow. Since I wanted to see more details on the left side of her face, I placed a silver 24” reflector at camera right next to Marie to help fill in the detail. The reflector is at a steep angle (feathered) so that only enough light falls on the viola to show the shape, but it still fills in Marie’s face and neck nicely.
A More Balanced Example
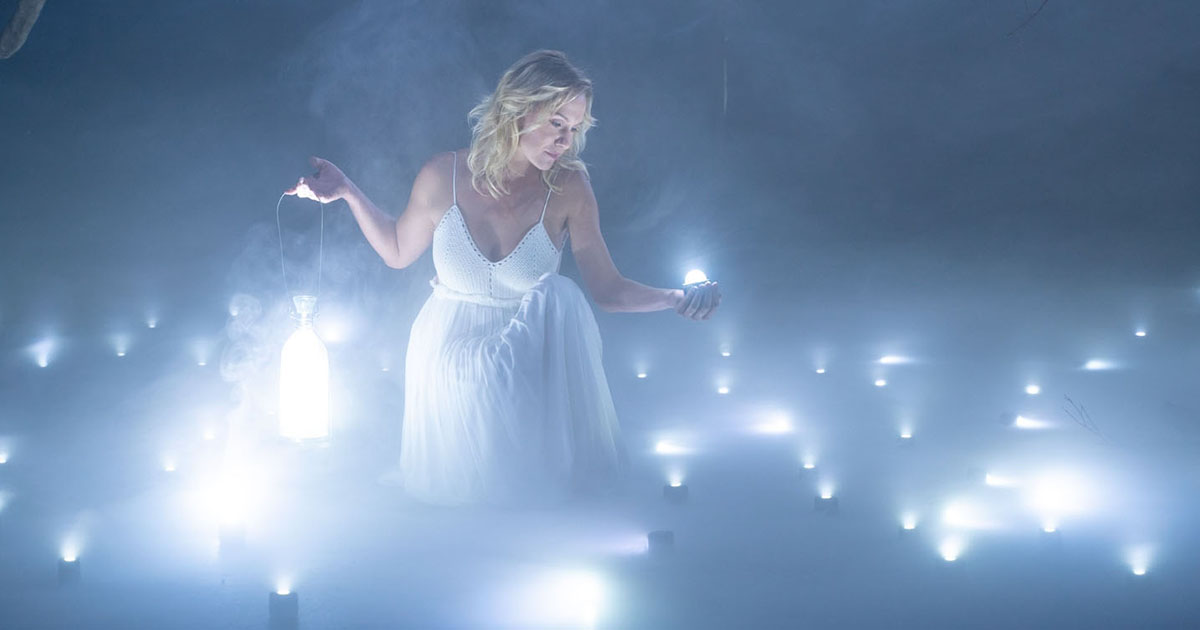
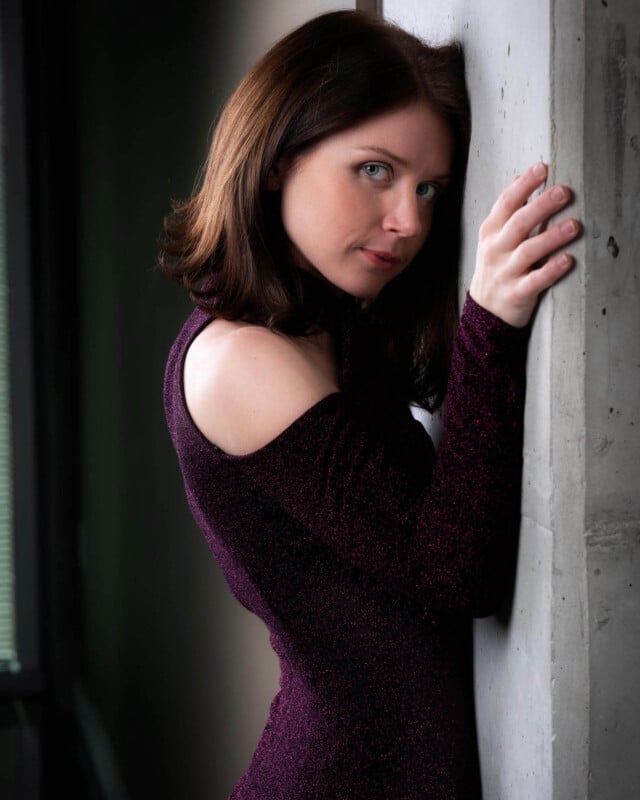
In the previous two examples, there’s been a distinct difference between the rim light and any front lighting, reflected or directly sourced. In Figure 5, the rim and main light are closely balanced. Both lights are placed to camera left here, with the one in front of Kate feathered and angled to just light her face, shoulder, and right hand.
The second light, placed behind her to camera left, is facing towards camera and creates the hair light and also creates a bright edge down Kate’s back separating her from the darker background. It also spills onto her hand and shoulder. While I should go in and burn these areas in a little so that they aren’t brighter than her face, I’m leaving it unedited as an example of what to watch out for, not because I’m lazy.
Not Just for the Studio
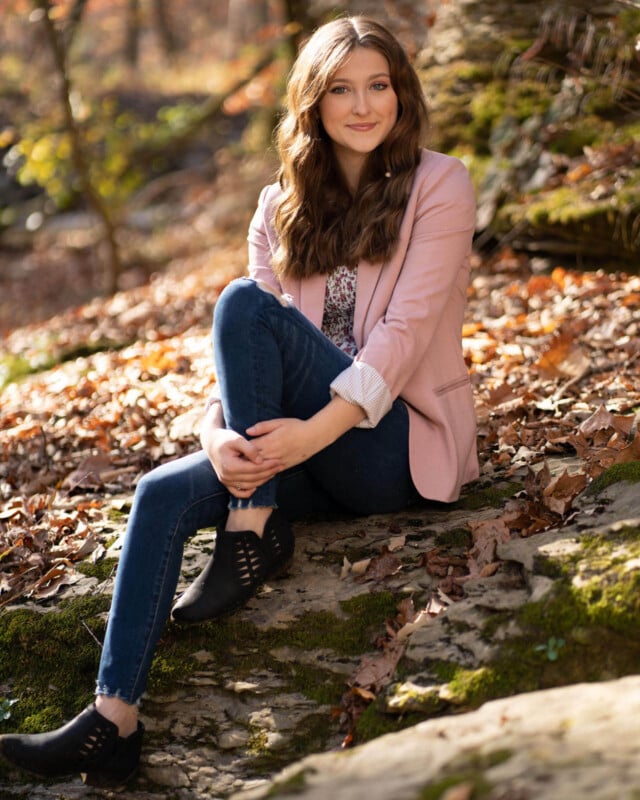
The studio and studio lights aren’t the only place to implement rim lighting. The sun can make a great rim/hair light when the weather cooperates, as it did in Figure 6. Here Calli is sitting with the sun behind her and to camera left, creating some lovely hair light.
It is also lighting the edge of her right arm and defining the right side of her jeans all the way down to the edge of her shoes. Calli’s face is getting some fill light from a silver reflector behind me and to camera right. This rim lighting adds depth to what otherwise might be a nice, but somewhat “flat” portrait.
Tools for Creating Rim Lighting
While a point light source like a bare flash or, in the case of Figure 6 the sun, can be used as the source for rim lighting, they don’t offer much control over directionality and spill. Fortunately, there are many lighting accessories that can be used to precisely control your lights. These can help keep the light from spilling into areas on your subject or other objects in frame where you might not want it.
Barn Doors
Barn doors have been around for a long time and are available to fit many studio strobes and continuous lights. These typically consist of four flaps (or sometimes two) that can be folded inward in front of the light head to varying degrees. This allows you to keep light from spilling onto the background, as well as preventing it from flaring in your lens if the light happens to be placed very close to being in the frame. Since the flaps can be set at any angle, they provide good versatility, but they are sort of a blunt instrument compared to some other modifiers.
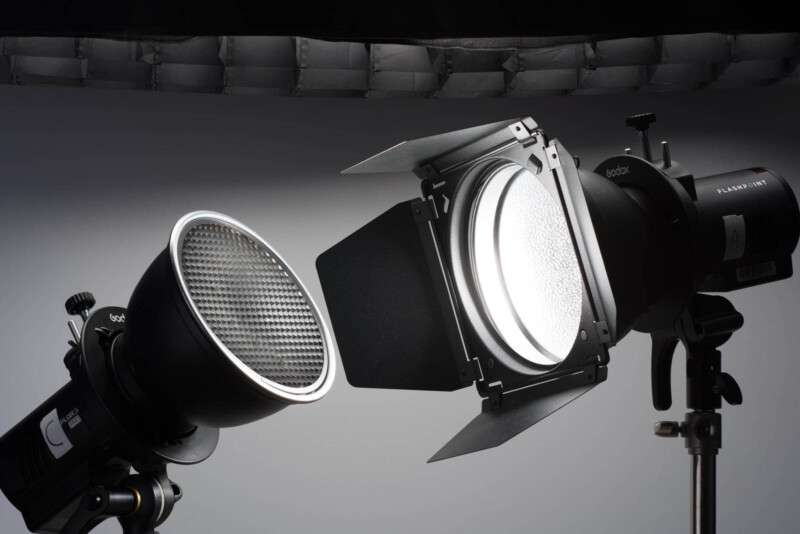
Grids
Grids are a great way to control light and these are typically available in two varieties, round metal or plastic, and fabric. Round grids from metal or plastic are typically fitted into a round reflector that is attached to a strobe, such as the “standard” seven-inch reflector found on many studio lights, as well as large ones for beauty dishes. These are often referred to as “honeycomb” grids since they do resemble the honey-filled variety.
Fabric grids are used to reduce light spread for softboxes and are typically attached to the front edge of a softbox modifier using a hook-and-loop fastener. While they usually don’t provide the tighter control of a honeycomb grid, they are still very useful to create rim lighting. A small strip box (10x24in) with a grid has been my go-to for hair/rim lighting for a long time.
Snoots, Flags, and Fresnel
Some other light modifiers that are useful for rim lighting include snoots, flags, and Fresnel attachments. Snoots are cones or cylindrical modifiers that fit over light heads that tightly narrow the “beam” of the light source. These often have a grid attachment that can further tighten the light beam.
A flag is a dark board or sheet that is used to control light spillage and can be placed between the light source and the subject. Black foam core boards are one of my favorite materials for this as they are inexpensive and light and be cut to shape if needed. Flags are also used between light sources and the camera to help prevent flare.

Fresnel attachments can be attached to a light source to create a tight beam of light. Fresnel attachments often have the ability to be varied, so one can adjust the tightness of the light beam. These can get expensive, but they are very versatile for rim lighting and have a lot of other uses as well.
Use in Product Photography
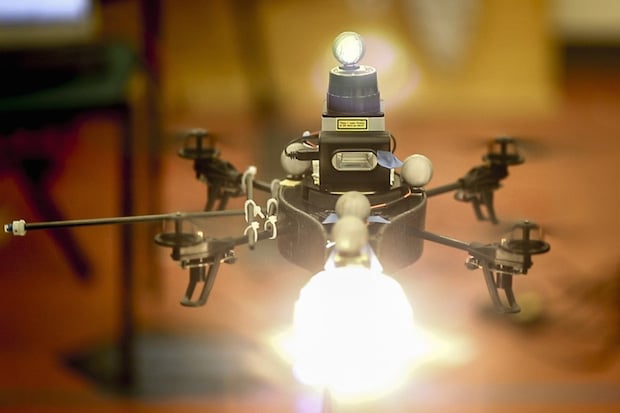
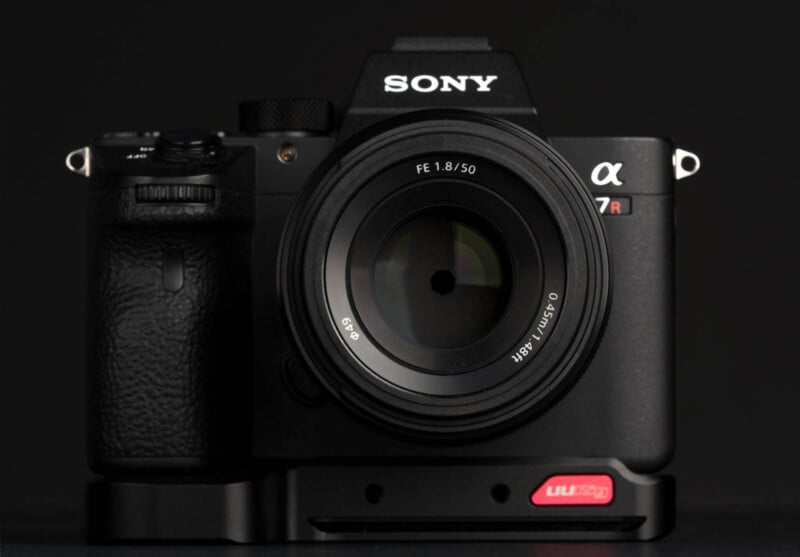
So far, I’ve demonstrated rim lighting used for portraits and some tools that can be used to implement it. Of course, rim lighting can be used with any type of subject, and Figure 7 is a photo of one of my cameras. This low-key product photography shot is properly exposed and looks OK, but it isn’t that engaging or interesting.
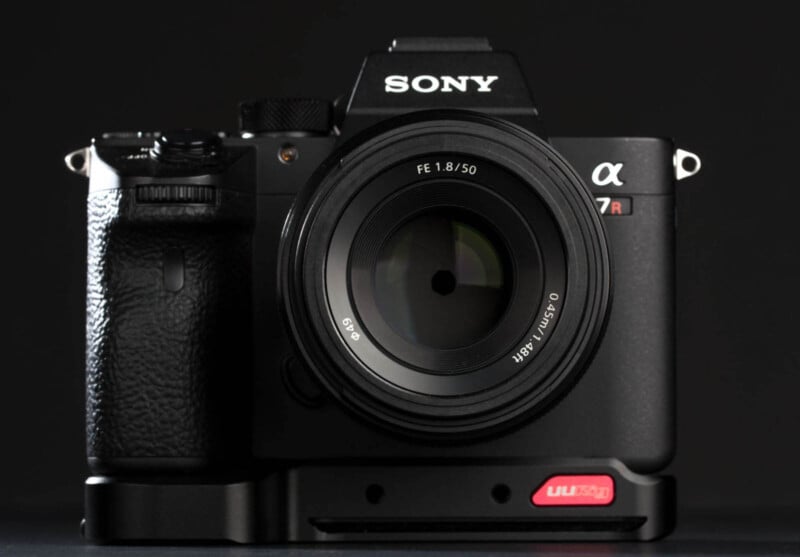
Adding a rim light at camera left behind the camera body (Figure 8) adds interest and helps separate the camera from the dark background. This one change is a simple addition to the lighting setup and is an easy way to add some needed “pop” to an otherwise boring image. There are certainly more ways to improve this image, but I feel this demonstrates how much a rim light can elevate an image even though it only is present in a small portion of the overall photo.
Conclusion
Rim lighting is a great tool to have in your lighting toolbox. It is something that can be as simple or as complex as you want to make it. While I mentioned many studio light-shaping tools that can be used, there are doubtless other accessories available, plus plenty of DIY options that can help you control lights used for rim lighting.
Finally, like many lighting tools and techniques, it has its place. Just because you can add rim lighting to the image doesn’t mean that it is necessarily going to help, and can even detract from your original goal. I hope this article helps you think of how you might implement rim lighting in your work, as well as decide if your particular image will benefit from it.