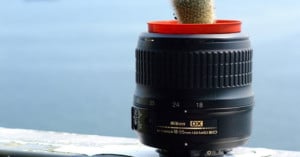
Broken Lens Repurposed as a Flower Pot
Have a busted lens that isn’t worth repairing? Instead of throwing it away, you can turn it into a …
Have a busted lens that isn’t worth repairing? Instead of throwing it away, you can turn it into a …
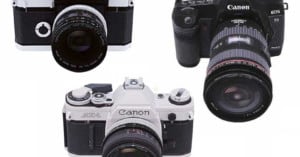
Last year, Canon celebrated its 50th anniversary in manufacturing SLR cameras and released three super detailed paper craft cameras that you can print out and build yourself. These included the Canonflex, the AE-1, and the EOS 5D Mk II. Unless you have a good amount of time you can set aside for arts and crafts, this probably isn't for you -- each camera has dozens of pages of detailed instructions and a ton of tiny pieces that come together to form the final replica camera.
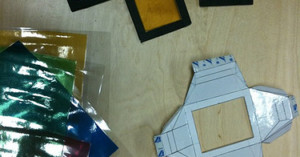
Today I spent a couple of hours designing and making a simple box to fit directly onto a normal flash unit. I also made a couple of colored filters. After doing all this I thought I could share this with others and hopefully make them happy by doing so.
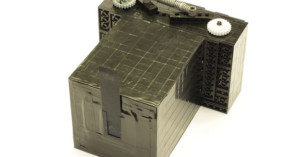
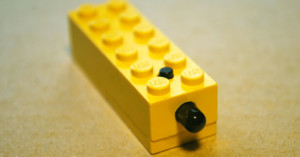
Fernando Ramírez Martínez (snipfer on Flickr) created this awesomely geeky medium format camera using Lego pieces.
We started sorting bricks out and after a couple of afternoons working on the camera obscura we managed to get some shots out of the thing. It was built using Lego pieces, duct tape, black cardboard and some glue. The camera shoots 6x6 and the "lens" sports a focal length of 150mm with an aperture of 1:300. All measurements approximate.
In the front there is the shutter and the pinhole. In the back, the gear on the left is the film advance. The white gear on the right has a clutched axis that prevents the film spool from moving freely. The "suspension" does not allow the film advance to turn backwards.
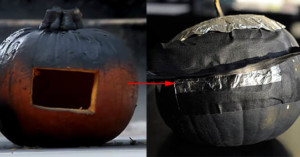
Claire O'Neill and Mito Habe-Evans over at NPR's The Picture Show blog have just posted a fun experimental project you can try out this halloween: making a pinhole camera out of a pumpkin. What you'll need is a pumpkin, aluminum foil, a knife, tape, photo paper, dark spray paint, and access to a dark room. Along with the disturbing skull camera we shared earlier today, this would be a fun way to capture photos of trick-or-treaters this halloween.
Update on 12/9/21: This video has been taken down by the creator. YouTube user Prippman created this nifty follow focus …
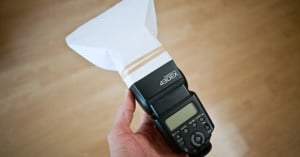
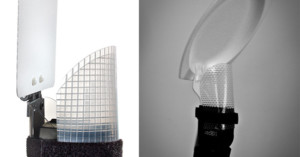
Want to print your own flash reflector? Pieroway has free PDF templates that you can use. The templates print double sided, with black printed on one side and faint gray fold lines printed on the other. Print it, cut the shape out, fold along the lines, and attach it to your flash with a rubber band.
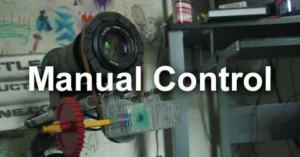
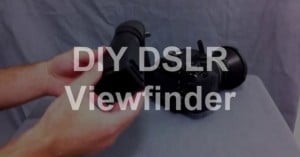
Want more precision in your focus adjustments when shooting video with your DSLR, but don't want to shell out money for a pricey follow focus? Flickr user Adam Lisagor shot this photo showing how he created his own DIY follow focus for $6. All you need is a steel hose clamp, drawer handle, nut, and bolt. Drill a hole through the clamp, and put it together as shown above.
This neat DIY video shows how you can convert an ordinary digital camera into a night vision camera. The …
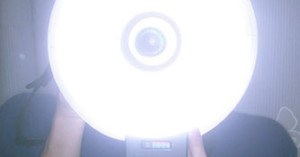
One of the things about macrophotography is that you either have to shoot wide open (and have a depth of field of about 1 micron or so) or stopped down to get some decent DOF (but have ridiculous shutter speeds making everything a blur). The solution: put a strobe on it! Given that you are so close to your subject, it's hard to properly light it. A ring flash is a good choice and at the tiny distance it is used from the subject, it has the effect of a large softbox creating even lighting.
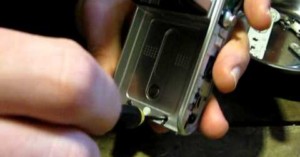
Alan Morris created a DIY LCD viewfinder loupe by slicing the viewfinder off …

Here's a creative idea that we love - cut out giant letters, gather up some friends, and spell out words with shadows! Justin Swindle, a student at Brooks Institute of Photography in Santa Barbara, created the above image by cutting the sides off the biggest cardboard moving box he could get his hands on. He then traded the letters freehand and cut them out using a razor.
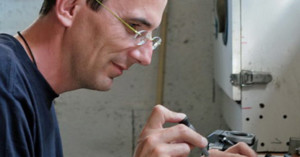
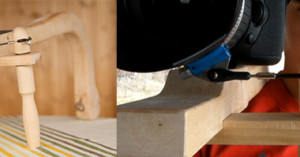
You've probably seen do-it-yourself pinhole cameras or even large format cameras created with foam core, but what about a solid metal do-it-yourself 35mm camera? That's exactly what Denis Mo decided to create, posting his step-by-step documentation to French camera forum collection-appareils.fr.
Denis had wanted to do such a project for 25 years, but it wasn't until he was almost 42 that he had the technical know-how to actually do it. Except for the shutter curtain fabric, ball bearings, and screws, all of the individual pieces that were used to create the camera were custom made.
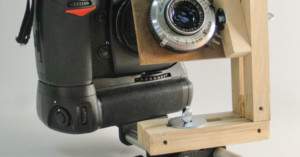
When Jon Martin found an old Kodak Ektar 101mm f4.5 lens from the 1940's at work, he decided to try it on his D700 by freelensing to testing and see if it was compatible. After finding that it was, he began on building a rig to use it as a tilt-shift lens. He ended up building a rig using old camera gear and some custom wood parts.
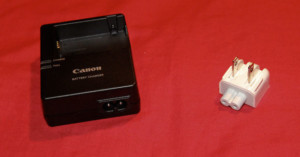
Some battery chargers (e.g. those that come with Canon's pro and prosumer cameras) plug directly into the wall and have prongs that fold into the charger, while others (e.g. the Canon T2i charger) connect to the wall via a removable cable. Though this may be more space efficient when connecting to a socket or surge protector, the extra chord takes up space and can be a hassle. CheesyCam has a clever solution: use an Apple wall plug duck head adapter to transform the charger into a wall charger.
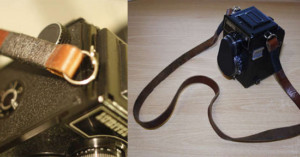
I have a small obsession with cameras, also, a slightly smaller obsession with film cameras. My favourite camera is Lubitel 166B. It is a medium format camera, this basically means it has a large image area to capture photos, using the larger 120mm film. The Lubitel's were twin lens reflex (TLR) cameras. They have a little pop up cover on top, you then look down through the viewfinder. The nature of holding the camera like this will getting the settings set up for the shot can sometimes be a pain, so having a nice camera strap to hold it at the correct height, and nice and steady is a great idea.
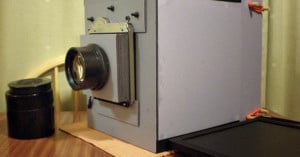
This foam core 8x10 camera was created by Daire Quinlan, the same guy that attached a 90 year old lens to his camera with homemade bellows.
The lens is an Industar 37 Russian large format 300mm designed for their FKD cameras. The shutter is a Sinar, takes standard 8x10 film holders.
Quinlan exposes onto photo paper instead of film, and focuses the camera by sliding the rear box forward and backward.

At times mounted photos can be a bit tricky in regards to how to display them if you do not want to use a frame. Leaning them against the wall or propping them up next to another object doesn't always work. One simple way to display your mounted photos is by creating custom photo holders using vintage wooden spools. The end product is practical, unexpected and pleasing to the eye. The process for creating these is simple.
My boys have started getting into photography, but often have trouble keeping the camera still enough for really clear shots.
The obvious solution is to buy a mono-pod, but why buy when you can make, especially when you have Sugru?

Here’s an easy to follow video tutorial by photographer Lucas Ridley teaching you …
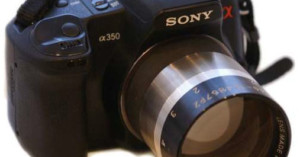
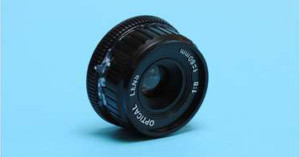
The ratio between the focal length and the aperture (diameter) of a lens is called the f/number. The smaller the f/number, the more light is let in. Fast lenses start around f/2.0, and the light let in goes as the inverse square. Compared to f/2.0, f /1.4 lets in twice as much light, f/1.0 four times, and f/0.71 eight times. The fastest camera lenses designed for DSLRs and widely available are between f/1.4 and f/1.2, but lenses as fast as f/0.75 have been made in quantity for special applications, and some of those are available quite cheaply via scrap yards, surplus stores, or eBay.
These ultra-fast lenses usually are branded either Kowa or Rodenstock and were designed for use in medical or semiconductor industry equipment, etc. They are not well-suited for use on DSLR cameras, and are no substitute for an f/1.4 or f/1.2 lens that was designed for your camera. However, they easily can produce very distinctive images. Here's how to use one on a DSLR.
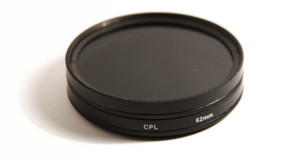
What is a variable neutral density filter?
The neutral density bit means it is a filter simply designed to block some of the light getting into a camera. The variable bit means it is variable - you can control the darkness of the filter just by twisting one part of it. A proper variable neutral density filter can cost £100 or more!
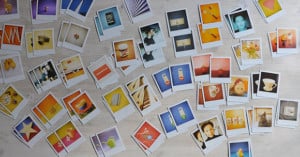
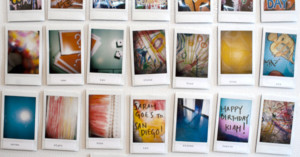
Here's a terrific "Doh! Why didn't I think of that?" idea shared by Flickr user Ralph Odenwälder in his photostream: create a set of matching Polaroid photographs for an awesome do-it-yourself memory card game that you can either give someone as a present or play yourself!
Tilt-shift lenses are usually pretty pricey, so many people fake the effect during post-processing by selectively blurring sections of their photographs. There's even simple web-apps that can add such blur to give your photographs a miniature scale model effect.
If faking the effect isn't legit enough to satisfy your photo-geekiness -- and you'd rather not drop big bucks on it either -- there's a nifty do-it-yourself solution you need to check out: Bhautik Joshi over at cow.mooh.org has a new DIY Tilt-Shift project that teaches you how to convert an old lens into various kinds of tilt-shift lenses.
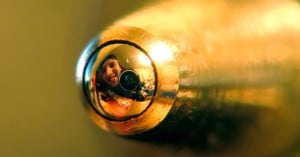
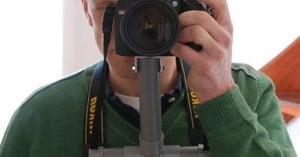
This crazy self-portrait was taken using the tiny reflection in the tip of a ballpoint pen. Russian photographer …
Here’s a really great way to turn photos from a novelty camera into something of practical use — make …
It’s almost a given for new Canon DSLRs to have an HD video recording mode, but older Canons can …
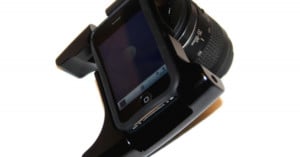
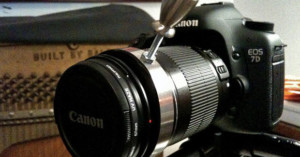
Jeremy Salvador assembled this strange contraption in an attempt to combine an SLR lens with the iPhone. Salvador created a prototype with an Owle Bubo iPhone camera mount, a 37mm filter with glass removed, a 37-58mm step-up ring, a Canon EF mount adapter ring, and a 35mm Canon lens. Though he's managed to fit all the pieces together, he's been unable to actually take a useable photograph.
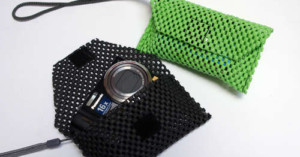
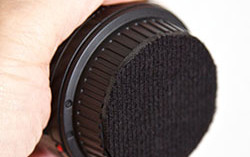
Using a bit of drawer liner as both padding and case, Instructables Living editor …
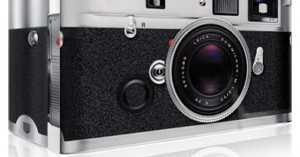
Always wanted a manual Leica but couldn’t afford it? This Likea pinhole camera may …
I have been using Holgas on and off for many years, and I have always had the idea of how to make it digital. There are many current options one being strapping a medium format digital back to your Holga, but that method is very cost prohibitive for most people messing around with toy cameras. I have seen lens mods on DSLR cameras that take the body cap and glue the holga lens on, but they are upwards of 50 bucks each.
I like a challenge so I decided to make one myself! Here is my method for doing so, so you can do it too.
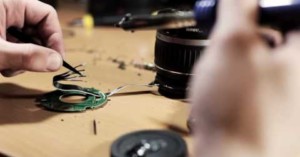
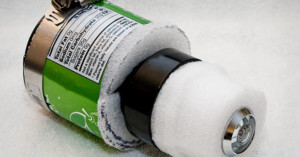
Recently I came across the Demb flash diffuser while reading a review of the best flash diffuser over at photo-tips-online.com. After seeing the Demb diffuser at the top of the list, I went to Amazon to see how much it costs and, to my surprise, found that Amazon, Adorama and B&H don't sell it. The only way to purchase it is from Joe Demb’s site. I then decided to try my hand at making this diffuser myself. The total cost of mine is $0, while the real thing costs about $40.
This is one of the most intense do-it-yourself videos I’ve seen, showing how to hack a Canon 18-55mm kit …
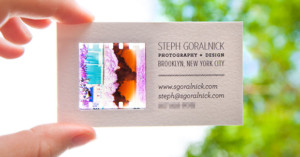
Editor's note: The creative photographic negative business card idea that we shared recently was pretty popular with our readers. Here we've asked Steph Goralnick to share how exactly it was made in case you want to make your own.
The realization that I had run out of my regular business cards the night before I was scheduled to attend a weekend-long special event inspired me to create a small edition of extra special cards on the fly. I was aiming for a simple design with a unique construction that would showcase my skills as both a photographer and a graphic designer. Due to the fact that time was an issue, traditional vendors out of the question; and since I didn’t need more than a couple dozen cards, I decided to make them myself at home using an inkjet printer and some negatives.
A few years ago New Zealand-based Flickr photog fettucininz was looking for an …
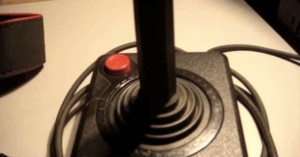
Self-described creative technologist Thiago Avancini hacked this Atari 2600 joystick into a shutter release cable -- complete with an autofocus control for his Canon T2i. The controller is considerably larger than the average cable release or remote control, but it's a pretty nifty.

Today, the New York Times’ Lens blog posted the end result of a global photographic project. “ …
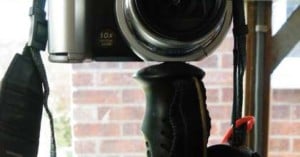
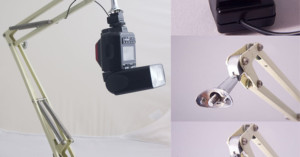
Jonathan Berqvist needed a shoulder rig for stabilizing his Canon 7D when filming, and his father Erik is quite good with woodworking, so they built a do-it-yourself a wooden shoulder rig using a a single tree branch. What's awesome about the shoulder rig is that it has follow focus built into one of the two handles used to hold it.

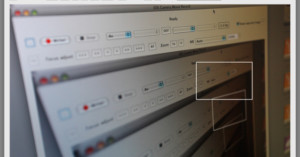
Laptopograms give “taking a screenshot” a new …
If you have multiple lenses and not enough space in your camera bag, carrying an extra lens might require you …

Steven Monteau is a French photographer who …

If you can’t shoot right-handed, or need to shoot left-handed for some reason (i.e. demonstrating something in a photo …
Bhautik Joshi, the guy who made the Phone-O-Scope that we tweeted a while …
When Instructables member bertus52x11 had his cast removed after breaking his arm, he …
Instructables member KoZuEst made his own remote …
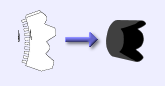
Lens hoods are ridiculously expensive considering the fact that they're simply fancy plastic tubes. If you'd like to use a lens hood but don't feel like shelling out wads of cash, you can create your own cardboard lens hoods!
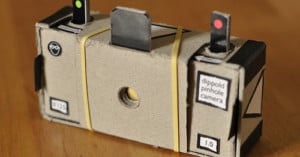
Francesco Capponi (Dippold on Flickr) has a fun printable template for creating your own nifty-looking 35mm pinhole camera.
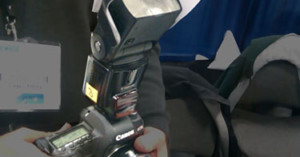
If you’re looking for a way to “upgrade” your flash unit without spending money on real gear, the Los …
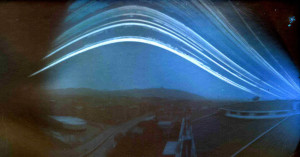
Solargraphy is a technique in which a fixed pinhole camera is used to expose photographic paper for an absurdly long amount of time (sometimes half a year).
At the beginning of the month we featured a creative lamp …