

Post-Processing

Great Two-Hour Lectures on How to Use Photoshop and Lightroom

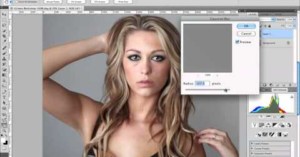
Looking for free lessons on how to get started with using Adobe Photoshop and Lightroom to post-process your photographs? Look no further than the official YouTube channel of New York City camera shop B&H Photo Video. The store often invites well-known professional photographers to hold lectures on subjects they're knowledgable in and passionate about. The collection of videos aren't as shared as other shorter tutorial videos you'll find online due to their great lengths -- they run up to two …
Seventeen Makes No-Photoshop Pledge In Response to Teen’s Campaign

A few months ago 14-year-old Julia Bluhm caused quite a stir when she managed to collect over 80,000 total signatures in an attempt to get Seventeen Magazine to put one completely un-Photoshopped spread in each issue. Her argument was that the magazine's readers have a sensitive body image, and constantly seeing unrealistically thin and perfect software-enhanced models wasn't helping the matter.

Hidden Gem Features In Photoshop CS6

Those of you lucky enough to already have Photoshop CS6 already know about all the popular, highly-advertised features like Content Aware Move. But there are a lot of smaller improvements that come with each re-design of Photoshop that never get to see the limelight. In honor of those small (but often highly useful) improvements, Photoshop Insider Scott Kelby put together a short YouTube video that highlights a few of them for you.

How to Scan Film Negatives with a DSLR

Well, lets just say I've gotten better at this over the last couple of years. The left image was one of the first I've "scanned" with my DSLR, and the one on the right I've just rescanned using the techniques described below (higher resolution available here). Right now I can get higher resolution and better image quality that what street labs give you on CD.

Snapheal Brings Content Aware Fill to Your Mac for Only $19.99

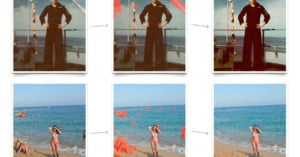
The "Content Aware Fill" tool was one of the most lauded advancements in Photoshop CS5. Of course, the tool wasn't without its occasional glitches, but the ability to select a section and have the program clone it out automatically was still very impressive. But what if that's the only tool you want to use? What if you're a casual photographer who wants to remove unwanted sections in your composition without buying and learning a whole editing suite?

What if You Could Photoshop Real Life?

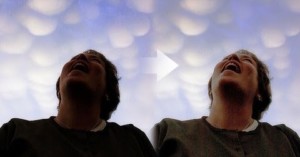
There's been a lot of controversy around magazines using Photoshop to make real people look unrealistically pretty or fit, but what if you could actively Photoshop what you saw and experienced? That's the question the people over at Cracked decided to ask, and the answers are pretty hilarious:

Overlay an Inverted Layer Onto a Photo to Brighten Underexposed Areas

Adam Dachis over at Lifehacker offers a simple method for correcting underexposed photo with any image editor that supports layers, inversion, and Overlay blending mode. Simply create a duplicate later, invert it, set the blending mode to Overlay, and then adjust the opacity to suit your taste. While it's certainly not a pro photography trick -- other techniques including adjusting the curves and levels may be better -- it's a quick and easy tip that may be good to know.

How to Manually Create an HDR Photo in Photoshop

Here's a tutorial on how to do non-automated HDR for real estate photography using Photoshop CS5. The first thing you'll need is a sturdy tripod with a level. The closer you are to a leveled image, the less correction you'll have to do later.

Shooting and Compositing an Outdoor Architectural Photo

Here's a brief video in which Los Angeles-based photographer Mike Kelley shares his technique for lighting large architectural spaces using small flash units. Kelley captures hundreds of photographs of each scene and the combines them afterwards in Photoshop. Back in September we shared an interesting time-lapse walkthrough by Kelley showing how he shoots home exteriors with the same technique.

Painting with Light: Lighting and Layering a B-25 Bomber

Here's an illuminating (pun intended) video walkthrough by photographer Eric Curry, showing how he went about creating a photo of a B-25 bomber. His technique for lighting the plane is similar to the real estate photography walkthrough that we featured last weekend, and involves lighting the scene a bazillion times from different angles, and then combining the different parts of the photo in Photoshop.

Photoshop’s Content Aware Fill is Only the Tip of the Iceberg

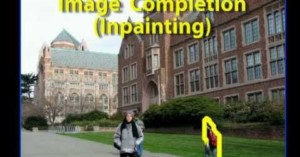
Demos at graphics conferences are often interesting to watch because they offer a sneak peek at technologies that may soon become available to the general public. The video above is a demo for "PatchMatch", an algorithm developed by researchers at Princeton and Adobe. Although you might be unfamiliar with PatchMatch, you've probably heard of its most famous feature: Content Aware Fill. Only a small piece of this amazing technology was introduced in Photoshop CS5, so the amazing image …

The New and Improved Sharpen Tool in Photoshop CS5

The Sharpen Tool in Photoshop has always been useful in that it allows you to quickly sharpen specific areas in a photograph, but a major problem was that it had the tendency to introduce nasty artifacts into the image. Alternative methods that avoid this issue (e.g. using a new sharpened layer) became popular, leaving the Sharpen Tool to gather dust on many users' tool pallets.

How to Photograph Buildings Using Two Canon 430EX Speedlites

Here's an educational time-lapse tutorial by Los Angeles-based architectural photographer Mike Kelley in which he walks through how he goes about photographing buildings. His technique might be described "manual HDR" -- after shooting the building over a longish period of time to capture different lightings, he then enters the scene and lights different areas of the building using two Canon 430EX Speedlites. Afterward, he loads the stills into Photoshop and selects different portions of the …

Instagram Filters as Photoshop Actions

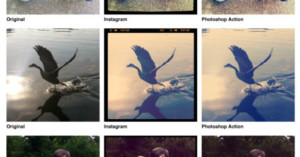
Want to use Instagram filters without using Instagram? Creative director Daniel Box carefully recreated a number of filters from the popular iPhone app as Photoshop actions, providing a quick and simple way to retrofy your digital photos. Download the actions file to get started.

How to Add a Vignette Using Photoshop

Vignetting is often viewed as a bad thing when discussing lens quality, but it's sometimes desirable to add artificial vignetting to a photograph to draw attention to the center of the image, separating the subject from the background. Here's a helpful tutorial that shows how you can add vignetting using a curves adjustment layer in Photoshop.

Using the Photoshop Clone Source Panel

If you use Photoshop, you're probably experienced with the uber-useful -- and oft-abused -- Clone Stamp tool, but what about the Clone Source panel that's been around since CS 4? This brief but informative tutorial by Photoshop guru Brian Wood is a great primer for that panel, and also includes some general Photoshop tips and tricks that you might not have known.

How to Shoot a 360-Degree Panorama Using a Christmas Ornament

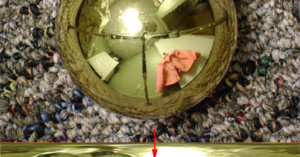
Ryan Burnside recently set out to find a cheap way to shoot 360-degree panoramas of scenes, and discovered that shooting a Christmas ornament (or any other spherical reflection) captures all the information needed -- all that's needed is a way to "unravel" the spherical image. Burnside found that the free image editor GIMP can do the trick.

Post-Processing a Band Photograph

Some friends of mine asked me to shoot a quick band photograph of them recently without any preparation or planning. Luckily, the location was pretty nice (we were at a hostel) and the weather was a bit cloudy so there wasn't harsh sunlight.

How NASA Uses Photoshop for Epic Galaxy Photographs

Those epic photographs of stars and galaxies that you see on sites like NASA's Astronomy Picture of the Day don't actually look like that straight out of the camera. Instead, a good deal of post-processing magic goes into each photograph. How much magic? Countless black and white photographs shot with different cameras are carefully weaved together, and color is added to enhance the final image. The video above gives a quick and interesting two minute tour of how they post-processed one …

How to Use the Healing Brush and Patch Tool in Photoshop

Like the Pen Tool tutorial we shared last month, here's another awesome tutorial by Sean Armenta showing how to use the Healing Brush and Patch Tool in Photoshop. Perhaps these are two tools that you've never gotten around to learning how to use. If that's you, watch this video and you'll soon have two new weapons in your portrait retouching arsenal.

How to Use the Pen Tool in Photoshop

Have you always wondered how to use the Pen Tool in Photoshop but have never gotten around to learning it? f stoppers published this uber-informative video tutorial by Sean Armenta teaching how it's used and why it's a tool that everyone should learn. The teaching is done on a Mac, so if you have a PC, just substitute CTRL for CMD and ALT for OPT.

Faking 1000FPS with Final Cut Studio and a Canon 60D

We've featured a couple beautiful examples of fake slow-motion video created using Twixtor shot with the Canon 7D and 550D. If you don't want to shell out $300 just for Twixtor, you can do something somewhat similar using only Final Cut Studio. The above footage was shot at 60fps using a Canon 60D and created entirely with Final Cut Studio. Yes, yes, we know the wheels look strange, but it's still a neat effect and might produce interesting results with the right kind of footage.

Double Rainbow All the Way in HDR

The Internet viral sensation "Double Rainbow" video was captured on January 8th, 2010. About two weeks later on the 23rd (and long before that video went viral), I saw a double rainbow myself when looking out my window. I quickly grabbed my camera (a Canon 40D at the time) with my 16-35mm lens (I wanted the widest shot possible) and ran out to shoot the rainbow.

Post-Processing a Cute Kitten Portrait

My friend recently had two stray kittens randomly walk up to her doorstep. I was called over to see them, and carried my 5D and 24-70mm along. There wasn't much light to work with, and I didn't bring a flash, so I had to shoot at 1600 ISO for any chance of capturing a sharp image of the energetic kittens. I haven't done a walkthrough post for quite some time (opting to post guest posts instead), but here's a quick walkthrough of how I post-processed one particular image of a kitten. I used …

Enlightening the Capture and Processing of Lightning

Living in the Southwest United States gives me a great opportunity to capture lighting. Every summer “Monsoon Season” arrives, officially June 15 through Sept 15th, in Arizona. Prevailing northwesterly winds carry humid air north out of Mexico where it meets the hot air of the desert, resulting in powerful thunderstorms nearly everyday. The thunderstorms often produce localized areas of heavy wind, thick blowing dust (Haboobs), rain, and most importantly, lightning. I regularly track the …

Aster Be Good: Post-Processing Purply Flowers

Asters of any kind provide such potential in photography: the colours and the gentle curve of their tiny thin petals combines with their close-growing nature to give the impression either of flowers fighting each other for space and light or of a mass of colour, huddled together for comfort. The clump of asters shown in this shot are a soft, luscious purply-cerulean-cornflowery-blue. Light seems to dance off the petals. Or it would, had there been much light when I took this. Instead, it was a …

Adding a Subtle Vignette with Photoshop

Adding a vignette to a photograph can add depth to the composition and draw attention to interesting details. However, a cautionary word: overdoing post-processing and editing techniques like vignetting can be at best distasteful. At worst, it might seem to over-compensate for what might simply be an otherwise uninteresting photograph. Generally, the less editing needed on a photograph, the better the photograph. And naturally, the better the photograph, the better the photographer. The same …

Crater Lake in Oregon

Crater Lake in Oregon is such a beautiful place that post-processing isn't really even needed for photographs taken there. Here's an unprocessed photograph I took there this past summer on a road trip with friends: …

Friends on a Bench

One of the results of always carrying around my camera is that I end up with a lot of portraits of my friends. I had lunch with a few of my buddies last Sunday, and snapped this photograph while waiting for a friend: …