Danger: Extremely Hazardous Waves
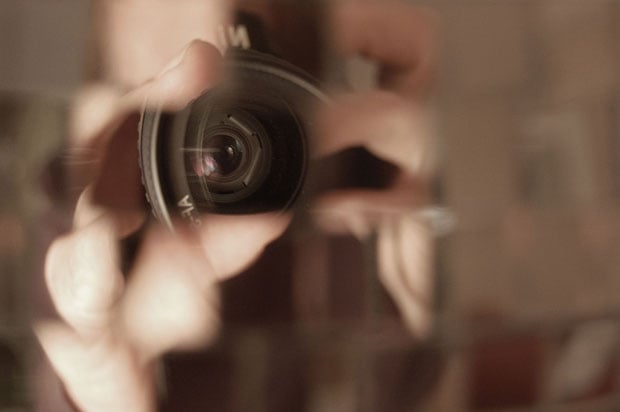
Went to Bodega bay to do some crabbing for the first time, and took this photo while walking to the beach (it’s the untouched RAW):

Canon 40D + 24-70mm 2.8 at 24mm, f/8.0, 1/250s, and ISO 100.
What was interesting was that though the sign warned people to stay off the structure, most people there were on the rocks fishing and crabbing.
In post-processing this image, I’d like to make it pop, while bringing out the detail in the sky.
Opening up the file in Adobe Camera RAW, I made the following edits:
 White Balance: Upped temperature to 5600 from 5400. Auto while balance set it at 6100, but I felt like it was way too warm, so I brought it down a bit.
Exposure: Increased by half a stop. +.50. This clips the sky, and but we’ll deal with it in recovery.
Recovery: +20 to recover some lost detail in the sky.
Fill Light: +20 to bring out some shadow details and to even out the difference between the sky and the ground. Gives the foreground a pretty unsaturated, pasty look. We’ll deal with the contrast in the next steps.
Blacks: We lost all of our true black in the previous steps, and the darkest color we were left with was a gray. Turn these darkest points into black again by upping blacks to +10 from +5.
Brightness: Unchanged.
Contrast: +70 to make it pop. Usually in photographs with textures and things like rocks, I like having more contrast rather than less.
Clarity: +20 to make the signboard stand out a little more against the bright sky.
Vibrance: +20 to make the colors pop a bit.
Sharpness: +75. What I usually like to set it at.
Luminance: Aquas -50 and Blues -50 to darken the sky a tiny bit (we’ll do the rest in Photoshop).
Lens Vignetting: -30. A little. Not too much.
This is the resulting image after this first RAW to JPEG conversion step (hover your mouse over it to compare it to the original RAW):

While the foreground has more detail and more “pop”, not much happened to the sky. As I explained earlier, I’d like to make the sky a little more dramatic in this particular photograph.
Opening up the file in Photoshop rather than ACR now, I do the following:

- Duplicate the layer
- Add a layer mask
- Mask out the ground, and selectively mask the rest
- Adjust curves for this duplicate layer (curve shown to the right):
For the mask, I decided that instead of only adjusting the sky, I also wanted to adjust the water and the hills at the horizon. I didn’t want to adjust these things separately, but I also didn’t want to adjust them as much as the sky.
Thus, I decided to use a mask in which the water and hills are 50% masked. This allows me to adjust curves for the sky, with 50% of the curve being applied to the water and hills as well.
This is what my mask ended up looking like. Notice how the sky is 0% masked, the hills and water are 50% masked, and the rest (whatever I don’t want affected) is 100% masked:

Here’s the final image (hover to compare with previous step):

You can also hover over these links to see the original RAW or layer mask.
That’s it! Hope you found this post-processing walkthrough helpful. If you have any thoughts, questions, or suggestions, please leave a comment.