Post-Processing a Cute Kitten Portrait

My friend recently had two stray kittens randomly walk up to her doorstep. I was called over to see them, and carried my 5D and 24-70mm along. There wasn’t much light to work with, and I didn’t bring a flash, so I had to shoot at 1600 ISO for any chance of capturing a sharp image of the energetic kittens. I haven’t done a walkthrough post for quite some time (opting to post guest posts instead), but here’s a quick walkthrough of how I post-processed one particular image of a kitten. I used Adobe Camera Raw (comes with Photoshop CS4) with my adjustments, but you’ll have the same settings in Lightroom, Aperture, etc…

The kitten wouldn’t stay still, so my priority was capturing a sharp photograph of it rather than framing the scene. I was using the center autofocus point in order to nail the focus on the eyes. My first step in post-processing is to crop the image, making it more interesting:

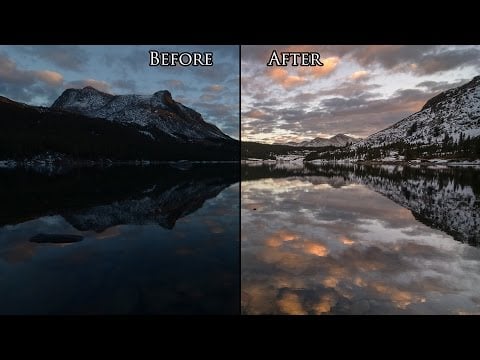
Next, I adjusted white balance to get rid of the nasty yellow cast. I chose Auto white balance first, and then eyeballed the Temperature and Tint sliders. Hover your mouse over this image to compare:

Now we move onto the meatier sliders:
 Exposure: Increased by a full stop (+1.00) to brighten the image up a bit
Recovery: Increase this to deal with highlight clipping. Make sure highlight clipping is turned on, and then increase it until you remove as much clipping as you can without making the image look nasty. For this image it was +12.
Fill Light: Increase to fill in the shadows a little and reduce shadow clipping. I chose to do +15.
Blacks: Increase this to darken the blacks, but stop if you start clipping the shadows in the image. I set this at 8.
Contrast: Set at +50 to recover some of the contrast lost in the earlier steps.
Clarity: Set at +10. This setting is pretty flexible — just don’t go too high.
Here’s the image that resulted (hover to compare):

To finish off the photo, I sharpened it a bit (30), noise reduced a tiny bit (20), and added some post-crop vignetting. Here’s the final image (hover to compare):
You can also hover over this link to compare the final image to the post-cropped, pre-processed original.