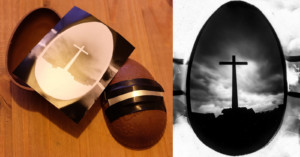
How to Make a Pinhole Camera Out of a Chocolate Easter Egg
For Easter, I made a pinhole camera out of a chocolate Easter egg. In this 5-minute video and article, I'll show you how it's done.
For Easter, I made a pinhole camera out of a chocolate Easter egg. In this 5-minute video and article, I'll show you how it's done.
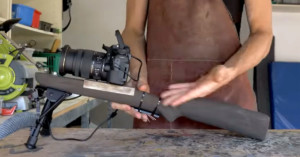
Want a camera stabilizer that's sure to attract (perhaps unwanted) attention? Just add a rifle-style stock to it. Alex over at I did a thing made this humorous 5-minute video showing how he built such a stabilizer for his own DSLR.
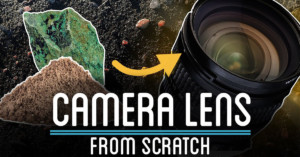
Can an ordinary person made a camera lens from scratch? Here's a 22-minute video in which Andy George of How To Make Everything answers that question by producing clear glass and metal and combining them to create a camera lens.
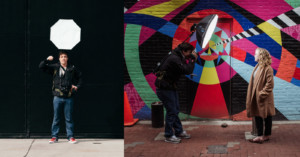
My name is Brendan Burkett, and I believe I have created an original device and street photography method. What I have done is attach a softbox to my back for ultimate portability. This allows me to get street portraits with a very unique light.
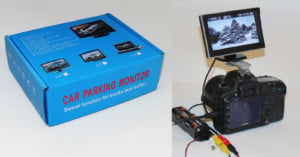
I was often disappointed by my Canon 5D Mark II not having a flipping or better yet a detachable monitor. Instances of this happened when I placed the camera on a fully extended tripod and had the camera pointed downwards to make a photograph of something on the floor. Getting one’s eye above the view screen was sometimes impossible.
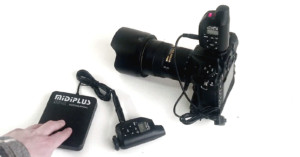
I have been looking into shooting other sports outside of the motorsport world, and I have been particularly interested in soccer, basketball, and baseball. After doing some research, I found that some sports shooters covering these type of events use different remote trigger setups such as foot pedals and cable release buttons.
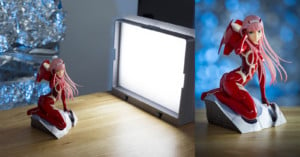
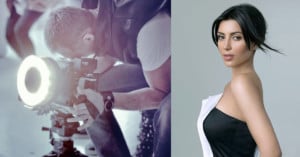
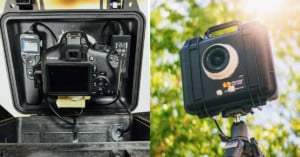
I got my first 3D printer recently, but it sits in a dark corner of my room, so I thought I'd design a light for it. Then I realized I could kill two birds with one stone and design it to be useful for photography as well.
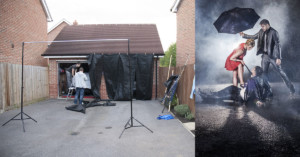
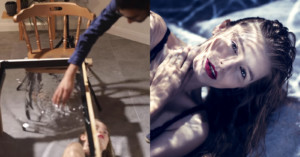
I’ve written about this project in the past, as I originally made the rain machine and shot with it in 2012, but we’ve now done it in video form! Hopefully it shows a little more detail about the construction and how I shot with it.
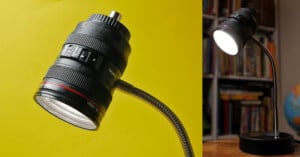
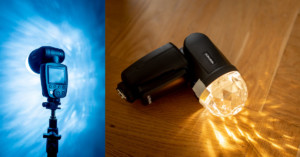
After Canon handed out camera lens mugs at the Vancouver Winter Olympics in 2010, novelty lens look-alike mugs and cups have flooded the market. If you've received one or more of them as gifts, one thing you can do is turn them into camera lens desk lamps.
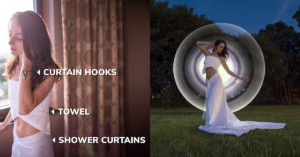
After our flight to NYC got canceled last summer, we got stuck in Chicago for one night with no light painting tubes, no dress, no tripods, and no battery chargers. During the shuttle ride to the hotel, we started joking about using a bed sheet to fake a dress and to use whatever we could find in the hotel room as a light-painting tool.
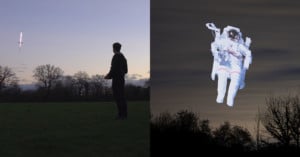
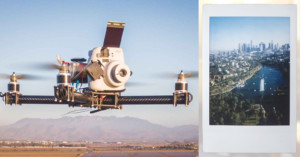
What do you get when you combine a pixelstick with a drone? Makers Ivan Miranda and Tom Stanton recently decided to show all of us by creating a custom light stick drone that can be used to shoot light-painting photos in the sky.
Back in July 2018, photographer Oscar Oweson started an effort to build a homemade rangefinder camera -- a 6x7 camera designed to be like an all-mechanical version of the Mamiya 7. Months later, the Panomicron Holmium was born.
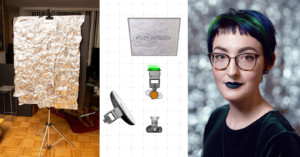
I love bokeh and wanted to incorporate it into some upcoming holiday-themed beauty shoots. Well, I didn't want to shoot in the cold and I really didn't want to buy strings of lights (or generally spend any money at all) so I put together this great backdrop with basically just tinfoil.
For a long time, I have been building sets or props for my images, which in time developed into making and selling furniture as a hobby business. I thought it about time I made videos detailing the process of those builds and the “high budget” results that can be achieved with little financial outlay and a little DIY.
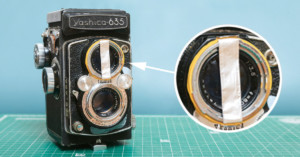
If you have a TLR camera, here's a simple trick you can try to help you to focus more easily. All you'll need is some rubber bands, scissors, aluminum foil, and a ruler (optional).
For many years, I have been modifying and adapting lighting and camera equipment to better fit my style of shooting. The process of altering lighting gear, as well as combining products that were not originally intended to work together, is of particular importance to me these days, as I constantly mix and match the best from many different brands.
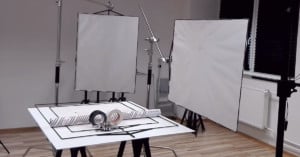
Light diffusion panels can cost $80 to $100 or more when purchased retailed, but very little when you make them yourself, and to do so is very simple. I can’t tell you how many times I have been asked about my diffusion panels and where I get them from. The ones I use in my studio have all been custom-made to fit my needs, and I’ll show you just how to make your own.
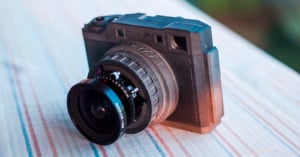
Freelance film photographer Casey Cavanaugh has always wanted a Hasselblad Xpan, but the cameras cost thousands of dollars used and have been out of his reach. So, Cavanaugh decided to build his own.
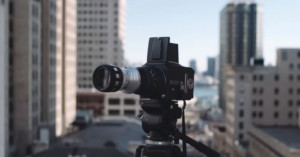
In the fall of 2017, I had the opportunity to capture the transformation of an empty plot of land turning into a high-tech vehicle test track. The bulk of the construction would take place for about a year. My friend and colleague, Ryan, and I were tasked with capturing that transformation into a timelapse video.
Over the last 5 years, drones have consumed every part of my life. From using aerial systems to carry cameras as a service provider with Drone Dudes, to selling drones with Dronefly, or designing and making drones in China with Yuneec, I’ve been involved in all aspects of the drone industry.
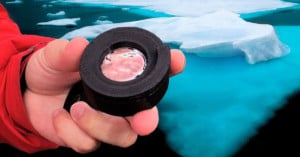
Photographer Mathieu Stern is a fan of creating strange lenses, but his latest creation is quite unusual, even by his standards. Stern visited Iceland and created a working lens out of ice from an iceberg.
Like most photographers who have been working for many years, I have my favorite, go-to lights. These include the Broncolor Para 88, 133, and 222; the Broncolor 'pre-2006 style' Flooters; the Elinchrom Zoom Spots; and Elinchrom Litemotiv Indirect.
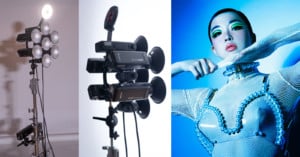
Controlling and modifying light is a lot of what photographing with studio lights and battery-powered strobes is about. Especially when it comes to portraits, I like to work with my lighting setups so they add something that is not perfect or flat.
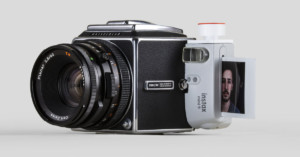
Instant photos are magical. They develop before your eyes. You can share them, gift them, spill water on them, draw on them. The only problem is that most instant cameras are pretty cheap — that’s why I’ve always wanted to hack my medium format camera to take instant photos with shallow depth of field and sharpness.
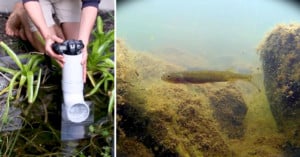
Want a cheap way of shooting right under the surface of water without having to buy a special housing for your camera? Alex over at I did a thing recently built himself a PVC periscope-style device for a total cost of around $10, and the results are great.
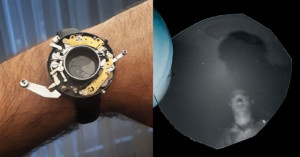
Iranian photographer Alireza Rostami had a broken vintage Chinese Seagull TLR camera on his hands, and he recently decided to get creative with it by turning the lens into a working wristwatch-style camera.
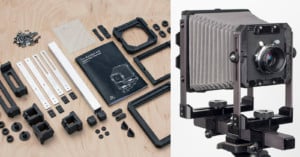
The Standard 4x5 is a new 3D printed large format camera that's perfect for aspiring large format photographers on a budget: the camera comes as an IKEA-style assemble-it-yourself kit that costs just $320.
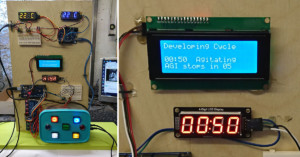
A truly mass-market (and widely adopted) at-home automatic film processing machine has yet to appear in the world of photography. Photographer Mark Webb didn't want to wait around for one to show up, so he cobbled together one with his hardware and software knowledge. It's called the Developist.
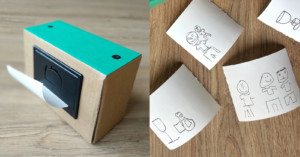
How accurately do you expect your camera to be in representing the real world? If your answer is "not very," then Draw This is an instant camera designed for you. It snaps pictures and prints them as cartoon drawings.
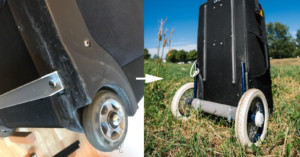
The Think Tank Logistics Manager 30 is my absolute favorite when it comes to all the camera bags, tripods, photo bags, and other bags I own for my flash equipment, tripod, and cameras. But, like almost all rolling bags, it's mostly made for being taken indoors at airports, offices or other places with flat floors.