How I Gave My Rolling Camera Case DIY Giant Wheels
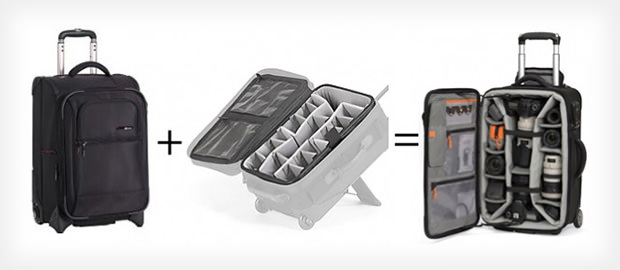
The Think Tank Logistics Manager 30 is my absolute favorite when it comes to all the camera bags, tripods, photo bags, and other bags I own for my flash equipment, tripod, and cameras. But, like almost all rolling bags, it’s mostly made for being taken indoors at airports, offices or other places with flat floors.
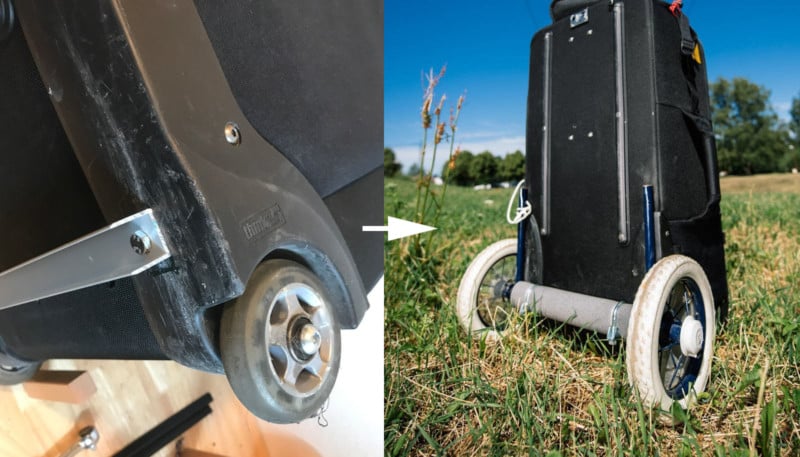
I recently completed a homemade DIY project that gave my roller bag giant, baby carriage wheels. This is the first version that works very well, but I plan to make a slightly smarter and more stylish solution.
With my creation, it has become easy to bring heavy lightning and equipment into nature. Here’s the step-by-step guide:
Step 1. Buy a Think Tank Logistics Manager 30
Check out the product page for information on this case. It can hold 2 to 3 big flashes (e.g. the Profoto B1/B2) plus two cameras, some lenses, and a lot of other small equipment you need to bring. You can also hang tripod and other things on the outside.
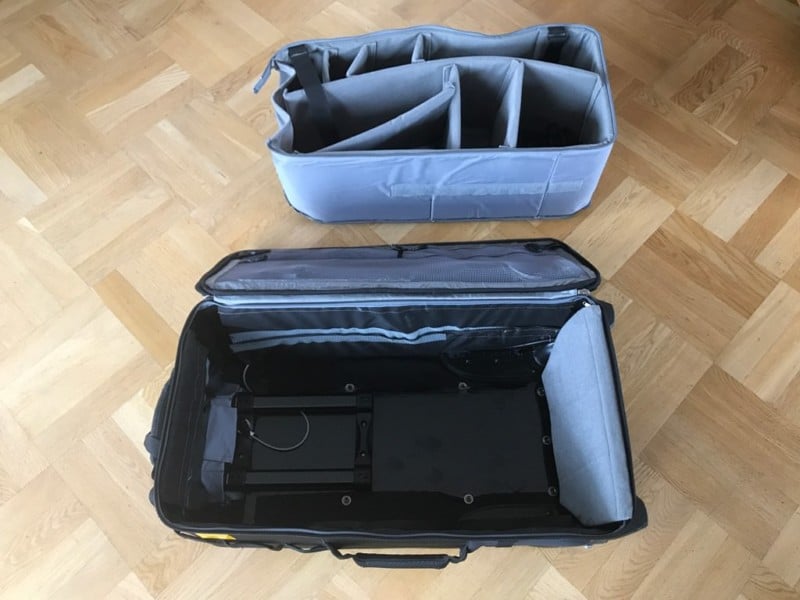
Step 2. Remove the Inner Bag
Find the zipper that holds the inner, padded bag to the shell itself. Perhaps you need to look under a tab, as the zipper can be a little hidden. Then detach the inner bag from the outer shell using the Velcro connectors.
Step 3. Buy an Axle and Wheels
I first bought a metal rod (10mm, I think), thinking this project would be easy. Then I bought light and durable wheels from Tellus at Fridhemsplan in Stockholm.
The problem was that the wheels have a quick-lock mechanism that locks the wheel to the axle, and this requires a small groove for attachment. If you have a tool at home that can cut a groove of a few millimeters on each side of your round axle, you could do that.
I asked a local bicycle repairer if they could help me do this, but that route would have taken too much time, so I found another solution.
I was looking for strollers from people in my area, and luckily found someone who had an old Brio Sitty stroller. The classic and simple stroller happened to have the right axle width for the wheels, and it fits perfectly outside of a Logistics Manager 30. I do not know the width of the larger Think Tank rolling bags, but maybe it’s the same and this part is compatible with them too?
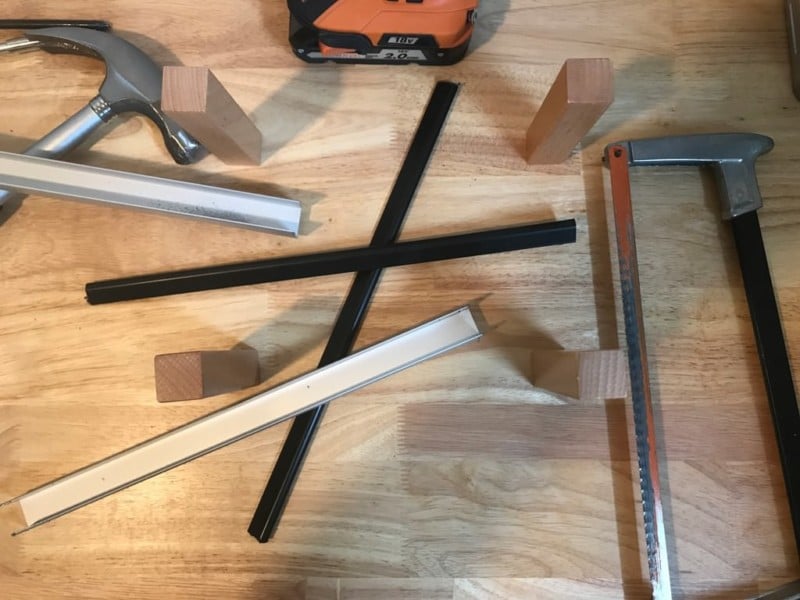
Step 4. Buy an Aluminum U Channel
For this piece of my project, I had a thousand different ideas. In the end, I chose the one by which I could actually finish the job without spending too much.
Measure the piece and trim it to fit your wheel axle and bag. You can buy plastic edging to place on each end to protect from the sharp corners.
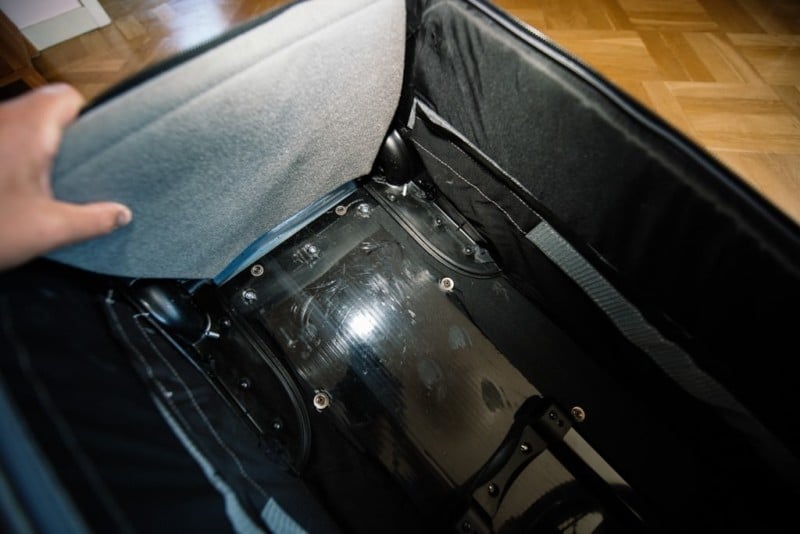
Step 5. Drill Holes in Your Case
I chose to put the holes near the edge of the bag, where it is reinforced by a large plastic part that contains the original wheels. The bag itself is a lot of corrugated plastic, so look for a location that’s the most sturdy place on the bag.
I’m going to reinforce this hole location in the future inside if I notice that it bears too much stress. It might be enough to include a larger aluminum plate.
Step 6. Screw On the U Channel
The choice of the size of the profile was based on the diameter of the wheel axle plus some air to easily insulate it with a plastic cover. One on each edge plus one on the actual wheel axis made everything fit quite perfectly.

Step 7. Hold the Wheel Shaft with Pipe Insulation
The wheels spin on the axle, so the axel itself can be stationary on the rolling bag. In order to easily tighten the axle and the rest of the parts, I bought pipe insulation that can easily be cut to the right size. Then I put it on top of the aluminum U channel and fixed everything with pipe clamps. The insulation provides shock absorption for the bag as it’s being wheeled around.

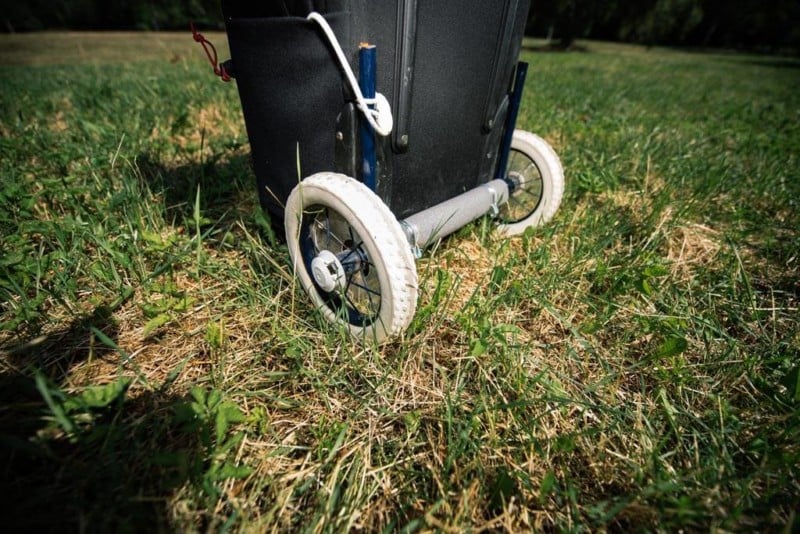
Step 8. Here’s the Finished Product!

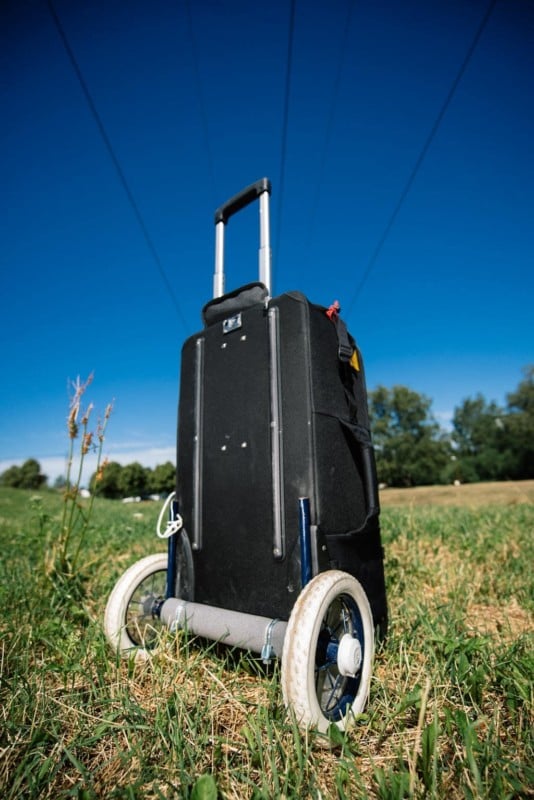
Planning for Version Two
This was a working solution for preventing anger when pulling my ThinkTank Logistics Manager 30 and all the equipment it holds over gravel, rocks, nature, and more. Perhaps it’s not the most polished design, but it works and makes my job as a freelance photographer significantly easier.
The reason I made such a minimal solution is that it is going to be possible to remove it and use the bag with the regular wheels as well.
The next version will probably be a bit nicer and involve a light frame on the inside and four blocks in each corner. Two of them should have some form of bracket for the wheel axle but can be used without the big wheels as well.
Ideas for Think Tank
Think Tank: when you have made such a good bag, why fall short on the wheels? Or rather, why not make it more modular with different wheel choices?
If you had included a lightweight frame inside with some prepared attachment points, many more things would be possible.
The Cost of This Project
I bought the wheels and axle as part of a used stroller that cost me
As I said on Blocket, I bought the wheels and wheel axle from a pram, costing 150 Swedish Krona (~$17). I had already purchased other wheels from a store for about the same amount of money. The aluminum U channel, plastic edges, and pipe insulation might cost 20-30 kr (just a few dollars). I already have the screws and nuts.
So, the total cost of my project was about 300 kr (~$35). The assembly itself took just an hour.
About the author: Stefan Tell is a portrait photographer based in Stockholm, Sweden. The opinions expressed in this article are solely those of the author. You can find more of Tell’s work on his website, Facebook, Twitter, and Instagram. This article was also published here and here.