Adobe Debuts New Photoshop Tutorial Series on YouTube for Beginners
Adobe has launched a new Photoshop tutorial series for beginners on its YouTube channel, titled "3, 2, 1... Photoshop!"
Adobe has launched a new Photoshop tutorial series for beginners on its YouTube channel, titled "3, 2, 1... Photoshop!"
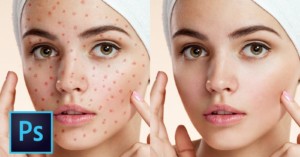
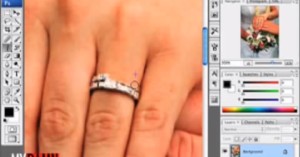
If you are troubled by blemishes big or small in your portrait work, this 16-minute tutorial by Nathaniel Dodson over at Tutvid will teach you how to use Photoshop to properly clean and heal skin in a flash.
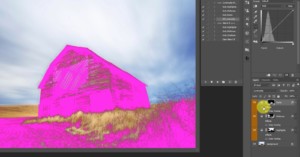
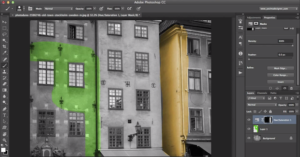
Photoshop's tools frequently overlap, and a great example of this is Luminosity Masks vs Blend If. Both can be used to do the same thing, but they work in slightly different ways. This useful tutorial breaks down the differences so you know when and how to use each tool.

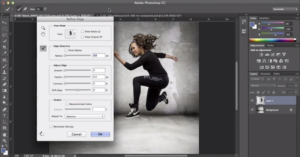
In this Photoshop tutorial, we’re going to walk through the many different ways to create this pixel dispersion fragmenting effect to make your model or object look like it is bursting into little particles and pieces.

There are good Photoshop tutorials and there are bad Photoshop tutorials. Tom Trager and Or Paz of the sketch …
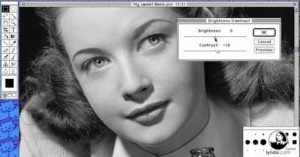
Yes, we know it's the day after April Fools', but we couldn't pass up the opportunity to share this little gem. We're all fans of tutorials, right? Well, today we have for you a tutorial that will dramatically improve your capabilities in Photoshop. Photoshop 1.0, that is.

Without a makeup artist at your disposal, even a great portrait can be ruined by shiny skin. So if you're looking through the results of your most recent portrait shoot and there's a lot of shine there, here's a fantastic tutorial that shows you how to get rid of it without making the photo look like it's been doctored.

Photographer Peter McKinnon made this 2-minute video tutorial on sky replacements. Watch it to learn how to quickly swap out the sky from one photo with another in Photoshop.
If you're not sure how to properly sharpen your images in Photoshop, this tutorial from the Photoshop Training Channel is a godsend—a deep dive into the most common sharpening techniques complete with an explanation of which ones are better and why.
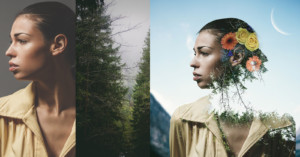
Adobe is getting creative on Instagram. Taking advantage of Instagram's new ability to publish multiple images and video in a single post, they've created this simple, step-by-step tutorial that will show you how to create a 'double exposure' in Photoshop.
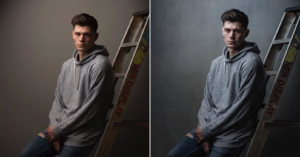
Most online photography tutorials focus on one thing—how to sharpen better or how to retouch shiny skin, for example. This video goes way beyond that, walking you through how to retouch a portrait from start to finish using both Lightroom and Photoshop.

Back in 2013, Adobe began posting a series of short video tutorials on YouTube called the "Photoshop Playbook." The series has since grown to contain fifty how-to videos showing how some of the most popular and fundamental edits are done in the photo editing program.
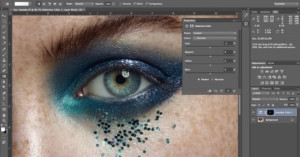
They say the devil's in the details, and one of the most crucial details of any portrait is the eyes. You want to make sure that the eyes in your portraits are always looking the absolute best without somehow coming off as fake or enhanced.
Here to help us do just that with a new tutorial that focuses, for once, on the white of the eyes, is retouching expert Michael Woloszynowicz.

Love carving Jack O' Lanterns? Hate the mess? No problem. We are photographers after all, which means we don't need to actually go out and DO things like this... we can just 'fix it in post.' Jokes aside, this short and simple tutorial will show you how to carve a simple Jack O' Lantern entirely inside of Photoshop.
No seeds, no sharp objects, no mess, just a bit of digital trickery.
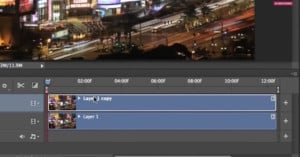
There's no shortage of methods for creating the partially animated photographs we call cinemagraphs; however, if simplicity and minimal effort is what you’re looking for in cinemagraph creation, the above tutorial by Howard Pinsky is just what you’ve been looking for.
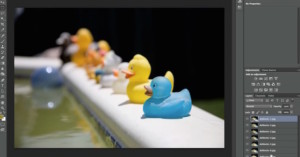
Focus stacking is a fairly common technique used in the world of macro photography, but the process of focus stacking isn’t always a straightforward one. Sure, certain programs can automatically achieve a result for you, but when you’re looking for much more control, getting it done by other means is sometimes a necessity.
In the video above, Adobe's Bryan O’Neil Hughes shows you an effective way to stack focus using a feature that's been baked into Adobe Bridge and Photoshop since CS4.
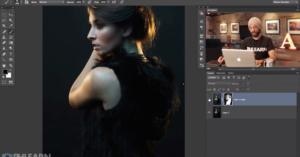
There are times when capturing portraits that you’ll notice the skin tone of the subject varies between their face and their body. It’s a rather common occurrence and by no means out of the ordinary. Caused by a number of factors, including makeup, tan, skin quality, lighting quality, etc.
While not a horrible problem to have, it can be a bit unpleasant, aesthetically speaking. Here to help fix the problem are the Photoshop gurus over at Phlearn. In the above video, Phlearn details a few ways to ensure skin tone is consistent across your image, giving you the results you’re looking for.
Photoshop actions can be a critical resource in any photographer’s workflow. Turning otherwise monotonous tasks into an autonomous utility, actions are created by manually performing a series of steps and recording them as an ATN file. This ATN file can then be ‘played’ in the future, when you’re looking to repeat those actions on future images, without the hassle of repeating the now-recorded workflow.
But where do you even get started with creating an action? And how can you effectively plan them out as to not cause any errors when trying to use them in the future? Well, Phlearn has us covered in their latest video, which breaks down the steps to creating and using an effective, flawless action.

Noise reduction, much like sharpening, is one of those post-processing tools that is often overused or used improperly, yielding terrible results. But as Bryan O'Neill Hughes shows you in the video above, tackling noise in Photoshop can be both easy and effective just as long as you know what you're doing.
Do you suck at Photoshop? No? Well, Donnie Hoyle seems to think so, which is why he put together this wonderful resource detailing how to properly use the clone stamp and manual cloning tools in Photoshop. (Warning: There is some strong language in the video)
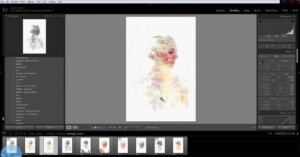
While double-exposure photography all started in-camera – most likely by accident – it’s since become an actual style and genre of photography all its own. And while it can still be done in-camera through film or a number of DSLRs that offer the capabilities, it can also be done in Photoshop. Here to show us how is wedding photographer Andrew Klokow, with a quick and efficient workflow for nailing double-exposures in post-production.
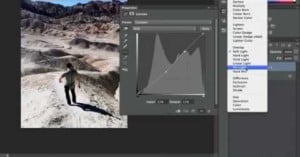
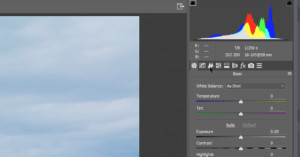
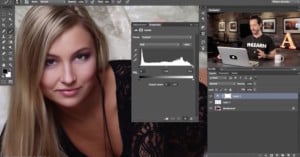
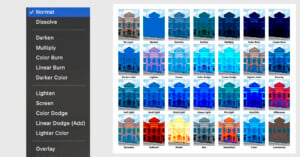
Over the years, Adobe has made image editing programs like Photoshop and Camera Raw much more intuitive and easy to use so that it's not quite so intimidating for beginners to dive in, but one of the adjustments that still scares many first timers is Curves.
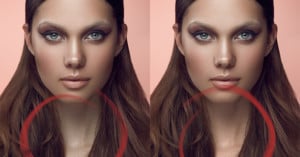
One problem almost all portrait photographers are going to run into at one point or another is skin redness. We're human, there's blood flowing through our faces, it's inevitable and even natural.
At times, however, it shows up just a bit too much around the nose, eyes, and cheeks. That's when you hop on Photoshop and pull up the tutorial above.

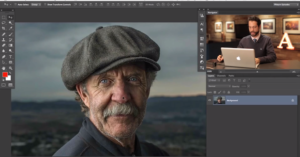
In this short but helpful episode of Adobe Creative Cloud TV, Adobe Evangelist Terry White reveals some neat Photoshop CC layer features that you may not know about. From filtering and searching layers, to selecting multiple layers, to generating assets from layers, White shares some very useful information.

Tilt-shift images can be made one of two ways: one is to capture them in-camera using a tilt-shift lens, and the other is to create the effect in post-production by using a clever blurring technique.
One isn't necessarily better than the other -- each has its own time and place -- but more often than not, creating the effect in post-production is the most convenient (read: cheapest) method.

One of the basic Photoshop skills that many beginners want to learn early on is how to change something's color in one of their images (be that an object or someone's eye color). Well, you're in luck, because Aaron Nace and Phlearn are here with a simple tutorial that will show you how to do just that, and do it well.
This colorization tutorial by IceFlowStudios is actually a couple of years old now, but we only just now stumbled across it and we just had to share. In it, Howard Pinsky demonstrates an incredibly quick and easy (albeit somewhat limited) way to colorize a black and white image.

When it comes to masking out and/or selecting hair in an image, be it to remove a background or selectively style it, it’s never an easy task. Even with the most tamed of manes, it can be a pain, but thanks to this "Advance Hair Selection Tutorial" by the Photoshop Training Channel, your life is going to get a lot easier.
One of the issues talented photographer and retoucher Michael Woloszynowicz often runs into when he's taking portraits is mismatched skin tones. Using a light modifier of some sort he'll get the tone he wants in the face, but the tones or colors in another part of the subject's skin simply don't match.
You could correct for this using curves, selective color or hue/saturation, but Woloszynowicz has a better way: using solid fill layers and tonal averaging, he's able to "take the guesswork" out of it and perfectly match tones every time.
There are many options for recovering shadow detail in post, but if you still haven't settled on one or you want a technique that will give you more control, then we have a great tutorial for you.
One of our favorite Photoshop tutorial websites, Phlearn, yesterday put out a tutorial that is both incredibly useful and a bit scary. Useful because making eyes pop in post is probably one of the most sought after Photoshop skills. Scary because this kind of manipulation is a slippery slope that could lead to photographers getting lazy and using the "fix it in post" excuse... so proceed with caution.
Colorized historical images are very popular in the photo community, but how exactly does one start colorizing photos? Getting to the skill level demonstrated by the Photoshoppers in Reddit's ColorizedHistory subreddit will take countless hours of practice, but if you want to start this Tutorial from Tuts+ is a great primer.

There are a few different ways to address bags under the eyes when you're editing a portrait in Photoshop, but the video above shows one that is both simple and extremely effective.

Privacy is a big concern these days, what with the NSA looking over both your shoulders, reading your emails and chiming in on your cell phone conversations. And while you might not be able to "fight the man" as it were, you can protect your privacy a bit by learning how to remove sensitive location information from the photos you post online.
It's likely one of the reasons Adobe decided to shift to a subscription model was so that they could bring in more beginners and amateurs that had never had affordable access to the software.
For them, justifying a several hundred-dollar purchase wasn't always feasible, but $10 per month through Adobe's perpetually-extended Photoshop Photography Program is more than reasonable, and so we'd bet there are more beginners on Photoshop CC than ever before. Now the hard part... actually using the software.
Super helpful Photoshop CC beginner tutorial to the rescue!

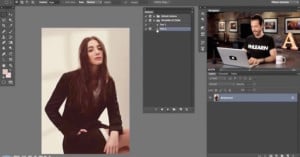
In addition to taking beautiful fashion photos, Serbian born photographer Elena Jasic also occasionally uploads a tutorial or two to her YouTube channel. One that has gotten some attention lately is this simple video that offers one way to dodge and burn non-destructively in Photoshop.

Faking the look of old films is becoming ubiquitous in the world of mobile photo sharing apps, but so far the popular apps have stuck with various films and not older photographic processes. If you want to create a photograph that mimics the look of a wet plate, it's actually pretty easy to do in Photoshop.

Here's a humorous and lighthearted 5-minute video titled, "Fafa's Photoshop Tutorial." Created by the comedy series Glove and Boots, it's a short and sweet introduction to using layers in Photoshop... taught by puppets. Think Sesame Street meets Scott Kelby.
Photoshop can feel infinite. It’s a lot like a high-tech espresso machine or a sports car: you don’t have to use all of its features for it to be functional, but when you can, it’s a powerful tool.

Adobe announced its annual update to Photoshop Elements and Premier Elements which add many AI-powered features, a new editing experience, and a fresh look.