A Nikon D850 Review for Nature Photographers

It’s finally here! My Nikon D850 review is finally finished! It took me 11 states, two countries, eight weeks, and 16,000 images to get it done, but here it is! This is a true field test loaded with real-world examples, advice, and tons of tips for getting the most from all the new features.
I also wanted to include some extras to go along with the video. These are either items that people have frequently asked about or that I referred to in the video.
D850 Bird In Flight (BIF) Settings
One of the questions I am getting a LOT is about bird-in-flight (BIF) settings. As with my other cameras, this sensor sees a lot of flying feathers, so you’re in luck!
As always, keep in mind that what works for me may not work for you and that’s cool – we can still be friends.
Focus Mode: AF-C of course. Since I use BBAF, I’m always in AF-C. However, if you’re more of a shutter release shooter, you’ll want to make sure you remember to switch to AF-C for action or face cards full of 46MP disappointments. AF-C is the only mode that can track/follow your subject, so, if you’ll pardon the pun, it’s the only way to fly!
AF Activation: For me, it’s always Back Button AF. It gives you the best of both AF-S and AF-C without all the switching back and forth. Rather than ramble on, I’ll refer you to this good-looking guy who did a video on the subject:
AF Area Modes: On the D850, I found myself once again gravitating towards Group AF for BIF shots, however, I also used the super-small D9 Dynamic Area as well – especially when the subjects were a bit slower or I needed more precise focus. Group AF likes to grab whatever is closest to the camera, so sometimes that can lead to sharp wingtips and cottony soft eyeballs. D9 gives you a little more precision in that department, BUT it is more difficult to keep on target.
Speaking of which, if you find D9 / Group is too tough, try a larger area like D25 or F72. As a general rule, always use the smallest AF area you can manage for whatever subject you’re after. Only go bigger if you can’t seem to stay on target.
For more on how Nikon’s AF modes work, see this video. Note that this was done prior to the D850 (and D500 / D5), but the way the modes (Group, 3D etc) work is the same.
Focus Tracking With Lock On (custom function A3): I mention this in the video, but I’d like to go into more detail here since Nikon has made some changes from the D810 to the D850. The first part of this setting is, “Blocked Shot AF Response” and the idea here is that if something comes between you and your subject for an instant, the camera won’t jump to the obstacle but instead hesitate just a bit and stay with your target until the obstacle has passed. Very handy if you’re tracking a bird flying by and a tree jumps between you and your subject as you pan.
The setting allows you to choose a value from 1 to 5. The higher the number, the “stickier” the AF system is. Of course, when people read that, the first thought is often to crank it up to 5 and call it a day. However, if the system is too sticky it will make it tough when you need to switch between subjects. Additionally, it can cause hesitation when you have an AF point on the wrong area of the subject and are trying to lock back onto the eye. I usually have this set to 2 or 3, but it’s not a set-it-and-forget-it option either. You may want to dive in and switch things up if the AF is letting go too easily or when it’s stickier than a three-year-old who just discovered the maple syrup jar.
The other part of this setting is “Subject Motion.” This new setting is a way for you to let the camera know how erratic or steady your subject is – especially when it’s coming at the camera. If you have a subject that likes to start and stop suddenly, you want “Erratic.” On the other hand, for a subject coming steadily at the camera, switch to “Steady.” For wildlife and BIF shots, I usually have good success just leaving it in the middle.
Custom Controls (Custom Setting F1): The D850 also has some exciting new options for the preview button, sub-selector, function button, and AF-On button. Here’s how I have a couple of mine set up.
For the PV (preview) button I have selected the “AF area mode” option, “Single Point AF.” This setting allows you to press the PV button on the front of the camera and regardless of what AF area mode you’re currently in, it will switch you back to single point as long as the button is held in (demo in the video). This is really handy when you’re in Group AF and your subject gets into a tight area (since Group AF loves to focus on the vegetation around the critter instead of on the critter itself).
For the Fn1 button, I have it set to cycle through Image Area Mode (1.2X, 1.5DX, etc.). The reason for this is that the buffer capacity of this camera is somewhat limited and switching to a crop mode will increase buffer depth. And, if I’m going to crop back home anyway, I figure I might as well just do it in the field and enjoy the gains.
To set, head to custom setting F1, and choose Fn1 button + dial turn (the right hand column). Select “Choose image area” from the resulting menu. You’ll also notice an arrow on the right of this menu. Give it a press and you can even select which image areas you want to scroll through. Way faster than setting this stuff via the menu!
Oh, and another cool option for crop modes is called “Masking” and is found under the Photo Shooting Menu > Image section. Look for an item called Viewfinder mask display. Turn that on and kiss those useless crop outlines goodbye. Instead, you’ll have a handy, semi-transparent mask to show you your image area. Try it, you’ll like it!
Frame Rate: This is set to maximum frame rate (7 or 9, depending on if you have a grip). Keep it at maximum for the best variety of wingbeats/expressions and shoot in short, controlled bursts whenever there’s something cool under your AF point.
Shutter Speed: I’ve been keeping my shutter speed at 1/3200 or higher for most of my birds in flight shots and that seems to keep my success rate pretty high. I have gone with lower speeds, but my keeper rate gets progressively more disappointing as my shutter speed drops (exactly like the D500 in fact). For faster birds, don’t be afraid to go to 1/5000th or higher if you have enough light.
F/Stop: This really depends on how much light I have at my disposal. Most of the time, I shoot wide open to keep noise to a minimum (usually F4) and capture those creamy, subject-isolating backgrounds. However, if it’s bright enough, I’ve been known to drop down to F5.6 for a little added depth-of-field fudge factor — especially with fast, tricky subjects.
ISO: This varies depending on the light of course, but I tend to cap out around ISO 6400 (preferring to keep it under ISO3200). Beyond that, I feel like I’m losing too much detail in the fur and feathers of my favorite subjects. About the only exception to that would be if something extraordinary was happening, but if I can get basically the same shot the next day in better light, I’ll wait (or grab the D5).
Also, I generally use Manual Mode with Auto ISO if I’m in an autoexposure kind of mood. With this method, I just set in the ISO range I want and choose the shutter speed and F/Stop I want to use. From there, the camera will float the ISO to give me a proper exposure. It’s either this or full manual mode, depending on the subject/scene.
See this video for more:
Nikon Approved Lenses For The D850
Now, for the “Nikon approved” lens list. As noted in the video, this list is chock-full of current lenses that Nikon wants to sell you. Many older discontinued lenses are NOT listed but would work just fine (like any big prime for example). Ditto for excellent third party glass. So, for what it’s worth:
Primes
AF-S NIKKOR 20 mm f / 1.8 G ED
AF-S NIKKOR 24 mm f / 1.4 G ED
AF-S NIKKOR 24 mm f / 1.8 G ED
AF-S NIKKOR 28 mm f / 1.4 E ED
AF-S NIKKOR 28 mm f / 1.8 G
AF-S NIKKOR 35 mm f / 1.4 G
AF-S NIKKOR 35 mm f / 1.8 G ED
AF-S NIKKOR 58 mm f / 1.4 G
AF-S NIKKOR 85 mm f / 1.4 G
AF-S NIKKOR 85 mm f / 1.8 G
AF-S NIKKOR 105 mm f / 1.4 E ED
AI AF DC-Nikkor 105 mm f / 2 D
AI AF DC-Nikkor 135 mm f / 2 D
AF-S NIKKOR 200 mm f / 2 G ED VR II
AF-S NIKKOR 300 mm f / 2.8 G ED VR II
AF-S NIKKOR 300 mm f / 4 E PF ED VR
AF-S NIKKOR 400 mm f / 2.8 E FL ED VR
AF-S NIKKOR 500 mm f / 4 G ED VR
AF-S NIKKOR 500 mm f / 4 E FL ED VR
AF-S NIKKOR 600 mm f / 4 E FL ED VR
AF-S NIKKOR 800 mm f / 5.6 E FL ED VR
AF – S Fisheye NIKKOR 8 – 15 mm f / 3.5 – 4.5 E ED
Zooms
AF-S NIKKOR 14-24 mm f / 2.8 G ED
AF – S NIKKOR 16 – 35 mm f / 4 G ED VR
AF-S NIKKOR 24-70 mm f / 2.8 G ED
AF – S NIKKOR 24 – 70 mm f / 2.8 E ED VR
AF-S NIKKOR 24 – 120 mm f / 4 G ED VR
AF-S VR Zoom-Nikkor 70-200 mm f / 2.8 G IF-ED
AF-S NIKKOR 70-200 mm f / 2.8 G ED VR II
AF – S NIKKOR 70 – 200 mm f / 2.8 E FL ED VR
AF-S NIKKOR 70-200 mm f / 4 G ED VR
AF-S NIKKOR 80-400 f / 4.5 – 5.6 G ED VR
AF-S NIKKOR 200-400 mm f / 4 G ED VR II
AF-S NIKKOR 200-500 mm f / 5.6 E ED VR
Macro / PC
AF-S Micro NIKKOR 60 mm f / 2.8 G ED
AF-S VR Micro-Nikkor 105 mm f / 2.8 G IF-ED
PC-E NIKKOR 24 mm f / 3.5 D ED
PC-E Micro NIKKOR 45 mm f / 2.8 D ED
PC-E Micro NIKKOR 85 mm f / 2.8 D
PC NIKKOR 19 mm f / 4 E ED
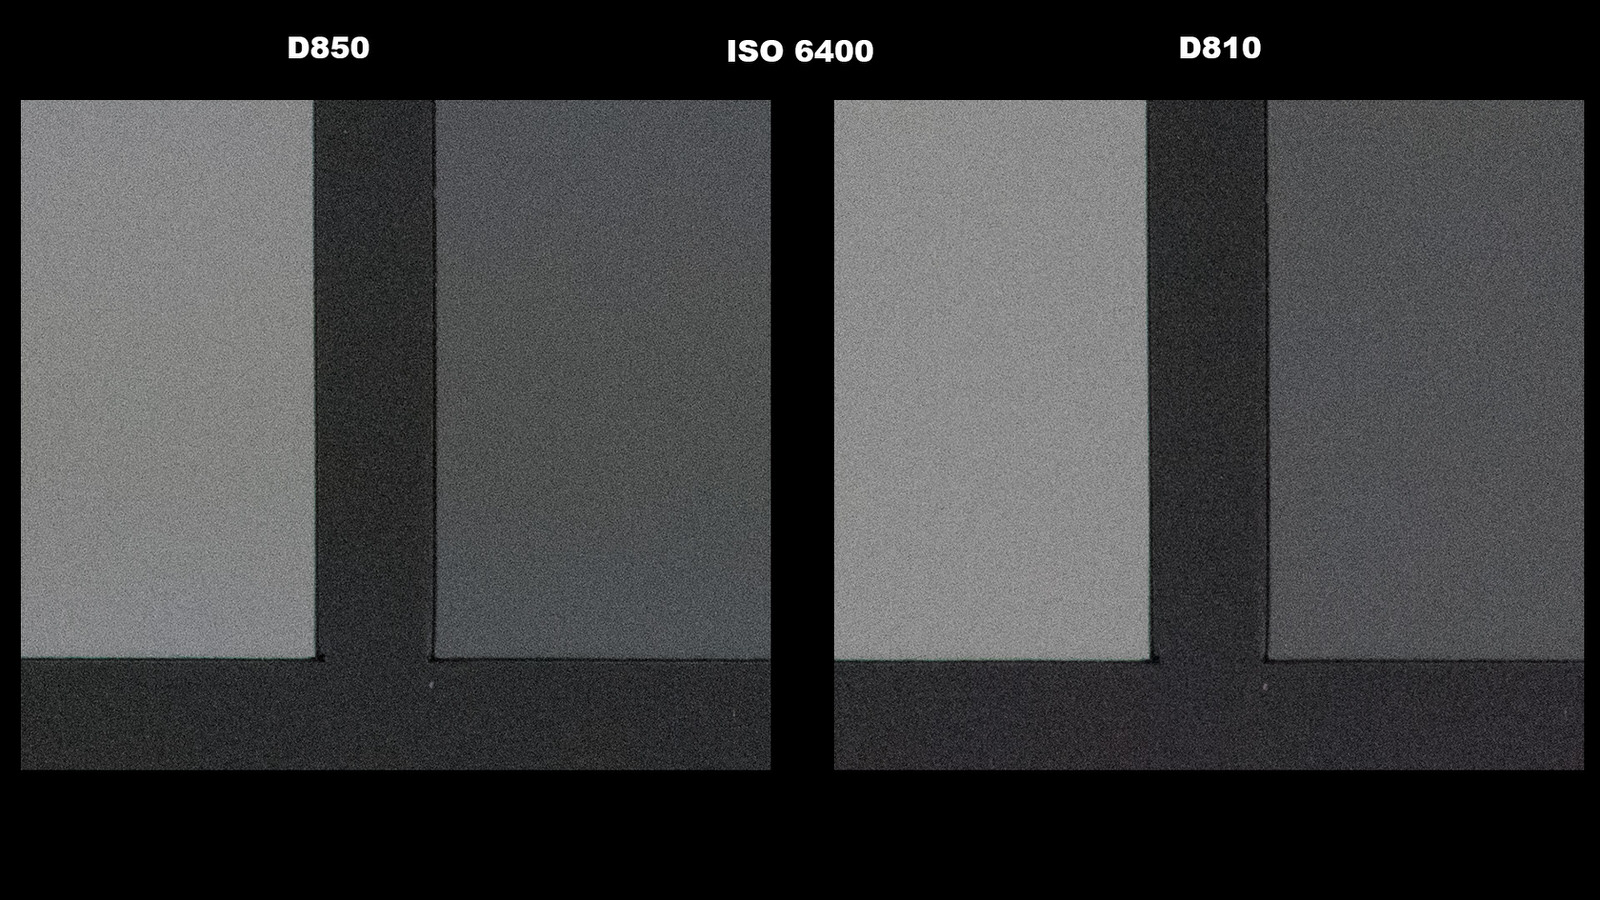
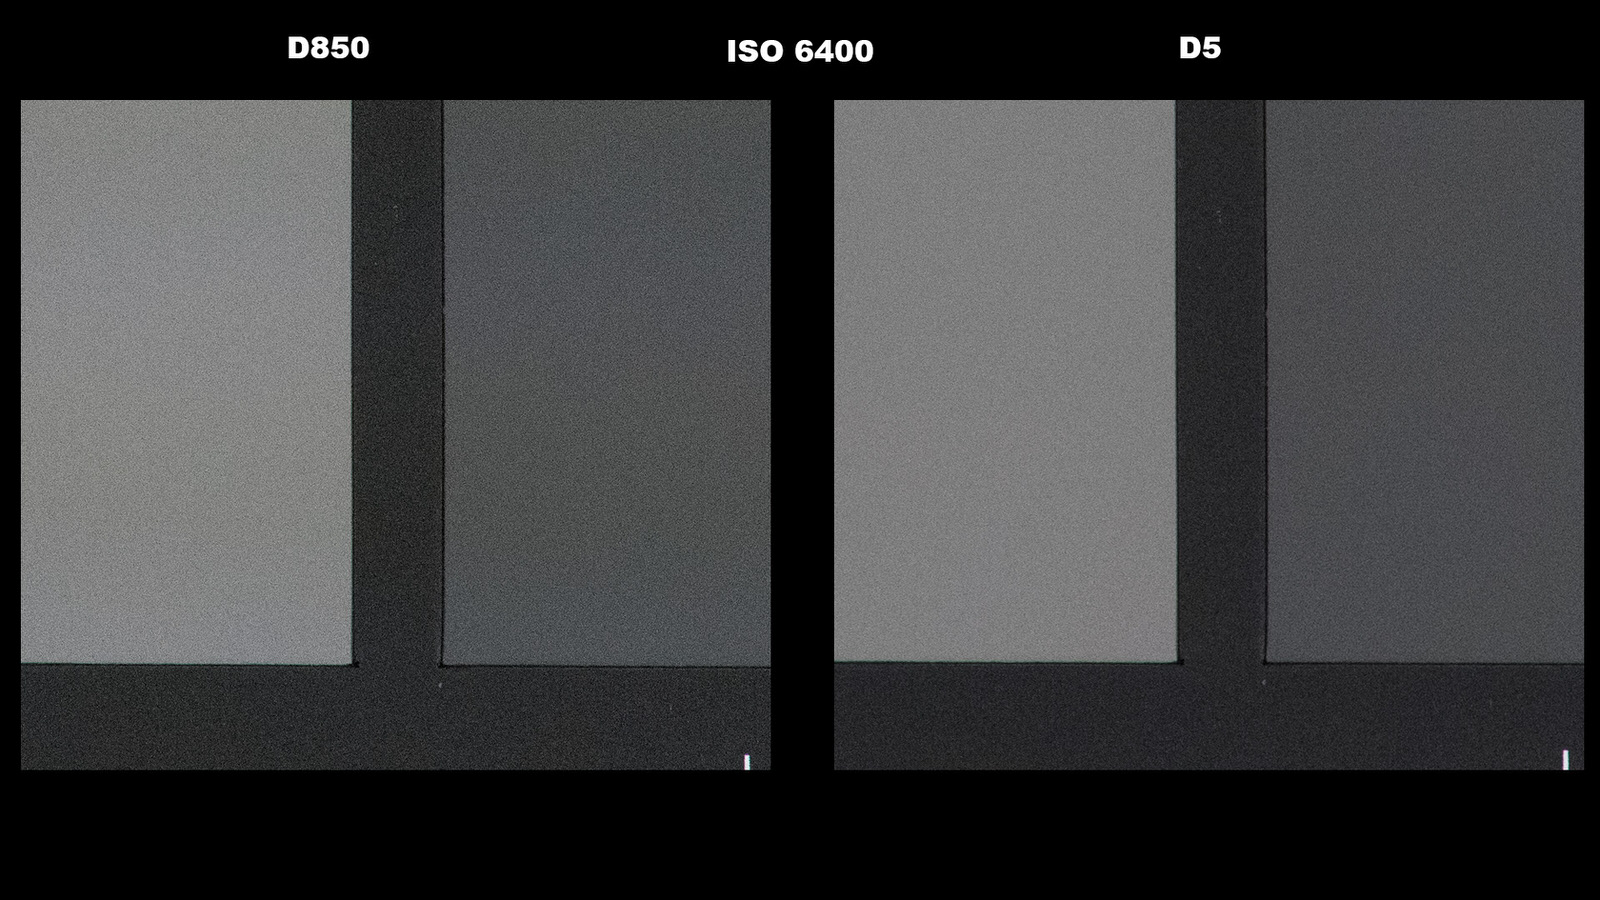
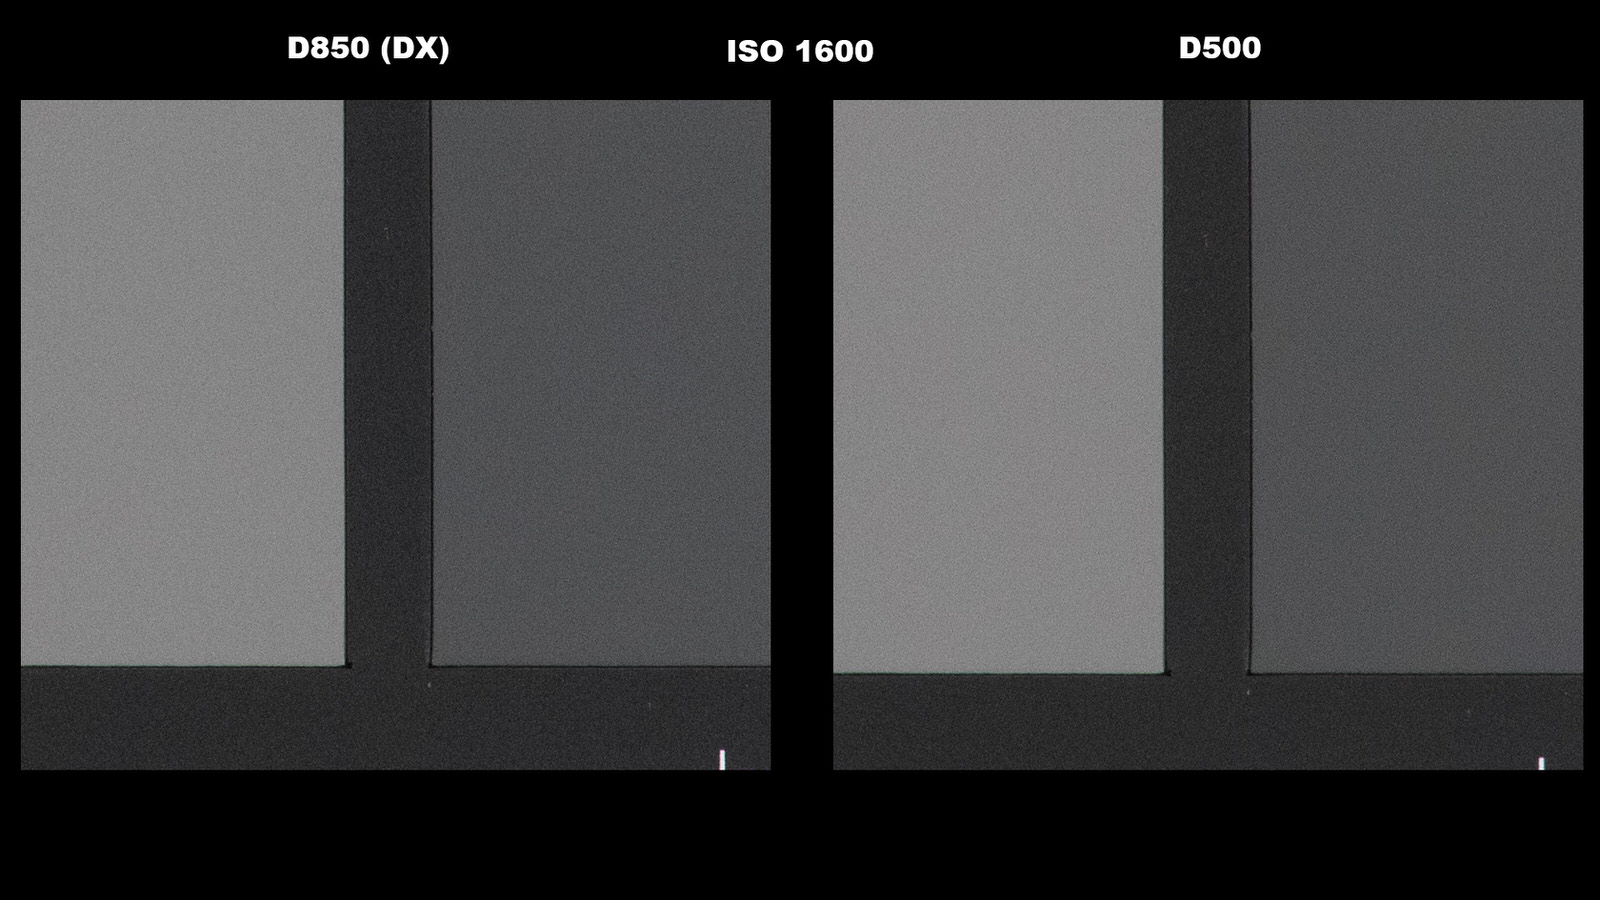
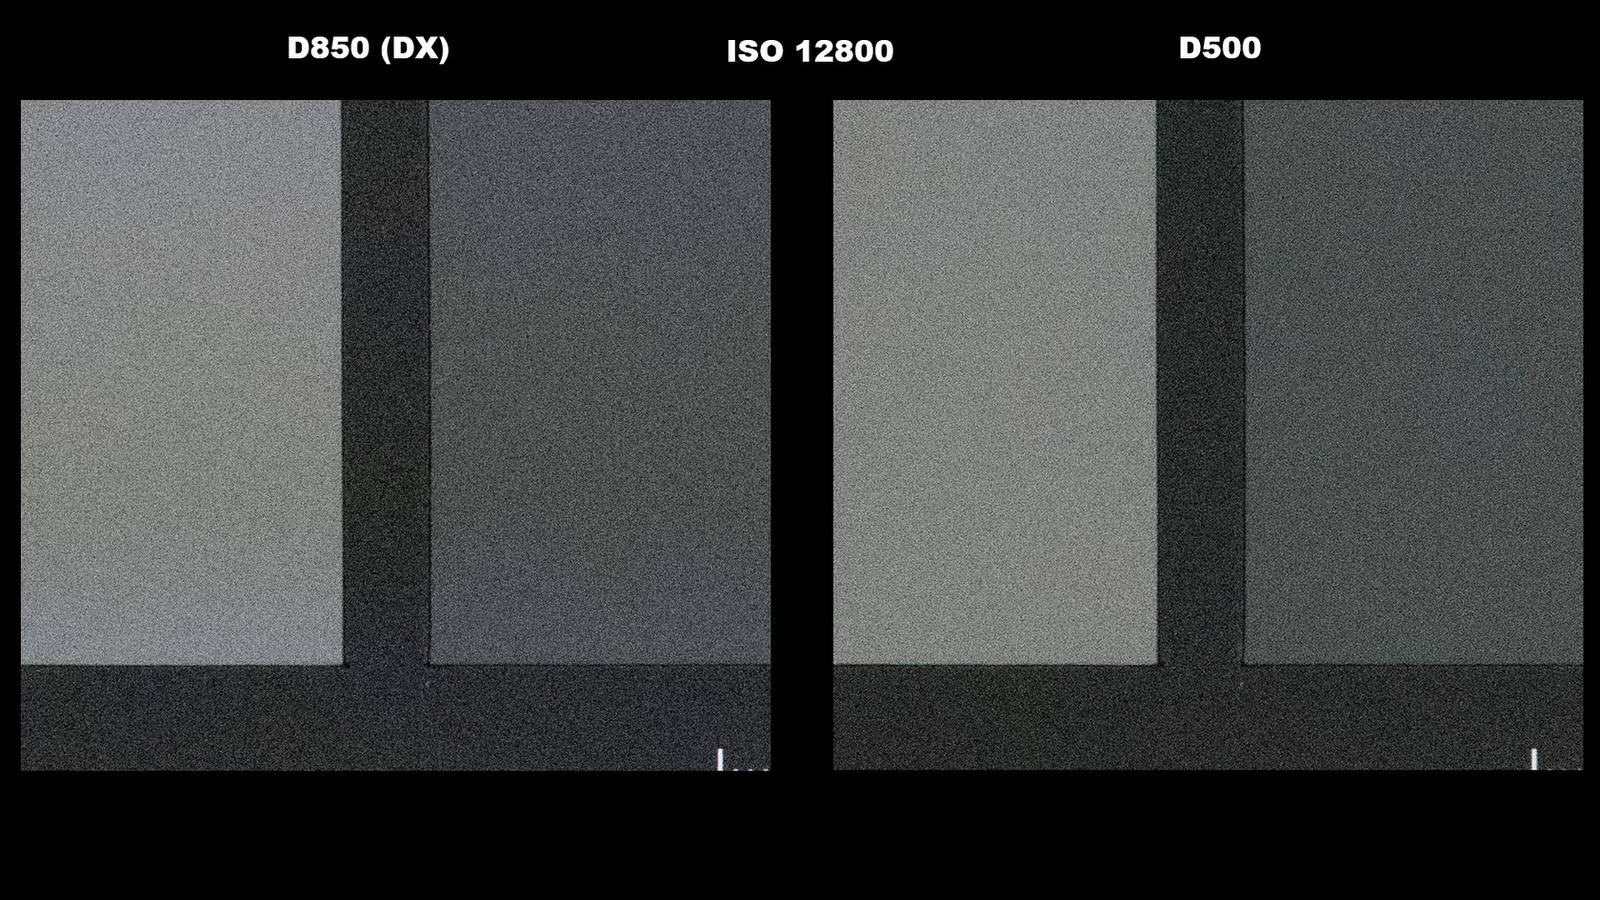
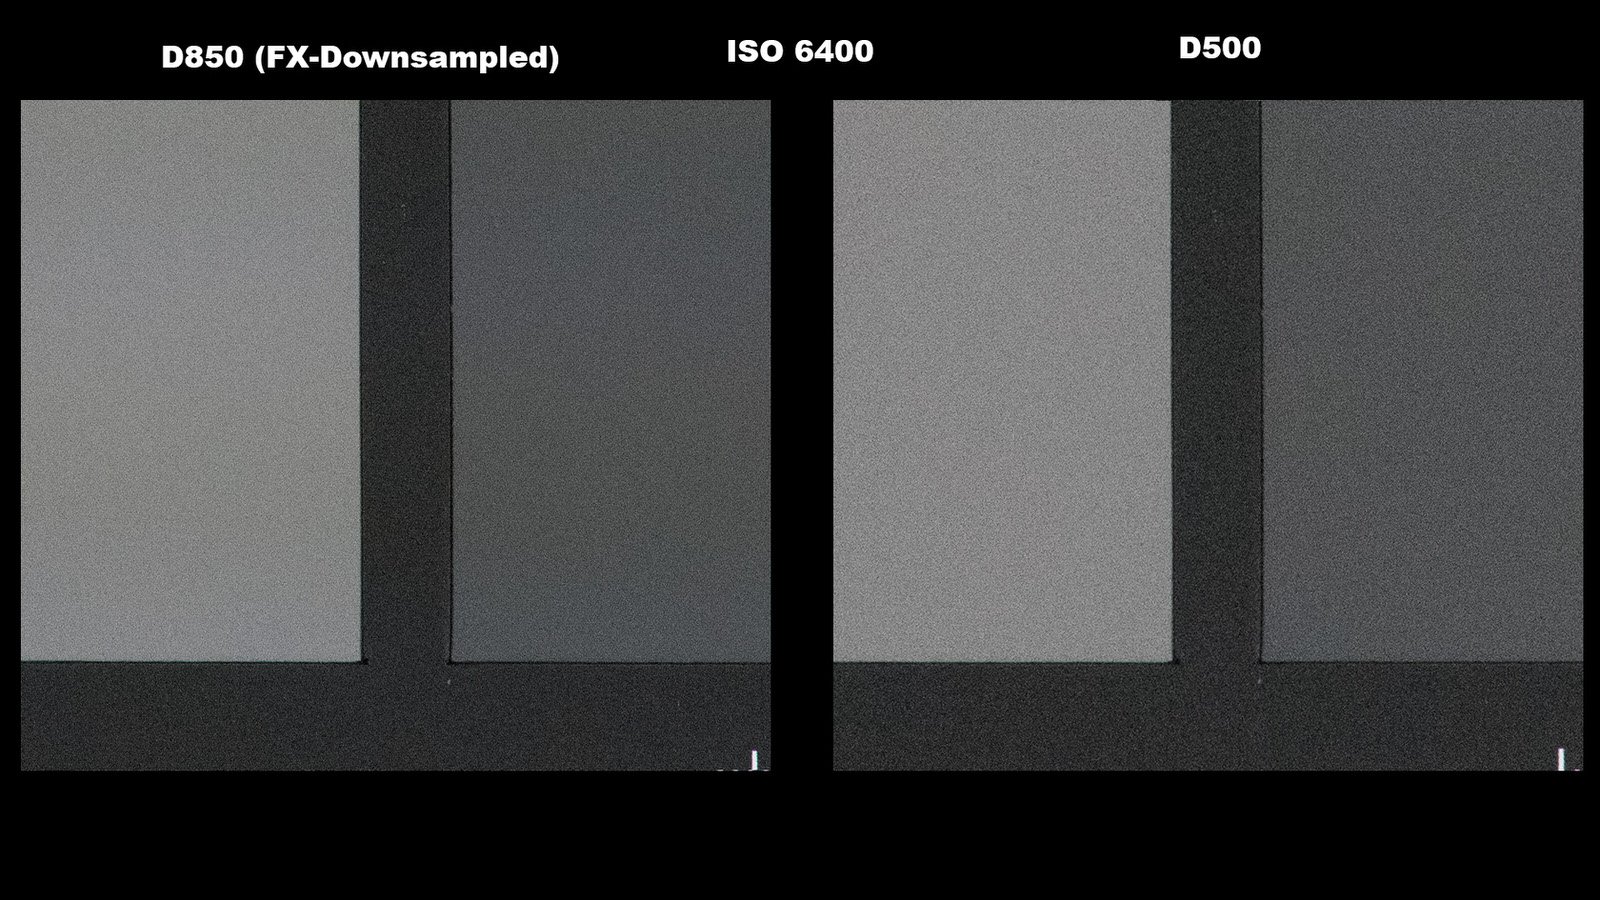
D850 ISO Comparisons
Next, we have the actual images from the video for ISO comparisons (100% crops, the D850 downsized to D5 and D810 size. The D500 was downsized to D850 DX size). Just click to enlarge and it will open on a new tab.
D850 vs D810


D850 vs D5


D850 in DX mode vs D500

D850 full frame downsampled vs D500 at ISO 6400
D850 Buffer Findings
Next, we have my buffer test findings. I may add more down the road, but for now this should get you started.
First, results from my normal, outside test scene (again, these can and will vary depending on the scene, don’t take the number as gospel).
14 bit 7 fps
FX: 35
1.2: 80
DX: 200
14 bit – 9 FPS
FX: 23
1.2: 36
DX: 46
12 bit – 7fps
FX: 84
1.2: 200
DX: 200
12 bit – 9fps
FX: 44
1.2: 70
DX: 86
Now, some figures I got with the lens cap on and viewfinder shutter closed. (The results are higher because it’s easy for the camera to compress and create a file when it’s just black.)
12 bit FX 9 fps = 48
12 bit 7 FPS = 193
14 bit FX 9 FPS = 26
14 bit FX 7 FPS = 51
I also tried a few rounds with higher ISOs. As you can see, the higher the ISO, the shallower the buffer:
12 bit 7 FPS ISO 6400 = 67
14 bit FX 6400 = 25
14 bit FX 5000 = 36
14 bit FX 3200 = 43
14 bit FX 1600 = 46
14 bit ISO 800 = 47
14 bit ISO 400 = 50
D850 Focus Shift Shooting Settings (Focus Stacking)
I also wanted to share the settings I typically set with I use Focus Shift Shooting (I wish they would have called it focus stacking, but what do I know…). Be sure to see the video for a quick intro.
Landscapes
Number Of Shots: 50+ (since the system stops at infinity)
Focus Width: 4
Interval Until Next Shot: 0 or 1
Exposure Smoothing: On (Off if you’re in manual mode)
Electronic Shutter: On
(I usually shoot landscapes between F/6.3 and F/8)
Macros
Number Of Shots: 20 (you can add more if needed)
Focus Width: 4
Interval Until Next Shot: 0 or 1 (set to 3 or 4 if electronic shutter is off)
Exposure Smoothing: On (Off if you’re in manual mode)
Electronic Shutter: On
(I usually shoot macros between F/8 and F/11)
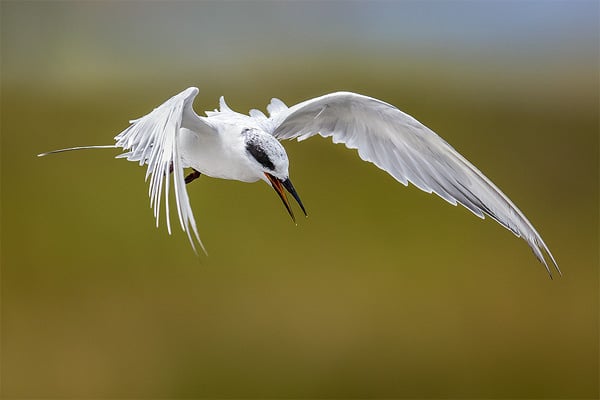
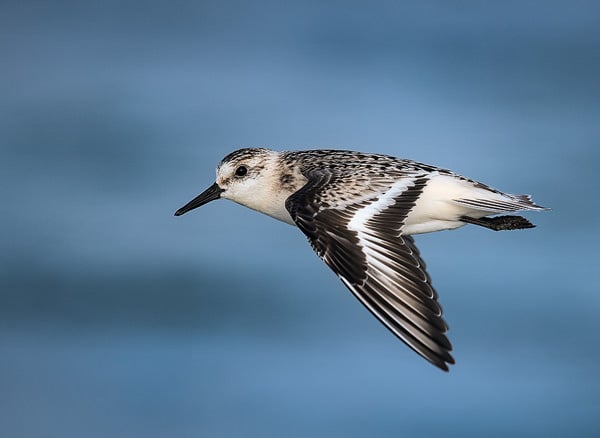
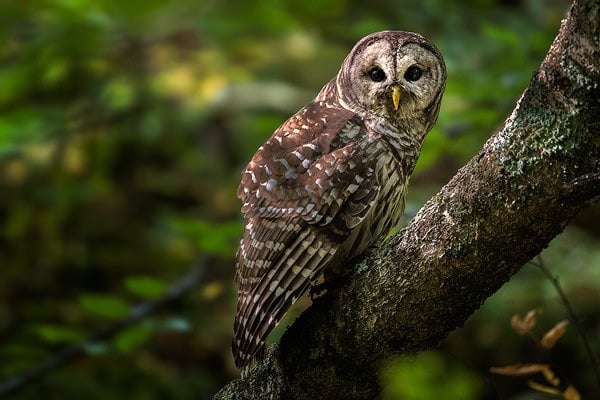
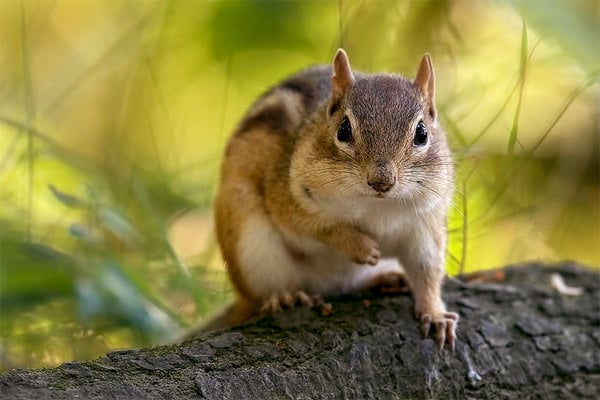
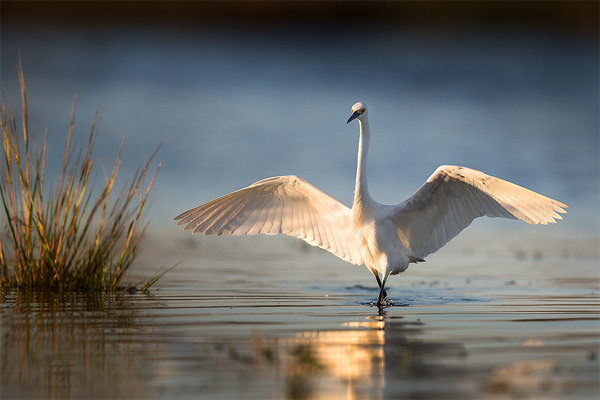
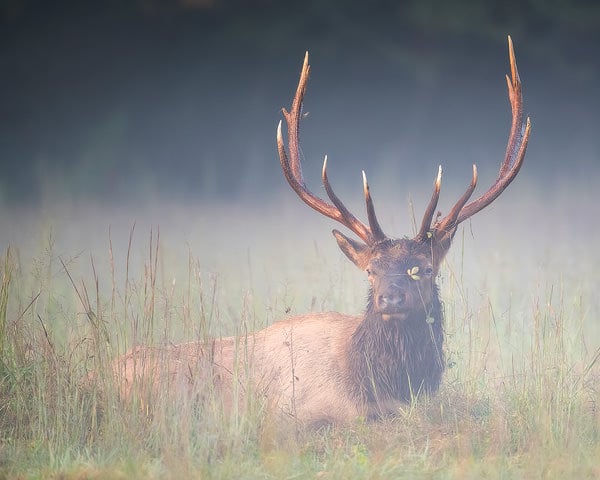
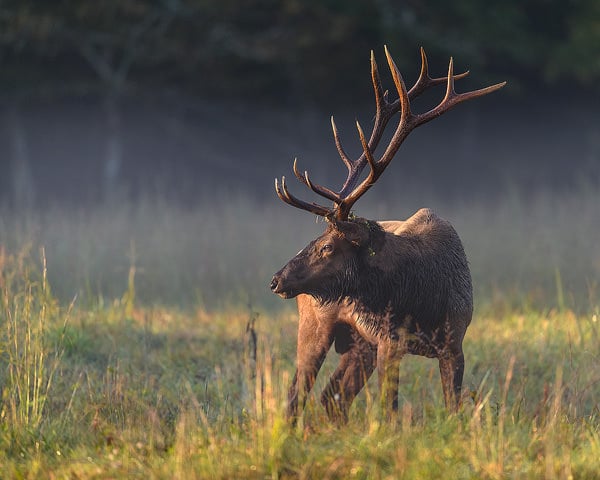
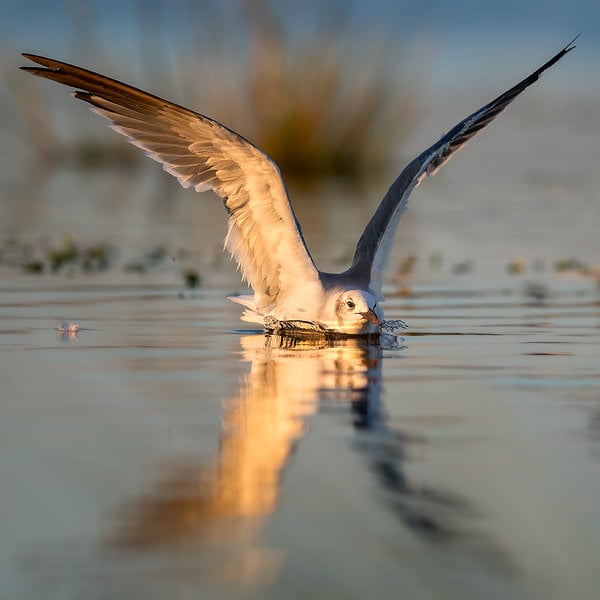
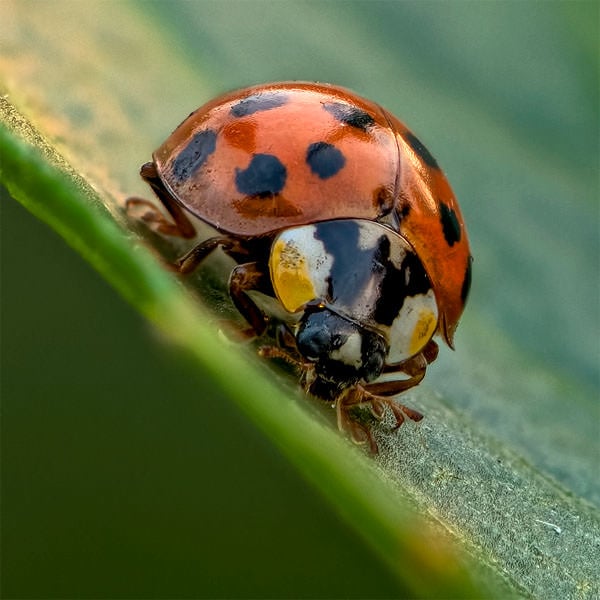
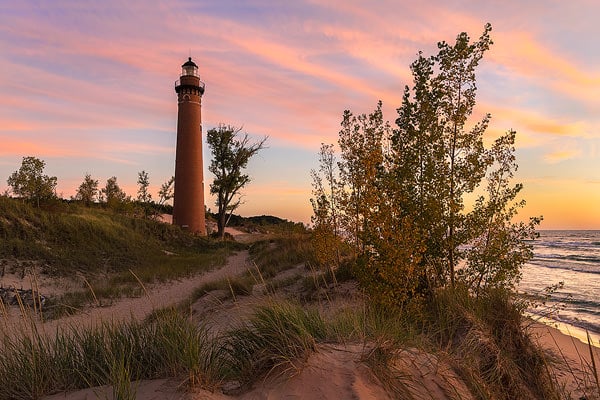
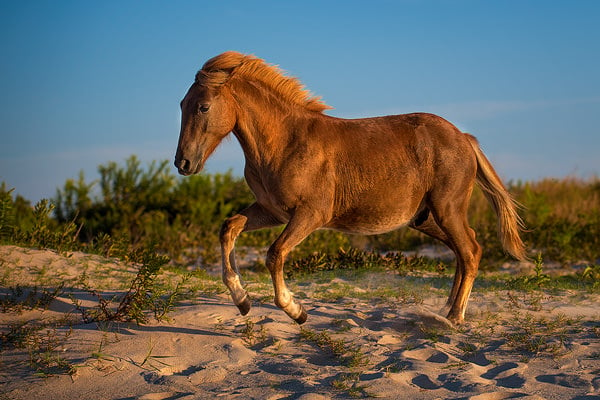
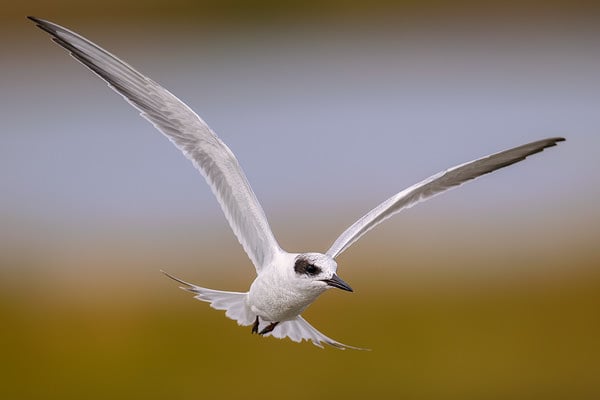
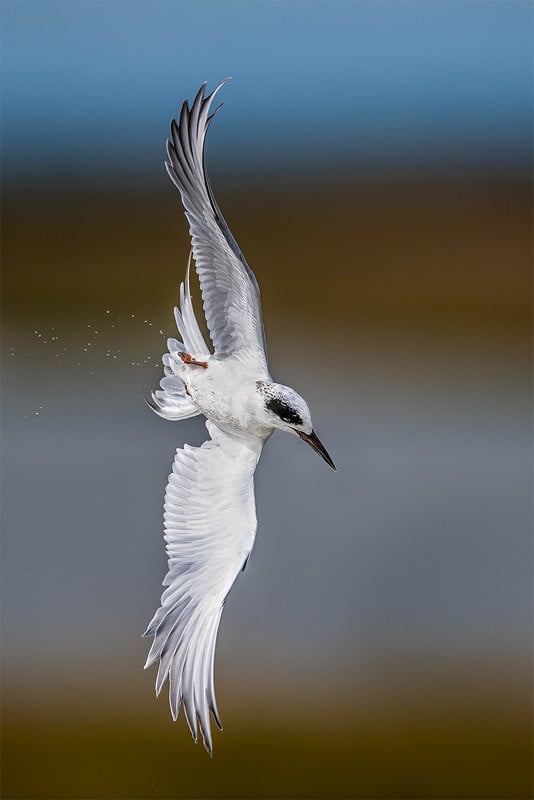
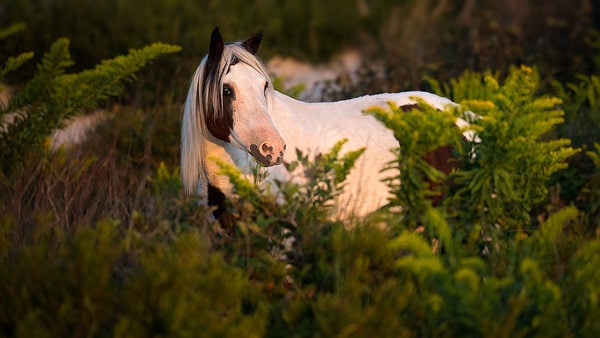
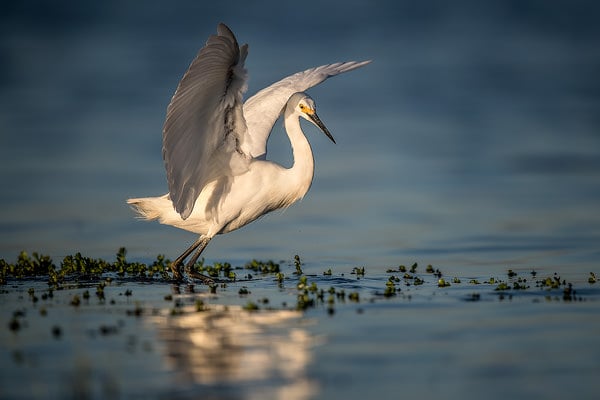
D850 Sample Photos
Finally, a few sample photos.
About the author: Steve Perry is a nature photographer and the owner of Backcountry Gallery. You can find more of his work, words, photos, and videos on his website, Facebook, and YouTube channel. This article was also published here.