

Adobe’s Quiet Lightroom Classic Updates Are a Big Deal for Photographers

Adobe’s MAX press kit focused on just a few updates to Lightroom and gave Lightroom Classic no specific attention, but that doesn’t mean that the popular RAW editing and organization app hasn’t received big changes. Lightroom Classic 16.0 is here, and it includes a ton of meaningful improvements.
Lightroom Classic 16.0 includes some of the changes that Adobe did talk about in its MAX press release, including the new Glow and Blemish Removal tools, but it includes so much more.
The changes start as soon as a photographer goes to add new photos to their Lightroom catalog. Users can now filter their photos before they import them, with Lightroom Classic 16.0 recognizing and preserving in-camera ratings, color labels, protected status, and file types. These filters also carry over to Lightroom Classic’s relatively new Assisted Culling workflow, promising even faster results and less bloated catalogs.
Speaking of bloated catalogs, Lightroom Classic 16 also lets users clean up history states on photos they’ve edited while preserving the final appearance. Adobe says that by clearing history states for multiple photos, folders, or even entire collections, users can significantly reduce the file size of their catalogs. It’s also possible to schedule automatic cleanup of history states, ensuring that catalogs stay lean without deleting data that might be useful during a specific project.
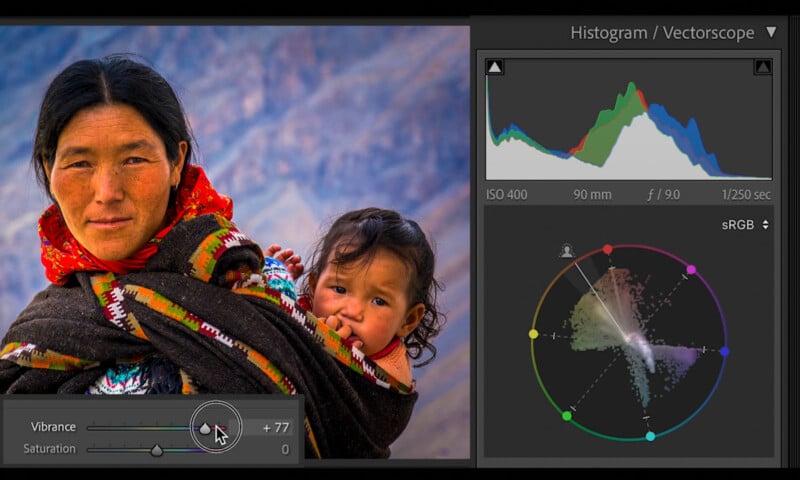
Lightroom Classic now includes a vectorscope, which photographers can use to analyze the colors and skin tones in their photos. Although vectorscopes might already be familiar to DaVinci Resolve users, they can be a little intimidating at first. Essentially, neutral colors—such as black, gray, and white—live at the center of the scope. The farther a color is from the center, the more saturated it is, while the direction from the center reflects the color’s hue.
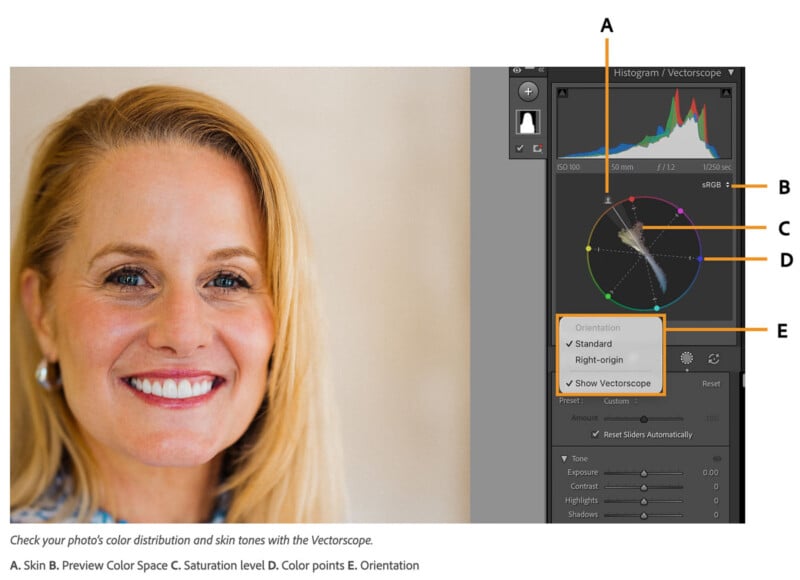
Adobe has a detailed breakdown of how to use Lightroom’s new vectorscope on its support website, but the main takeaway is that the vectorscope will make it easier for some users to analyze and edit colors, including across multiple color spaces.
The newly updated Lightroom Classic also offers new ways for photographers to edit the colors in their images. It’s now easier to add color tints only to masked areas in any image using the existing Color Grading tools. Editors can tweak color grades for shadows, midtones, and highlights within a selected masked area of the frame.
Lightroom Classic 16 also includes new ways to manage and customize the app’s Masking panel. Photographers can rearrange controls and add their most-used sliders to a Favorites section for quicker access.
While existing subject detection and masking tools have long made it easy for photographers to perform specific localized edits inside Lightroom Classic, Adobe is adding an AI-powered depth masking tool to let users select and edit the foreground, middle ground, or background in their photos.
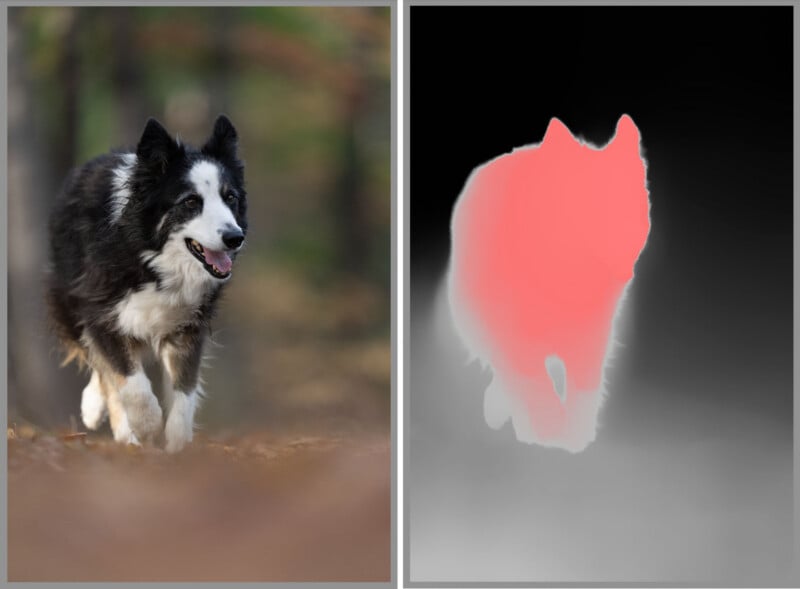
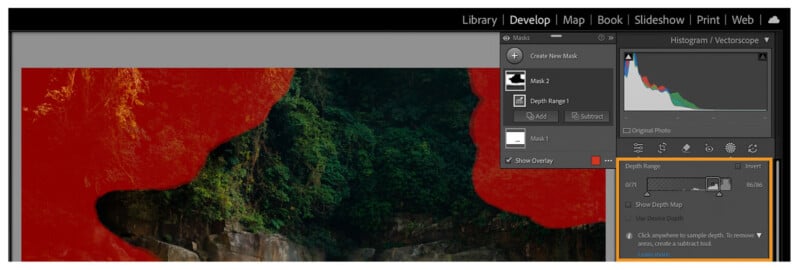
This can be performed on any photo, and users can customize and refine the depth mask manually. However, in some cases, photo files already include depth information, which Lightroom Classic recognizes and uses to create its depth mask.
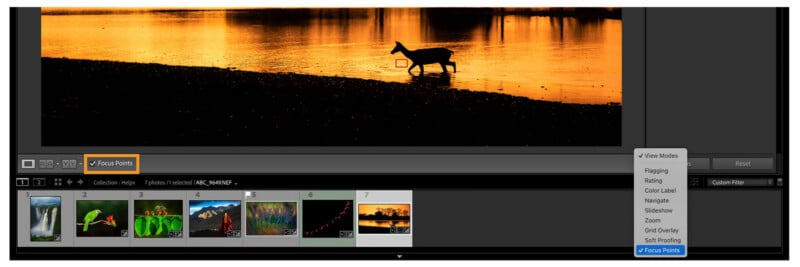
Lightroom Classic can now also show users the focus point data recorded in RAW files by the camera, at least with select cameras. As of now, RAW photos from Canon, Nikon, and Sony cameras that record autofocus data work with focus point viewing.

In the Transform panel, there’s a new Projection slider that users can adjust to fix distorted faces and objects near the edge of the frame, especially when using a wide-angle lens.
As always, the Lightroom Classic update brings new camera and lens support as well. In this case, it’s a short list of new cameras, with just the Apple iPhone Duo’s Ultrawide and Wide cameras getting new support in Adobe Camera Raw 19.0 inside Lightroom Classic 16.0.
On the lens side of things, Apple’s new iPhone Duo cameras are supported, of course, but so are lenses from Laowa, Sigma, Sony, and Tamron. Of note are Sony’s new FE 8-14mm f/3.5 Fisheye G, FE 400mm f/4.5 GM, and FE 600mm f/6.3 GM lenses. Sigma’s new 50-120mm f/2.8 DC OS and Tamron’s new 17-70mm f/2.8 RF lenses are supported, too.
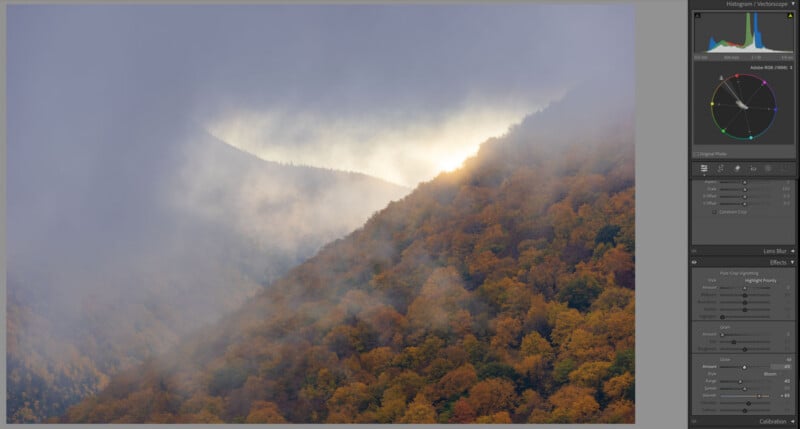

As mentioned in PetaPixel‘s other MAX coverage today, the Glow tool added earlier this year to Adobe Camera Raw has arrived in Lightroom, letting users add a soft glow around highlight areas in their photos with customizable controls. Blemish Removal, introduced in Lightroom for mobile, is now in Lightroom on desktop as well, including Lightroom Classic.

Lightroom Classic 16.0 is available to all subscribers now through the Lightroom Classic app itself or the Creative Cloud app.
Image creditsAdobe with additional illustrative example photos by Jeremy Gray.
Affiliate Disclosure PetaPixel articles may include affiliate links; we may earn a commission if you buy through one.