How I Create 200MP Aerial Panoramas with a Tiny DJI Mini 2 Drone

My name is Vlad Moldovean, and I’m a photographer from Brasov, Romania. In this article, I will share how I use my DJI Mini 2 — a cheap drone that many people dismiss as being a toy for beginners — to create photos and animations that stand out.
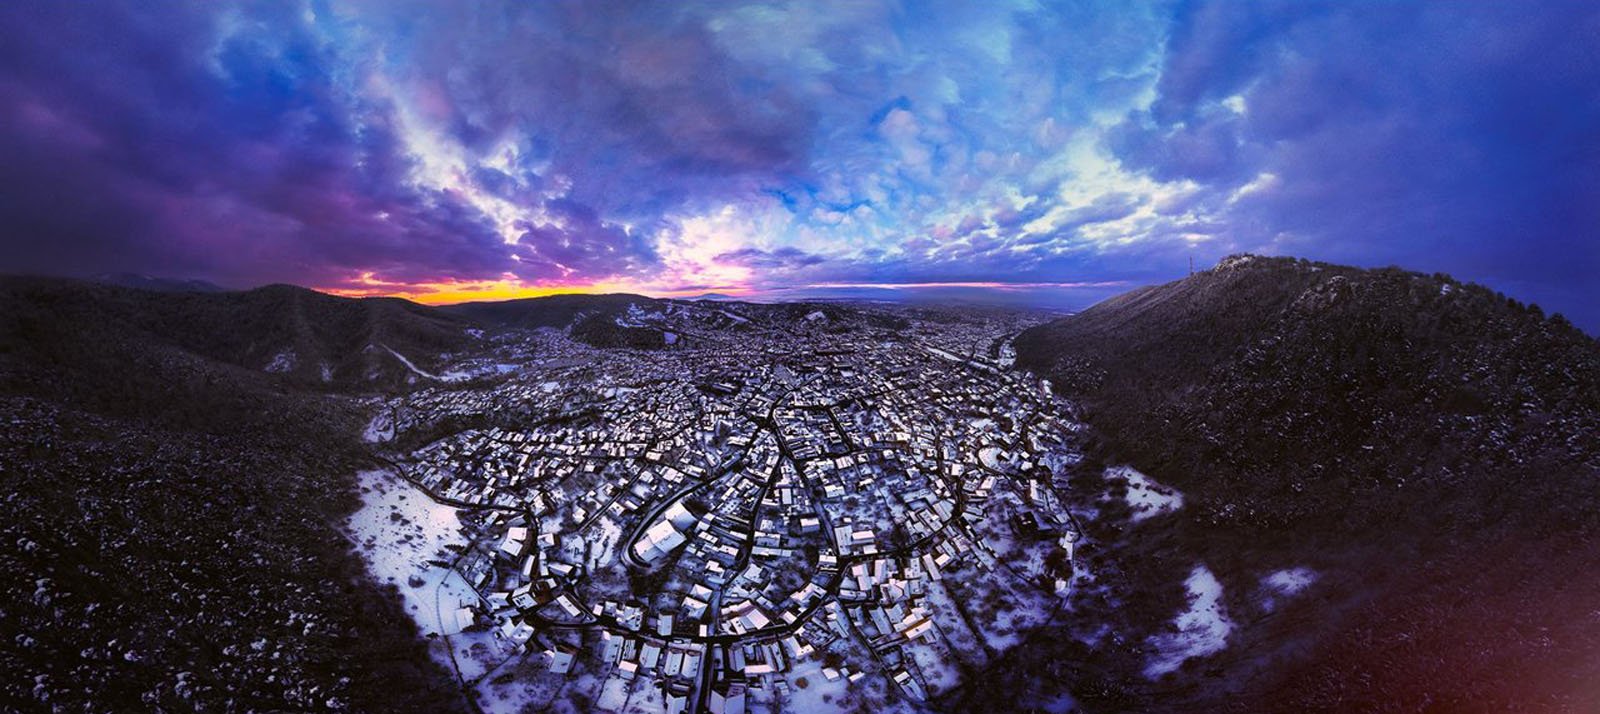
A 360-Degree Aerial Panorama
I don’t know if this ever happens to someone else, but sometimes I leave home thinking that I would go to one place and end up in an entirely different one. This is what happened to me on the 5th of March. The universe was calling, I responded and ended up on a hill near Brasov, Romania, looking at one of the most amazing sunsets I have ever witnessed.
I took my little drone out to get an even better view of the zone and shoot a 360-degree panorama to capture the entirety of the scene, and the results were mind-blowing, even for me.

The panorama is around 200 megapixels in resolution and the amount of details that made their way into the final image is insane. The lesson I’ve learned from this experience is that you shouldn’t always be the one in control — just let the universe guide you, and the years of prior experience will come through and help you achieve amazing results.
I’d like to share the knowledge I’ve gathered on 360-degree aerial photography over the years.
Using the DJI Mini 2 for Panoramas
The thing with the 360 photography space is that it evolved a lot around phone apps and there is not one software that would serve you well from start to finish, so I will try to guide you through a workflow I developed over time to obtain the highest quality final photos without losing data to JPEG exports and resizes.
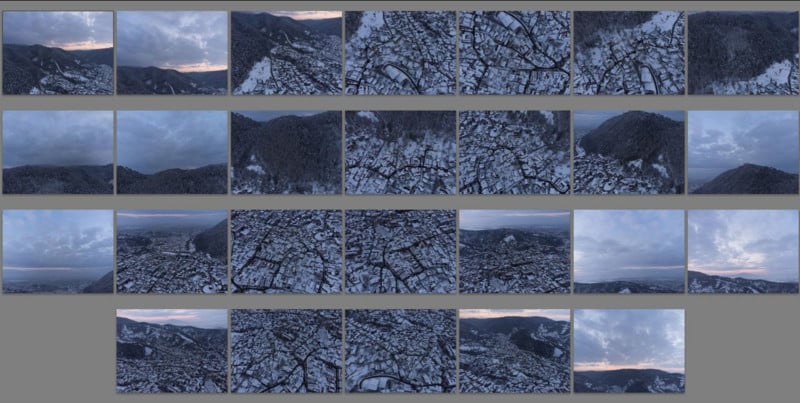
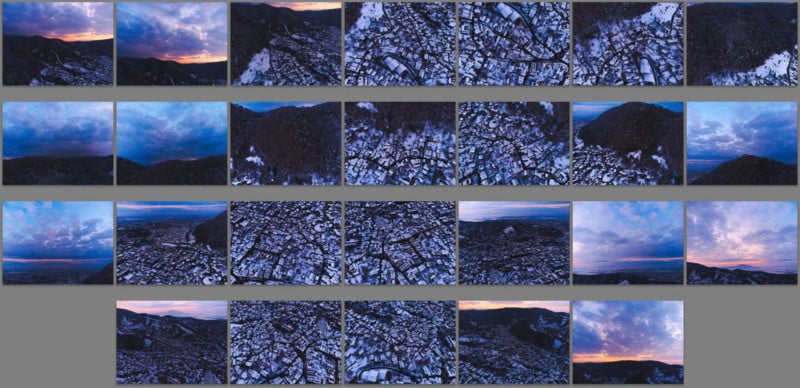
Although it is tiny, the DJI Mini 2 has two key features for this. It shoots RAW and has a function to shoot a 360-degree panorama automatically, the result of which will be 26 photos on your SD card. Just make sure you don’t cut off anything like tree branches or mountain peaks on the upper limit of the gimble rotation and wait for the drone to finish shooting before you fly to the next location. It will take between 30 seconds and 1 minute depending on the lighting conditions.
A good tip considering the limited dynamic range of this sensor is to shoot a bit underexposed so you avoid getting blown-out whites around the sun. Also in my case, there is a lot of forest around me and the drone will try to overcompensate for how dark it is and give me blown-out skies, so AUTO and -0.7 EV is how I shoot these panoramas most of the time. Auto because the entire scene always has so much light variation depending on where the camera is pointing that it would be impossible to not get pure whites/blacks on full manual mode.
Stitching the Photos Together
Now the hard part begins! You got home and you have 26 .DNG files on your hands to work with and transform while retaining as much quality as possible.
To prepare your photos for stitching now is the time to take advantage of all the information in those RAW files in Lightroom. Adjust the light and colors as close to the final look that you are aiming for as you can without using any local adjustments, curves, or the color grading wheels, and sync those settings across all of the 26 photos.
Keep an eye open on how the highlights look in the shoot that contains the sun and how the shadows look in the darkest one of the set. When you are done just export them as 16-bit .tiff files.
For stitching, you do have the option to pick between software like PTGui, Kolor AutoPano, Pano2VR, and I’m sure there are many more out there. Just make sure to use a cylindrical projection and you should be fine as long as you stay away from anything made by Adobe and export your image back to 16-bit .tiff files.
My weapon of choice here is Kolor AutoPano. It’s an old software but it gets the job done impressively well and has more options than I usually need.
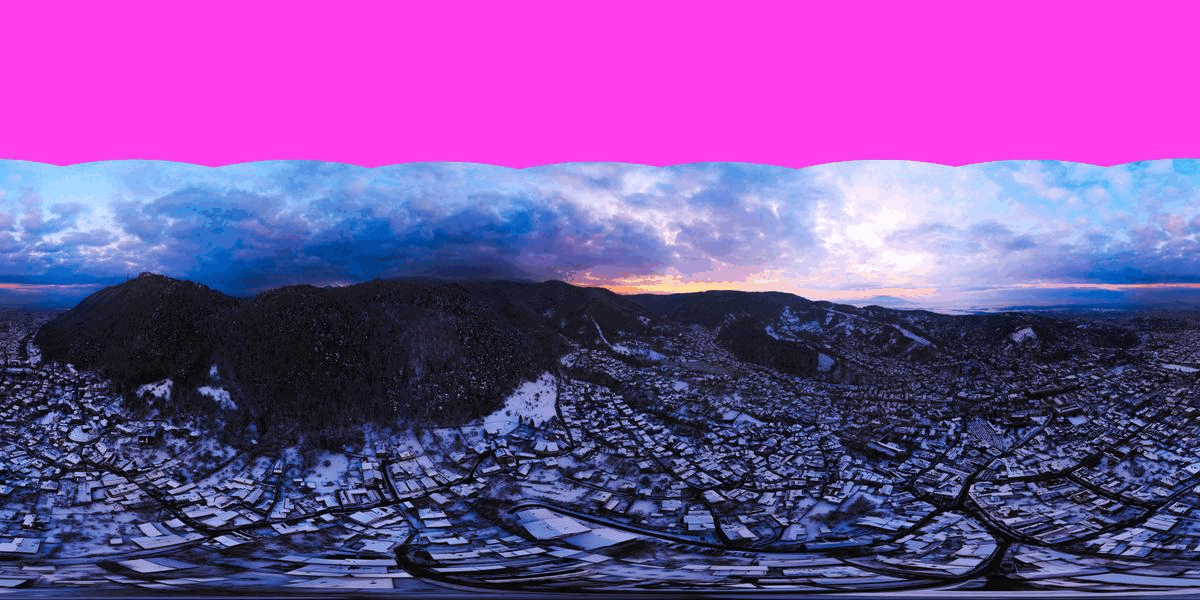
Since drones are unable to point their gimble upwards the resulting panorama is not yet equirectangular (2:1 aspect ratio) so we will have to use tools like Content-Aware Fill to recreate some of the missing skies. Since Photoshop recently removed the ability to project panoramas to the sphere and edit them like that after adding some clouds to the photo, the best alternative is to open it in Affinity Photo and use their version of healing brush to hide any seams and warping we created in the process of creating some sky.
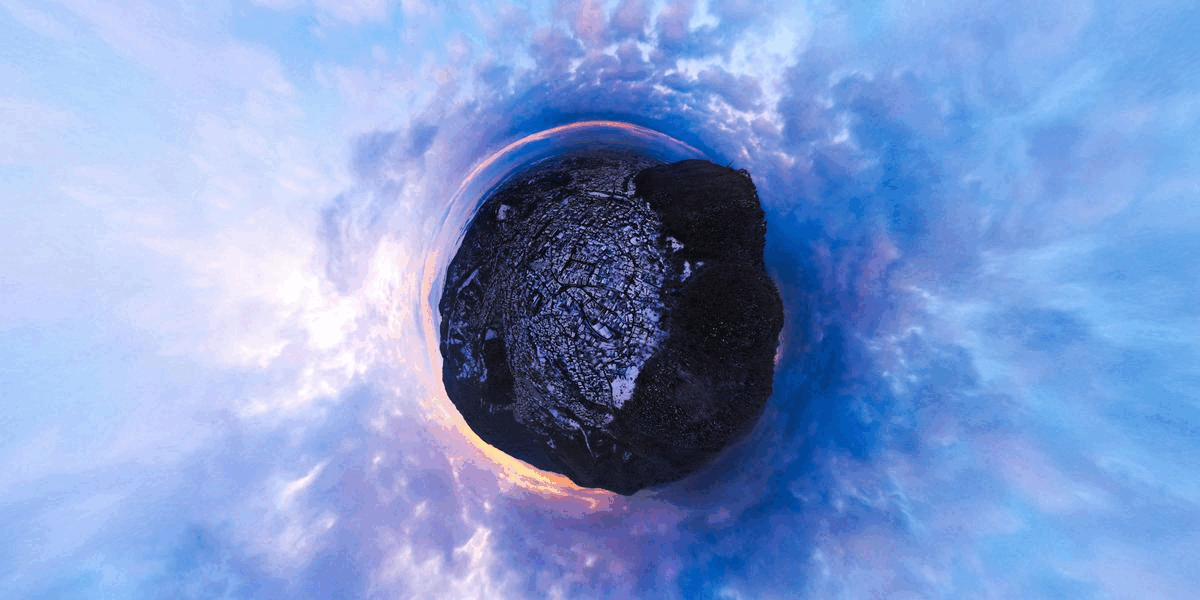
Now that you finally have an equirectangular image, you can put it back into Photoshop and use a little know plugin called Flexify 2 to distort it into a tiny planet, an Inception-like cityscape, a very wide-angle photo, or anything in between. But before you do that make sure to save a copy of the file as it is the source for everything that you are going to create based on this panorama.
After you have distorted your image you can start adding in the color grade and any other edit you normally do to your photos. Just keep in mind that the file is rather big and every new layer you add to it will make Photoshop react slower and slower.
A Workflow That Preserves Data
I developed this entire workflow in order to retain as much of the raw data as possible so when you add the finishing touches to your shots it’s an image that the human brain has an easy way of understanding, not a flattened out sphere that you have to wrap your head around. You will be forced to use a minimum of 4 or 5 applications and will end up with a file that most of the time is around 200 megapixels. It will take you at least 10 minutes to get to a stage where you can twist it around and see what possibilities you have for your final shot but in the end, you will have some unique images that fascinate the viewer.
For my final image, I decided to go with an extremely wide-angle approach so you can see both the sunset and the last few houses the sun was illuminating before going behind the hill while also showcasing the entire spectacle of clouds on the evening sky and a colored that aimed to enhance and amplify the peaceful atmosphere of this view.
I wish one day I’ll be able to print it in large format and display it in a gallery so I can showcase the level of details this image holds. But until that moment comes, it’s on display in my virtual gallery.