Wacom One Review: An Entry-Level Pen Display Perfect for Photo Editing

With the release of the Wacom One in 2020, Wacom lowered the barrier to entry into the world of pen displays and inadvertently created an ideal product for photographers. Where other pen displays in the Wacom lineup are either too big or too expensive, the Wacom One makes a great case for trading in your Intuos Pro for a more intimate photo editing experience.
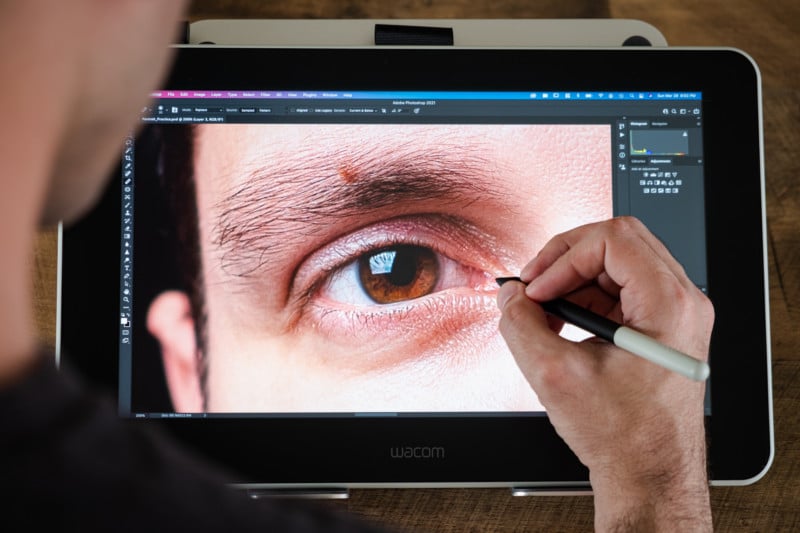
The advantages of a pen display over a pen tablet are obvious: you can edit directly on your photos, making tasks like blemish removal, dodge and burn, and detailed Pen Tool work a breeze — but you usually pay a premium for this privilege. Pen displays are often large, heavy, and expensive, with big screens, chunky bezels, and price tags that range from $650 all the way up to $2,000. Affordable alternatives do exist, but you have to take a chance on a lesser-known brand like Huion or XP-Pen.
That’s what makes the Wacom One such a compelling product. It’s about the size of a 13-inch laptop, weighs just 1 kilogram (2.2 lbs), and costs only $400. In other words: it’s the smallest, most affordable pen display you can buy without sacrificing the quality assurance that comes with the Wacom brand name.
Design and Build Quality
Like most Wacom products, the Wacom One is built to last you many years. It’s not quite as sturdy as Wacom’s “Pro” branded products, but the plastic construction is exceptionally rigid and I never felt like I was working on a “cheap” display.
The screen itself takes up an area of 11.6 x 6.5 inches (13.3 inches on the diagonal), and it’s continuous with the bezels, which measure about 1.25 inches all around the side. There’s no seam between screen and bezel on which to catch the pen, which I like, but there are also no shortcut buttons or dials built into the display, which I don’t. If you want shortcuts you’ll have to pony up for the bundle that includes Wacom’s ExpressKey Remote, bringing the total price up to $470 for functionality that should just be built into the tablet.
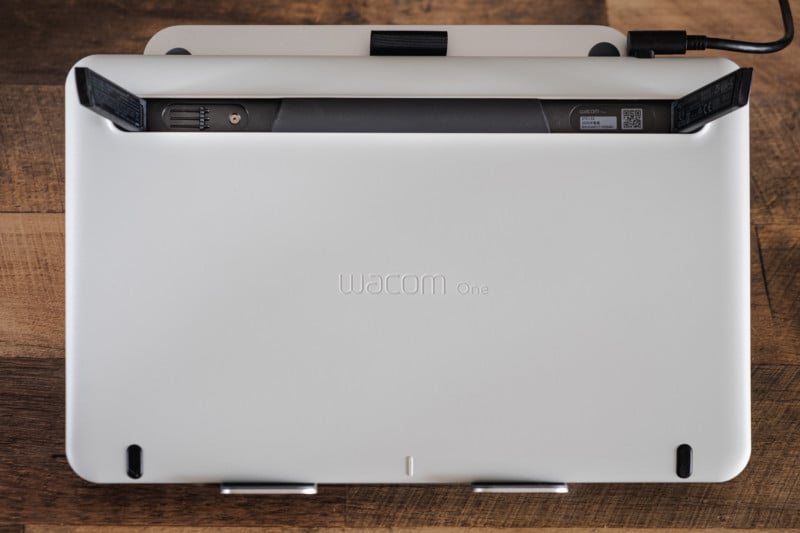
Absent a row of shortcut keys, there’s not much in way of inputs or other bells and whistles. Along the top of the tablet, you’ll find a cloth loop that doubles as a pen holder, a USB-C port, a power button, and a single LED. On the back, you’ll find two fold-away feet that pop out to prop the display at a 19-degree angle, with three spare pen nibs hidden underneath — And that’s about it.
The only other things in the box are Wacom’s entry-level battery-free EMR pen and the clunkiest connection cable you can imagine. It’s an “X-shaped” cable with the power cord and USB-C connection on one side, and a USB-A and HDMI connection on the other. Power goes to the wall, USB-C to the pen display, and the USB-A and HDMI cables both have to be plugged into your computer.
This cable is far and away the most annoying thing about the Wacom One. When USB Type-C/Thunderbolt is capable of delivering data, display, and power through a single cable, the fact that Wacom didn’t even include the option is just plain annoying.
Still, if you ignore this little faux pas, what we have here is a portable, capable little pen display that you could easily pack away in your backpack just like a regular pen tablet.
Screen Quality
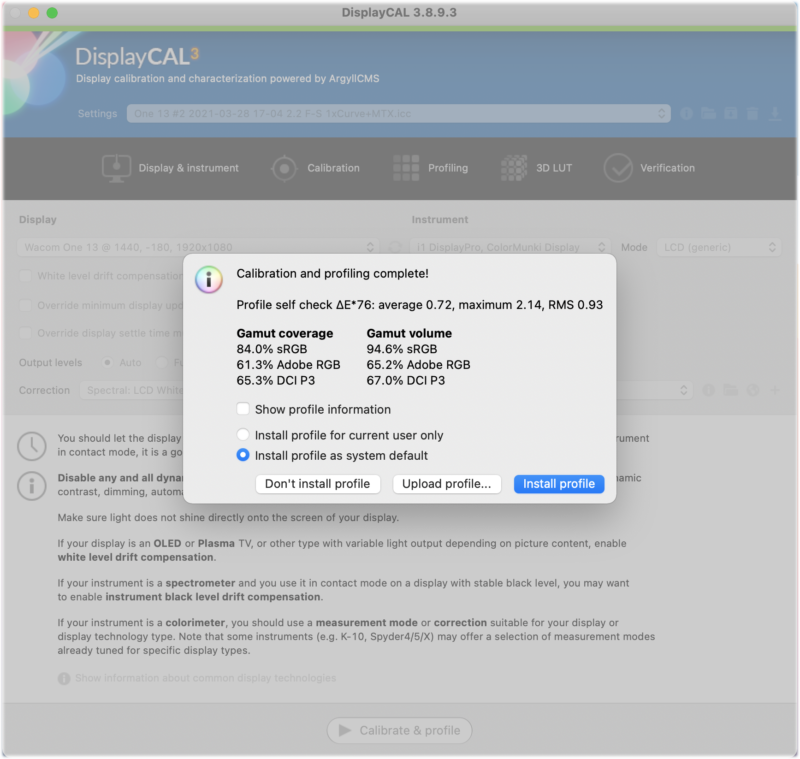
At the heart of this product is the display: a 1920 x 1080 Full HD AHVA panel (an “IPS-like” technology) that claims 72% coverage of NTSC and a max brightness of 200 nits. But in our own testing using an i1Display Pro Plus colorimeter through DisplayCAL, we didn’t quite hit the numbers that Wacom is claiming.
At best, the tablet was able to cover 61.3% of AdobeRGB and 84.0% of sRGB. Since NTSC is similar to AdobeRGB, we were hoping to hit ~70% of that space and 95% or more of sRGB.
I initially thought these lower-than-expected results from our colorimeter may have had something to do with the anti-glare and texture coating that Wacom puts on its displays in order to provide some drawing resistance, but Wacom tells me that shouldn’t affect color readings. Whatever the case, you probably shouldn’t rely on the Wacom One for color-critical adjustments. Do your soft proofing and final color check on a proper color-accurate display (like the BenQ SW271C we recently reviewed).
Another reason you may want to rely on another display for global adjustments is brightness. At a max brightness of just 200 nits, I was forced to use the Wacom One at full brightness all the time. Even 250 or 300 would have made a big difference, but alas, no such luck. It’s not a deal-breaker, but if you regularly edit in a bright area you’ll want to work with the display pointing straight at you — even a little glare makes a big difference.
Finally, the last thing you need to know about this screen is that it is not a “laminated” display. Lamination is a way of getting the touch-sensitive layer closer to the underlying screen, which decreases the distance between your pen tip and the spot on the screen you’re trying to activate. The larger that distance, the more parallax you’ll experience, and the more annoyed you’re likely to become.
I didn’t struggle with this, although I did have to re-calibrate the pen and display every time I worked with the Wacom One from a new angle. It takes a couple of seconds to recalibrate, but it’s absolutely necessary. Even 1mm of drift due to parallax is unacceptable when doing detailed Pen Tool work or blemish removal.
User Experience
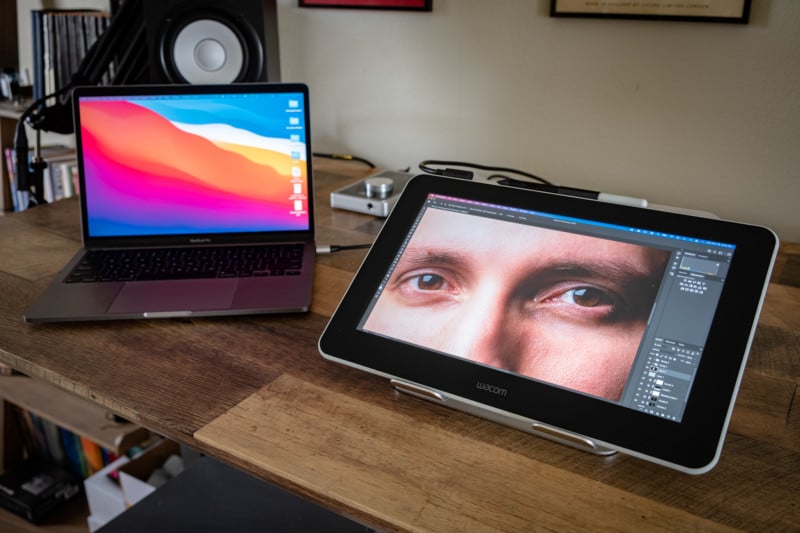
Setup for the Wacom One was essentially plug-and-play on my 13-inch Intel MacBook Pro, and all of the settings and calibration options I needed were either in Wacom Desktop Center or the Wacom System Preferences panel. My only complaint is with the aforementioned connection cable, which forced me to use a USB Hub every time I plugged in the display.
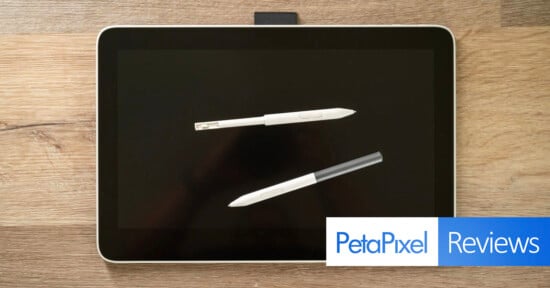
Once you’re up and running, you’ll be using the Wacom pen to do all of your editing. This is not Wacom’s top-of-the-line Pro Pen 2, which offers over 8000 levels of pressure sensitivity, a pressure-sensitive eraser, and two programmable buttons on the pen itself. Instead, Wacom includes an entry-level version that maxes out at 4092 levels of pressure sensitivity, has only one button, and does not include an eraser on the other end. It’s also a little thinner and lighter than the Pro Pen 2, and there is no dedicated pen holder in the box.
None of this was an issue for me, as I rarely (if ever) use all the buttons on the Pro Pen 2 that came with my Intuos Pro Medium, and 4000+ levels of pressure sensitivity is more than enough for photo editing. If I were using the Wacom One for drawing or illustration, I might want a more sensitive pen so I can really dial in the pressure curve, but for my purposes, I had no issues whatsoever and actually prefer the thinner pen profile anyway.
There were only two truly annoying aspects to the user experience. One was the lack of shortcut keys or a dedicated dial — I’ve already said all I need to say about that. The other was the angle of the display: when using the built-in feet, the display is propped up at about 19-degrees, which is too shallow for my taste. For long editing sessions, I put the Wacom One on an aluminum laptop stand right in front of me and set my computer off to the left, where I could use its keyboard to trigger common shortcuts.
If you’re planning to pick up the Wacom One for home use, I highly recommend grabbing an adjustable laptop stand like this one from Nulaxy.
Conclusion: When Entry-Level is All You Need
In my opinion, the photo editing experience of a pen display is far superior to using a pen tablet. While I have no issues looking at my computer display while drawing on the tablet, it’s far more satisfying and engrossing to work directly on top of the photograph. And yet, up till now, I’ve always reached for my Intuos Pro instead of the pen display(s) that I’ve had available to me. Even when I had an XP-Pen Artist Pro 24 on hand, I rarely used it, opting for the pen tablet out of sheer convenience.
The Wacom One changes all that by offering all the benefits of a pen display without the typical drawbacks. It’s not perfect, as the Cons will attest to, but it offers more photo-editing bang-for-your-buck than anything in Wacom’s Cintiq or Cintiq Pro lineups.
Pros
- Solid build quality
- Quick setup and calibration
- Great pen feel
- Responsive performance with no noticeable lag
- Small and lightweight
- Affordable for a Wacom display
Cons
- Clunky connection cable
- Dim display
- Middling color accuracy
- No shortcut keys
- Screen is not laminated
- Expensive compared to the competition
At this point, if I had to choose between buying a Wacom Intuos Pro Medium ($380) or a Wacom One ($400) for myself, I would choose Wacom One.
Solid Performance at the Entry Level
The Wacom One is accidentally ideal for photographers. By trying to make a cheaper pen display, Wacom cut a bunch of corners that didn’t matter to many of them anyhow — things like 4K resolution, a laminated display, or a pen with overly-extreme precision pressure sensitivity.
If you’re not dedicated to the Wacom brand, you should definitely check out the alternatives from Huion and XP-Pen as noted below. The Kamvas 13 is particularly tempting since it offers all the same specs plus a laminated display, 120% sRGB coverage, and built-in express keys for ~$175 less. But if you want to stick to a brand you know and ditch the pen tablet for the more engrossing experience of a pen display, the Wacom One is the best game in town.
Are There Alternatives?
Whenever we’re talking Wacom, you can bet that XP-Pen and Huion both offer a tablet with equivalent (or better) specs at a fraction of the price. You’re trading brand recognition and maybe a little bit of build quality for a product that is, at least on paper, the superior option.
In this case, Huion and XP-Pen’s Wacom One alternatives are the Huion Kamvas 13 and the XP-Pen Artist Pro 13.3. Both of these options come with a more sensitive pen (8,192 levels), laminated display, similar-or-better color accuracy, built-in shortcut keys, a pen holder, and an included adjustable stand that’s separate from the display itself. In the case of the Huion, you also get single-cable USB-C to USB-C connectivity, which is a huge plus.
The Huion Kamvas 13 costs $225 (on sale as of publication), while the XP-Pen Artist Pro 13.3 costs $300.
Finally, you could also pick up an iPad or iPad Air and Apple Pencil, and use that as a wireless pen display using Sidecar, Astropad, or Duet Display. However, by the time you’ve purchased an Apple pencil (which is not battery free), even the most affordable combination of Apple products will cost you more than a Wacom One.
Should You Buy It?
Yes. Creating a more affordable entry-level pen display was a smart move by Wacom, and photographers will benefit most. While digital artists might genuinely need a bigger canvas or lament the lower-sensitivity pen, photographers can do without either of these things—you don’t need 8,192 levels of pressure sensitivity to dodge and burn, use frequency separation, cut something out with the Pen Tool, or do some spot healing.
Having a small, affordable pen display that you can easily travel around with is a boon. And while I would have loved to see a brighter, laminated display, built-in shortcut keys, and an all-in-one USB-C cable, these are all things that I can live without.