7 Tips for Photographing Dreamlike Landscapes
Luke Stackpoole is a London-based landscape photographer and Adobe Lightroom Ambassador who has traveled around the world in search of dramatic scenery. From the barren deserts of Namibia to the frigid seascapes of Iceland, Stackpoole has amassed a stunning portfolio that shows the world’s most dreamlike landscapes.
Full disclosure: This article was brought to you by Adobe
Stackpoole makes it look easy, but in reality, his work is anything but. Planning, patience, luck, and proficient editing in Adobe Photoshop Lightroom are all critical for Stackpoole to create his dramatic landscape photographs.
The 29-year-old visual artist hasn’t always been a globe-trotting travel photographer. Up until just four years ago, Stackpoole was working at a desk job, handling accounting for Deloitte. He believes that the analytical side of his mind works in conjunction with the creative side, as he meticulously plans his photos and edits his work down to the pixel level in Lightroom.
“I love to create dreamlike landscape images because it inspires viewers to want to travel and create photography work from these locations,” he says.
Stackpoole shares the process that goes into creating his stunning dreamlike landscape images.
At a Glance
Picking a Location
Stackpoole credits much of his incredible portfolio to the locations he photographs. While he says that it is possible to create dreamlike photos from almost any location, being somewhere with dramatic scenery gives the photographer an immediate advantage. He suggests researching and identifying locations with photogenic features, such as jagged mountains, expansive deserts, or moss-covered highlands.
In an information-driven age, Stackpoole explains that social media can be your best friend when researching locations.
“It is often the case that even the most obscure locations have been photographed or filmed by somebody, so always be on the lookout for some cool spots when you are scrolling through social media,” Stackpoole says. “I use the save post feature on Instagram to house all of the videos and photos that I come across for a location that I think would make for some great photographs.”
Experienced local guides can also be a well of information for finding the most photogenic locations.
“If a photographer who I follow has used a specific guide in a region, I will reach out to them to talk about a potential plan for a visit. Usually, just telling them the types of images you are after will give them enough information to put together a rough itinerary of shooting locations that I would visit with them when I arrive. Often, the guide will bring me to incredible places that I didn’t even know existed from my initial research,” he adds.
Using his analytical skills, Stackpoole also obsessively scours Google Earth to identify potential photography locations and the best angles to shoot them from.
“When I was touring the Icelandic highlands and the Faroe Islands, I opened Google Earth and did a ton of map work beforehand to look for some cool aerial compositions. That extra research allowed me to capture some incredible landscape photos that hadn’t been shot much yet by others, if at all,” Stackpoole says.
“When I visit the more popular photography locations, I am always looking for ways to have my photos be unique,” Stackpoole says. “Sometimes that comes from finding original compositions, and other times, that comes from a unique approach to the way I edit the photo in Lightroom to express the creative vision I have for the scene.”
Deciding on Weather and Time of Day
When in search of capturing dreamlike landscape images, the weather and time of day are critical to coming away with portfolio-worthy images. Each location will have different ideal conditions and shooting times that will maximize a photographer’s chance of coming away with worthy landscape photos.
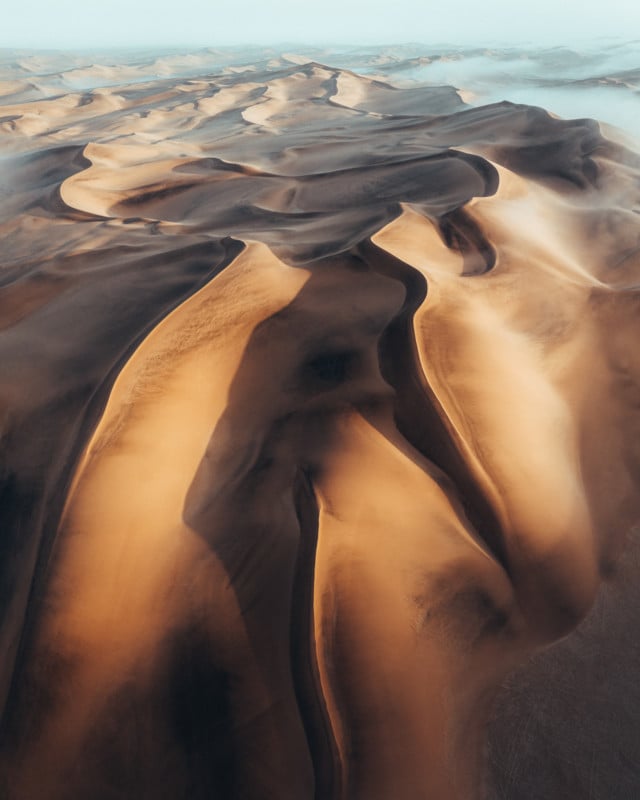
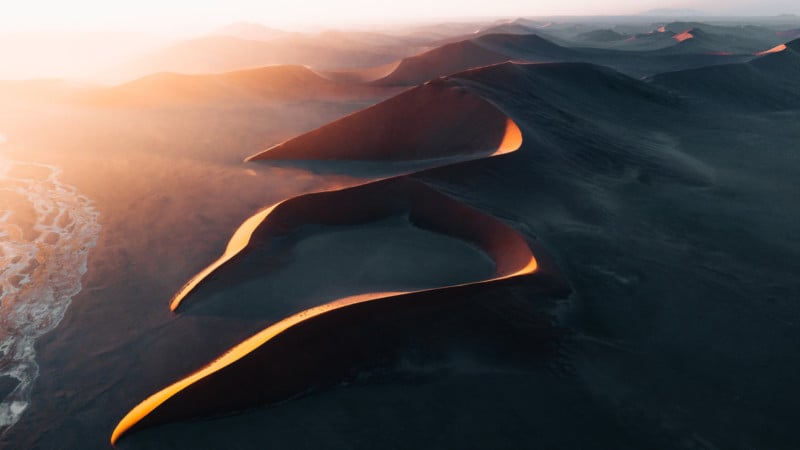
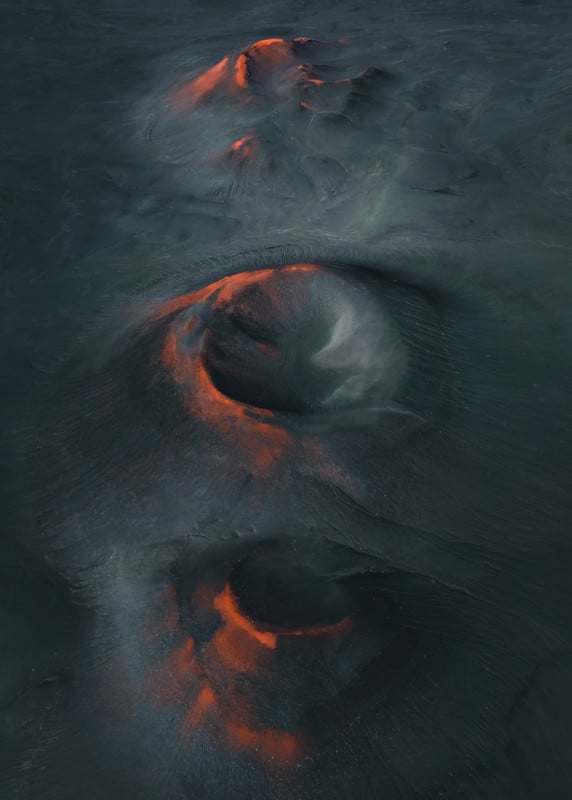
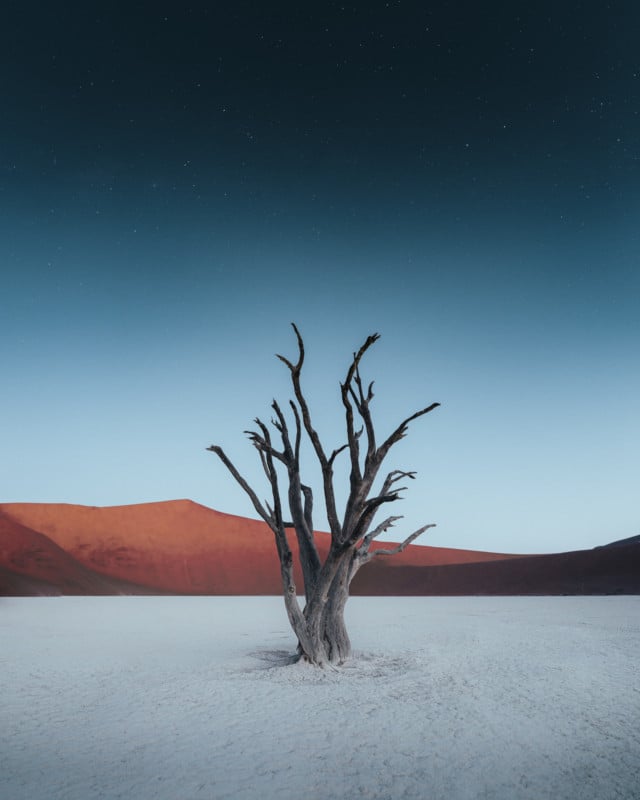
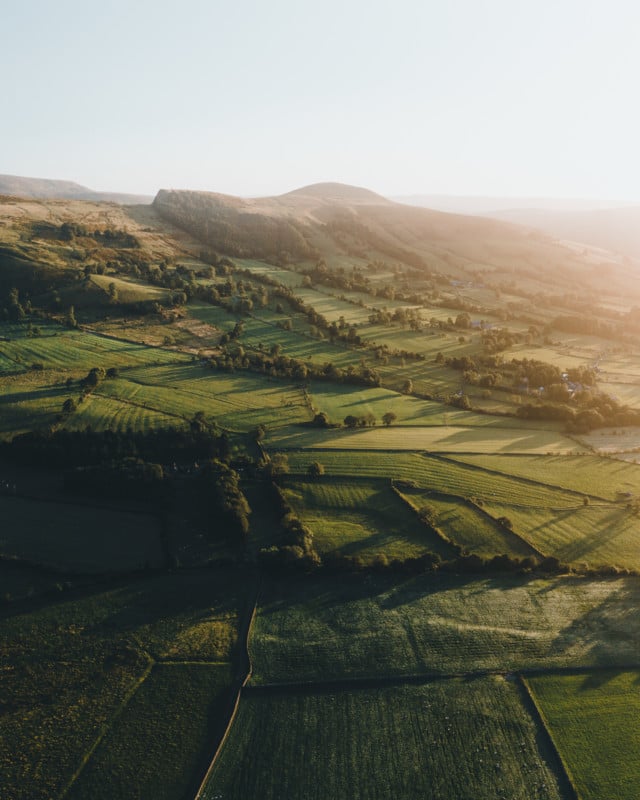
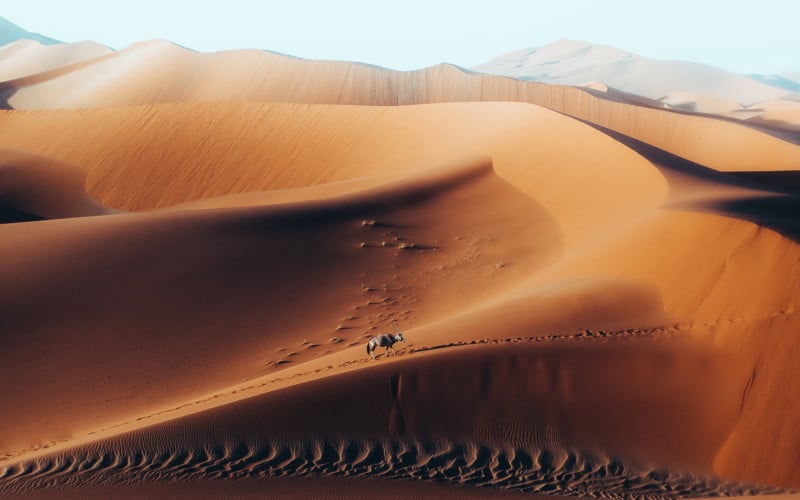
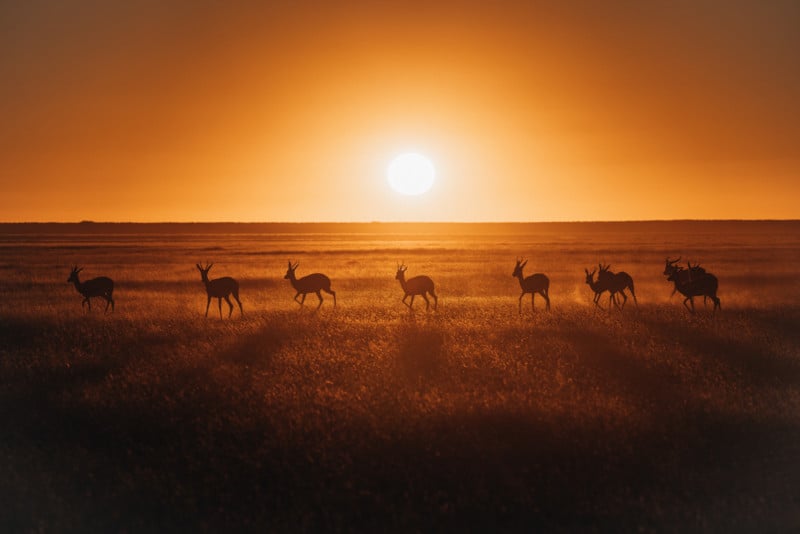
“For a desert scene, you will want some clear skies as the light is really important in adding a soft, ethereal glow to the dunes and sand,” Stackpoole states. “For a moody, dramatic vibe, however, you might be better off with some flat light on an overcast day. When I photograph in the Icelandic highlands I am always hoping for clouds so that the light isn’t too harsh on the black sand and mossy landscapes. The colors of Iceland pop in diffused light, so bluebird skies are not ideal in this environment.”
Of course, Stackpoole emphasizes the importance of the golden hour.
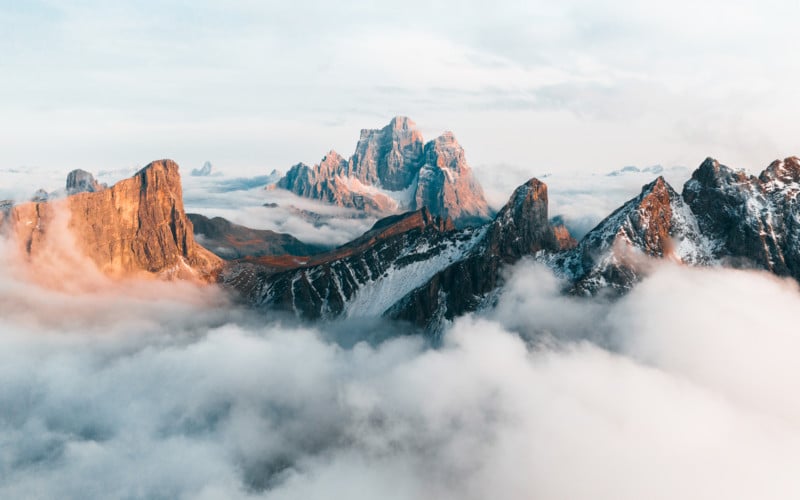
“The minutes right after sunrise and just before sunset almost always lead to the best images,” Stackpoole says. “It completely transforms the scene and helps create that dreamy, soft look. You might have some light rays coming down through the breaks in the pink and orange clouds, and the entire landscape in front of you is lit up in this beautiful golden light. And if there is a storm clearing during this short window, you will be given some of the most dramatic and photogenic conditions possible”
Stackpoole’s landscape photography doesn’t end when the sun sets, however. Blue hour, the time before sunrise and after sunset, is one of the photographer’s favorite times to shoot.
“You still have enough light to work with, and you can add in some artificial light sources like headlamps to create dreamlike scenes,” he explains.
After the blue hour has passed, the artist will typically stick around to capture some astrophotography.
“For photos of the night sky, you want clear skies. This is where having multiple locations identified and a vehicle can come in handy. If there are clouds in location one, a drive to your next location might yield better results with a clearer sky.

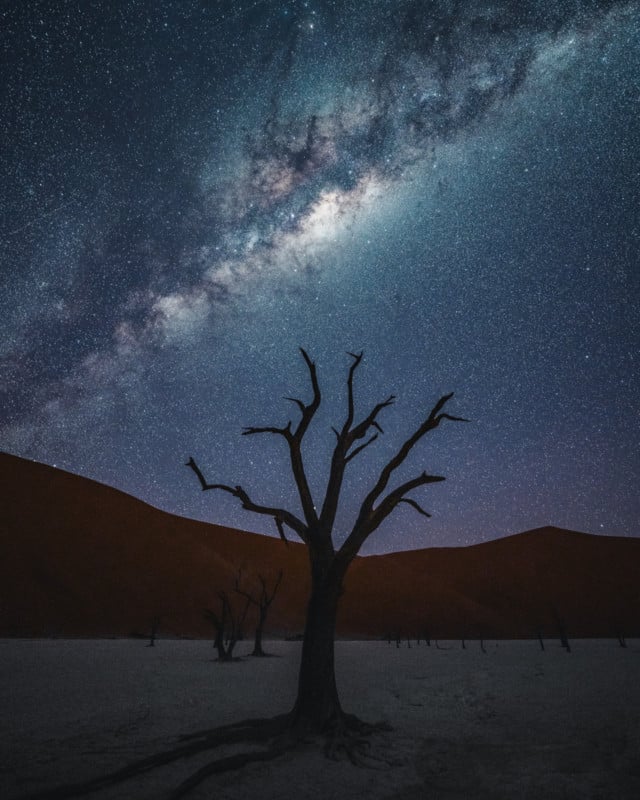
“To capture the details of the landscapes in front of you, having a bit of moonlight is key. If the moon has already set, or it is a new moon, you might just get a starry sky in your photo, even though there is an incredible, yet pitch black, landscape in front of you.”
Deciding on Composition
Composition choices are important in any genre of photography, and capturing landscapes is no different. The choices made when composing an image will help lead the viewer’s eye through the scene, which can make or break a photograph. In the age of viewing photos on social media through your phone, the old composition rules often go out the window.
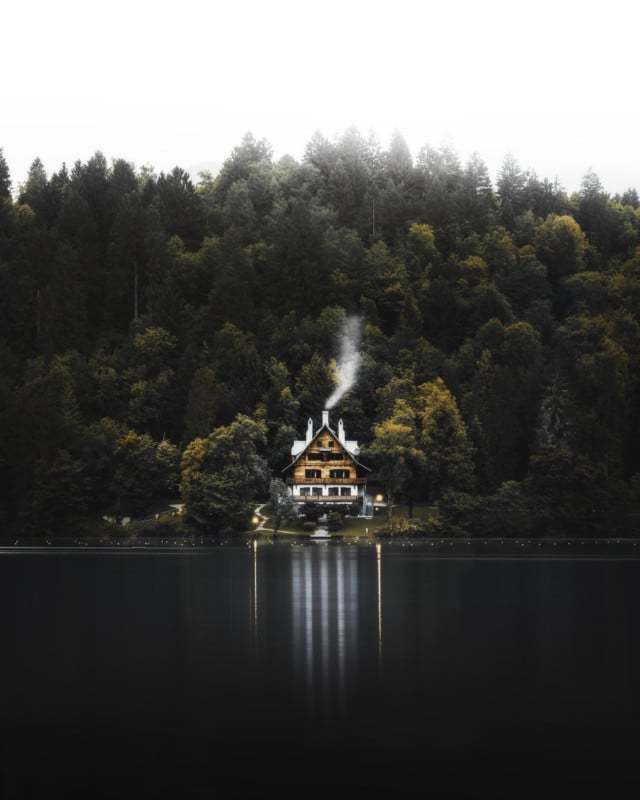
“I tend to shoot my images vertically for social media, so having a clear subject in the center of the frame often works best,” Stackpoole says. “Once the viewer can see this subject, you can help tell a story and create that dreamlike atmosphere as it allows you to center the audience’s attention on what is important.”
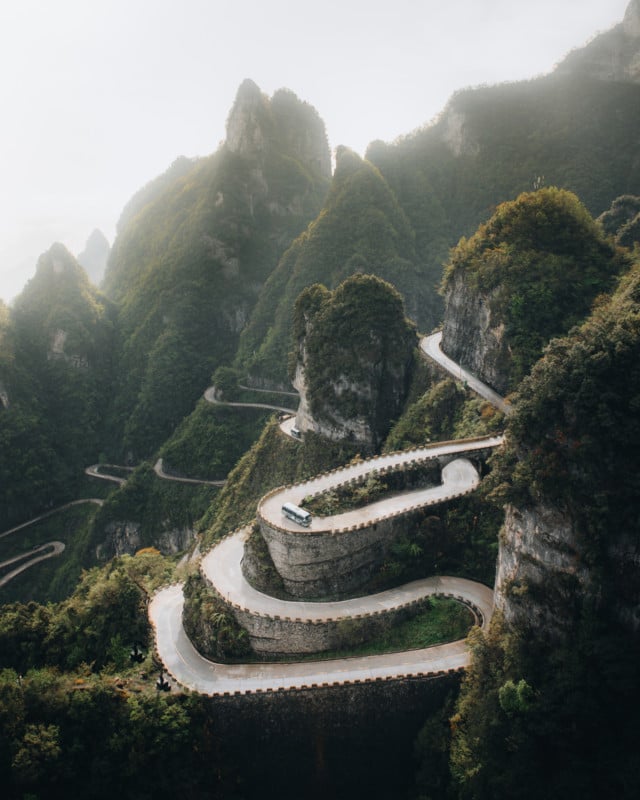
Stackpoole says that when he is looking for composition options, he often searches for objects such as winding roads, a small cabin, an animal, or even people. Whatever the subject, how a photographer frames the photo is key.
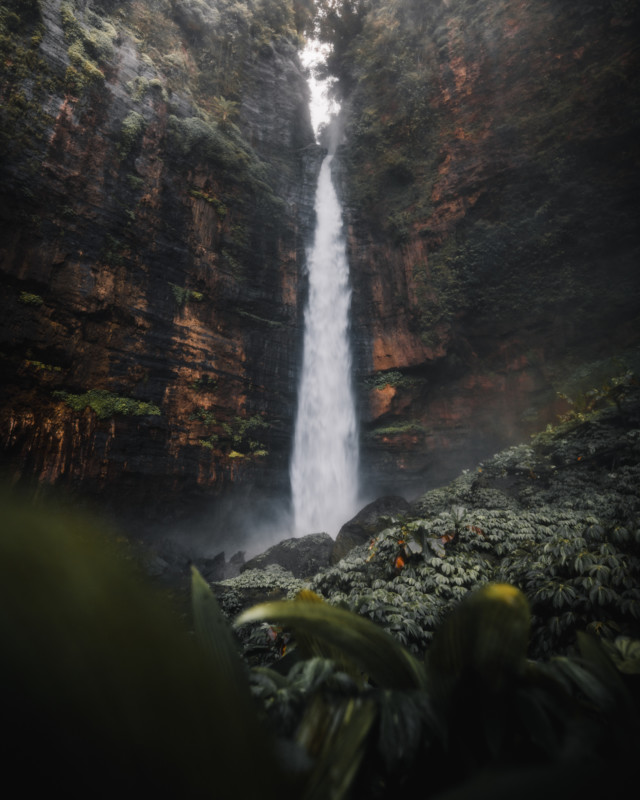
“I like to make use of foreground elements such as grass or flowers, which I usually capture from a lower angle. These foreground objects come in handy when using the rule of thirds, as you can lead the viewer from the front of the image to the back. You can either have these foreground objects in focus or allow the soft bokeh of an out-of-focus object to lead a viewer’s eye through the frame,” he concludes.
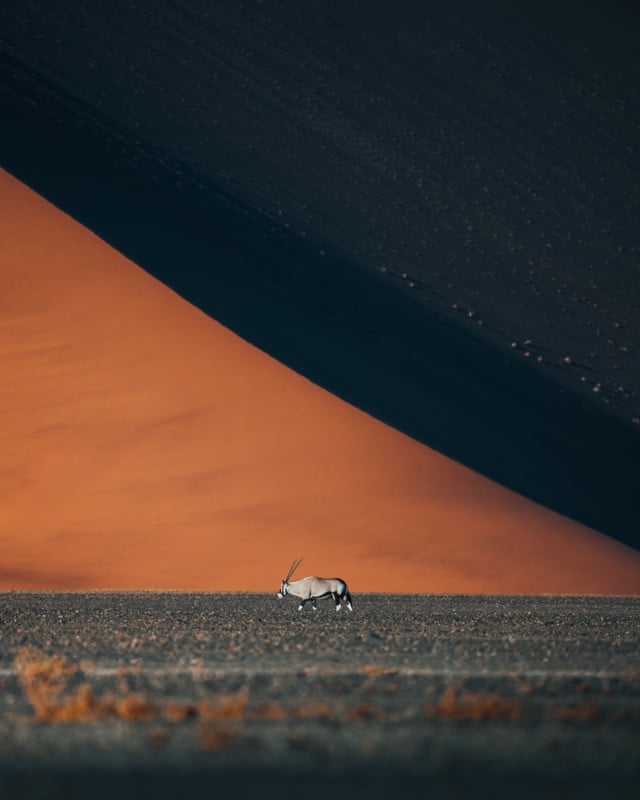
Include a Sense of Scale
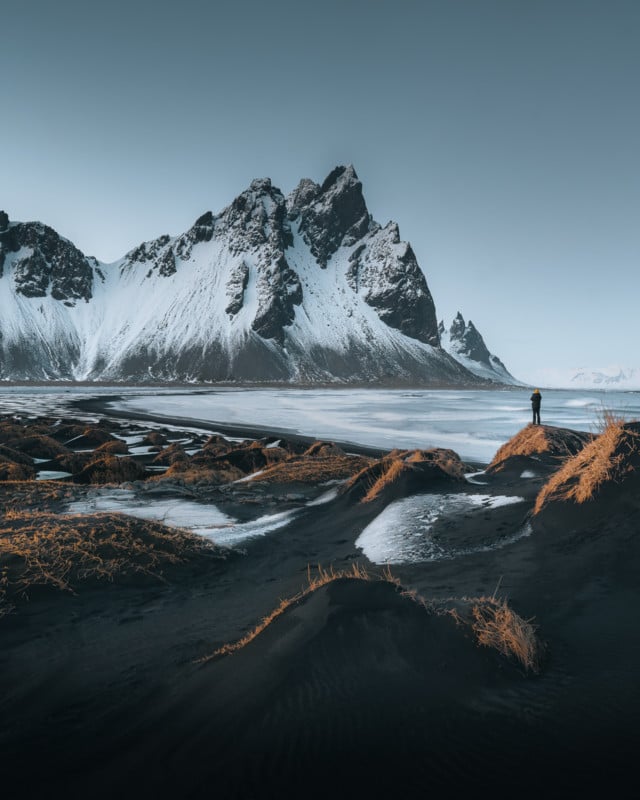
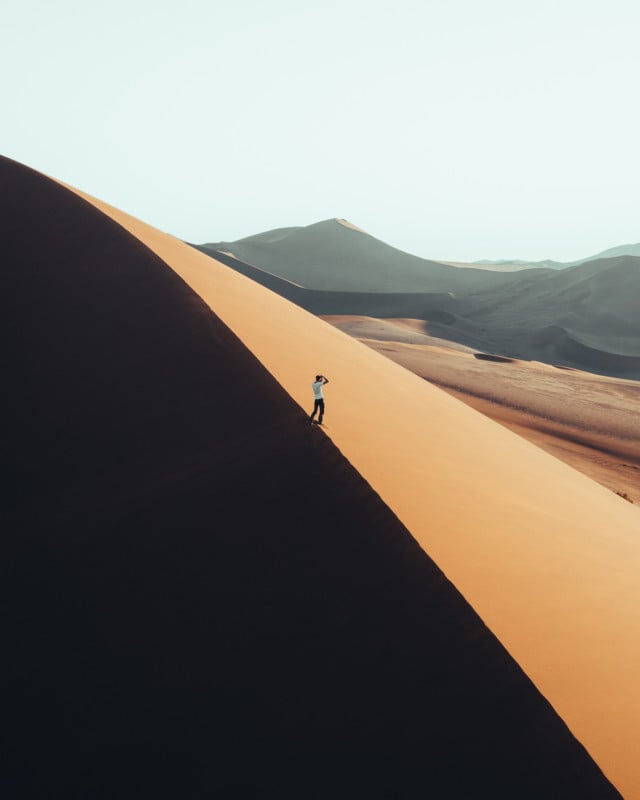
To add even more dramatic effect to a scene, Stackpoole recommends adding a sense of scale. Usually, this works with using a telephoto lens, which will add compression to the background. No matter the lens, however, adding a person or another object to show the scale of the scene is helpful.
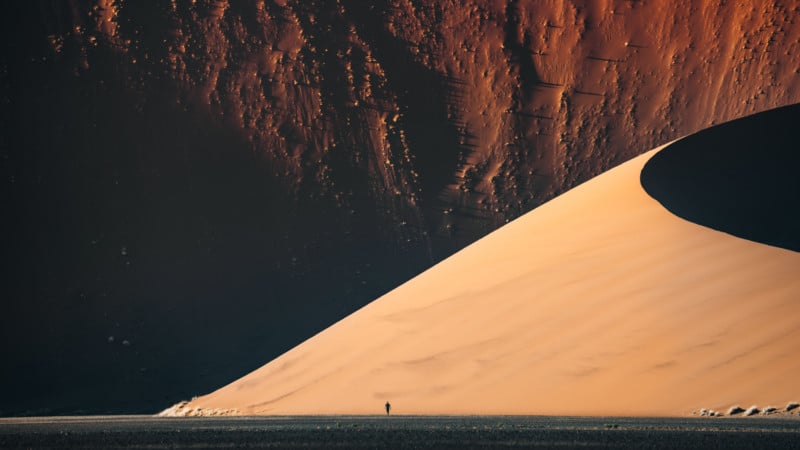
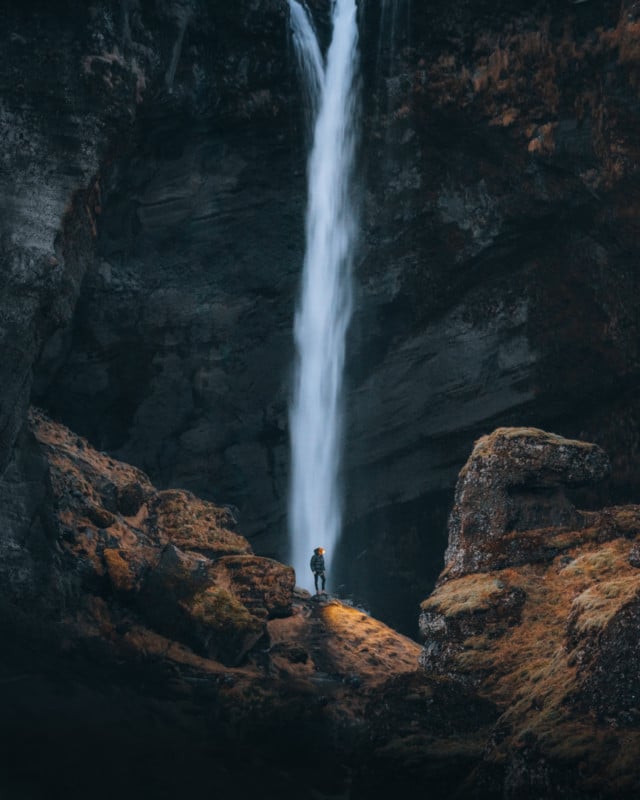
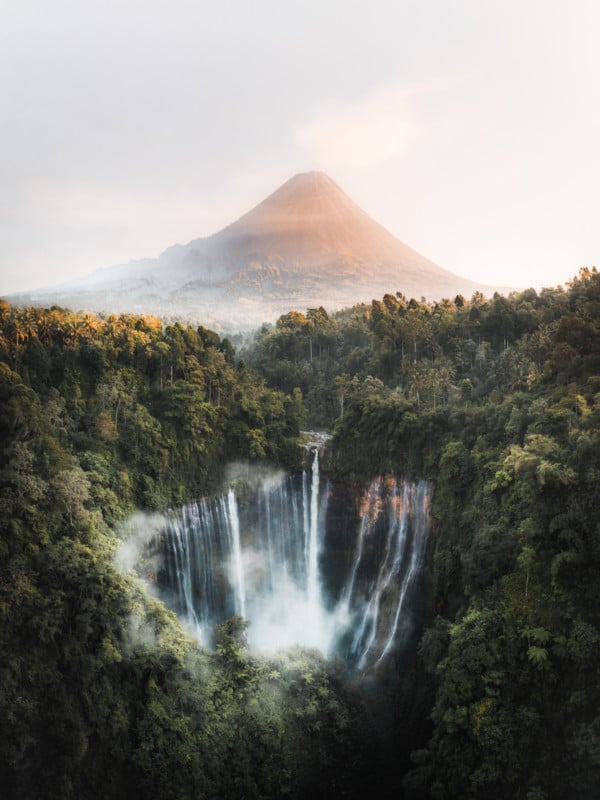
“Having someone stand in the frame in front of a waterfall or on a sand dune allows the viewer to feel like they are there, and can also show how big the landscape and its features look in comparison to the person,” Stackpoole explains.
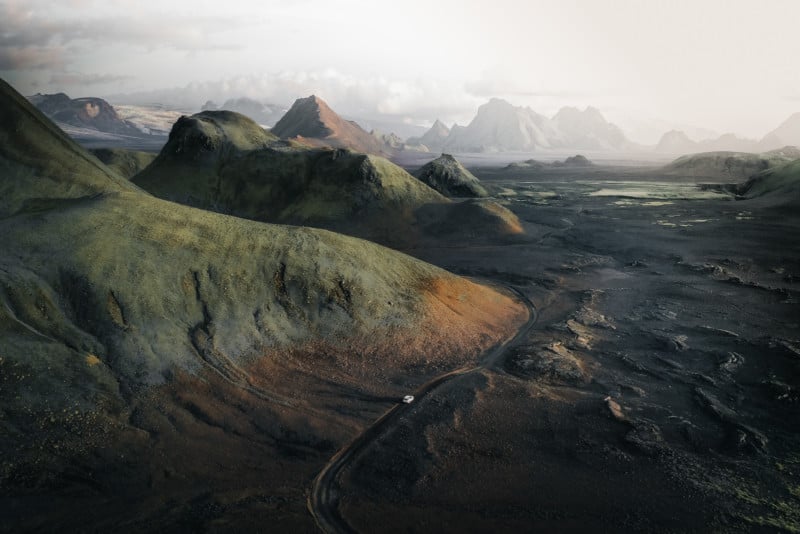
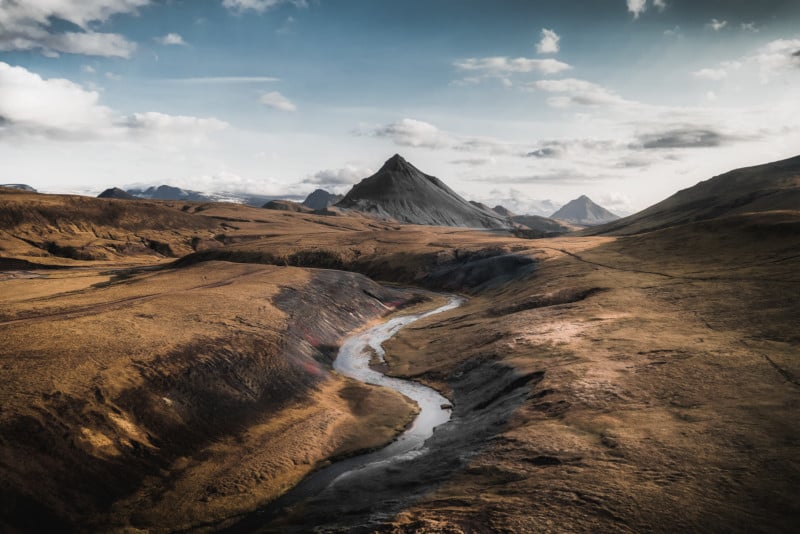
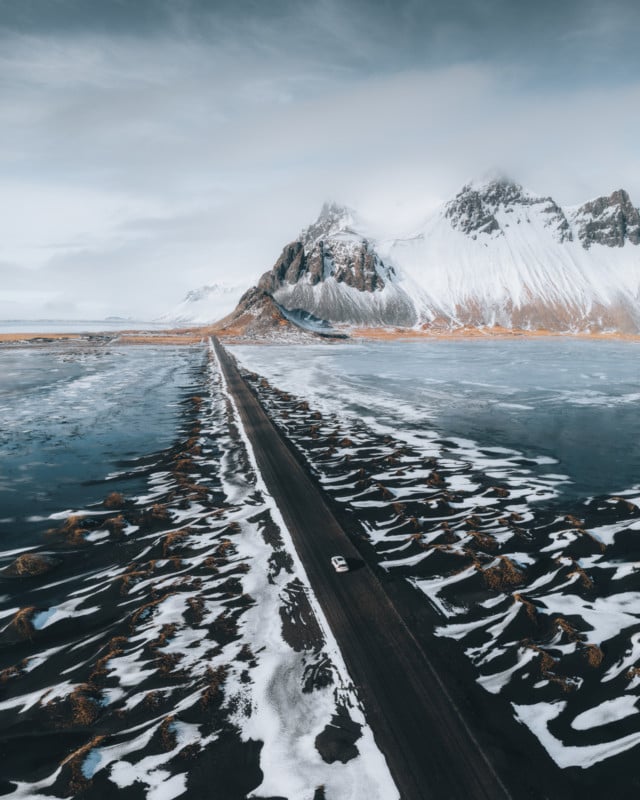
“Another way I like to show the scale of a location is by including a vehicle, especially with a drone photograph,” he says. “I found this helpful in the Icelandic Highlands, as the vehicle helped show just how massive the landscape is, while also telling a story of adventure.”
How to Edit Landscape Images to Make Dramatic Final Photos
Using a Base Preset in Adobe Lightroom
Once Stackpoole returns from a photography trip, he immediately imports all of his photos into Lightroom and begins editing. He recommends always capturing photographs in RAW, as that will yield the best results in the editing process.
“One of the first things I do when I find a photo I want to edit is to cycle through my personal custom-built presets to look for something that stands out to me and is fitting for the scenario,” Stackpoole says.
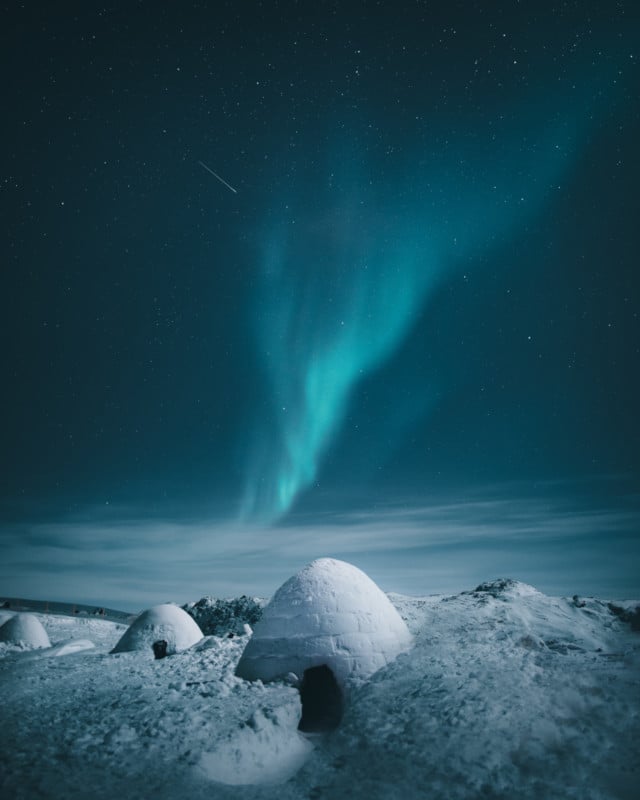
“For example, I created my own presets for the dramatic blues of Greenland, the earthy tones of a forest, or to bring out the stars in my astrophotography. That’s one of the things that I love most about Lightroom. I can create unlimited presets that I can then use for any future photos that I capture. In addition to the presets that I create myself, Adobe has a large number of Premium Presets that were created by some of their Lightroom Ambassadors as well as other talented photographers. The Premium Preset collection includes some really great ones, so there are always a lot of different styles to choose from when selecting a base layer.
“Before I apply a preset base layer, I always adjust the white balance to fit the creative vision I have in mind for the scene. I then hover my mouse over the presets listed in the preset panel and quickly scroll through these to see which fits best,” he continues.
“Rarely, I don’t start with a preset because sometimes none of them fit with the image,” Stackpoole says. “For instance, with my photos from Greenland, I didn’t have any presets that worked with the icy blue tones, so I simply edited an image and saved those edits as a preset, and I was able to quickly sync that preset to every image in my Greenland folder so I had a base layer to start with, which made my editing process much easier.”
Working with Global Edits
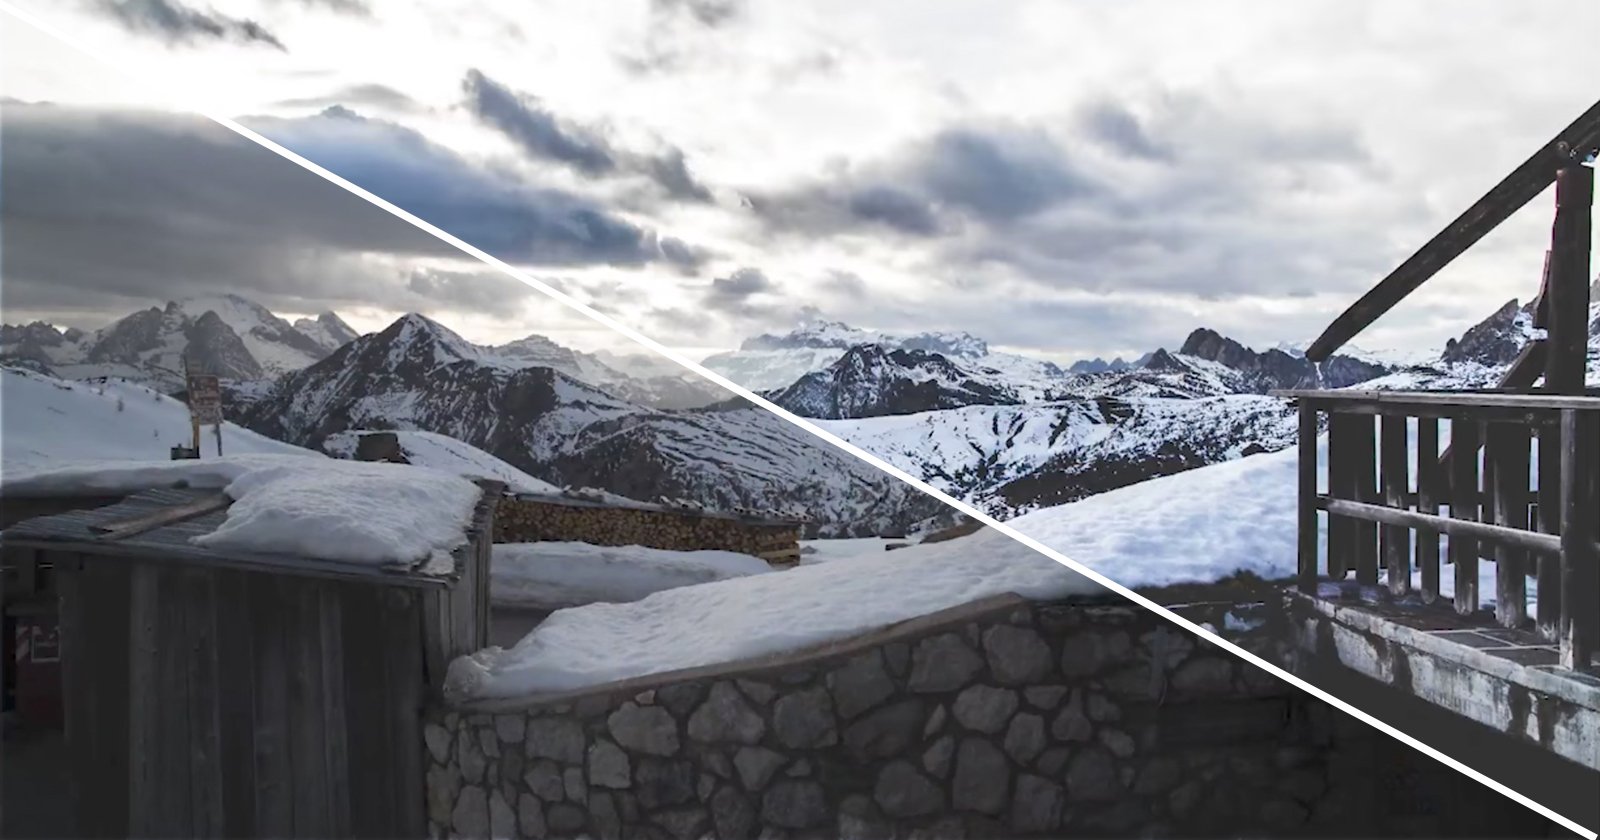
Applying a preset as a base layer helps Stackpoole get his editing started, but it’s far from the end. Making fine adjustments using Lightroom’s editing tools helps him get the dreamlike results for his landscape photographs.
“Since RAW files are usually pretty flat, I usually add some vibrance to give the scene a bit more color,” Stackpoole explains. “I then slightly increase contrast, but at the same time, I reduce clarity a touch. This is a key step as it helps to give the image an almost “painting-like” feel to it, which is achieved through this clarity change.
He continues, “I then will reduce the blacks a touch with the tone curve, giving a nice dreamy fade. Lastly, I’ll add some color grading, often blue hues and a touch of vignette if the image needs it. These small adjustments can turn a rather normal image into a dreamlike landscape without much work.”
Using the Healing Tool and Spot Removal
Many photographers only use the healing tool built into Lightroom to clean up dust spots that may appear on their photos thanks to a dirty lens or sensor. Stackpoole, however, will use this powerful tool to make the subjects stand out more.
“For me, using the healing tool is key to making sure the image is clean and without distractions. I find myself using the keyboard shortcut ‘H’ to enter the healing tool on Lightroom Desktop on a good amount of the photos that I edit. I will often remove unwanted distractions such as twigs, unkempt fur on wildlife, people, and even cars. Years ago, I would need Adobe Photoshop to remove these objects from my photos,” he says.
“Now, the AI built into the Lightroom healing tool is so powerful, that most objects can be cleaned up or even eliminated by simply zooming in on the image and carefully ‘healing’ the distraction out.”
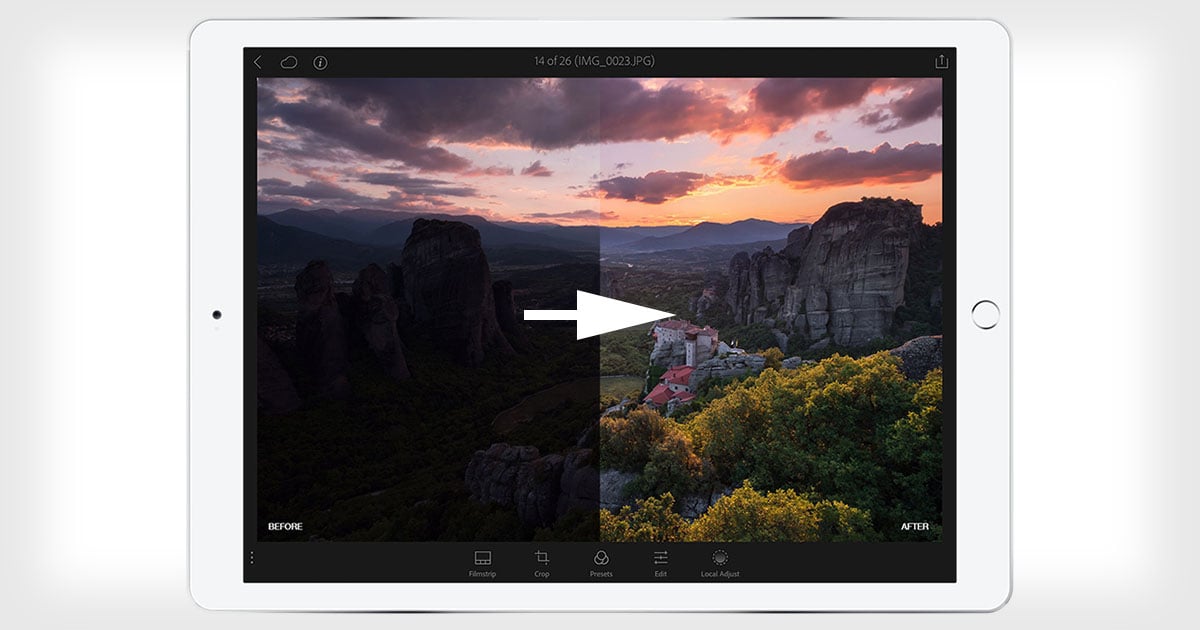
Working with Masks
As opposed to using the sliders on the Develop menu to make global changes to the image, the masking tools in Lightroom let photographers make detailed edits on a specific area of the photo. Whether it’s changing the brightness of a sky or softening the skin of a person’s face, masking is a critical tool for all photographers to learn.
During Adobe MAX in 2021, photographers were ecstatic with the additions of AI to the masking tools. With the update, photographers can simply tell Lightroom to select the entire sky or identify the subject of the photo automatically. Not only did this helpful addition eliminate errors where the masking brush might paint over an edge on the horizon, but it also saved photographers countless minutes of manual work.
“I think masking is really where Lightroom can transform an image for me, giving it that dreamlike atmosphere,” Stackpoole says.
“Adobe has given us tons of options with the new tools available, including sky selection. This is such an incredible advantage for me since I tend to darken the skies in most images to give them a moody, atmospheric feeling. With the new sky selection tool, I no longer have to manually brush in my mask layer. Lightroom automatically selects the sky in mere seconds, and most importantly, with no errors. The mask is always perfect. After I have my sky mask edited, I can then add some directional lighting with the graduated filter, which helps add to the dreamlike effect.”
“I might then bring up the brush tool by using the keyboard shortcut ‘B’ on Lightroom Desktop to finish an image off with some dodge and burn,” he says. “This involves brushing on the highlight and shadow areas of my photo to help me emphasize the contrast in these regions. For me, all of the masking adjustments that I make are the secret to the dreamlike look that my photos have. While they may be small and unnoticeable on their own, the adjustments can have a profound effect on the way a viewer’s mind processes the story behind the image.”
Stackpoole says that above all, he hopes his dreamlike landscape photographs leave his viewers wanting more. “I hope that when a person sees a photo of mine that they like, that it leaves them inspired to not only visit the locations that I photograph but also to share their travel stories through their photographs as well.”
With only four years of photography experience under his belt, Stackpoole has already made a name for himself in the industry. With an impressive client list consisting of companies like Adobe, American Express, Aston Martin, Camelbak, Pangaia, Talisker, and The North Face, he stays busy with commercial photoshoots.
But with almost every free moment available, Stackpoole is planning for the next adventure.
“For me, nothing is more enjoyable than the process of planning a landscape photography trip. I love the thrill of the chase, always trying to capture that perfect moment where everything comes together,” he says.
“I am addicted to that moment of euphoria when I finish an edit in Lightroom and I know that one image made all of the hard work worth it. I don’t think I will ever get tired of that feeling.”
More from Luke Stackpoole can be found on his website, YouTube, and Instagram.
Full disclosure: This article was brought to you by Adobe
Image credits: All photos by Luke Stackpoole.