Why I’m Sticking with Lightroom Classic… for Now

Ever since Adobe announced that Lightroom would become “Lightroom Classic”, the writing has been in the wall. Lightroom as I know it will someday become a technological dinosaur. If Adobe gets their way, the replacement—confusingly known as Lightroom (non-Classic)—is the way of the future.
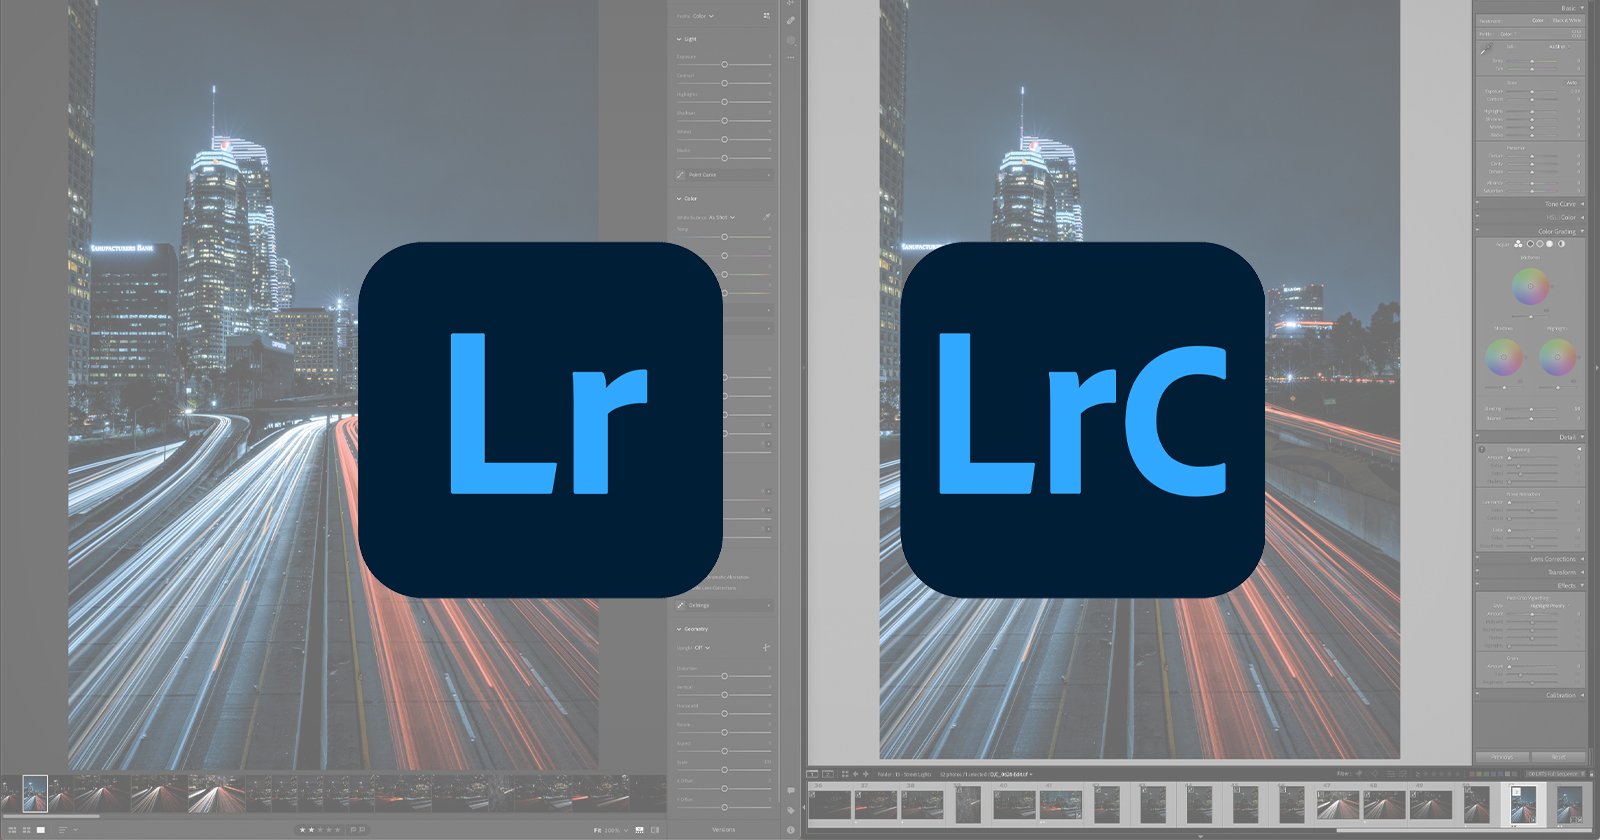
Adobe’s priority is clear in the naming of the products. As of 2017, “Lightroom” refers to the cloud-based version. “Lightroom Classic” is the term used for the older software. To avoid confusion in this article, I’ll refer to Lightroom Classic (the old version) as “Classic”. I’ll refer to the new cloud-based Lightroom as “CC” for “Creative Cloud”.
When CC came out, I opened the program and poked around a bit. But it was such a different interface and I couldn’t really see the point. I had photos to process, so I closed CC and went back to work in Classic.
A few months ago, I completed a survey for Adobe and was very dismissive of CC.
Maybe I haven’t given CC a fair shake.
In this article, I’ll give you my impressions as I revisited CC with a view to switching from Classic.
I went into this project with an open mind. Maybe all those things that drive me nuts in Classic have been fixed in CC. Maybe I’ll have new post-processing tools to play with. Maybe I’ve been missing out and my editing will take half the time in CC!
General Background
Since I seem to get Adobe upgrades every few weeks, let me take a moment to document which versions of Classic and CC I’m working on. I’m up to date with CC version 3.1 and Classic 9.1.
I do most of my image post-processing in Classic with a round trip or two to Photoshop (version 21.0.2) for some content-aware fill and the occasional overlay or composite.
I subscribe to the yearly Photography Plan from Adobe which comes with 20GB of cloud storage. I’ve been using this storage to share albums through Lightroom Web – which is different from both Classic and CC. I discovered Lightroom Web by accident. This third version of Lightroom can be accessed at https://lightroom.adobe.com/.
I do a lot of traveling and my internet access can be slow and at times non-existent. I simulated travel conditions by periodically putting my computer in airplane mode. I get a lot of post-processing done on airplanes, so this was a good test.
In CC, I tried to replicate as closely as possible the post-processing workflow I’ve developed in Classic. But I was also on the lookout for new and interesting features in CC that might make my workflow more efficient.
Getting Started in CC
When I opened CC for the first time, I was surprised to find some of my photos were already in the program. Apparently, my Classic has been talking to CC for a while now. Some of the images are from albums I’ve shared through Lightroom Web. But most of the photos I don’t remember syncing to CC.
My new iPhone also seems to talk to CC. I’m not sure how I arranged that, but photos from my phone are synced to CC.
Since I already had photos to work with, I started with a bit of editing in CC.
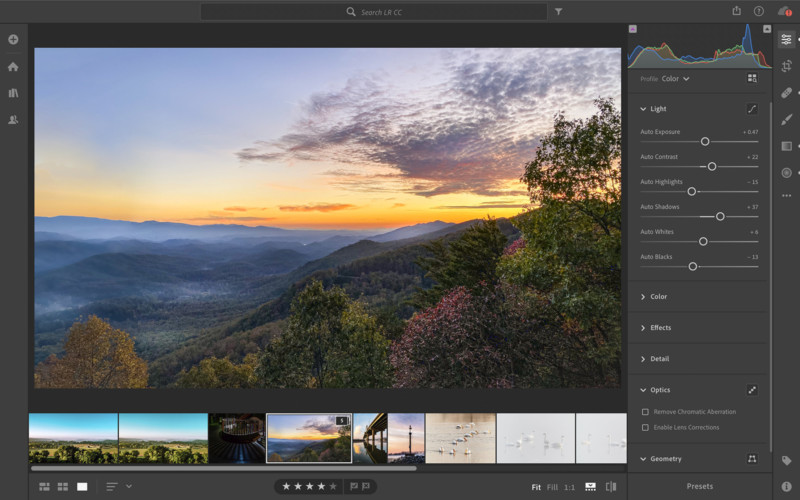
Editing in Lightroom CC
The CC photo editing interface is a bit different from what I’m used to in Classic, but I found most of the tools I frequently use. Adobe has changed the look of some of the tools or relocated or renamed them. For instance, the term “Optics” replaces “Lens Correction and “Geometry” replaces “Transform”.
Tone Curve tool is located as a button in the Light panel, Split Toning is located under Effects, and Temperature is located under Color. It took me a bit of time to find these tools, but once I did, they worked as I expected.
All this I can get used to. In fact, if I’d learned to post-process on CC in the first place, I wouldn’t think twice about the layout.
As I played with a few photos, I did find some things that were different from Classic. Some I could get used to; others might be deal-breakers. Here are a few differences that I noted.
Tone Curve
In CC, I can’t adjust the tone curve by dragging on the histogram. In Classic, I can grab my shadows and move them left or right and quickly see the difference in the image.
Also, the tone curve (when I finally found it in CC) doesn’t have Medium and Strong options. I’ve only just discovered these options recently so maybe they are new to Classic. In the past, I would have to round trip into Photoshop and apply a blend mode to get the strong contrast I like. Now, I can get the same effect in Classic – but not in CC.
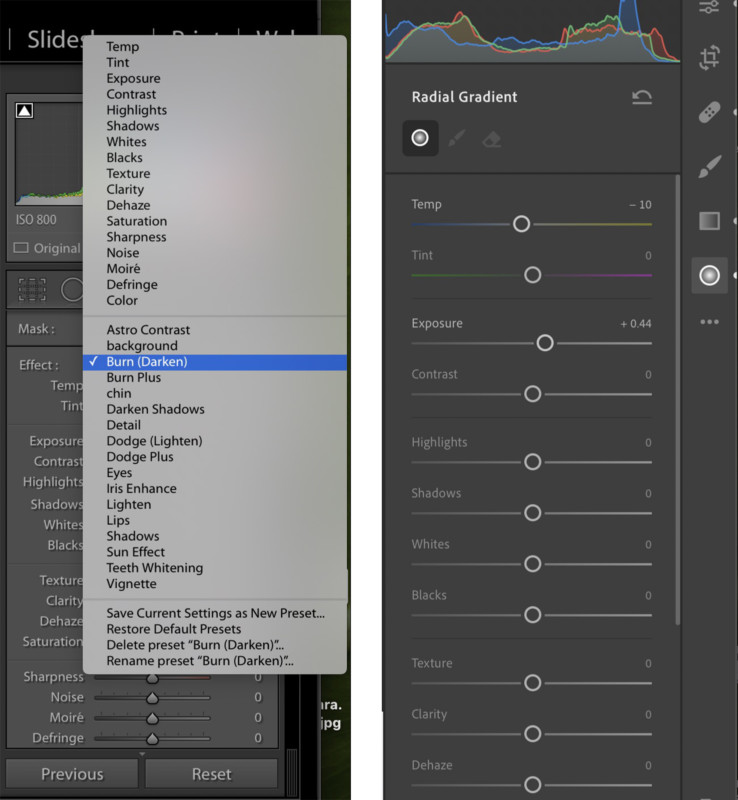
Adjustment Tools
The adjustment tools like Spot Removal and the Radial Filter (called Radial Gradient) seem to work in a similar fashion in the two programs. But the adjustment tools don’t include a list of presets.
I dodge and burn a lot and I really don’t want to tweak every slider each time I want to make a change. In Classic, I can create my own adjustment tool presets.
Not quite a deal breaker, but close.
The healing/clone tool functioned similarly to that in Classic. I was hoping for an upgrade on this tool. I used the healing brush for small changes, but I still had to round trip from CC to Photoshop for the more powerful content-aware fill.
Hotkeys
Some of my hotkeys don’t function as they do in Classic. The use of alternate hotkeys is fine. I can relearn key combinations. But some of the hotkeys are simply missing.
For instance, I toggle back and forth between color and black and white using the V key a lot in Classic, which I can’t do in CC. Also, the Create Virtual Copy hot key (command-‘) doesn’t work in CC. I can right click on an image and make a duplicate, but it’s not the same thing.
While we’re talking about virtual copies, I can’t easily see which file is the original and which is the copy. In Classic, the virtual copy is tagged.
Photoshop Round-tripping
When round-tripping into Photoshop from Classic, I’m given a few options. Most of the time, I choose to “Edit a Copy with Lightroom Adjustments”, but sometimes I want to edit the original. I don’t seem to get this option when roundtripping a file from CC.
I also have to close down the file each time I want an image to appear in CC. With Classic, saving the image does the trick. I often edit many files at once and don’t want to be closing and re-opening files in Photoshop all the time.
Conclusion
In general, the editing tools in CC created a similar product to Classic. But I found myself having to click a lot more in CC to get the same job done.

Above, I listed some tools that seemed less convenient in CC and some tools are simply missing from CC. But sadly, I didn’t find any cool new tools to play with.
Most of the differences between Classic and CC are minor and there are probably work arounds. But I’m a bit ADD when it comes to technology. If I can’t learn a program quickly, it’s not going to happen. And I already have a work around – I can edit in Classic.
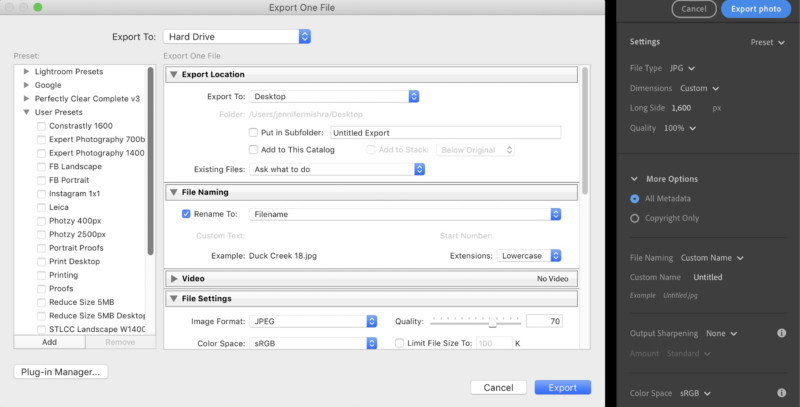
Exporting & Printing
After I finish editing an image, I usually want to share it to Instagram or Facebook or another site like Flickr. I export to jpg and I usually put my signature on the image.
My export options in CC are severely limited.
In CC, my export size options are “small”, “full size” and “custom”. But for custom, I only have the option of setting the long size. I’m also not able to set the export file size in CC, a feature I use a lot in Classic.
I can’t create export presets in CC. I export for lots of different publications and social media platforms. I don’t want to remember the optimal specifications for each.
I also like to rename exported files. Often, I tack on a description so I know immediately what the file is. For instance, I’ll add the word “web” to the title if I export a file sized appropriately for online viewing. I can do this in CC, but for individual exports – not automatically as part of a preset.
Most importantly, I don’t seem to be able to watermark my images when exporting in CC. This is a real problem. Maybe the option is located in a preference somewhere and I just haven’t found it yet.
Finally, the entire Print module is missing from CC. I frequently print from Classic using exposure and sharpening presets, so I’d really miss this.
Conclusion
Exporting from CC is much simpler, but that means giving up customizability. If I can’t figure out how add a watermark, this is a deal breaker.
Importing & Accessing Files
To get new photos into CC, I tried two things:
- Accessing the thousands of images I have stored on external hard drives
- Importing new files from my camera’s SD card
The process of importing files into CC is easy. Select ADD ITEMS (plus sign in upper left corner) and then the source. In the case of my previously stored files, I selected an external hard drive. In the case of new files, I selected the SD card.
But I quickly encountered a problem.
I have nearly 200GB in files from just the month of December – well beyond my current 20GB storage limit. Not all these files are important. I’ve already rated these files in Classic and I really only want the 3-star files (my “keepers”). But I can’t see the ratings until after I import the files. I simply don’t have enough cloud storage space in CC.
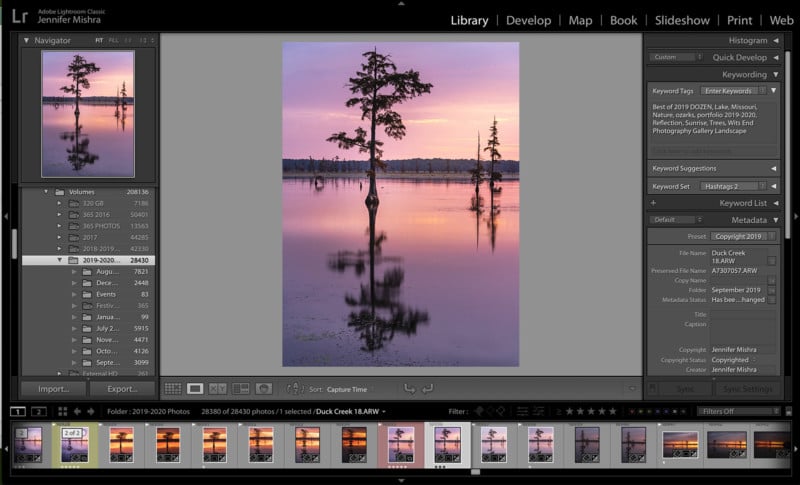
In Classic, I can see all my files along with ratings and metadata, even if the external hard drives aren’t plugged into the computer. I can edit files on the road by creating Smart Previews. My current system would need to change substantially if I switched to CC.
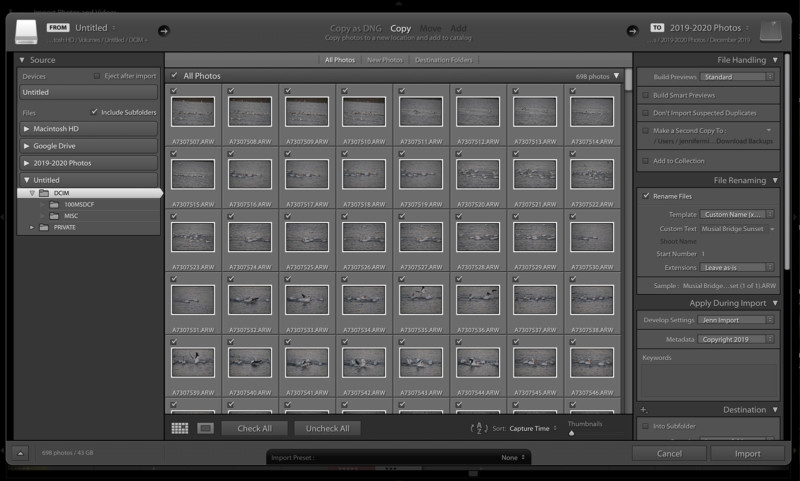
I also imported files directly from an SD card to CC. The SD card contained about 700 files from a recent trip to a local wildlife area where I photographed migrating birds.
I had enough storage space left to import about ½ of the photos on my SD card. Just because Sony lets me shoot 10 frames per second doesn’t mean Adobe is happy about it.
The first thing I noticed was that CC doesn’t have import presets. I don’t have the option to apply edits or my copyright information. Nor can I change the title of the images or add global keywords.
There must be a way to fix these issues. I’ll add them to my growing list.
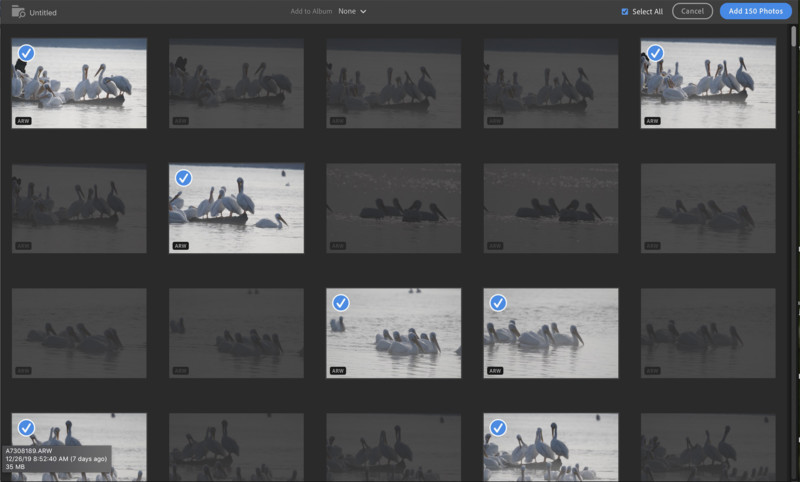
I imported all the images I could and went through my regular culling workflow in CC.
I clicked through and flagged or rejected images (using the Z for “Pick” rather than P – a hot key change that would take me some time to get used to).
Then my current workflow hit a brick wall.
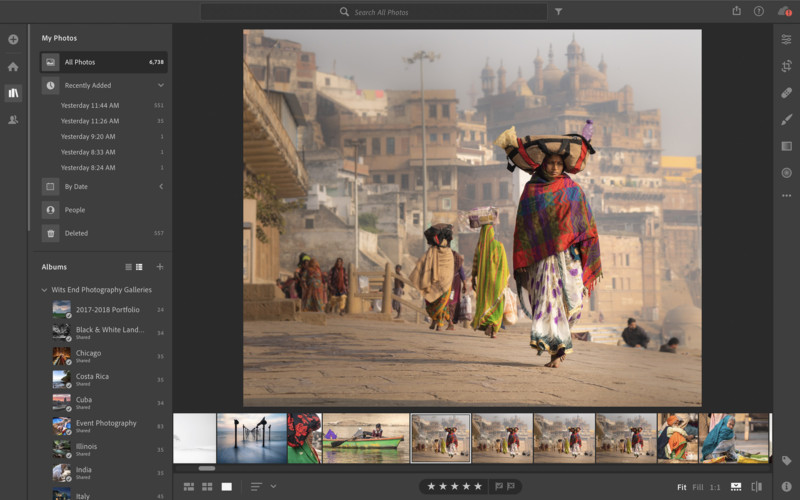
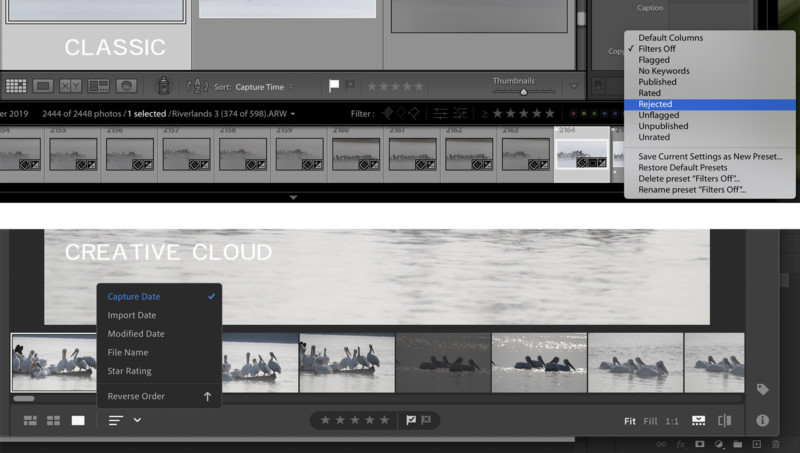
My next step would be to select all the flagged images and add a star to the ones that I want to see again. This is easy in Classic. I click one button (the flag) in the default filters just above the filmstrip. Only flagged images appear and all other images are hidden. In CC, all I seem able to do is sort by rating. This really didn’t work for me. I could never seem to find the files I wanted to look at again.
In Classic, I can also create Filter presets that allow me to find photos with certain attributes quickly. Not an option in CC.
Most alarmingly, color labels are missing in CC. This is a big problem for me. I use color labels a lot. For instance, I use a color-coding system to remind me on which social media platform I’ve posted the image. I have a preset that allows me to find images that are finished but have not yet been published. This preset looks for a unique combination of star ratings and color coding.
Also, at the end of my culling, I usually select all rejected photos and delete them (there’s a hot key for this in Classic). I can’t quite figure out how to do this in CC. I’ll let you know if I figure it out.
During my import and culling, I noticed a problem with keywords. Specifically, the Keyword List is missing.
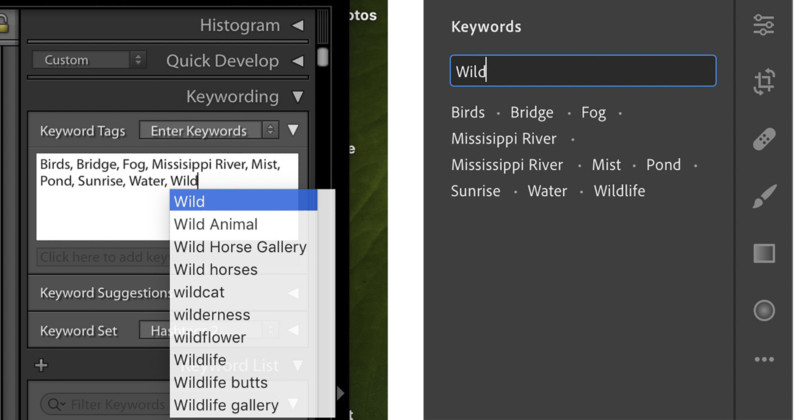
In Classic, I’ve painstakingly crafted a long Keyword List. Many keywords contain synonyms. When I start typing a keyword, I’m presented with a short list that I can choose from. There’s nothing like this on the keyword screen in CC. It looks like the photos I’ve keyworded in Classic transfer over to CC. For new files, I have to type in all keywords in full.
I also don’t seem to be able to apply a list of key words to multiple photos. As if I don’t hate keywording enough!
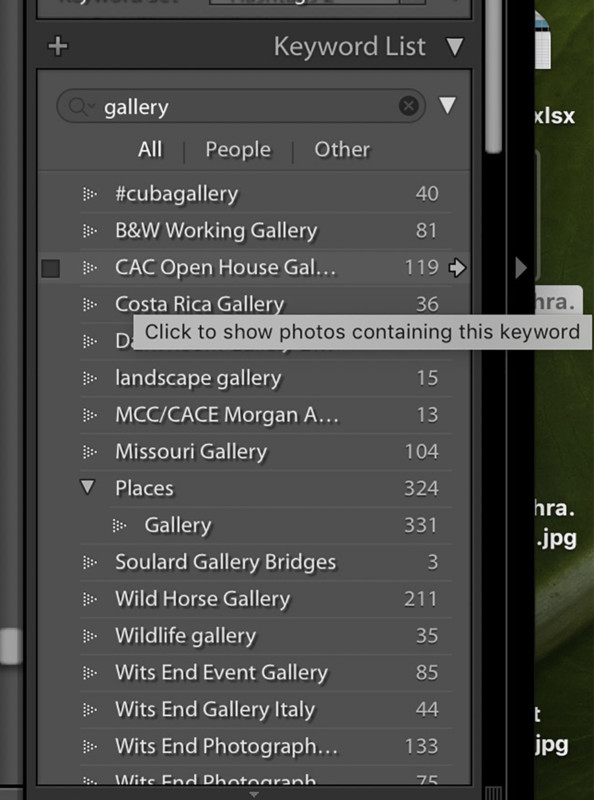
Finally, I can’t select photos by keyword in CC. I often use keywords to organize content in Classic. Clicking the arrow button next to each entry on my Keyword List brings up all photos with that keyword. I use this process because the images load faster than if I create a collection. This option seems to be gone in CC.
Conclusion
The import and culling process was a bit rocky in CC. The simplicity of keywording in CC is a deal breaker.
I also had a problem with storage. It looks like the 20GB of storage included in my Photography Phan tops out around 7,000 photos. Let me see how difficult it would be to get more cloud storage.
Storage Space in Creative Cloud Plans
In my current system, I keep my Lightroom catalog on my computer’s hard drive and my image files on external hard drives (with back-ups, of course).
My Adobe Photography Plan comes with 20GB of cloud storage, but this isn’t enough for me. In an average year, I need about 3TB of storage. Granted, I tend not to delete heavily so I could probably cut this down. But I do a lot of Photoshop processing. An image edited in Photoshop can be 1- to 2GB. So, my current 20GB plan isn’t going to get me far.
I took a look at the Creative Cloud plans to see what my options were. 5TB looked like the plan for me. I checked the price. Then I double checked the price.
The price is 10 times what I pay now to Adobe.
10 times.
Did I mention 10 times?
Am I doing the math correctly?
Even subtracting the amount I pay for the external hard drives I use to store my images, I would be paying a lot more for CC.
They say, “storage is cheap”, but apparently not at Adobe.
To use CC, I’d need to be much more ruthless about the images I keep. I would need to merge layers and compress files in Photoshop before adding them to CC. The problem is that I often revisit Photoshop images and want to be able to edit the original layers. That means keeping the uncompressed files.
The max storage offered by Adobe is 10TB. At my current image-making pace, that’s only about 3 to 4 years of photos.
At this time, the 10TB plan is nearly $2000 per year.
I can’t quite wrap my head around this number. It’s so much more than I’m paying for the Photography Plan.
And what if something happens and I can’t pay for all of this storage one year? Do I lose my photos as well as my Lightroom edits? If I understand the system correctly, I’m locked into $2000 per year for life.
The thought fills me with icy dread.
Final Thoughts
I took Lightroom Creative Cloud out for a spin and overall I’m left appreciating what I have in Lightroom Classic.
Can I use CC? Of course. This tool works fine.
CC has the cool-factor. The interface is at times more colorful and on the surface, friendlier. I was worried about the online nature of CC, but this proved not to be a problem. The program seemed to work fine in airplane mode.
If I switched to CC, there would be some things I’d need to get used to or learn to live without, but I could probably do it.
The problem is that I’m just not motivated to do it. Adobe seems to be asking me to give up post-processing tools and to substantially change my workflow. They’ve limited the customizability of Lightroom and have opted for a sleeker, one-size-fits-all interface.
There just don’t seem to be any features in CC that are worth it for me.
There’s nothing particularly wrong with CC and I’ll continue to use the sharing albums feature of Lightroom Web. But I simply can’t see the draw of switching to CC.
The biggest stumbling block is the price of cloud storage. As I understand it, I’d be locked into paying almost 20 times what I’m paying for now for a tool that works less well than the tool I’m currently using.
I must be missing something. If you really love CC, let me in on the secret.
I’m ok with my current Classic workflow and I see no reason to change it. If Adobe figures out a way to make CC more useful for me in the long run and adds in some cool editing tools, then I might reconsider. But not with the current price tag.
For right now, I’ll continue to use Classic.
About the author: Jenn Mishra is a travel and landscape photographer based in St. Louis. She is a classical musician by training and author of the book iPractice: Technology in the 21st Century Practice Room. Her photos have been featured in a number of solo exhibitions. Her studio is Wits End Photography. You can see more of Jenn’s photos on her website or by visiting her Instagram @jennatwitsend. She photographs with the Sony system.