7 Lightroom Tips to Transform Your Winter Photos
The frigid winter months provide an exceptional opportunity to capture unique photos, but they aren’t the easiest to create due to extreme weather conditions and the many post-processing nuances related to snowy winter photography. In this 14-minute video, I review 7 Lightroom tips that have helped me along the way with my winter post-processing workflow.
1. Change Your Background
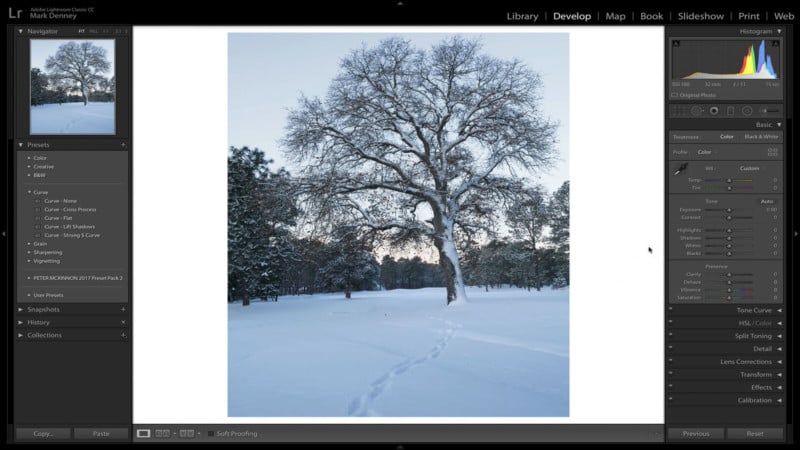
This tip actually has nothing to do with your image, but rather the canvas you’re working on. Right-clicking the background and changing the color to white creates a good reference point for absolute white and will certainly help you with the remainder of your edit.
2. Adjusting White Balance
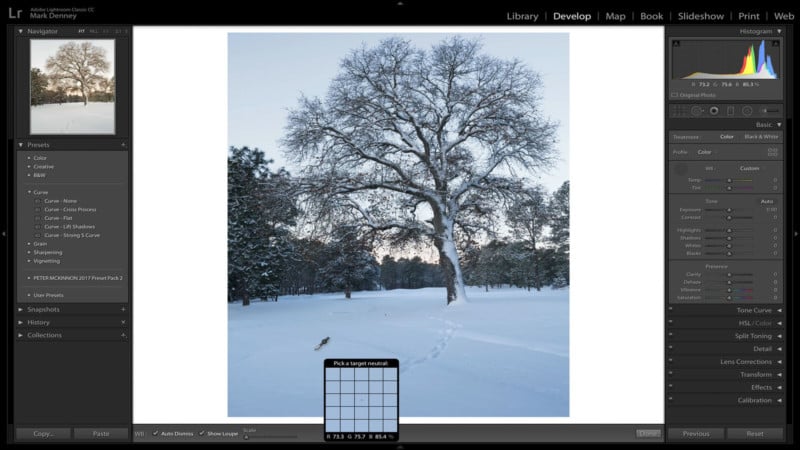
Adjusting the White Balance can be a tricky proposition due to the reflective nature of snow. If you use the eyedropper to target a neutral color (snow) this will almost always result in Lightroom over warming the photo. I’ve found that setting the white balance to Auto and then reducing the settings by half provides a good starting point to begin the rest of your edits.
3. Resolve Exposure Issues
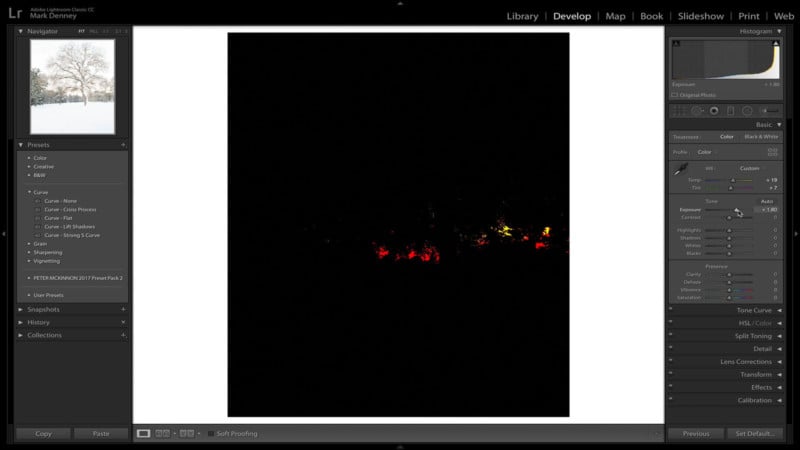
Many of my winter photos usually require a bit of positive exposure in Lightroom since most camera’s metering systems like to underexpose snow. I’ll usually hold down the Option key(Mac) and drag the exposure slider to the right until I see pixels beginning to bleed through. I do this to determine how far I can push the image from an exposure perspective and then I back it off until I find an exposure level that looks good.
4. Choose Your White and Black Point
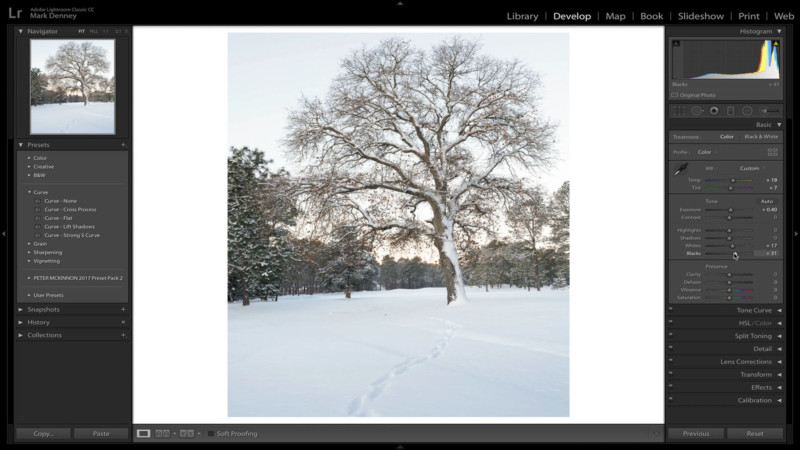
I often try to fill out the histogram by setting an absolute white and black point, but I approach winter photos in a slightly different manner. With a snowy scene I’ll pull up the white point as far as I can before clipping the highlights, but rather than bringing the black point down I’ll bring that up as well. I like the softening effect this creates in the photo – sometimes I’ll even dial in a bit of negative Clarity to exaggerate the ethereal look.
5. Add and Remove Contrast
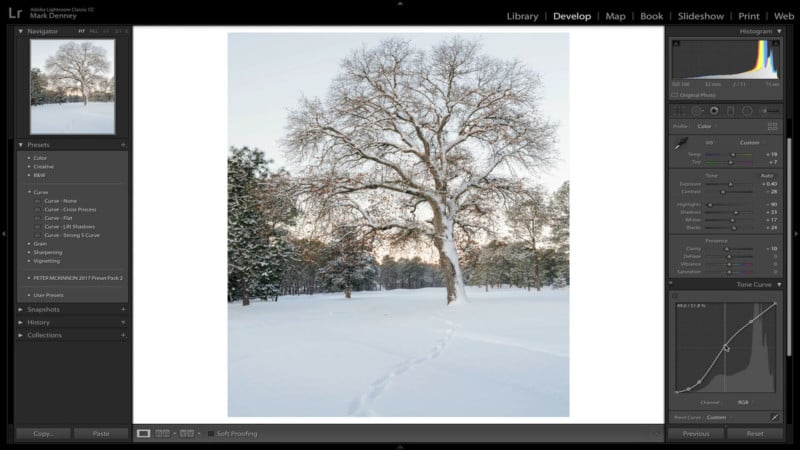
Next time you edit a winter image try removing global contrast using the contrast slider, then add contrast back in using the tone curve. I prefer this approach as it will typically result in a smoother less contrasty look, again creating a softer feeling image.
6. Get Creative With Colors
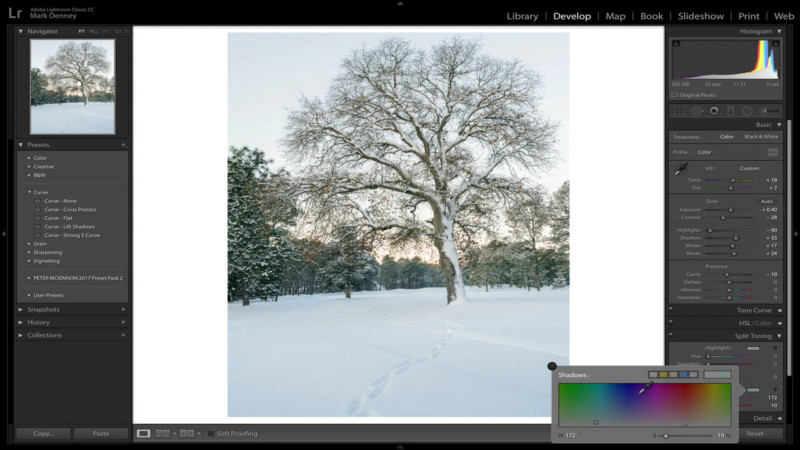
When I think of a creative edit I immediately think of colors. There are many different ways to get creative with colors within Lightroom, but I find that adding a subtle green or blue tone to the shadows using split toning produces a great look.
7. Walk Away
This should be the easiest step in the process, but it’s often the most difficult to accomplish. I recommend this with any image, but taking a break from your edit and allowing your eyes to reset is certainly time well spent. It becomes difficult to see minor changes that you’re making to an edit after you’ve been staring at it for a while, especially winter photos.
Winter is probably my overall favorite month for photography, but it certainly comes with a unique set of challenges during post-processing and while on location. The additional work is usually rewarded though with unique images that many folks wouldn’t dare venture out in the elements to capture.
P.S. If you enjoyed this video and article, you can find more by subscribing to my YouTube channel.
About the author: Mark Denney is a landscape photographer based in North Carolina. The opinions expressed in this article are solely those of the author. You can find more of his work on his website, Facebook, Twitter, and Instagram.