Composite Photo Breakdown: Mother Earth Always Wins
This composition started as a practice (practice and playing) like most of my composites. I think that’s the key of growing and good execution on art: do not think about doing things right but instead focus on having fun with creating.
Step by Step Breakdown
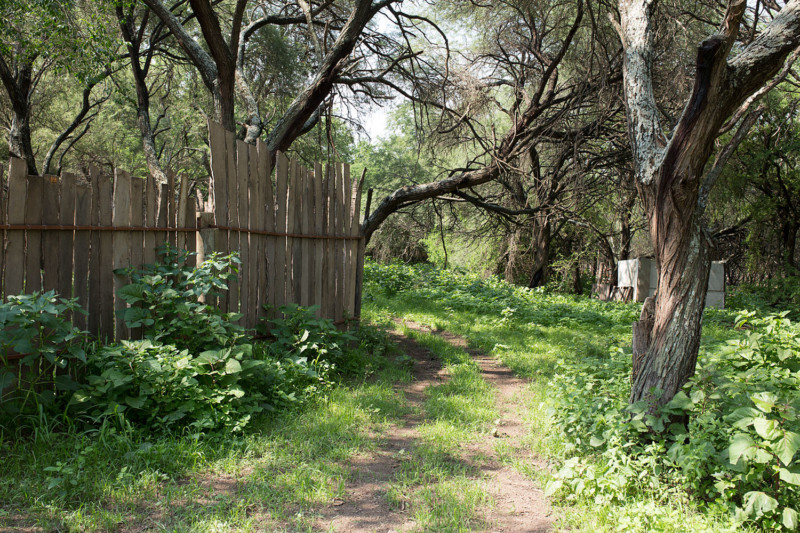
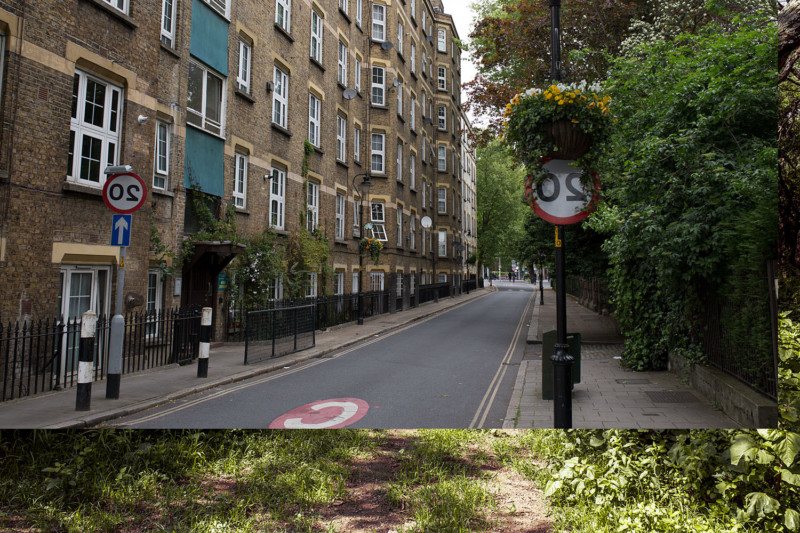
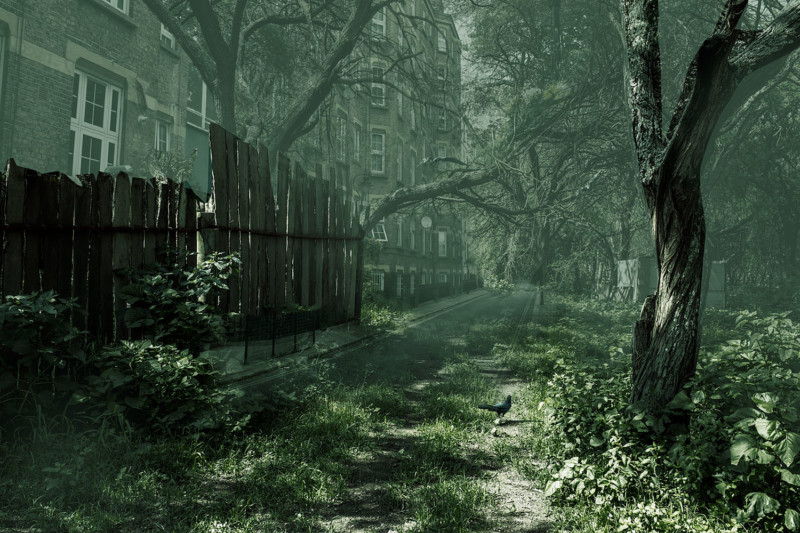
I wanted to create something with my own stock pictures that I’ve taken from my trips. The forest background was taken in Mexico and the main images were taken in London. I took these photos while recording a video for a friend, and now I have tons of awesome foliage pictures and backgrounds to use for my composites.
The best thing about having your own stock is that you can have the RAW files to adjust as needed. Another advantage is being able to pick the angle and distance of what you are working with.
I really don’t think about what I’m going to do with them when I take them, but I try to visualize something, and that helps to take several perspectives of objects and backgrounds.
I also take a lot of textures when I travel. What I like the most is taking pictures of the clouds when I’m on the plane as I use them a lot.
But let’s get into the composition…
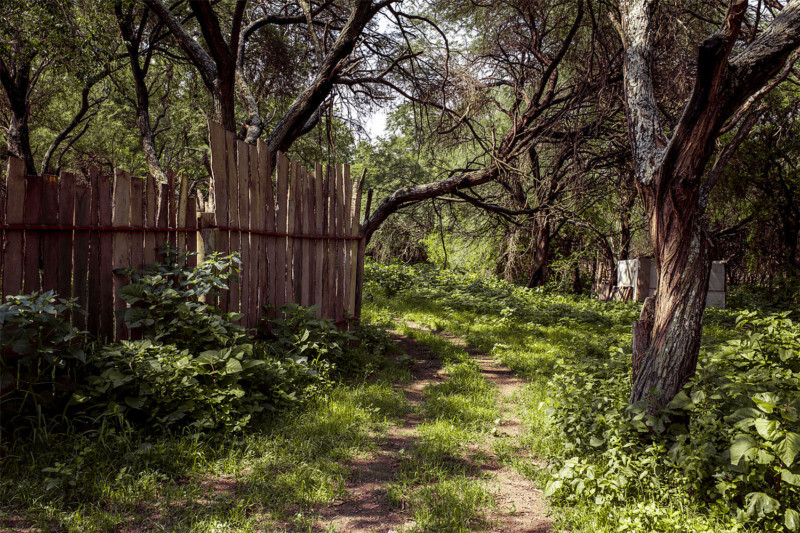
I started by playing with this background in Camera RAW. Here’s the straight out of camera shot:
After editing the RAW file:
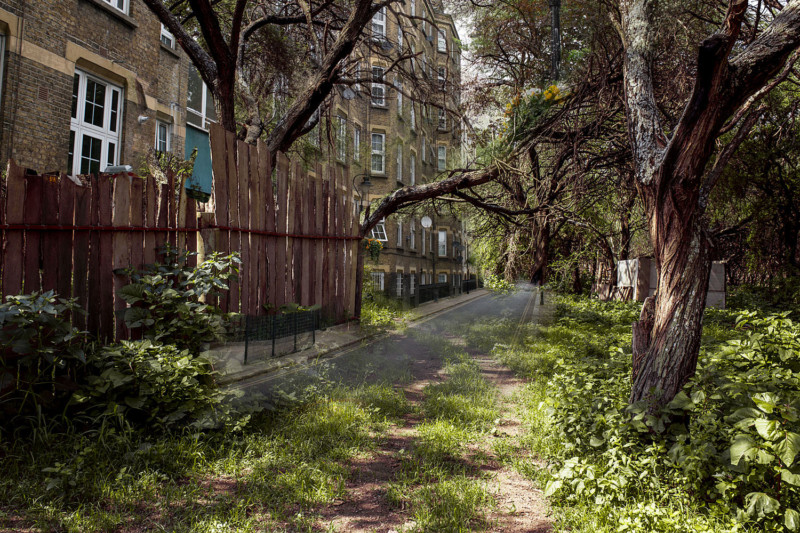
Then I added the London picture I took. The awesome thing is that perspectives matched so I didn’t have to distort the image.
Then I just masked the parts I wanted to be visible so I played with a soft brush and the Polygonal Lasso tool. This is the image with both backgrounds blended in together with masks.
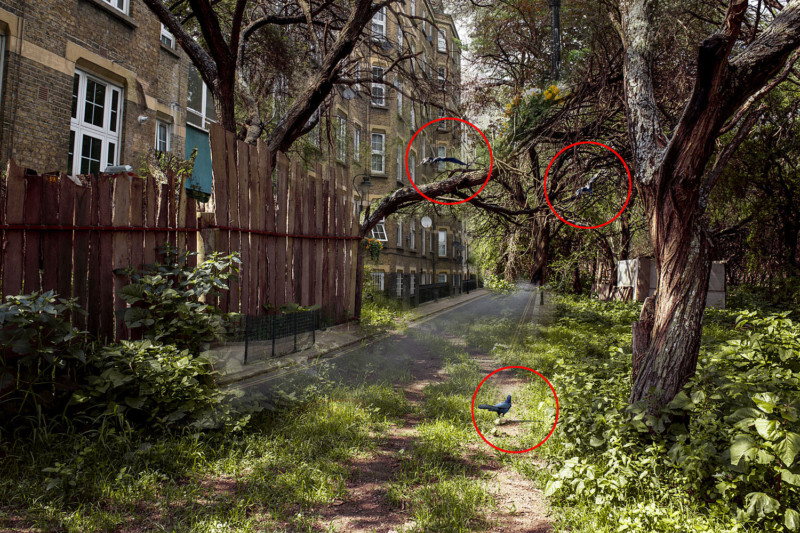
Then I added some birds to the comp to give it more life. Even though most people won’t notice, it’s the small details that really matter!
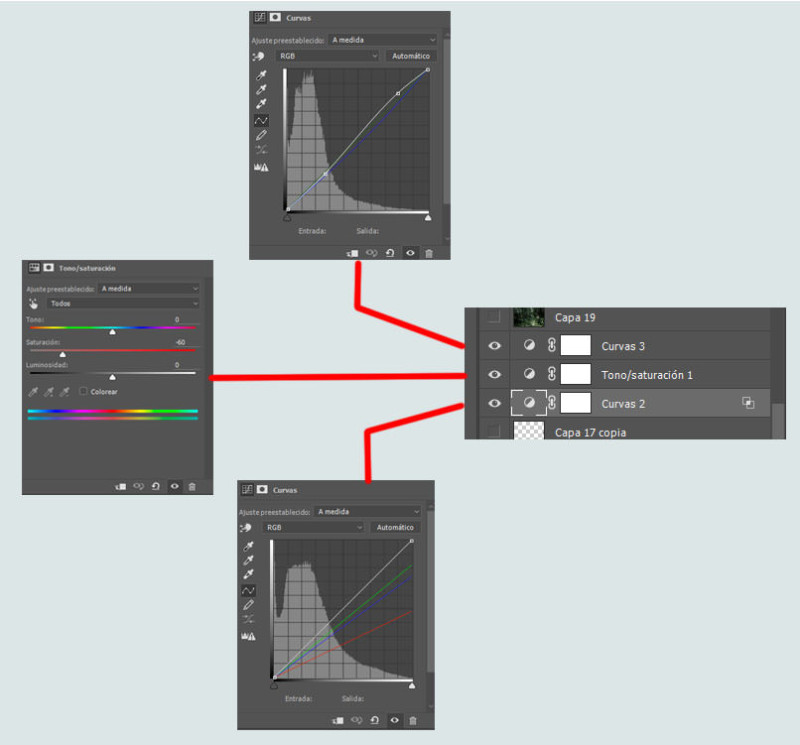
Then on top of that, I started with some color grading to feel out the mood that I have in my composition. I used three layers for this.
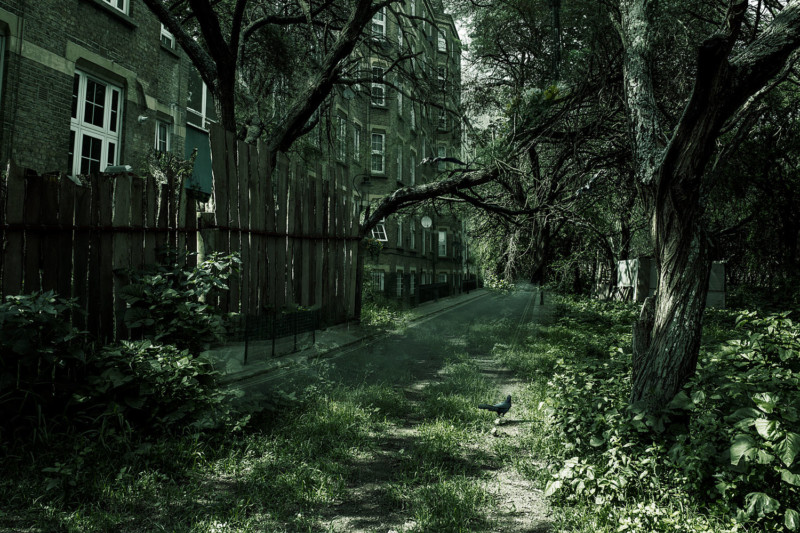
The adjustment layers:
An important thing to create an awesome mood for composites is to give “depth” to the elements. I use curves or levels to decrease the contrast of things. the farther they are the less contrasted things are. Like in real life, fog decreases contrast.
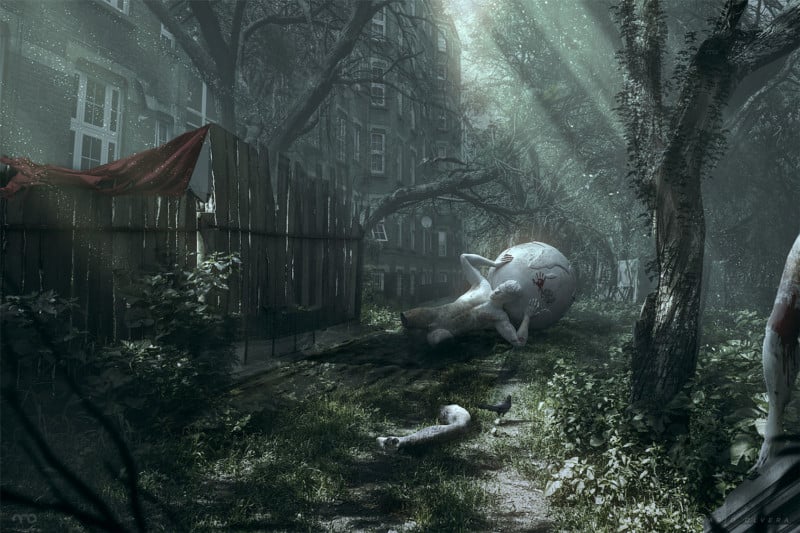
Then I found this sculpture, so I cut it out and placed it in. Like some of my comps, I’ll throw things in to see what works. This time it really worked for me. So I took out the legs to give it a feeling of a broken sculpture.
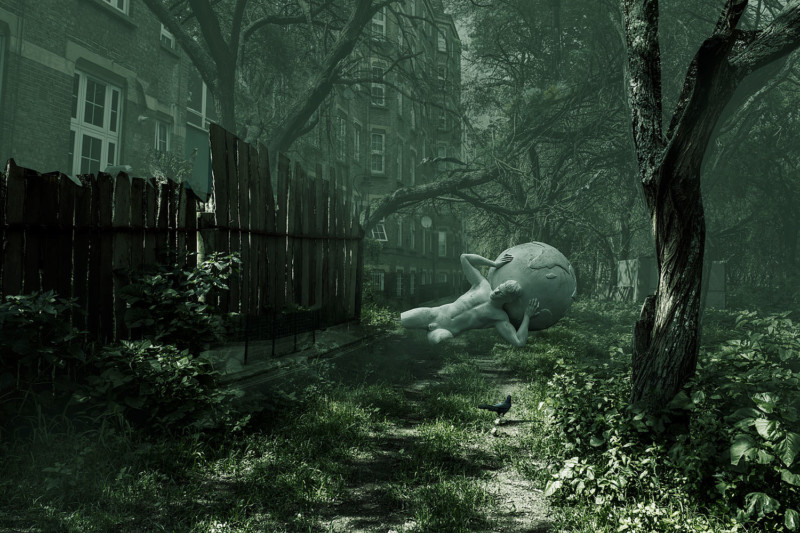
So this was the first attempt to throw it to the sharks on social media. I received a lot of feedback. Also, there were people who told me that the comp would look infinitely better without the sculpture. I just said thanks to them and left the sculpture in. I loved it and it was the main character on my comp!
Sometimes, people give “feedback” on the Internet, but really it is personal taste. Everything is usually subjective feedback about your piece. So don’t follow all the feedback you receive, especially if you don’t like their work.
That has been one of the most difficult things I’ve learned so far, when to listen to feedback and when to disregard it. Most importantly though is believing in myself. There are people who don’t understand your art. It’s ok, we all have our own perception of reality, that’s what makes us unique, just listen to your self.
Here is the first “final” composition.

When coming back to Photoshop after the feedback, my perfectionist mind mixed with a bruised ego continues on…
I aged the sculpture, adding a bit of rust to it and the surroundings. It gave it more integrity to the scene.
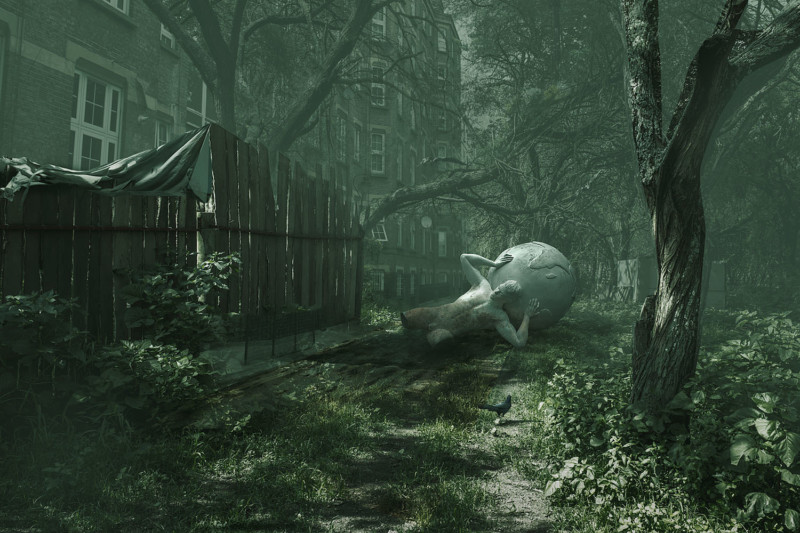
I put in some lighting effects and rays for more detail.
I changed the fabric color to the complimentary tone of green: red.
I added the broken legs to the ground so it can lead the imagination of the spectator to more room in the composition.
I finally added more blood details to enhance the story of the image.
Be sure to always add a sense of depth, but recreating a depth of field. Different levels of blur for trees and branches add a lot more depth.
For the final touches, I added some color grading to neutralize the tones for the composition and balance.
Final Thoughts
I hope this was helpful!
I get asked a lot about tips on how to be good at compositing. My best tip is that you should the real world, how the physical world behaves, how the light behaves on different materials and try to recreate a lot of different environments. That will take you out of your comfort zone and you’ll learn a deeper meaning to Photoshop. Once Photoshop gets intuitive for you, it’s all about playing with it. Having fun is the key to success in art. Most importantly, shut down your ego and listen to feedback. You don’t know it all, we are all learning each day something new. Lastly, share cool things with people!
As always I share my work on internet groups before putting it in my portfolio, this helps me when I receive good feedback from my compositions, especially coming from people with experience. There are definitely haters looking for the “mistake” always,
but those critiques can help if they are valid. If we open our perception, any comments can be taken as good feedback. We choose how we perceive it.
People are always giving away free information about something you didn’t know, or things you already did, but it’s awesome to be quiet and thank people for sharing that with you. That way you can learn a lot from everyone!
(via Retouchist)