Five Beginner Lightroom Editing Tips to Dramatically Improve Your Photos
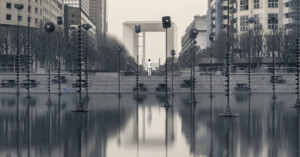
Want to get the best out of your photos this year? Using one photo as an example -- a photo I took in Paris with a Canon 5D Mark II to prove it can be done with a camera of nearly any age -- I will show five easy tips that will make dramatic differences in your images.