How to Photograph the Milky Way Core Season
Milky Way core season is right around the corner. I wrote this quickie guide on how to photograph our galaxy for anyone interested in going out to do some astrophotography this season!
Planning
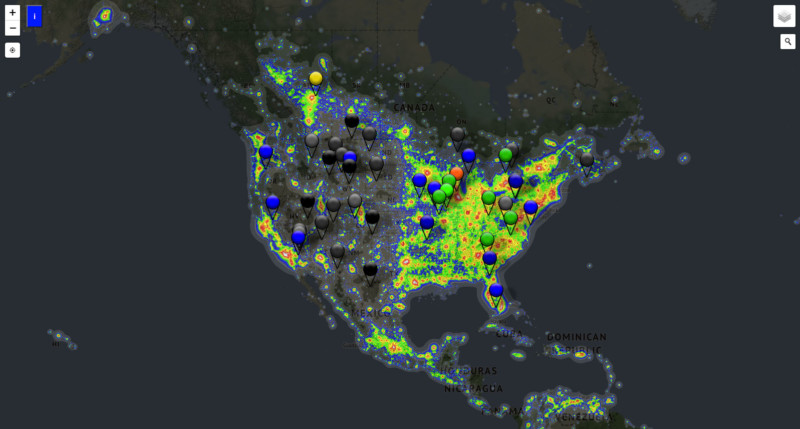
The first thing you will need to go is find a dark site location. Use this map to find a place near you which offers pretty dark skies, but you don’t have to drive for hours to get to. I live in the suburbs of NJ and while it is difficult to find dark sites, there are a few within only an hour or so drive each way.
Next up is timing. You will need to take into account the current Moon phase which will determine if there will be a large amount of light reflecting off the Moon when you shoot. The fuller the Moon, the more it will wash out the stars. By the next new Moon on March 13, the Core will be out in all of its glory.
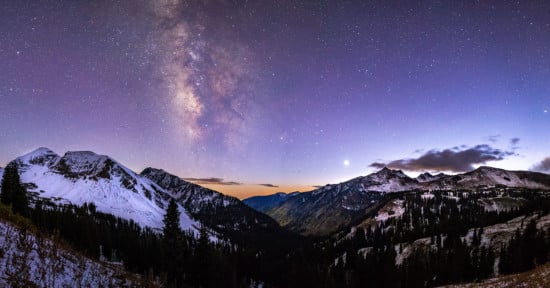
Another factor of timing is rise and set times of the Milky Way itself. I took this shot in June, for instance:
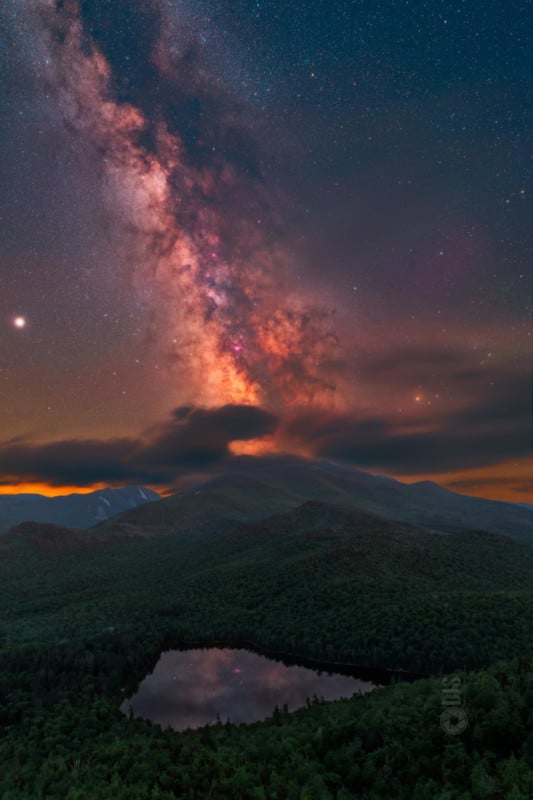
In the early season like March, the Milky Way will be rising during the early hours of the night around 3-4 AM. The core will start to rise earlier and earlier with mid-july being one of the best times to shoot the core. Then it will be visible after sunset and it will be seen throughout the night.
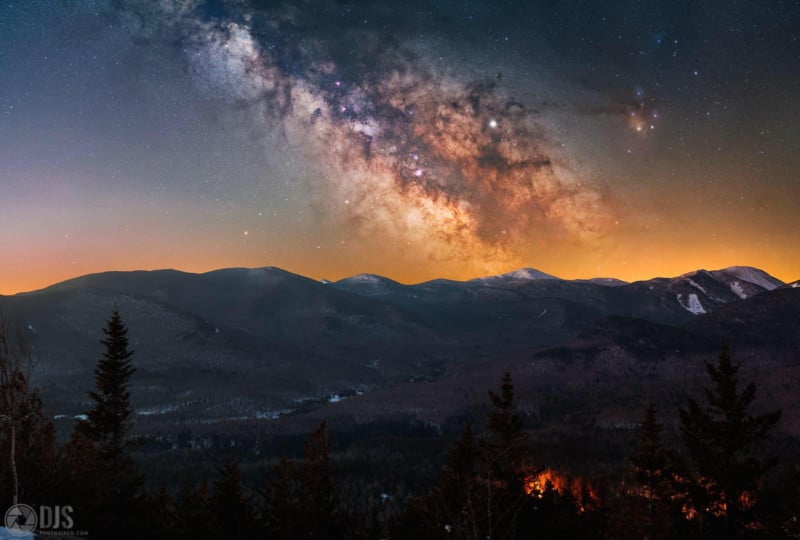
Towards September, the core will set earlier and earlier and be visible for around less than an hour before dipping below the horizon. No need to shoot just the Milky Way core though, the winter Milky Way is beautiful in its own regard, but I figured with Core season around the corner I would try to keep it focused to the Milk.
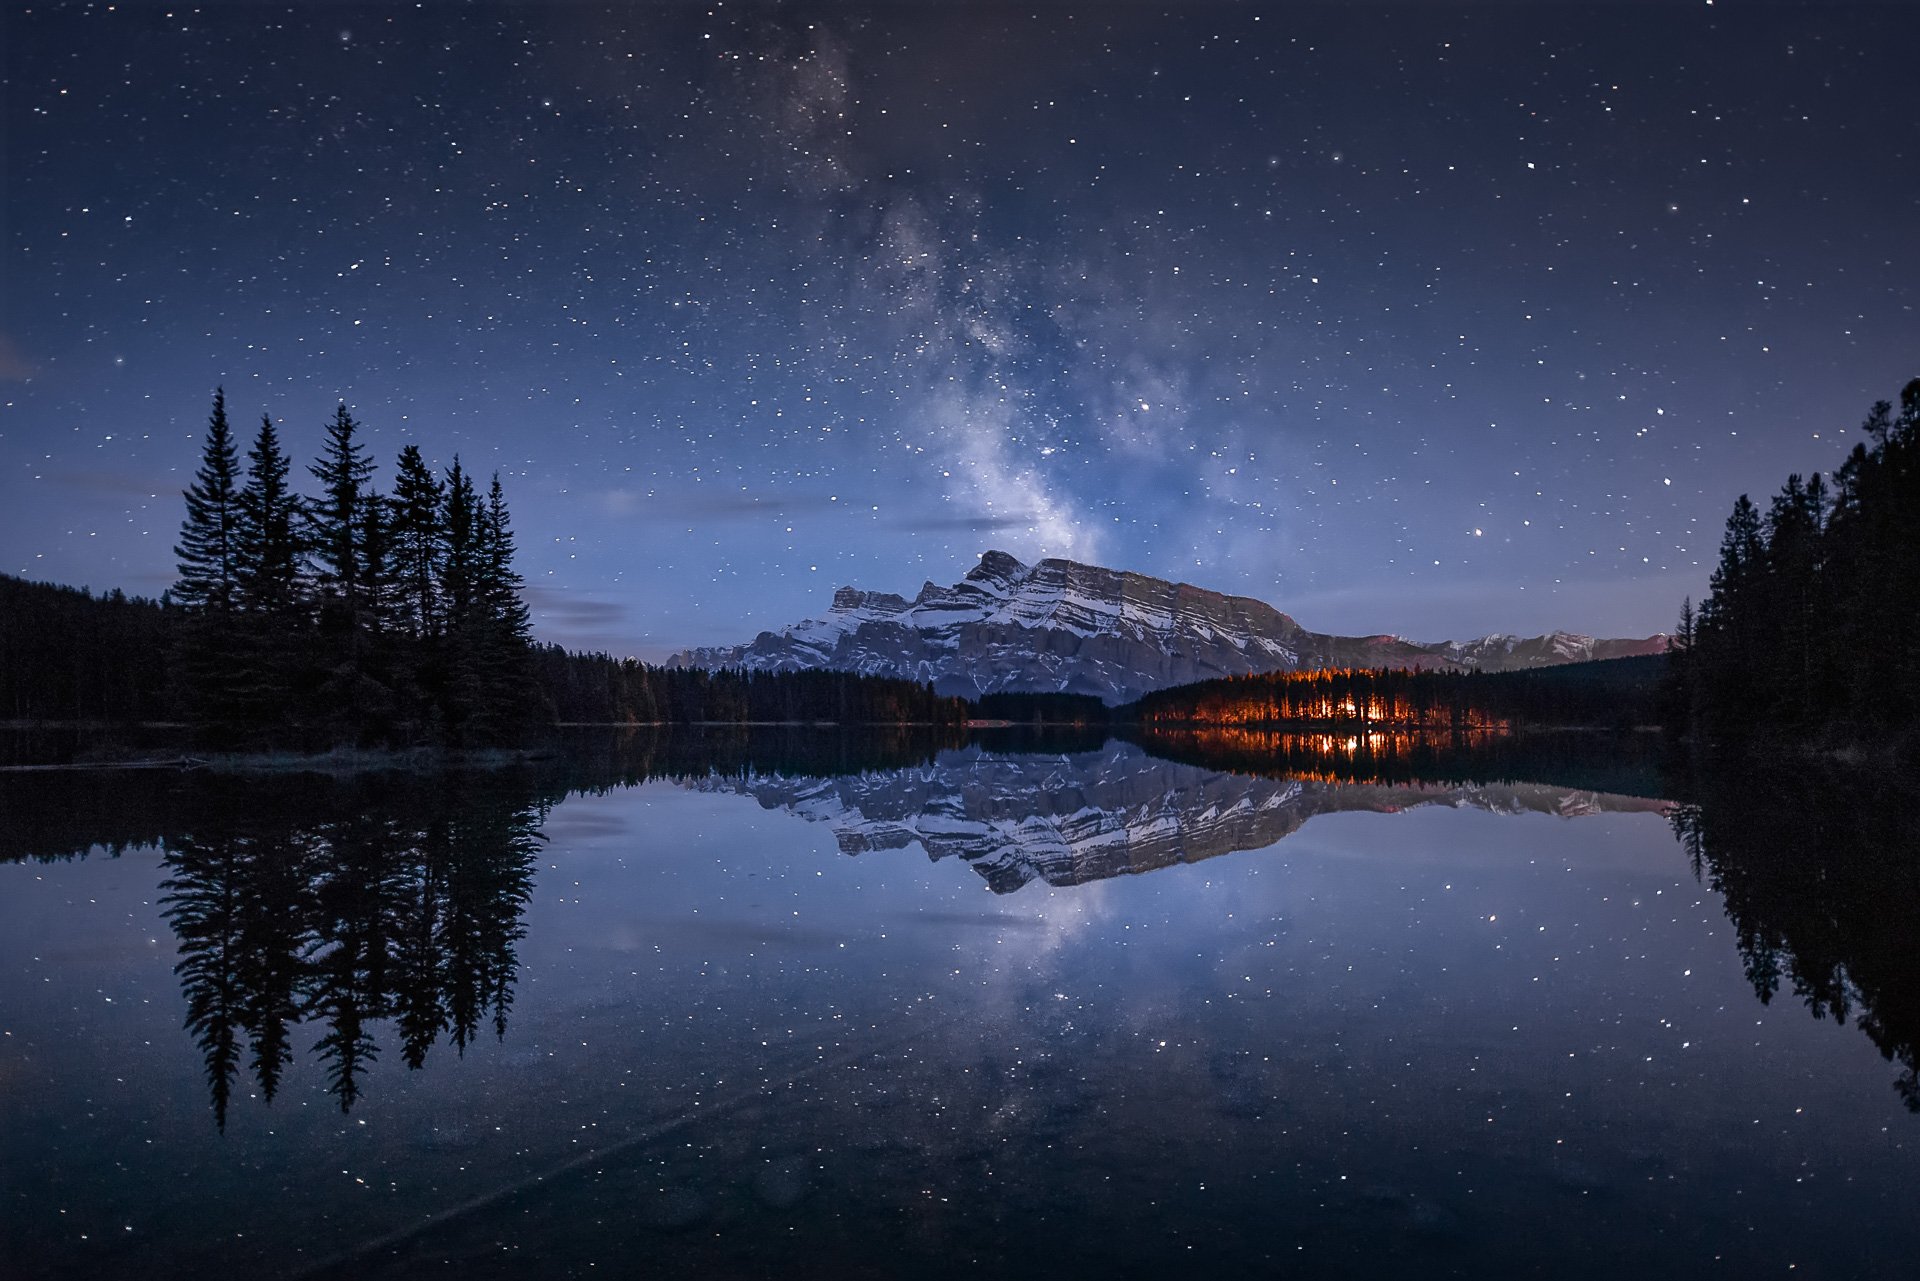
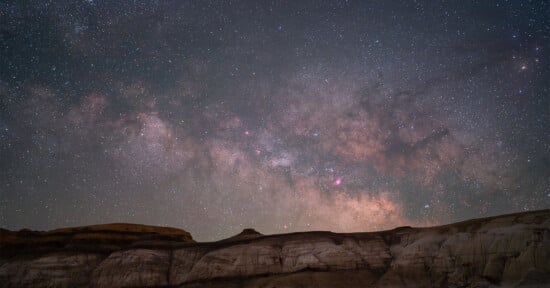
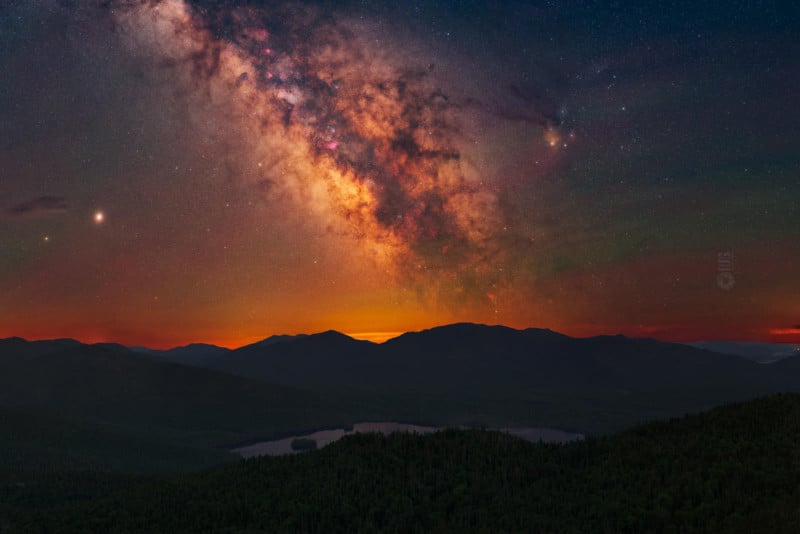
Here are some core timing examples:
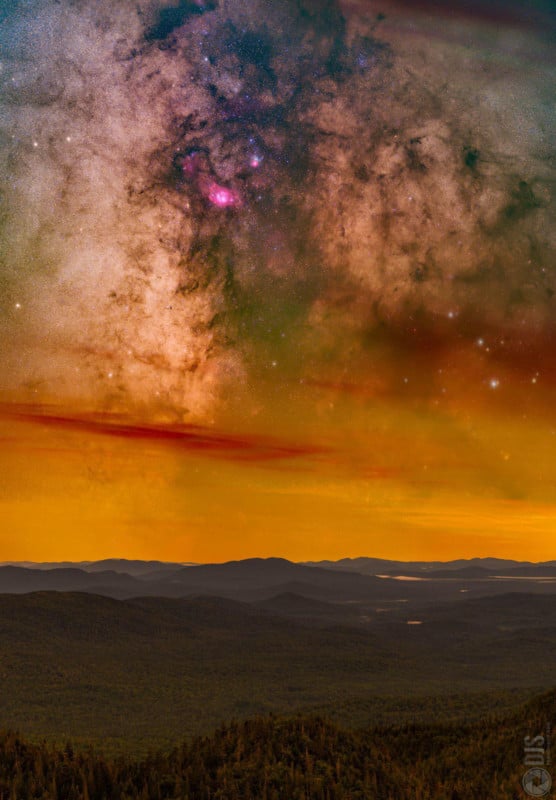
The last thing to consider before heading out into the field is weather. A clear sky is vital in seeing the stars. Even the thinnest clouds can wash them out. But, clouds are still cool to work with — they add another atmospheric element near the horizon. You just want to make sure the sky is mostly clear before heading out.
Shooting
Initial Settings
Onto the camera goods. Plop your camera on a tripod and make sure it is secure. You will need to place your camera in Manual (M) mode. Set it to shoot in RAW, and use the daylight white balance setting. Manual will allow for full control of the camera, RAW will allow for better post processing (as you all probs know), and a daylight white balance is used as that is the color temperature that most represents a “true” night sky so it is a good starting point. RAW mode will allow that to be adjusted effortlessly in post production if the warmer tones aren’t your style.
Next, put your camera in the live view mode (if using a DSLR). This will blackout the optical viewfinder but make it easier to use the screen to compose your shots. Live view is also crucial for focusing which is the next step. If you have a mirrorless camera, your camera is “always” in live view.
Crank up the ISO to about 1600-6400 depending on how dark the sky is, and open the aperture wayyyy up to the maximum possible for your lens. We are trying to let in as much light as possible since everything around you is so dim. I won’t get to deep into the technicals of what is the best ISO to use for your camera and ISO invariance. I am trying to keep it simple here.
Focusing
Put your lens in manual focus mode, and then try to vaguely focus by moving the focus ring to the infinity marking on your lens. If it does not have that marking, try moving the focus very slowly until stars start to make their way visible in live view.
Next, find a bright star and use your tripod head to place it in the center of the live view screen. Press the little magnifying glass button on your camera which will enable a digital zoom feature on your screen. Press the button until it as big as possible on your screen. At this stage, gently rack the focus back and fourth until that star is as sharp and pinpoint as possible. This can be tricky, so be patient and if you can’t find a star to work with, try a bright distant object.
Shutter Speed
After focusing, you will need to calculate your shutter speed. We know this Earth isn’t flat so it rotates and thus too long of a shutter speed will blur the stars. But, too short of a shutter speed and the shot will come out too dim. To calculate this, we use the NPF Rule.
You may heard of the 500 rule, but as digital sensors progressed that rule became less relevant. The NPF is super precise and takes into account the many parameters of your specific setup. This is where having a wider lens will help, something between 14mm-24mm is nice for a widefield view. Remember to take into account your crop factor if you are not shooting with a full frame camera. Something like a 70-200mm zoom is great for events or sports, but it will make your shutter speeds super short because it does not take much time for a star to move across the frame since everything is “bigger.”
Techniques & Composing
Once you dial in your shutter speed, start shooting! If you find the shot came out too dark, increase the ISO. If it was too bright, decrease it. Compose your shot by moving the camera on the tripod and when you are happy with a composition, turn on the camera’s self timer release mode, then let it rip. The self timer will ensure there is no shakiness interrupting the shot after the shutter button is a pressed. A remote trigger will help with this too, but it is not necessary at first.
Another thing to consider when out shooting is image stacking. If you find your shots are super noisy, you can take 10-20 shots of the same composition all back to back and merge them using software which can average out the noise and thus mitigate it. I do recommend first trying out astrophotography with single images to get the grips with imaging the stars, then factoring in stacking later on. Again, something I may think about demonstrating in a future tutorial.
Processing
Post processing can be done in pretty much any RAW imaging software. Lightroom, Photoshop, Capture One, etc… Start with the sliders. Play around with the exposure, contrast, highlights, shadows, white balance, etc, and see what works for you. If you shot a stack sequence, you can process that too. I think there is a lot of creative freedom to be had with post processing and you can really convey your emotions of how you feel about your shots with these powerful tools.
Final Thoughts
Remember, everything here takes a lot of practice. If you find yourself getting discouraged or frustrated because a shot isn’t working out or something is difficult, that is normal! That is a sign of learning and progress and shows you are taking steps to accomplish something new and challenge your skills. At the end of the day, you are killing it!
I hope this was helpful. If you like posts like this, I may consider starting a blog/tutorials category on my website. Shoot me a comment below if you want anything clarified, and I am happy to help when I have a hot second. Also feel free to check out my Instagram at @danieljstein, which is where I usually post my work and interact with the photography community as well.
About the author: Dan Stein is a passionate nightscape photographer working full-time in New Jersey in his family’s commercial plumbing contracting business. The opinions expressed in this article are solely those of the author. You can find more of Stein’s work on his website and Instagram.