How to Set Your White Balance for the Most Common Types of Streetlights
Streetlights are the driving force behind nighttime street scenes and how they make us feel. The way streetlights spread their light, the shadows they cast, and the colors they bring out affect everything else nearby, setting the tone of the scene.
As a night photographer, streetlights can either be your best friend or worst foe: a common complaint from first-timers is that harsh streetlights “ruin the colors” in their photos—and that can certainly be a valid complaint. But by understanding the light that different types of streetlights generate, a photographer can adapt to any street lighting they find in a scene, seeing it as a resource to be harnessed for maximum photographic impact rather than a deficiency that needs to be overcome or compensated for.
This article goes over the three most commonly-installed types of streetlight bulbs and the attributes of their light output, along with recommendations on how to set your white balance for best results under each. We’ll also discuss how to approach mixed lighting conditions.
For the easiest white balance adjustment, you should shoot with RAW files and use image editing software such as Adobe Photoshop Lightroom or DxO Optics Pro (which was used for the samples here) to set white balance after shooting using the Color Temperature and Tint sliders. Since nighttime white balance can be tricky to pin down, setting white balance in-camera and shooting with JPEG files is strongly discouraged. You’ll want to be able to test out different white balance levels afterwards, and JPEG locks you in to whatever white balance you punched in (or let the camera automatically set) when the photo was taken—you can only make slight tweaks afterwards.
Three notes before we begin:
- Individual light bulbs vary. Bulbs of the same type will produce slightly different colors and tones, depending on specific manufacturers’ bulb designs, glass coatings, etc.
- White balance is up to artistic interpretation; there’s no right or wrong answer. The suggestions given are intended as broad/general guidance for different situations and examples of what’s possible with white balance adjustment.
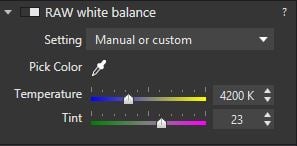
- This article assumes a basic grasp on white balance: at least know that white balance consists of two dimensions — color temperature and tint (see the screenshot above).
High Pressure Sodium (HPS) Lights
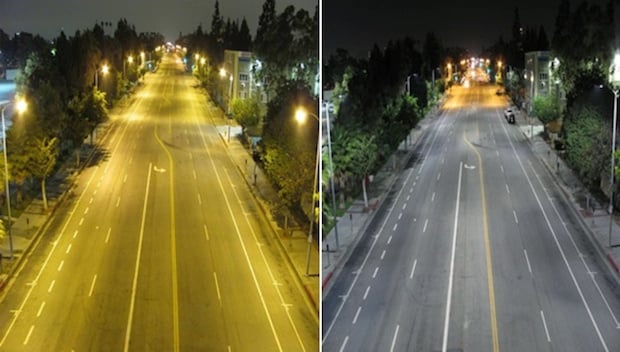
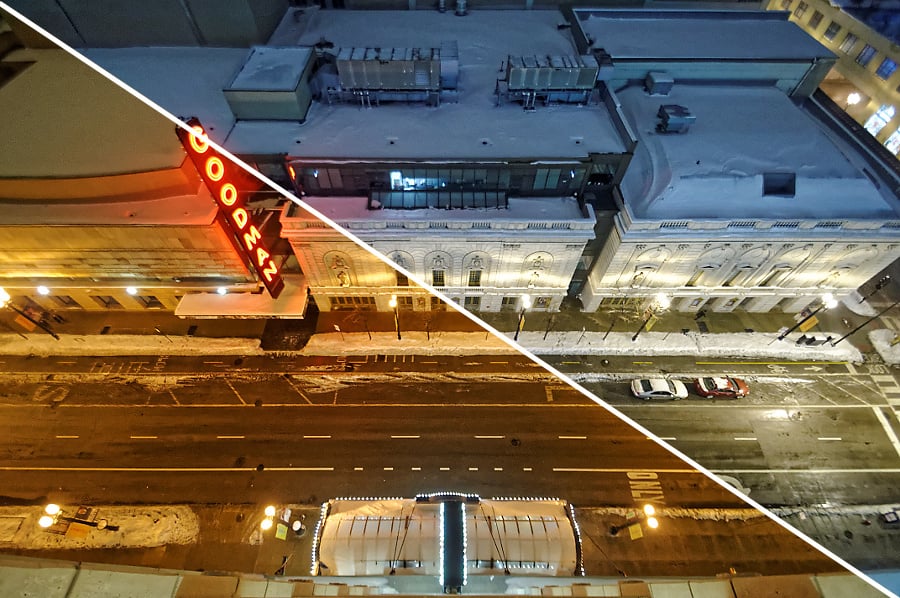
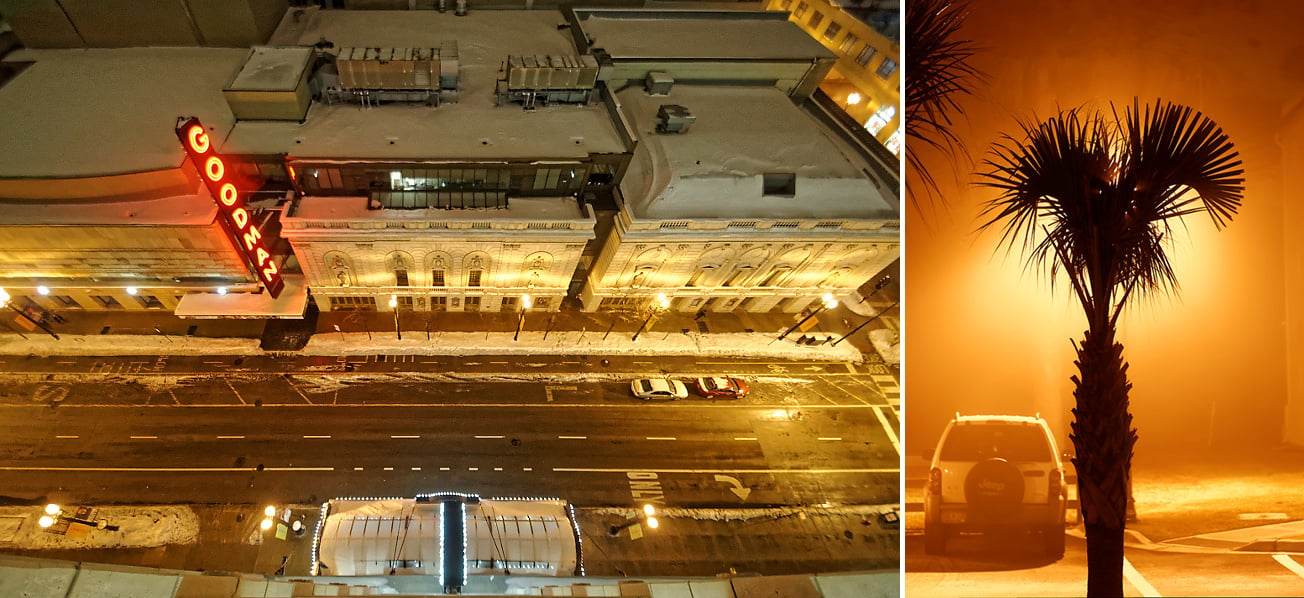
High pressure sodium lights are one of the most common streetlight bulbs used today, due to their high efficiency. A strong yellow/orange glow is the defining characteristic of HPS light, but it can be unwanted or overpowering in some situations, especially when it is the sole light source in the scene.
To make matters worse, most cameras’ auto white balance (AWB) has trouble compensating for sodium vapor lamps. In these two scenes, the chosen color temperature (K number) was too high, giving the image a strong yellow/orange cast.
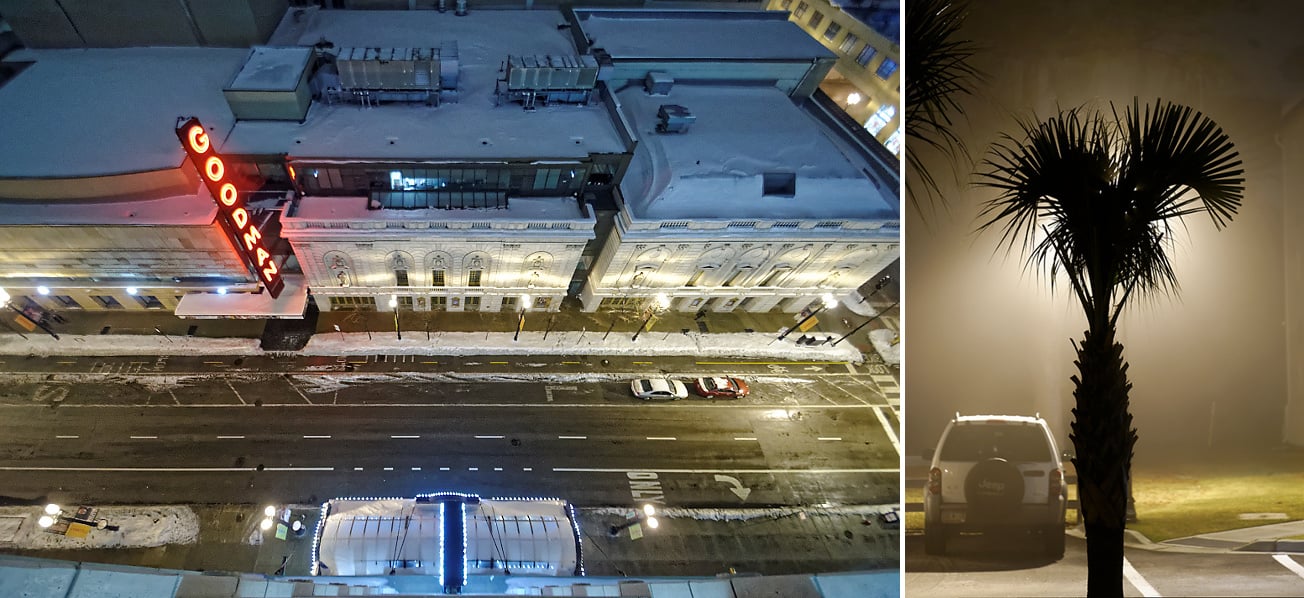
Reducing the color temperature drastically, by using color temperatures in the low 2000s, makes photos look more balanced and pleasing, while still retaining the familiar and cozy feeling of warmth the amber glow provides.
Be wary of dropping the color temperature too low, though, as that can cause things to begin looking unnaturally cold and blue. In the left image, the snow on the rooftops is getting close to that.
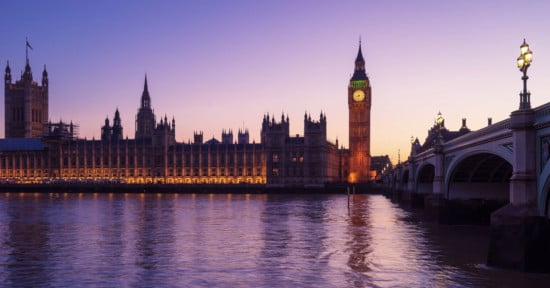
Metal Halide Lights
Metal halide lighting along with HPS are the two lighting technologies used in the majority of today’s street lighting.
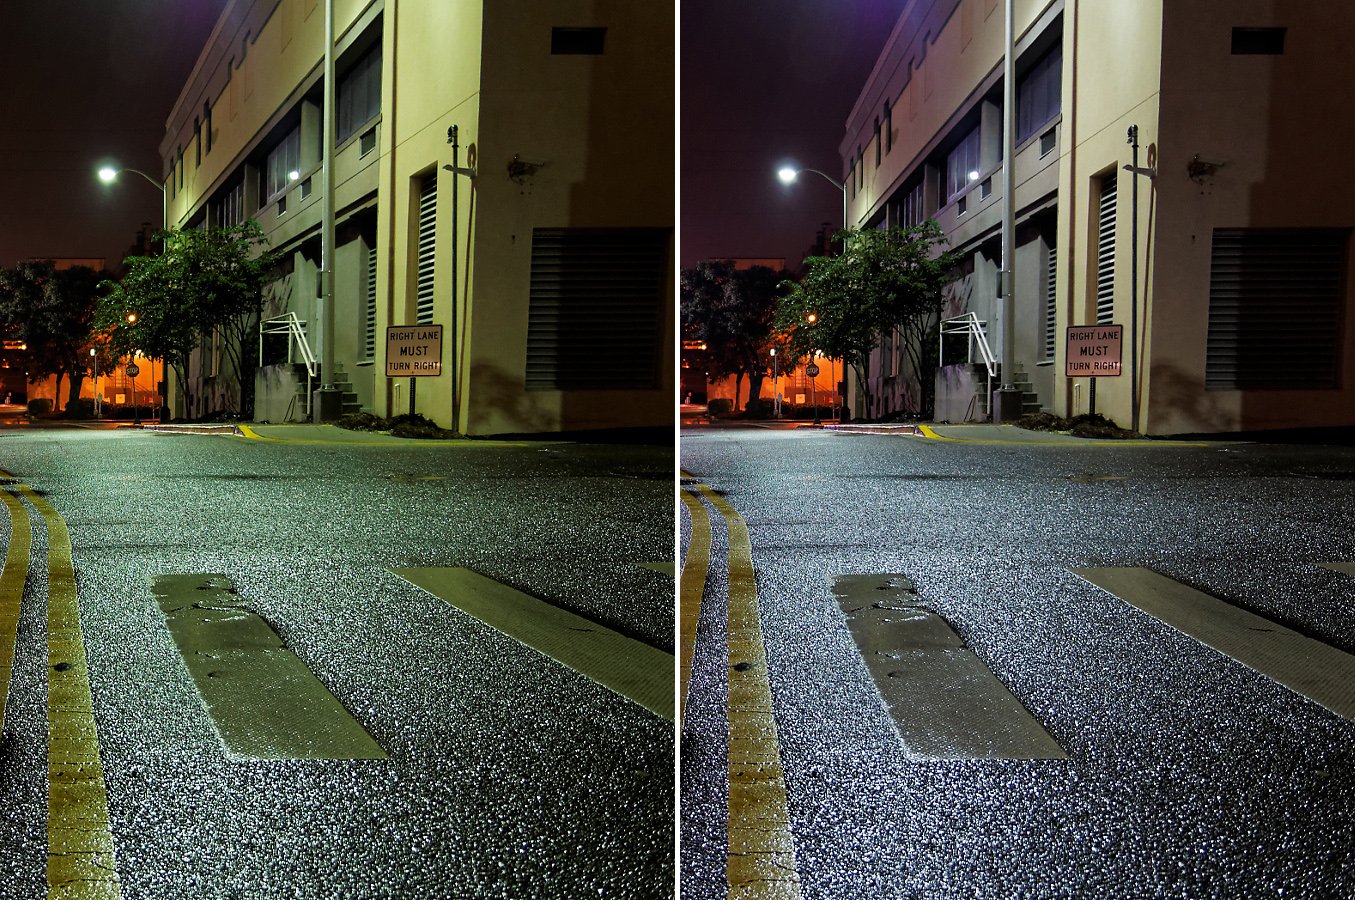
Metal halide bulbs aren’t as efficient as HPS bulbs, but they produce significantly cleaner and whiter light. Since the light produced by metal halide bulbs is much more agreeable and natural-looking than HPS light, cameras don’t struggle as much with auto white balance in scenes lit by metal halide lamps.
Typically, the camera’s auto white balance will put out a pleasing image.
Still, slight tweaks to white balance can lead to noticeable improvements. In these examples, white balance was used to eliminate unwanted tinting—a slight green tint in the left photo, and a slight magenta tint in the right photo.
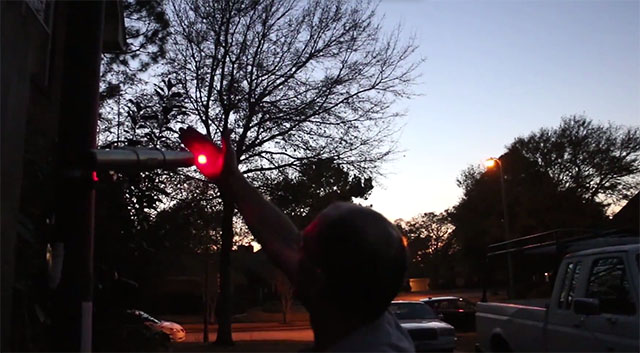
Mercury Vapor Lights
You won’t run into mercury vapor lighting as often as the first two, as it’s an older technology that’s being phased out. Mercury vapor bulbs produce a cool-colored light with a distinct green/blue glow; however, more modern mercury vapor lamps will be color-corrected using glass coatings, eliminating or significantly reducing the color imbalance. These lamps can be identified by a faint blue ring of light around the edge of the light source.
The strong green tint that mercury vapor bulbs produce gives cameras a tough time with auto white balance. In the following example, the image is too warm (color temperature too high) and a significant amount of ugly green tint is left in the image, both issues that are easily corrected.
Pure, unfiltered mercury vapor light is too strong to be corrected using only white balance: the Nikon D610 knows this and automatically set white balance tint to the maximum for the following sample image.
So, in order to neutralize this green, more advanced adjustments like selective saturation (which lets you adjust the saturation, or colorfulness, for individual colors) can be used. Selective saturation is found under the HSL Tab in Lightroom and DxO Optics Pro.
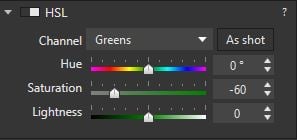
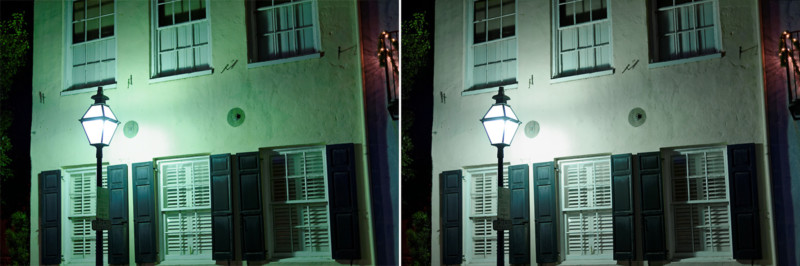
In this example, selective saturation was used to reduce the intensity of the greens in the scene significantly, as well as the cyans by a lesser amount, leading to a noticeable improvement in appearance.
Mixed Lighting
In the real world, you’ll rarely encounter uniform lighting in a scene. Cities are messy places made up of many layers, and are constantly changing piece-by-piece over time.
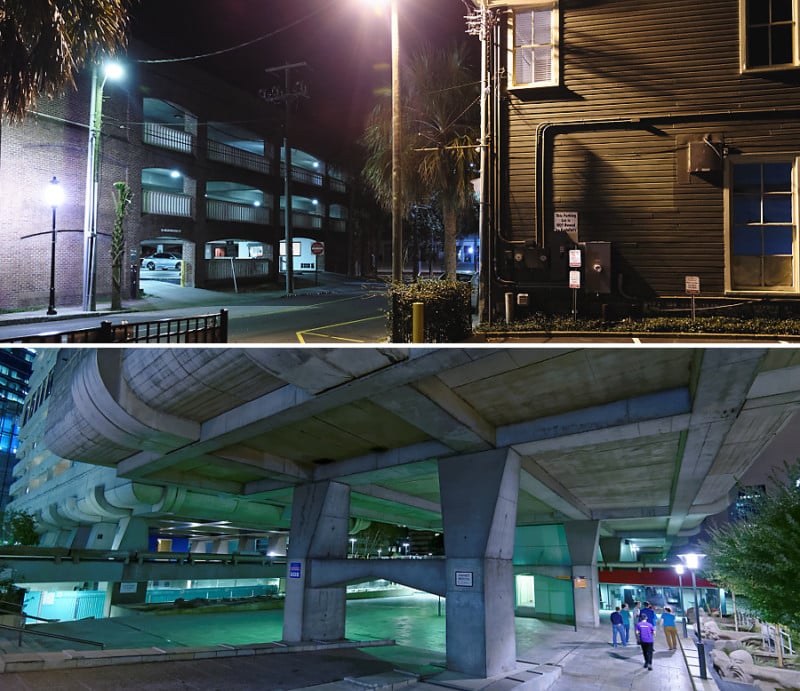
The transportation department may have installed energy-efficient high pressure sodium streetlights, but a business may have chosen to use metal halide lighting on their premises to improve their appearance, then the parking garage across the street could still be on mercury vapor bulbs. As LED lighting becomes cheaper and more popular, that’ll be entering the mix too.
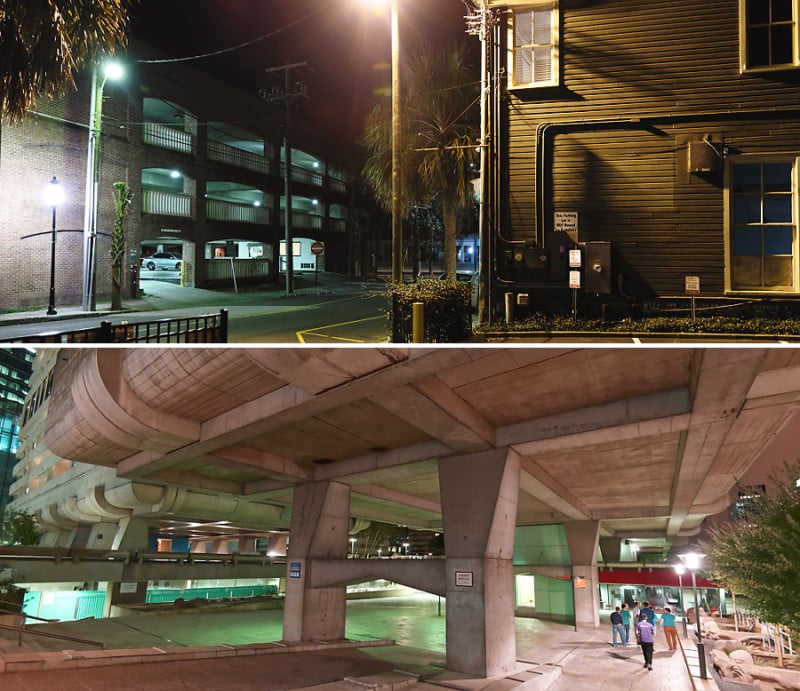
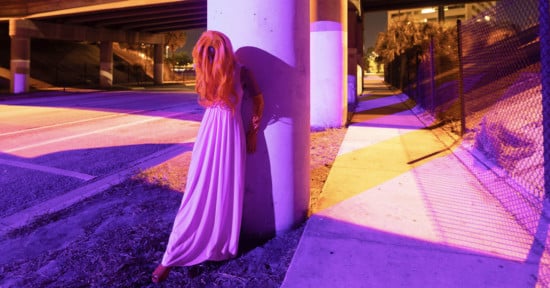
In complex situations, photographers need to use their creative judgement to decide how to set one white balance that applies across the whole scene. To do this, ask yourself what the most important parts of the photo are, and where tradeoffs can be made. Most importantly, experiment with a variety of white balance values and be willing to try extreme and unconventional settings.
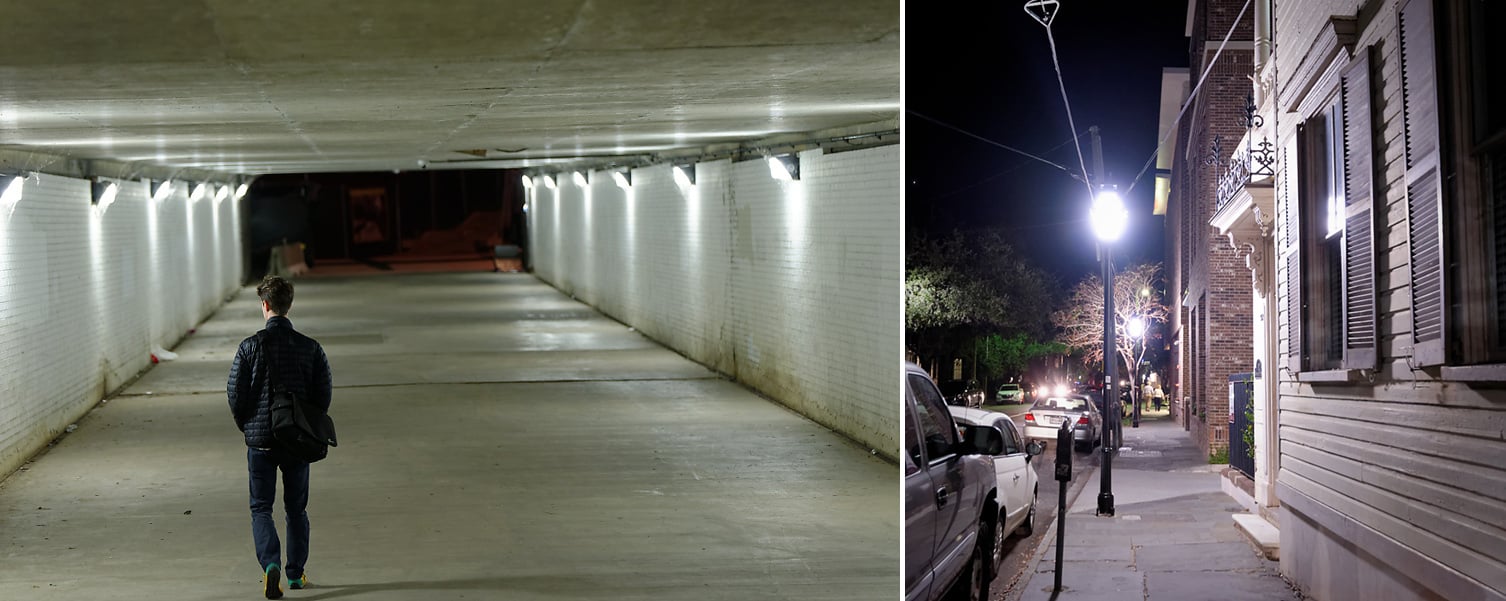
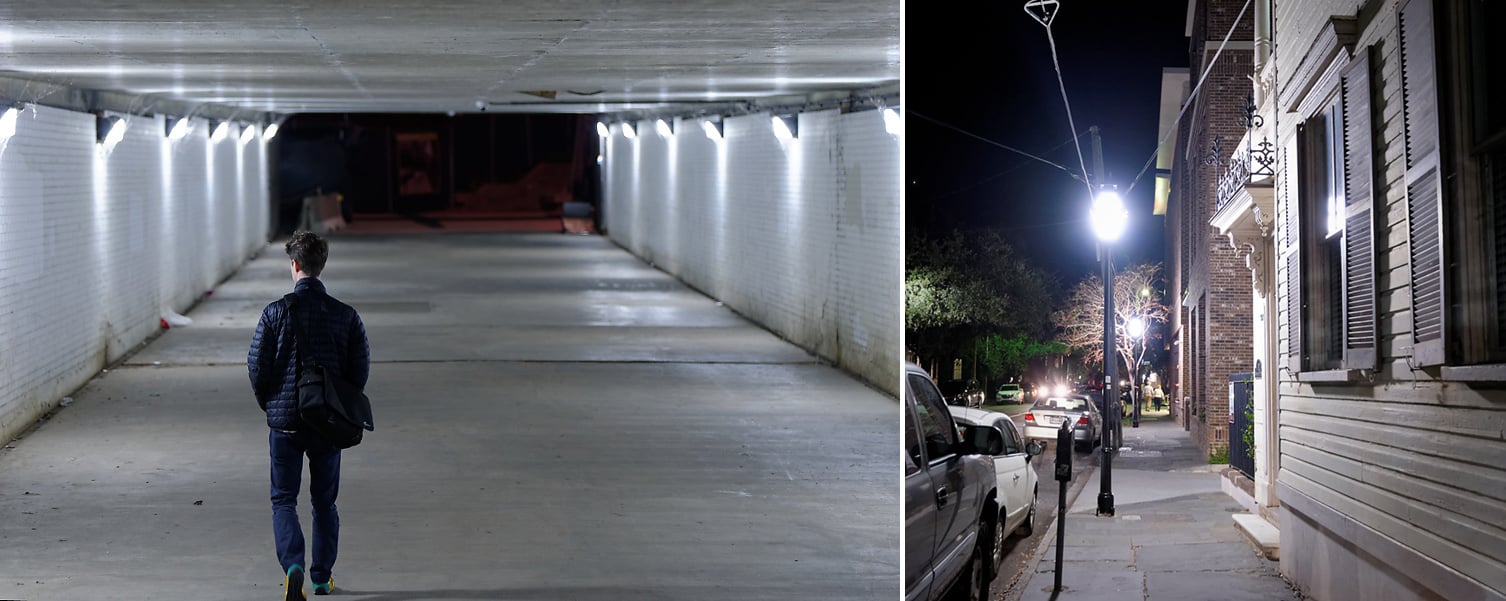
Sometimes, you’ll chose to strike a fine balance between the different types of lighting present, as in the top example, but other times, it’s best to nail the white balance on one part of the photo and just let everything else do whatever it does, as in the second example. In that photo, white balance was adjusted for the walkway lighting on the right to draw focus to the group of people, but the green mercury vapor lighting under the Brutalist architecture was left to its own devices, imparting the scene with an ominous and dystopian jade-like glow.
If you’d like to read more about streetlights (especially about the technical details of light production), the History of street lighting in the United States Wikipedia page is a great place to start.
About the author: Alex Zhu is a photographer and the writer behind Shutters In the Night, a website that showcases breathtaking night photography from around the world. To see more articles like this, visit the SITN website or follow SITN on Facebook and Twitter. This article was also published here.