What is White Balance in Photography?
Although many photographers approach it in different ways, understanding white balance is a key to getting better at photography. Like other camera settings, it’s possible to have your camera set white balance automatically, but it doesn’t always produce the best results.
Table of Contents
What is White Balance?
In simple terms, white balance is your camera’s way of adjusting colors so that the whites in an image actually appear white. For example, if you’re shooting without proper white balance in a setting with lights that appear very yellow, any whites in your image will look yellow or tan. The entire image will have a color cast on it, and it won’t look natural. White balance counteracts color casts and produces natural-looking images.
Our eyes and brain work together to adjust to different lighting, which is why we usually see whites as white regardless of the conditions. If you wear sunglasses, you’ll probably see everything with a color cast right after you put them on. After a few minutes, the colors will look normal again. This is one example of how our eyes and brains work to adjust to different lighting conditions. Similarly, your camera may try to adjust to different lighting, and it will succeed to various degrees.
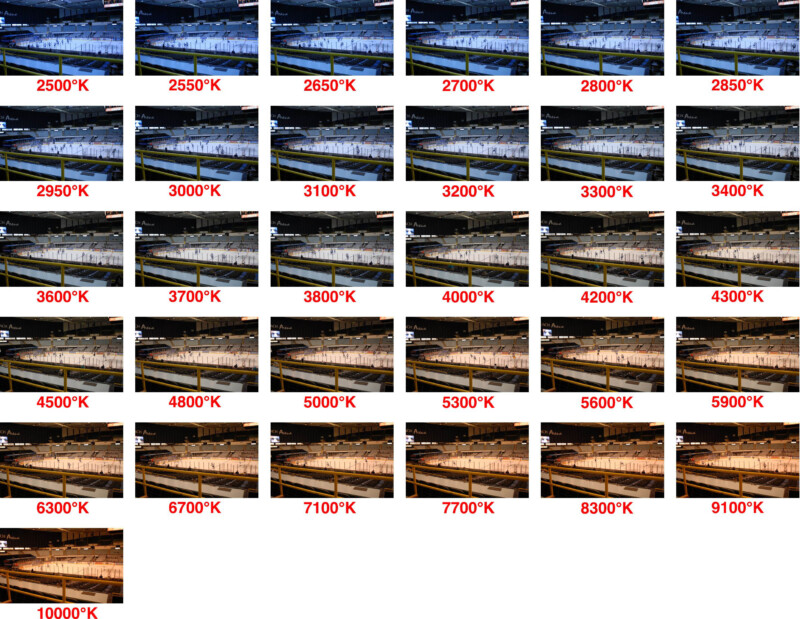
White balance is dependent on something called color temperature, which is measured in degrees Kelvin (K). Color temperature is essentially how warm or cool a light source is, and it ranges from 1,000 K to 10,000 K. The lower end of the spectrum, closer to 1,000 K, corresponds to warmer light sources (more yellow or orange), while the higher end of the spectrum corresponds to cooler light sources (more blue).
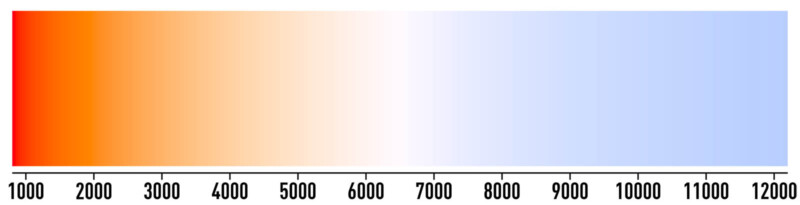
For example, a candle’s flame is usually warmer than light outside at midday. The next time you shop for light bulbs, pay attention to the different color temperatures that are written on the bulb packages. Many people are very picky about the color temperature of their lights throughout their homes.
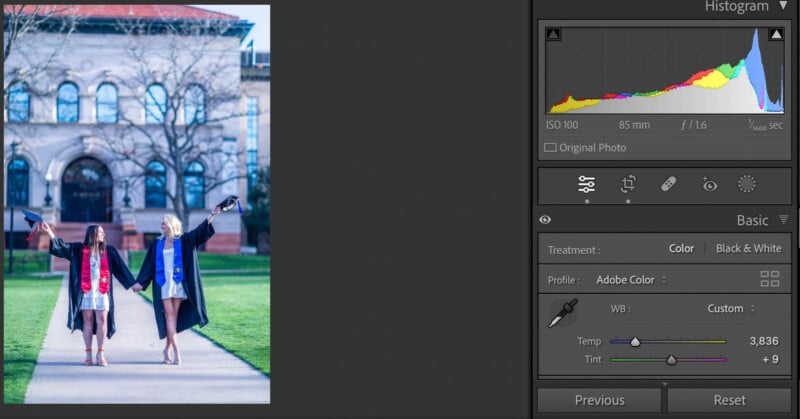
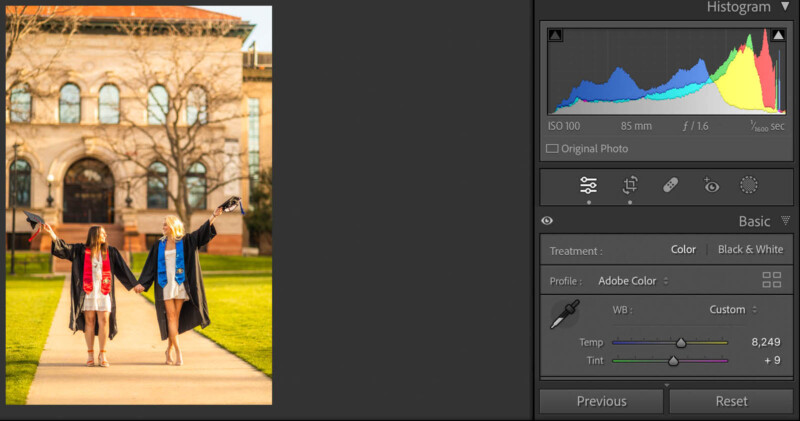
In more technical terms, white balance is your camera’s process of adding a certain color to a scene in order to make the image neutral (and make the whites appear white). For example, if you’re shooting outside in the shade where the light has a fairly cool temperature (something like 7000-8000K, for example), your camera will compensate and add warmth back into the image if you set your white balance accordingly. Something as simple as going from sunlight to clouds can change the color temperature of the light by a lot, so it’s important to pay attention to consistency in white balance throughout any shoot.

White Balance Presets
On most DSLR and mirrorless cameras, there are many different white balance presets, as well as auto and custom options. In your camera’s menu or home screen, you should see options to change your white balance. If you’re having a hard time finding out how to change your camera’s white balance, read your manual or search the internet for tips.
White balance presets are useful if you know that the light you’ll be shooting in won’t change very much throughout your shoot. Here are a few common examples.

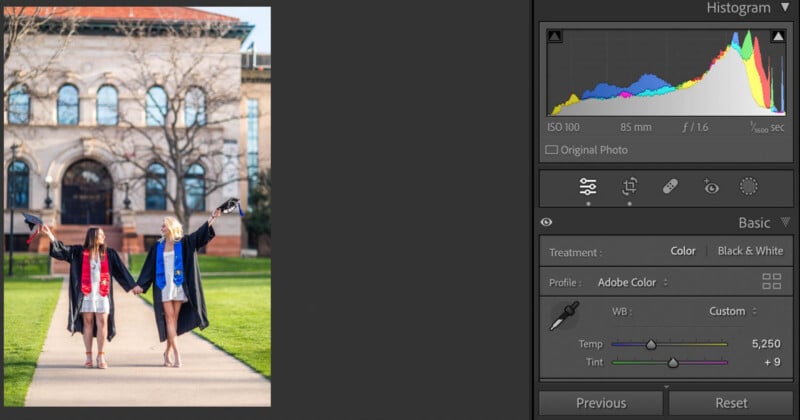
A sun icon will usually denote a daylight preset, which accounts for a color temperature of around 6200 K. Daylight is usually in the high 5000 K or low 6000 K range. Obviously, not all daylight is guaranteed to be the same, especially with varying air quality and locations. Presets are best used with some caution because not all light is created equal.

A building with lines next to it denotes a shady white balance preset, which is cooler than daylight (around 7000-8000K). If you were to switch to this preset in the shade, your images won’t be too blue from the change in color temperature.
Instead, the camera will compensate for the change in color temperature and your image will be balanced.

A cloud icon is similar to shade and is useful when it’s cloudy outside. This is usually a little warmer than full shade, around 6000-7000K.

A light bulb icon is useful in scenarios with light coming from a light bulb, also called tungsten light. This light tends to be very warm, around 3200K.

A larger, more horizontal light bulb denotes fluorescent lights, which are cooler than tungsten light, around 4000K.

When you’re using flash, your camera emits light around 5000 K to 6000 K.
Automatic White Balance
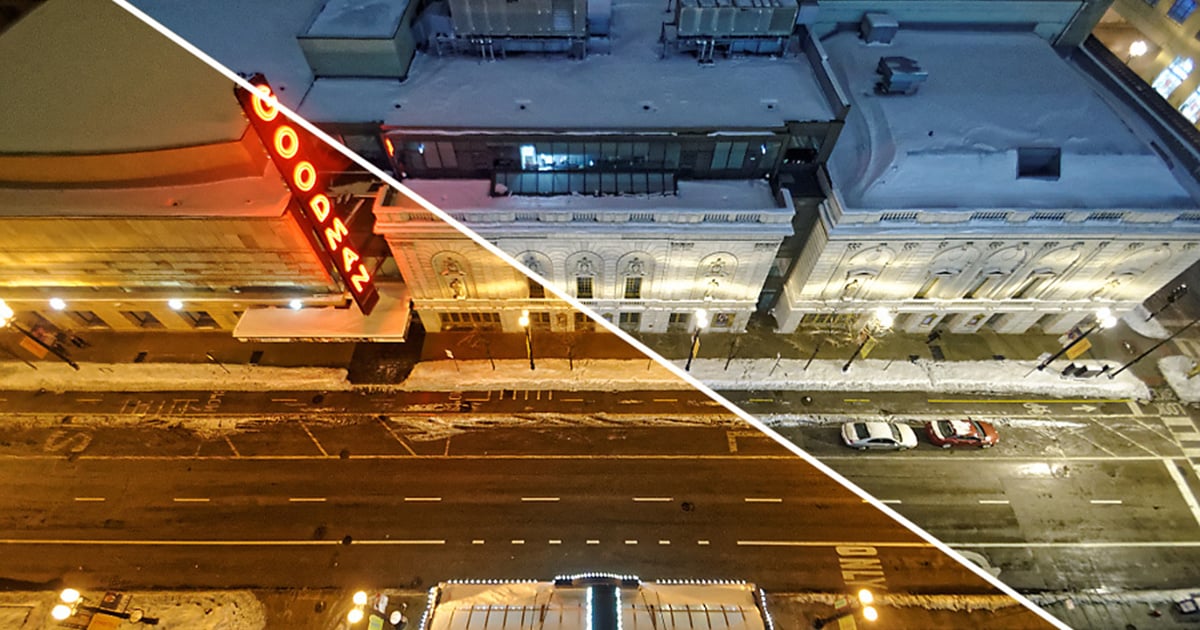
Auto white balance, usually depicted by an icon that says “AWB,” allows the camera to decide what it thinks the white balance should be. Essentially, your camera will evaluate the incoming light and reference it with a neutral, which is usually similar to daylight. If the incoming light is warmer or cooler than the neutral, the camera will determine what needs to be done to bring it back to neutral. This isn’t always perfect, especially because scenes can have multiple color temperatures at once, and lighting conditions can change rapidly.
The goal of a camera’s auto white balance feature is to make reference white points appear white.
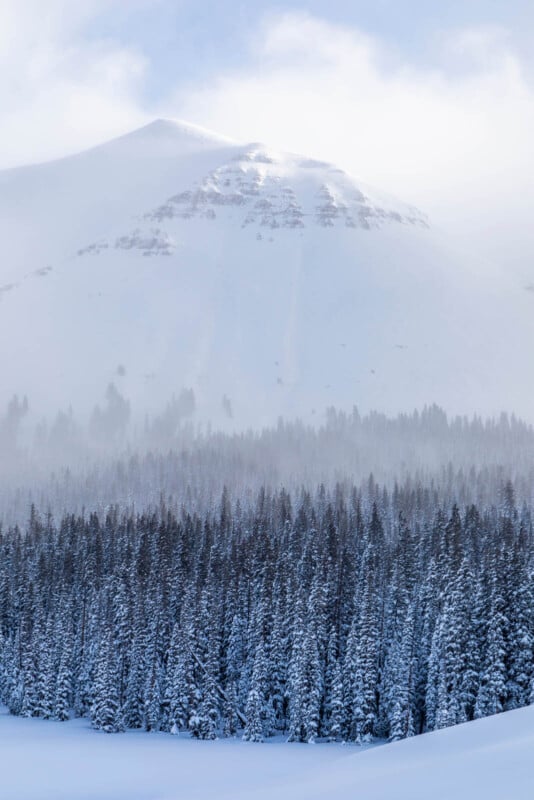
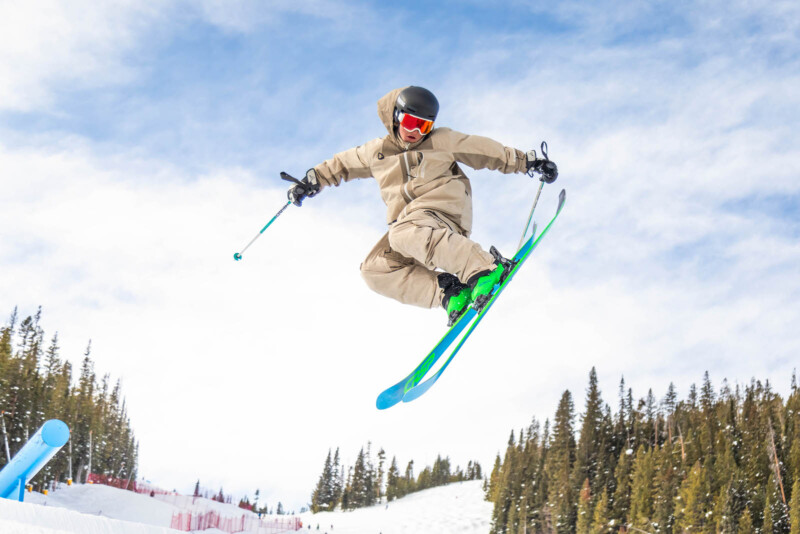
Certain scenes, such a snowy landscape, can also make it challenging for a camera to determine the correct white balance. This can be due to things like color temperature confusion (e.g. the sunlight reflected off snow causes the resulting photo to have an unwanted tint), a lack of neutral elements to serve as a reference point, dynamic range challenges (e.g. different parts of the scene reflect different amounts of light, causing the white balance to be skewed), and reflective color casts (e.g. snow reflecting the colors of the surrounding environment).
Custom White Balance
This is useful when you know you need your white balance to be accurate, and/or if you’d prefer to post-process as little as possible. This is a mode on many cameras that allows you to set the white balance by holding a physical card or set of cards in front of the camera. From here, the camera will measure the actual color temperature of the light and set the white balance accordingly.
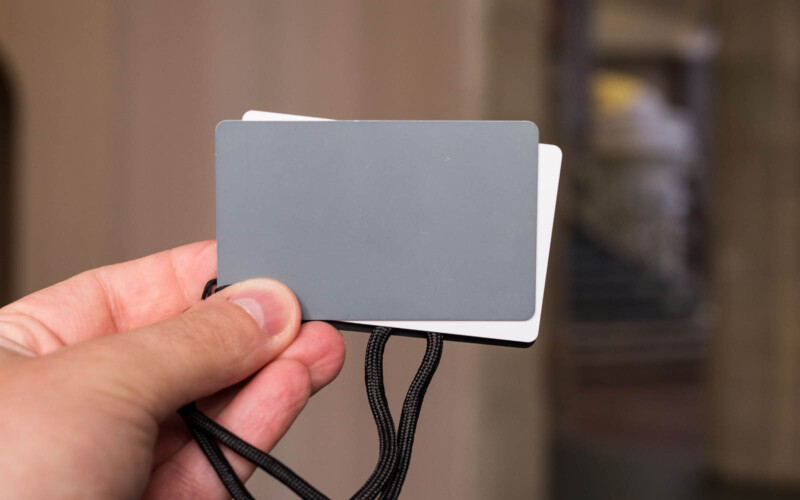
White balance cards are also called gray cards and can be found at many camera stores. They vary in price and application. Many studio photographers use custom white balance because once they set their white balance for their studio and light setup, chances are good they won’t have to change it much as long as they continue to use the same gear.
Especially if you’re shooting using a white backdrop, it’s important to have balanced whites.
Color Temperature Mode
Finally, many cameras have a white balance setting that allows you to input a custom color temperature. This gives you some creative direction if you’d prefer your shots to be on the cooler or warmer side for whatever reason. You can also change white balance precisely on the fly if you know your color temperatures well.
Auto White Balance, Fix Later If Necessary
Especially these days, many photographers choose not to worry about white balance while they shoot. Instead, they turn on auto white balance (AWB) and correct their images using tools such as Adobe Lightroom. Most post-processing tools have built-in white balance adjustment tools, and if auto white balance doesn’t do the best job in-camera, it can be corrected. The best way to do this is by shooting RAW rather than in a compressed format because much more information will be retained.
Note that when shooting in raw format, the white balance setting selected in-camera doesn’t affect the actual raw data, which will be identical regardless of which setting is used. Instead, the selected white balance will serve as a reference for the software you use to process the raw files. This means you can change the white balance after capturing the image without any loss of image quality.
Some post-processing tools such as Adobe Lightroom have their own “auto white balance” tools.
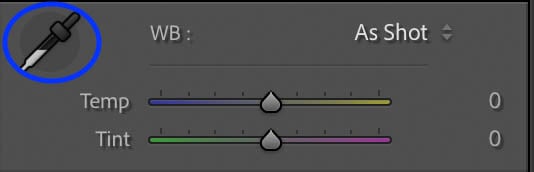
Essentially, you can use a dropper to set a target neutral, which is whatever color you want to appear as white. The accuracy of this tool isn’t always perfect, but it can let you very selectively determine what parts of your image you’d like to actually appear white.


Tint
In addition to color temperature, which adjusts yellows and blues, you’ll see something called “tint” if you adjust white balance using a post-processing tool. Tint adjusts the appearance of green and magenta in your image and contributes to white balance.
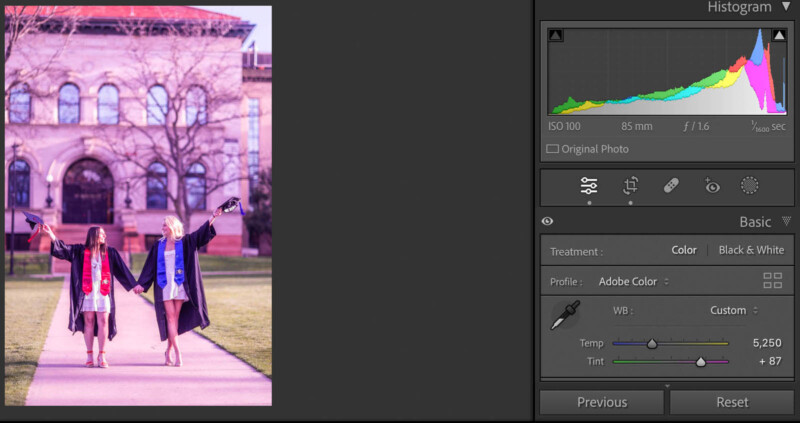
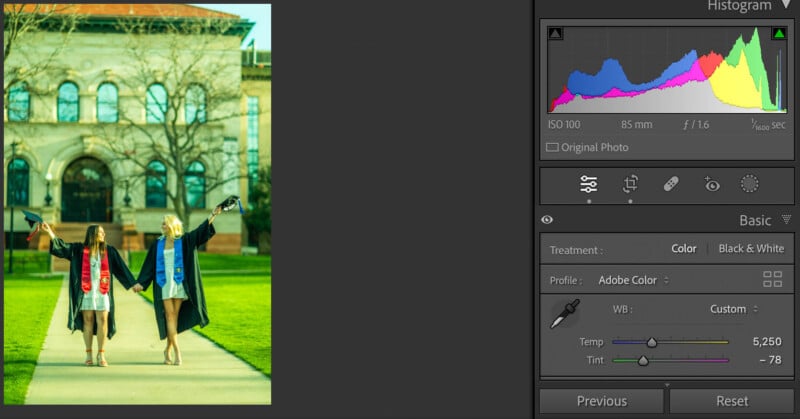
These adjustments are somewhat second to color temperature, especially because your camera will emphasize color temperature in its white balance menus. However, in post-processing especially, it’s important to know that you can make your image more green or more magenta, similar to how you can change the color temperature.


Creativity and White Balance
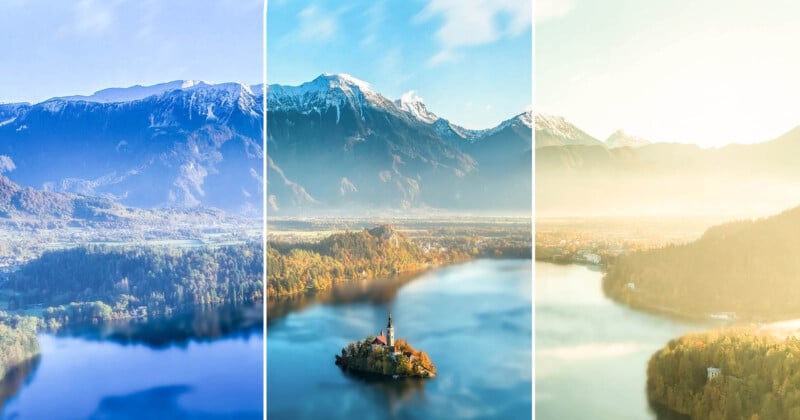
Many photographers consider white balance to be part of their style. Maybe they always shoot on the warmer side, cooler side, or some other creative way. White balance is really just a way of changing the colors in your image, and sometimes that’s a great way to develop a consistent style.
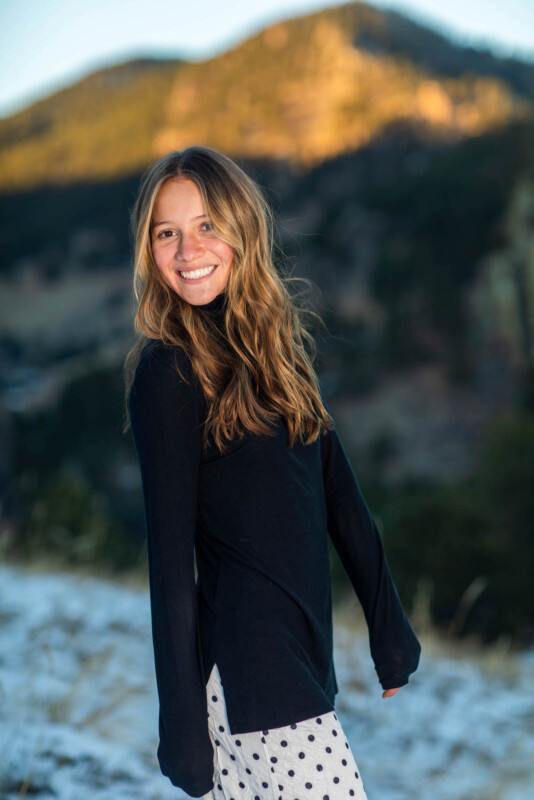
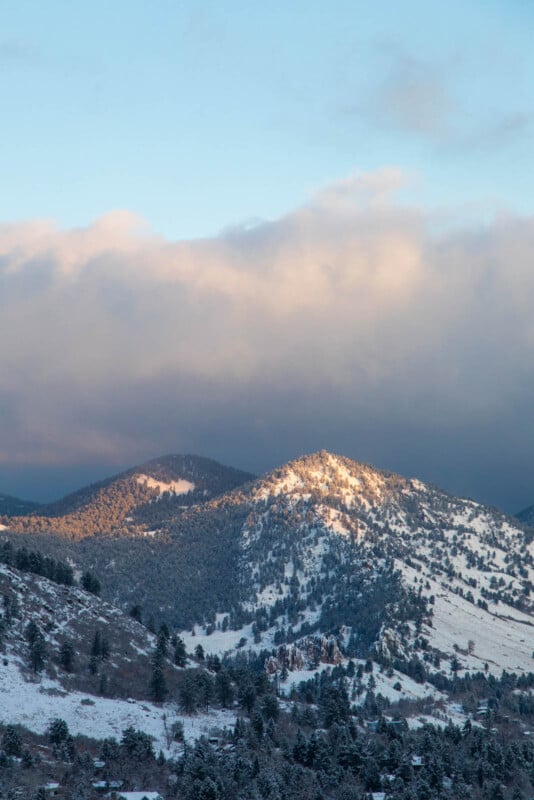
If anything, many photographers intentionally keep their portraits on the warmer side, especially when they’re trying to achieve the “golden hour” look. Some street photographers and landscape photographers keep their images on the cooler side, and some people prefer everything to be free of color casts.

It’s up to you as a photographer to decide if you’d like to use white balance to be creative or not. Above all, it’s important to know how to use white balance so that you can properly decide whether you’d like to be creative with it or not. There’s a big difference between intentional, creative use of white balance and not knowing how to manage white balance on your camera.
Conclusion
It’s easy to look at an image and notice if there are white balance issues. Images will be astoundingly yellow or blue when the photographer really didn’t intend for that to happen. By learning about white balance and its components, you have the ability to fix white balance issues in-camera or using post-processing tools. Once you master that, many photographers turn to white balance as a way to add to their style.