How I Built Myself a Large Format 4×5 Monorail View Camera

I’ve been taking photos all of my life. Something that I realize now started from a young age: I’ve been genetically disposed with bad eyes, but it was only discovered around the age of ten. This forced me to look closely at what was in front of me for a long time. Once I got tested and got glasses an entire world opened up. As a result, I’ve always looked at things and people with an appreciation I doubt I could’ve had any other way.
It’s a hunger to try and capture what I see in the moment as it presents itself, be it a theme or a feeling, a relationship or a time. There’s always a story to tell and that’s why we take photos.
Alternative Processes
I started out with trying to find a way to make prints that are meaningful. I spent years taking photos and printing a few. My goal was to find a way to use papers or chemicals that would produce the textures and depth I felt needed, so I researched alternative methods and explored everything from homemade recipes for emulsions to cyanotypes. I considered contact printing, which led me to large format photography.
The Lens
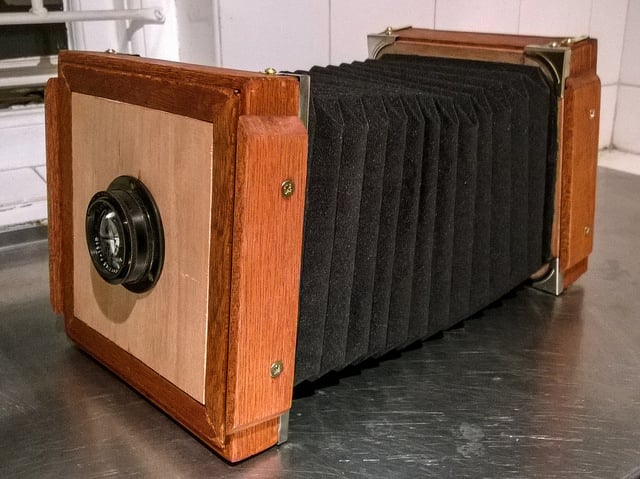
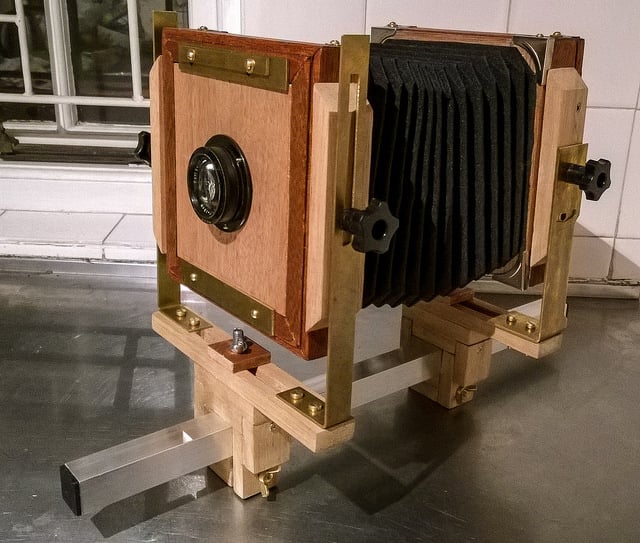
A stroke of good luck: I found a Carl Zeiss Tessar Jena 10.5cm f/4.5 on a local bidding website as part of a bundle sale that included a copal shutter (in parts) and a few old lens filters. I had no idea what I’d bought until I picked up the purchase. The lens was in great condition and it was attached to a beautiful f/36 aperture.
I had to do something with it — I had to build a camera.
Research
I spent countless hours online looking for some plan for a camera. There were many short posts displaying the results but none really went into detail regarding materials and the process. Then I found Jon Grepstad’s webpage and the freely available book he wrote on how to build a large format camera. It was detailed and came with a separate drawings file, so I decided to undertake this build even though I had no tools, no space and no real woodworking experience.
My Workshop
I had none, so I worked on the floor in the lounge of my apartment because there was space and it was easy to clean.
Tools
The only power tool I used was a drill. I got a miter set and many clamps. Wood glue. Loads of sand paper.
Materials
I went to the local hardware store specialising in wood thinking at first that I’d get the parts made which I could just assemble at home. I soon realised that the store was not that specialised. I worked primarily with cover strips. A length of wood of a certain width and thickness used as a finishing “cover”, skirting etc.
I decided on meranti because of its relatively low cost (being a hardwood) and red tone which I just thought would be perfect for the look I was going for in my mind. I also used a few pieces of plywood for things like the lens board.
The standards where made from brass.
The Process
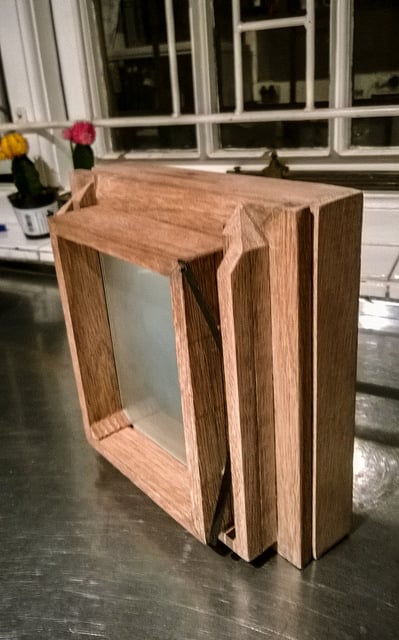
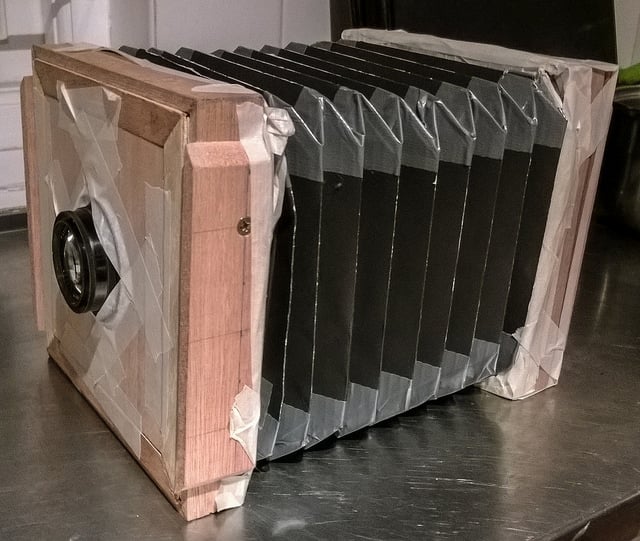
I figured that the front and rear frames would be a good start. Then I worked on the film holder seat, made the ground glass and ground glass holder and the spring system to hold it all in place. Then I made a test bellows from cardboard and duct tape to test the pattern. Then a second test bellows with light tight material. And only then, when I was confident of the pattern, I made the real bellows.
I made frames for the bellows to fit them into the front and rear frames and modified picture frame hangers to use as connectors. Then I had a functional “camera” which I used to take a few photos with the help of a lot of masking tape (to hold it all in place) and patience.
I had the brass frames made for me and fitted those to the frames. Then I found a piece of square tubing and worked on the optical bench. The sliders where made from wood pieces which tighten and loosen on the rail by means of bolts and wingnuts. I still have to spend time refining these to make the camera more stable.
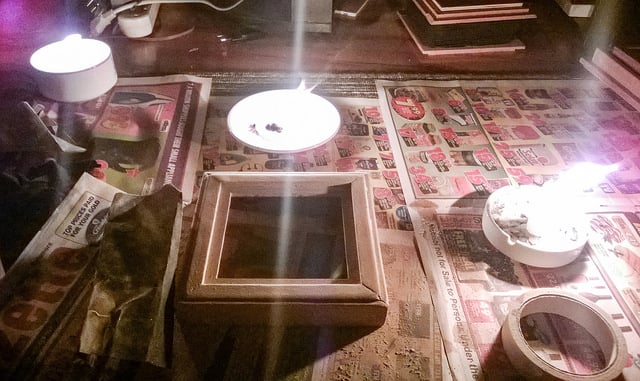
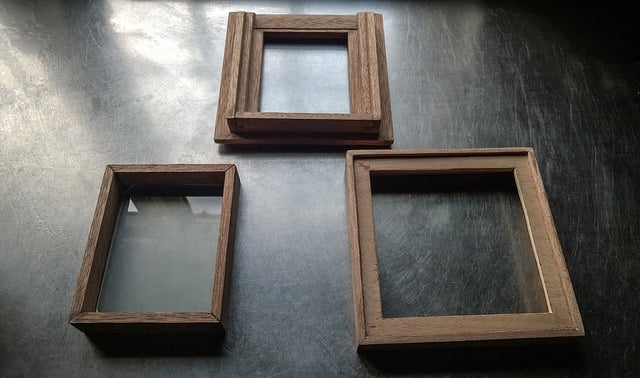
Frames
I cut the cover strips to size and cut the ends at 45 degrees. Then I glued them together and used clamps to form the frames.
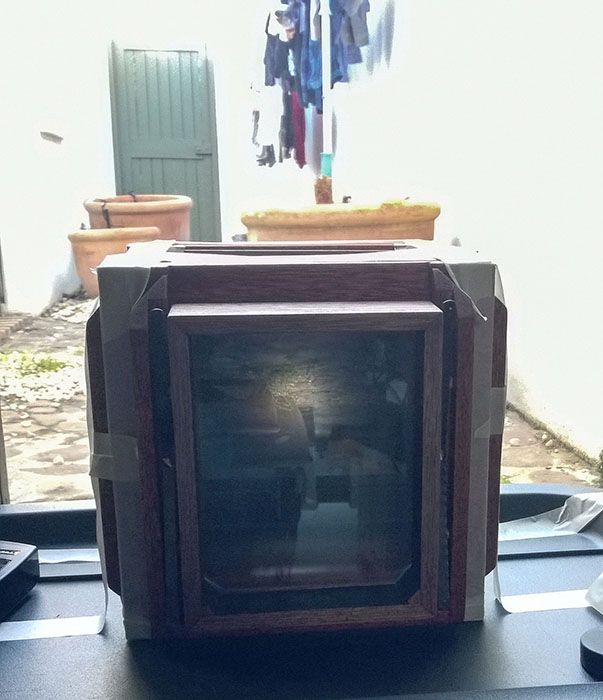
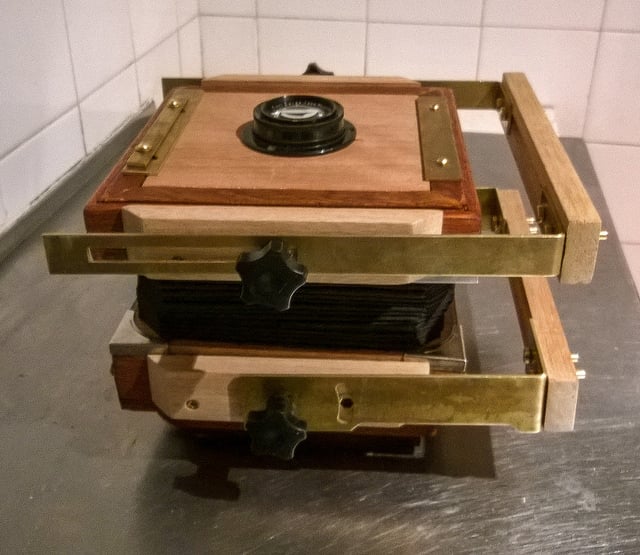
Film Holder Seat
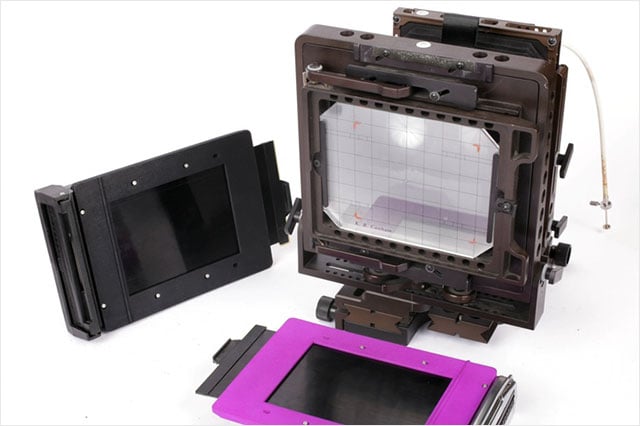
This part was made up of many wood pieces to form a snug fit for the ground glass holder and the film holders. I had to make sure that the position of the ground glass was the same as the film plane (once the holder is inserted) to ensure focus.
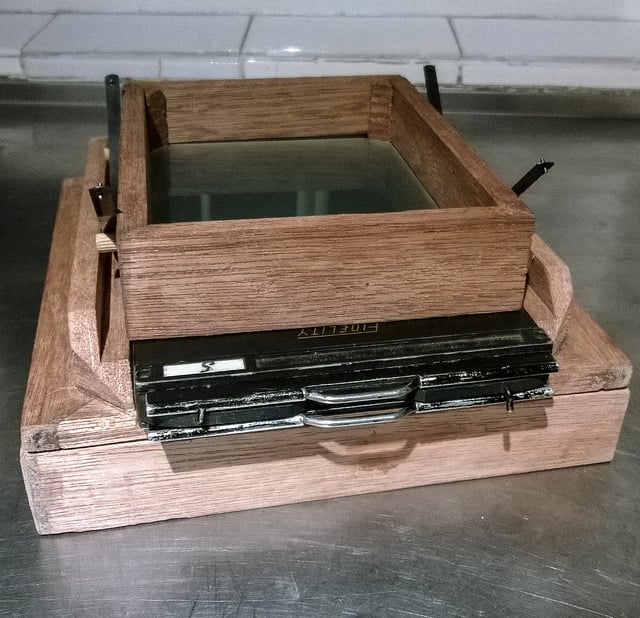
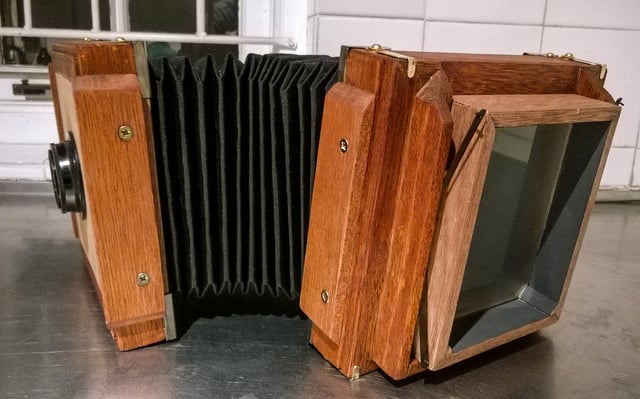
Ground Glass
I had a piece of regular glass cut to size and went at it with the finest sandpaper I could find. I spent about two hours going at it, wetting the sanding area to stop the glass dust from rising from rising up. I started with a coarser grain and gradually moved to the finest grain. It took a lot of elbow grease but it worked. I ended up with a bright piece of ground glass.
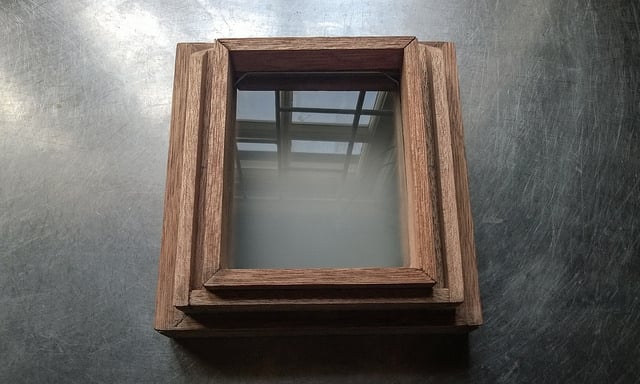
Then I built a frame around it to fit in the film holder seat. I inserted dowels on each side of this frame. The frame is held in place by leaf springs I made using small hacksaw blades with the teeth filled off. They are screwed into the film holder seat.
These allow the ground glass frame to lift as you insert a film holder. I cut locating grooves in the film holder seat and ground glass frame to lock the film holder in place once inserted.
Bellows
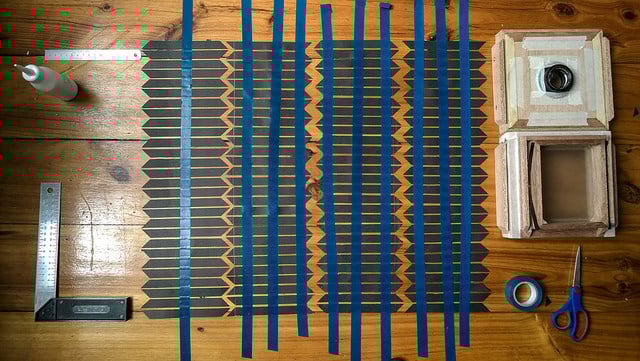
This took a lot of time — three days in fact. I bought a synthetic, flexible light tight material and a roll of black cotton (for the inner liner). I cut stiffeners from thin, tough chart paper. Then transferred the stiffeners to the inside of the light tight material using glue which took a few hours to set.
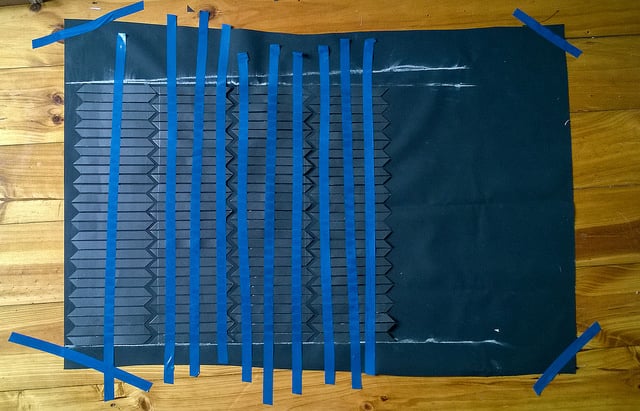
Then I glued the black cotton inner liner over that. Trimmed the sandwich and lined the edges up. I glued the ends together to form a tall open ended box.
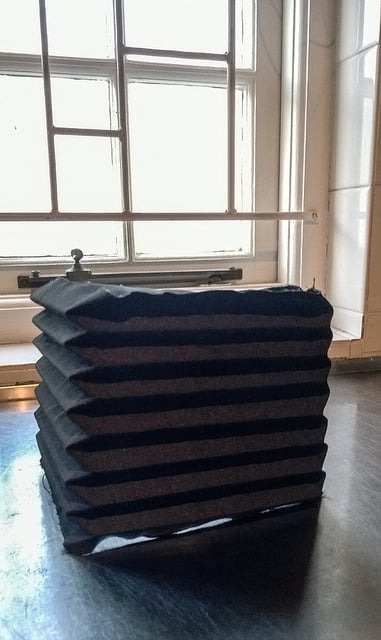
All I had to do then was to kink in the corners in the right order and compress the whole thing as went along. This was because of the shape of the stiffeners and the pattern that they are arranged in. After a while the bellows were formed. I placed a stack of heavy books on it and left it for a day to set the shape. I built wood frames and glued them to each end of the bellows to attach it securely to the front and rear frames of the camera.
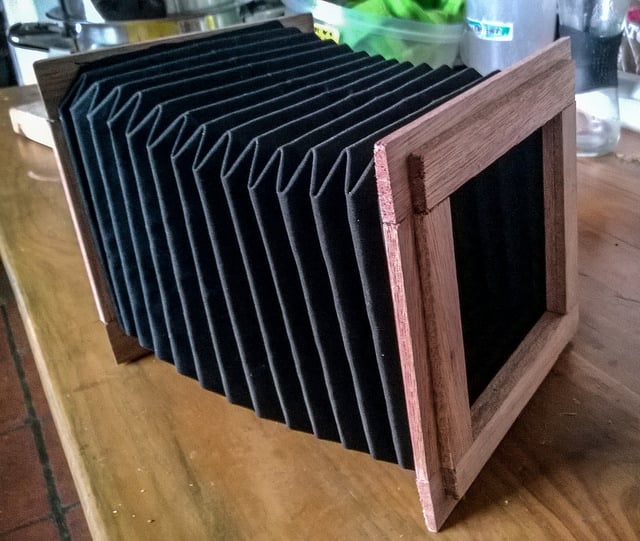
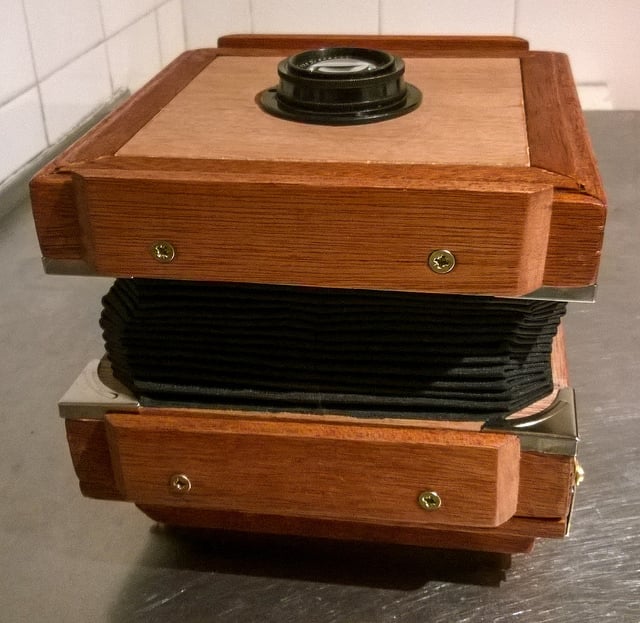
Standards
I took the drawings made by Jon and edited them to fit my frames. I then sent them away to a workshop to be made.
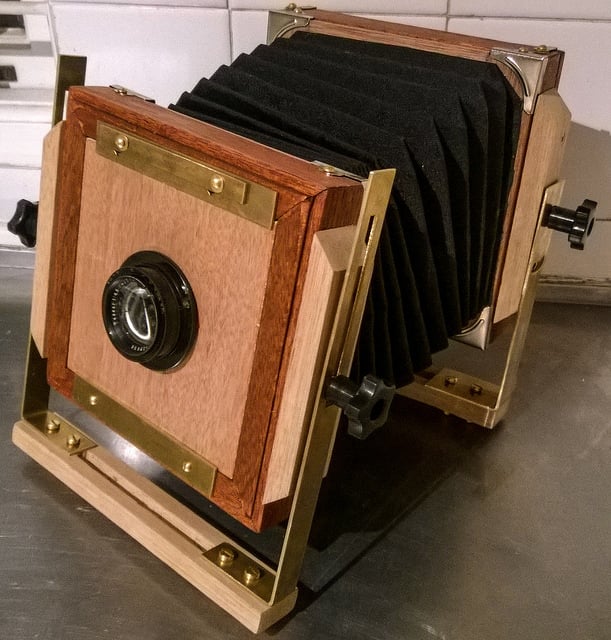
The Optical Bench
I used a 25mmx25mm piece of square tubing, 500mm long with endcaps at each end. I built two slider blocks, one for each standard, and a trip mount block. These can move along the rail (with some friction for feeling) and be fixed in any place by clamping tightly using bolts and wingnuts.
Conclusion
I did not know what I got myself into at the beginning, but I just had this need to learn more about photography. That was the primary goal, to understand every aspect of the medium I chose to work with to be able to express my ideas effectively. So I built the camera from scratch.
I sanded down a piece of glass to be able to focus and spend many nights ensuring that each part fits and that everything is light tight. The build took months, money, blood, sweat and tears but I got what I set out for. It’s lit a raging fire to pursue what I love and upped my craft game more than anything in recent years.
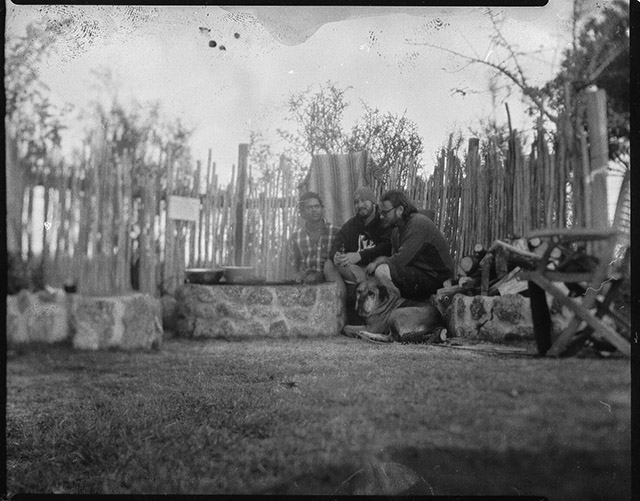
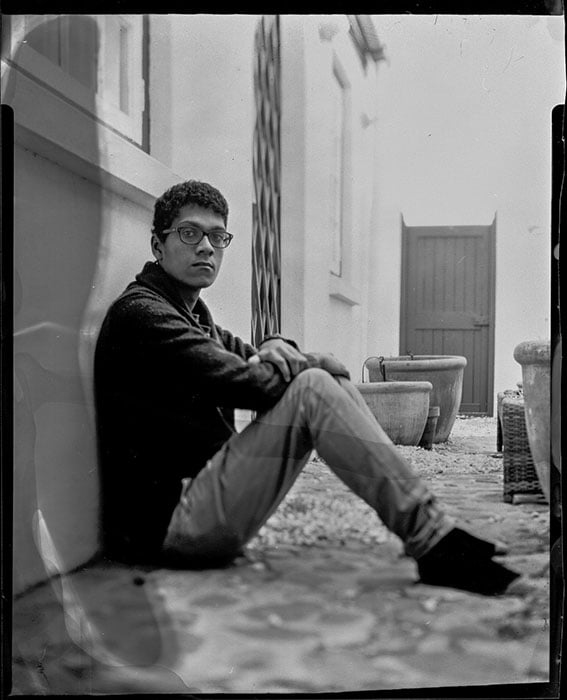
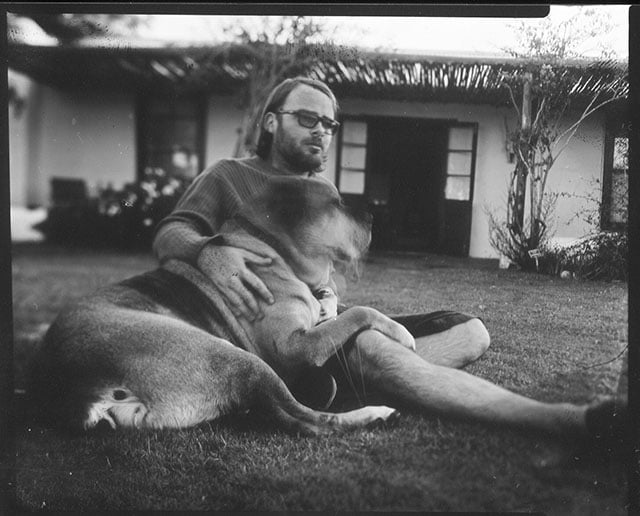
Here are a few sample photos I made using this camera:
Figuring out the exposure needed, spending time framing and focussing just right. Checking everything, then rechecking, and finally inserting the holder, removing the dark slide and exposing the film. Developing the film and hoping that you had it all right and then removing a negative has been rewarding beyond anything I can explain. You have your hand in every part of the process. It’s your work.
If you love photography, the medium, this is what you need to do. Build a camera. Mix some chemicals. Develop your film and watch it dry.
About the author: Carl Topkin is a photographer who is passionate about expanding both his breadth and depth of knowledge in the art. You can find him on Flickr here.