After Living With Adapted Lenses, Switching to Native Glass Changed Everything
![]()
With companies releasing hit after hit of new gear from cameras to lenses at CP+, gear acquisition syndrome is very real. But does upgrading really make such a difference? I recently had the opportunity to find out.
I’ve been a photographer most of my life. I remember always having a camera in my hand and bringing my film to the camera shop downtown to have it developed. Then, in college, I developed my own film as I worked towards my BFA in Fine Art and Design. When I was in college, my school didn’t have any digital photography classes yet. Everything was done on black and white film. It gave me a solid foundation and core set of values in having to do everything the hard way but also understanding textures, lines, and tones to create my photographs.
After graduating, I started my digital photography journey. I went from Nikon Coolpix to Canon Rebel to Canon 7D and eventually settled on Sony Alpha mirrorless cameras. I’ve been using third-party lenses my whole career, and since my switch to mirrorless six years ago, I have been using that same Sigma lens for Canon EF glass adapted to my Sony camera using the Sigma MC-11.

Given my photographic journey, rarely using the latest technology, I think of gear differently. I see it as a tool to create my artwork, and I seldom feel a need to have the newest equipment. However, as my lenses age, particularly the optical stabilization that no longer works in my telephoto lens, combined with reviewing (and shipping back) so many amazing modern telephoto lenses, I feel it creeping on me — that feeling that it’s time to upgrade. Gear acquisition syndrome? Perhaps a little.
If you looked at my portfolio though and you didn’t know any of this, you would probably not guess what equipment my photos were created with. I like that. I think it’s the photographer who makes the photograph, and the gear just helps you get there. Without trying to come across as pretentious or full of myself, I say humbly, although with some pride, that I have won multiple awards, from the National Geographic Travel Chase Adventure Grand Prize to the Sony Alpha Female+ Wildlife Award, Photo District News Duggal Image Maker Award, People’s Choice, Finalist in the USA Landscape Photographer of the Year, and many more. All for photos created with gear that many would scoff at and which is factually outdated. Using vintage gear is only cool when it’s film.
As I enter a new era in my career spanning over 20 years in the industry, I’ve started writing for PetaPixel. My editor Jeremy Gray and our Editor-in-Chief Jaron Schneider have taken me under their collective wings as I start this new chapter. While many of you may see their names at the tops of PetaPixel articles, features, and reviews, behind the scenes, it is camaraderie and a tight-knit team. You can see a bit of that if you watch the videos of the podcast recordings.
So one of the first things that happened when I started was Jaron asked me what I photograph with. When I shared that I use the mirrorless Sony a7R IV with a Sigma MC-11 adapter to attach my old Canon DSLR EF-mount lenses, I think he was a little shocked. He asked me if I were to upgrade what I would choose. He had an idea. What if they asked Sony to let me borrow a kit for a couple of weeks and compare it to my older gear? Would upgrading really make a huge difference?
There are so many other photographers likely in my same position transitioning through technologies and gear. There’s a reason why the adapters sell so well. However, rarely is there a side-by-side comparison, not only of results but how it feels in the field.
On paper, having native lenses on a native camera body and the latest camera body is a no-brainer. But sometimes you have to try something because you might just be surprised.
So I thought for a moment. I mostly do nature photography, landscapes, wildlife, macro, and night sky work. That’s what made me choose the Sony a7R IV. I wanted the higher resolution, even knowing there are cameras with greater frames per second (fps) for wildlife. The a7R IV, with its 10 frames per second and animal eye tracking, was a massive upgrade over my Canon 7D with eight fps and no eye tracking. So, I got the Sigma MC-11 adapter and kept the same Canon EF lenses.
Looking at gear now, I did consider answering Jaron that I wanted to try either the Sony a1 II with 30fps or the a9 III with its blazing 120fps. Ultimately, due to the megapixels for huge files and wanting a fair upgrade comparison, I decided to pick what was most equivalent to my kit. Sony was happy to entertain the experiment and provide loaner gear.
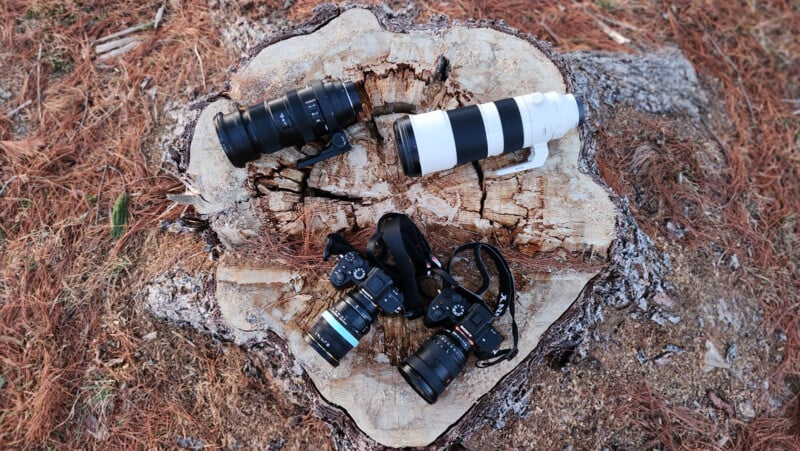
The contenders of this battle: in the left corner the Sony a7R IV, Sigma MC-11 adapter, and lenses Sigma 17-50mm f/2.8 EX DC OS HSM FLD or Sigma 50-500mm f/4.5-6.3 APO DG OS HSM SLD for Canon EF-mount. In the right corner, the Sony a7R V with lenses Sony FE 16-35mm F2.8 GM II or Sony FE 200-600mm F5.6-6.3 G OSS.
The greatest questions I went into this adventure looking at were: Will my pictures be better, and will my user experience with these new tools be vastly improved? Additionally, to be thorough, I would look at aspects like dynamic range, noise, colors and clarity, and the all-important wildlife eye tracking.
After two weeks and over 470 miles of road trips across Pennsylvania, New Jersey, and Delaware, I’m here to answer all of my, and perhaps your, questions about upgrading Sony mirrorless gear.
Field Testing
The gear from Sony arrived via its partner Lensrentals , carefully shipped in a hardshell case. In the Pelican case, the Sony a7R V camera, and Sony FE 16-35mm f/2.8 GM II and Sony FE 200-600mm f/5.6-6.3 G OSS lenses, each in their own separate compartment.
My first adventure was to see if things were working correctly and ensure the new camera’s settings were correct. One of the first differences I noticed between the two camera bodies is that the screen of the a7R IV only tilts and folds out slightly. The screen of the a7R V is fully 4-axis, offering tilting, side-open, and flip-out at various angles. This type of screen is beneficial for me. When photographing wildlife, I prefer to be at their eye level and often sit or lie flat on the ground. The updated 4-axis screen is excellent for those tricky angles.
My initial impression of holding the gear was that the 200-600mm at 4.65 pounds (2,115 grams) was not much heavier than my 50-500mm telephoto at 4.34 pounds (1,970g). The weight, to me, didn’t feel unbalanced or too much. I was able to easily handhold the gear without issue.
For the wide-angle lenses, the 16-35mm was also larger than my 17-50mm, but not by much; I’d call it negligible.
Settings
The biggest initial difference arrived when turning the gear on. I immediately noticed the updated and streamlined menu of the Sony a7R V. It was completely different, and I was lost for a moment trying to find the settings I’m used to in my a7R IV to get the gear set up. I appreciate the Fn button quick menu to adjust my main settings quickly.
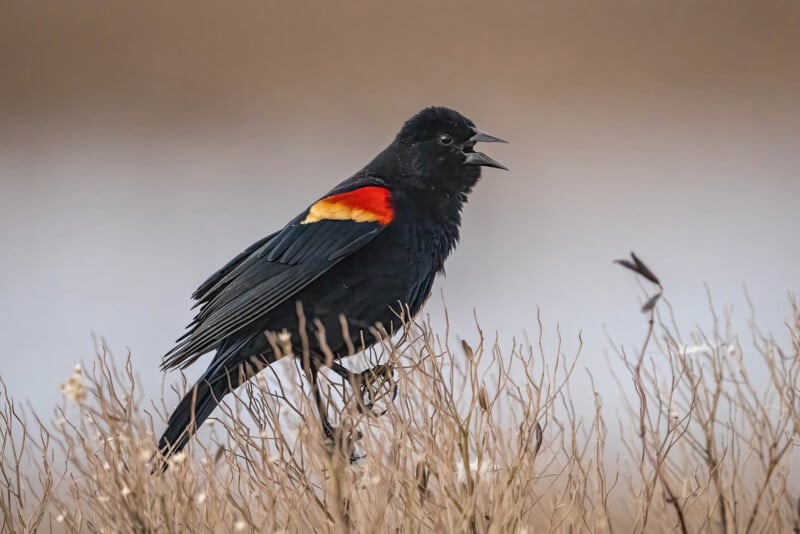
For my wildlife image testing, all images shown were taken at the lowest aperture, wide open, which would mean 600mm at f/6.3 for the Sony. I used evaluative metering, auto white balance, bird/animal eye tracking, continuous autofocus, and the highest burst for frame rate.
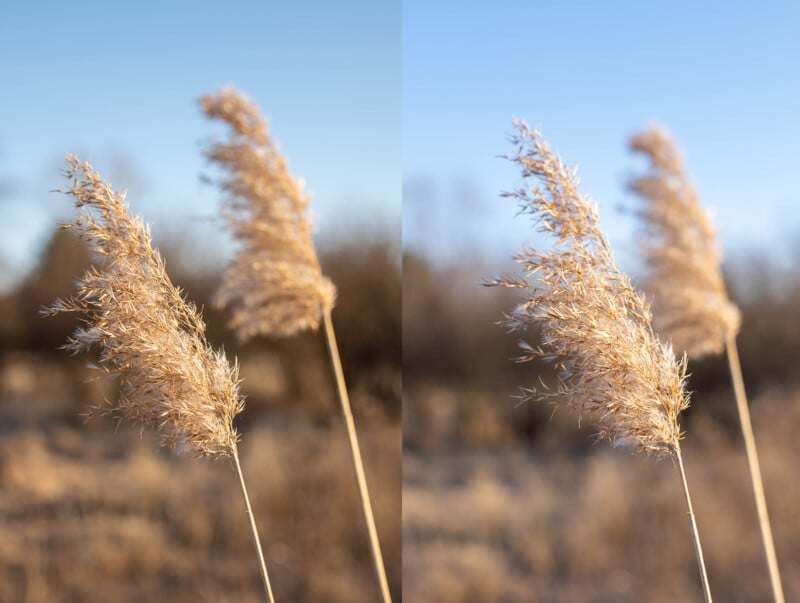
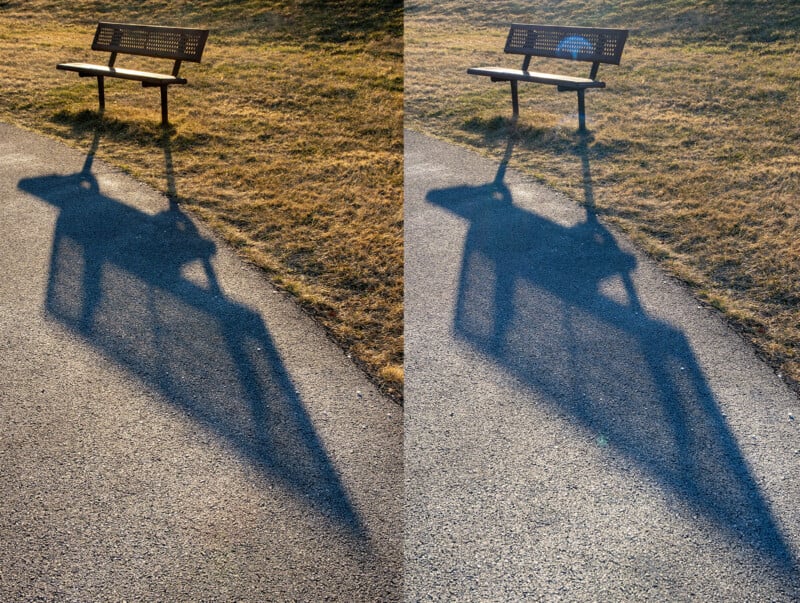
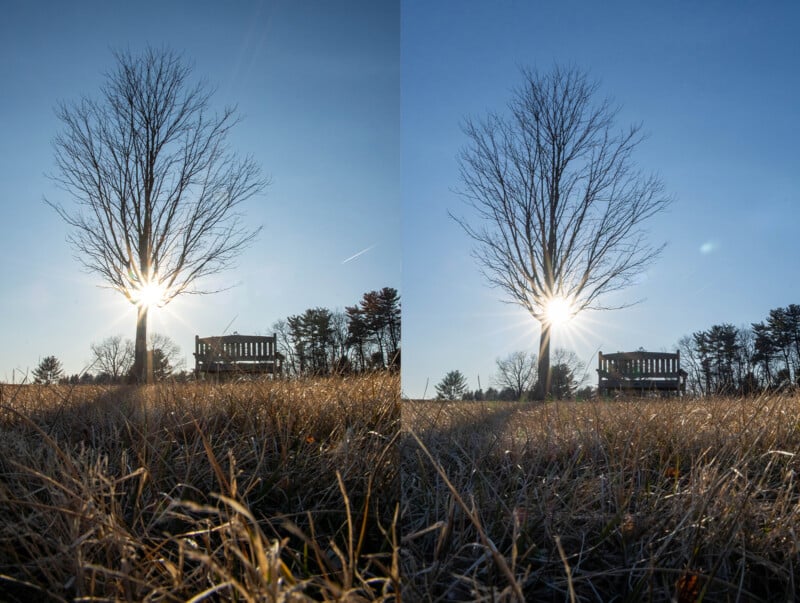
When photographing landscapes with the Sony 16-35mm: for the bokeh test shots, I used the smallest aperture at f/2.8, in the starburst image f/22, and everything else was pretty much shot at f/8-16. This gives us an idea of how the lens will perform at various apertures and any distortion that may appear.
Colors and Clarity
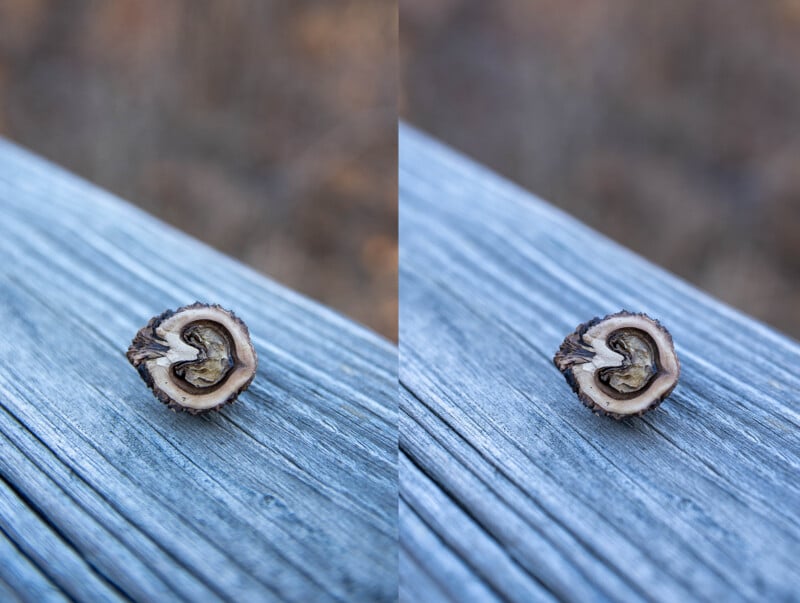
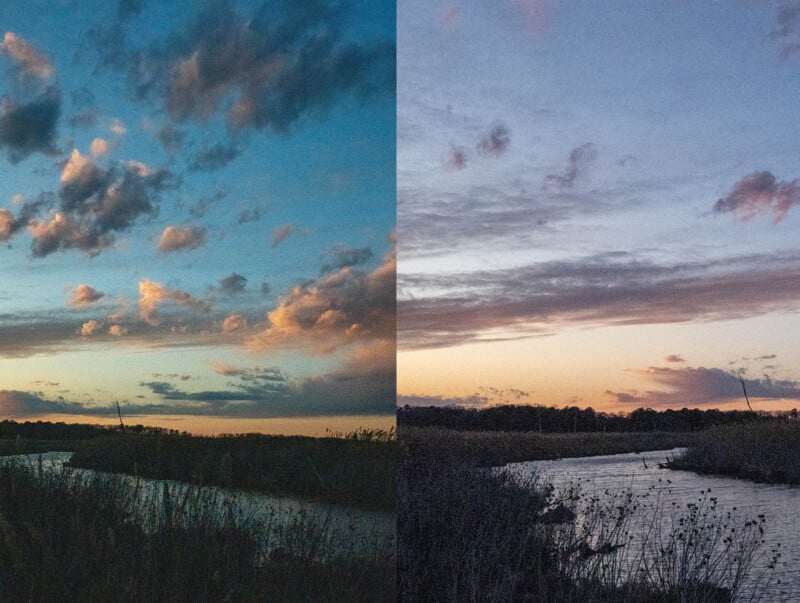
Regardless of whether photographing wildlife or landscapes, the very first thing I noticed was the color difference between the two different kits. My usual gear apparently photographs much warmer and with a bit of a green tinge. The Sony native gear trended towards a cooler tone.
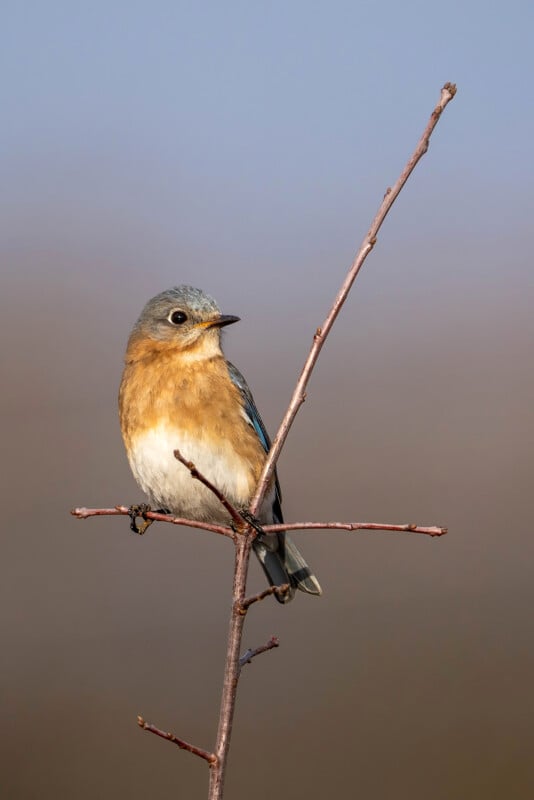
More importantly, I also noticed, as expected, that the newer native lenses were considerably sharper especially in areas of fine detail like feathers and fur or foliage. I also feel there was more clarity and contrast to the Sony native images.
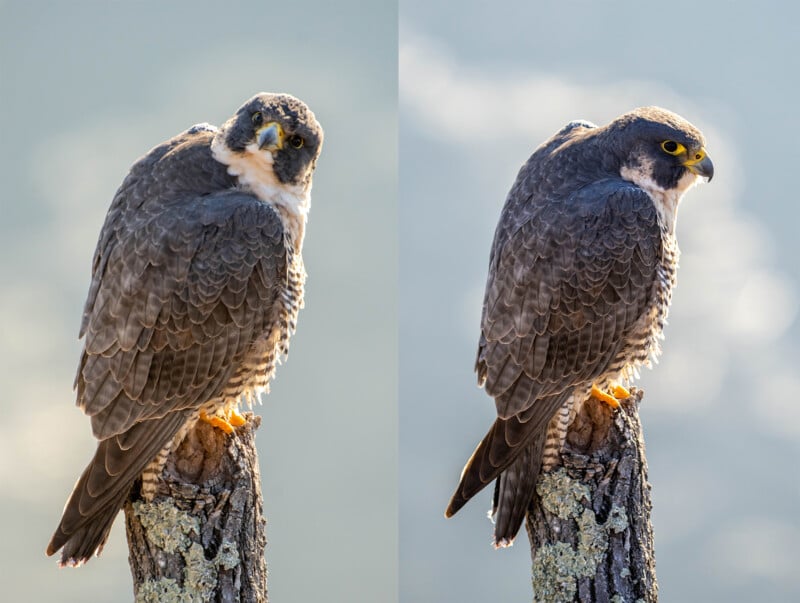
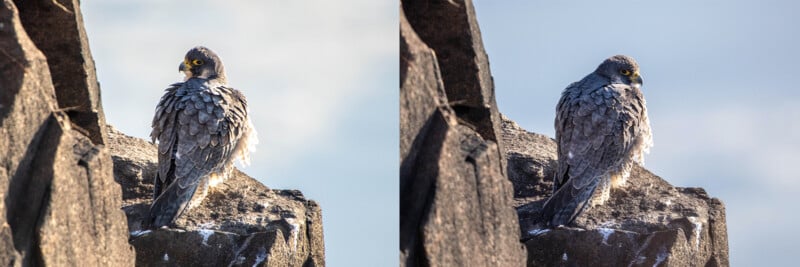
Image Quality
In my part of the world, we call this “stick season,” when it’s the end of winter, still cold, there’s no snow left, and little foliage. I still found some landscapes that would give insight into comparing these two kits.
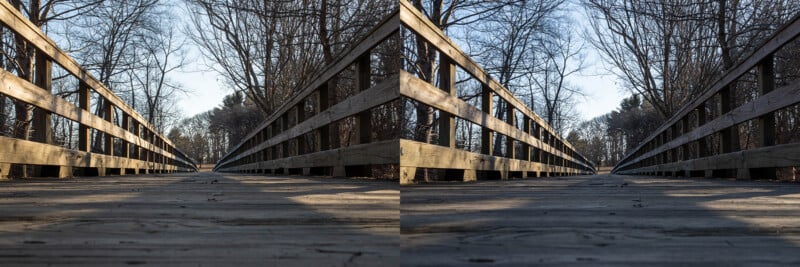
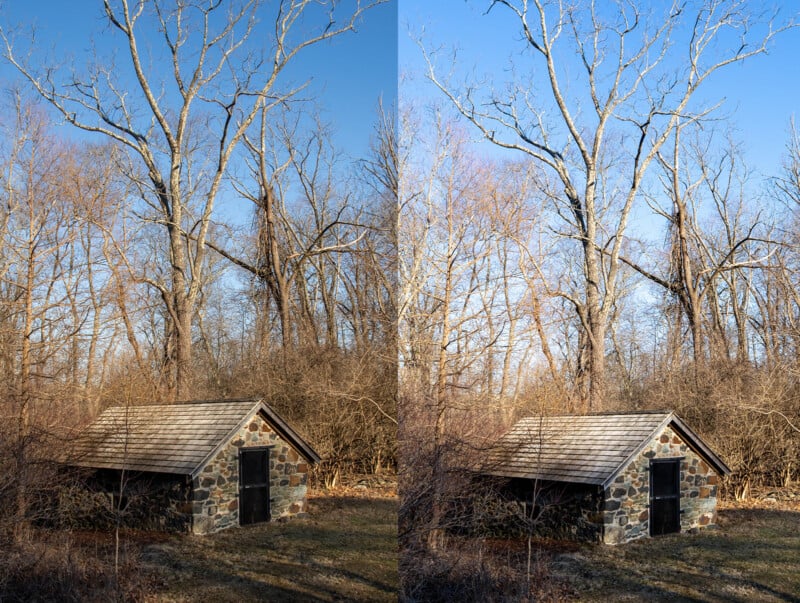
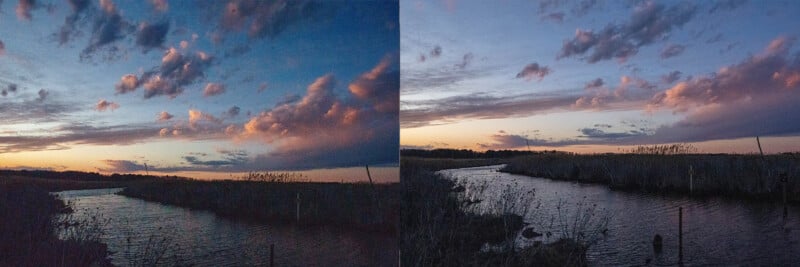
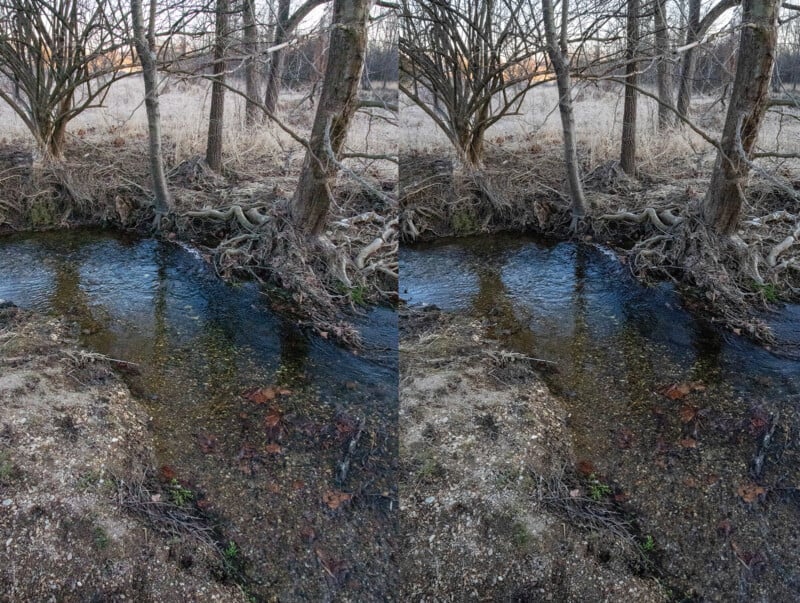
In every comparison image on the left, I will have my base kit of the Sony a7R IV and Sigma MC-11 using either the Sigma 17-50mm f/2.8 EX DC OS HSM FLD for Canon EF-mount or Sigma 50-500mm f/4.5-6.3 APO DG OS HSM SLD for Canon EF-mount. The Sony a7RV and either the Sony FE 16-35mm f/2.8 GM II or the Sony FE 200-600mm f/5.6-6.3 G OSS will be on the right side.
I didn’t use any lens filters and did minimal post-production of the images.
The two kits’ image quality is the easiest difference to notice between them. In almost every case you could see that the detail in the Sony native gear was much finer. The older Sigma 17-50mm DSLR lens is soft in the corners, whereas the Sony 16-35mm maintains its sharpness throughout. Neither shows any extreme distortion to my eye. I suspect one of Sigma’s latest E-mount lenses would give the Sony 16-35mm a run for its money.
While not evident in this test, in the past, I have noticed some chromatic aberrations in my landscape images under other conditions. In times of high contrast, such as out West photographing the iconic red rock formations against a blue sky, when zoomed in, shows color fringing like a green line around the subjects. I didn’t experience that here, but I wanted to mention it to be thorough.
Dynamic Range and Noise
The Sony a7R IV and V use the same 61-megapixel full-frame BSI-CMOS sensor. However, they have different processors, with the Sony a7R IV using the Bionz X and the Sony a7R V using the newer Bionz XR. The sensor and processor combined in my testing seem to give similar results to the dynamic range. The a7R V, on paper, has a marginally wider range of light levels, but to my eye, it’s close.
With that, they were similarly close in noise. The two images shown in the comparison below were photographed at ISO 12,800. The noise is well visible in both to a similar degree. Interestingly, I noticed that the noise in the skies or highlights looks worse on the a7R IV, whereas the noise in the shadows looks worse for the a7R V.

Wildlife Eye Tracking
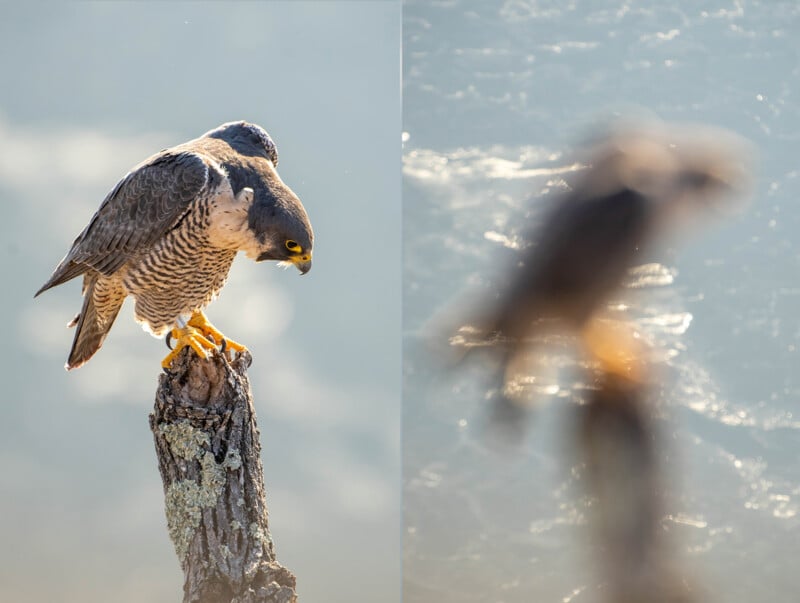
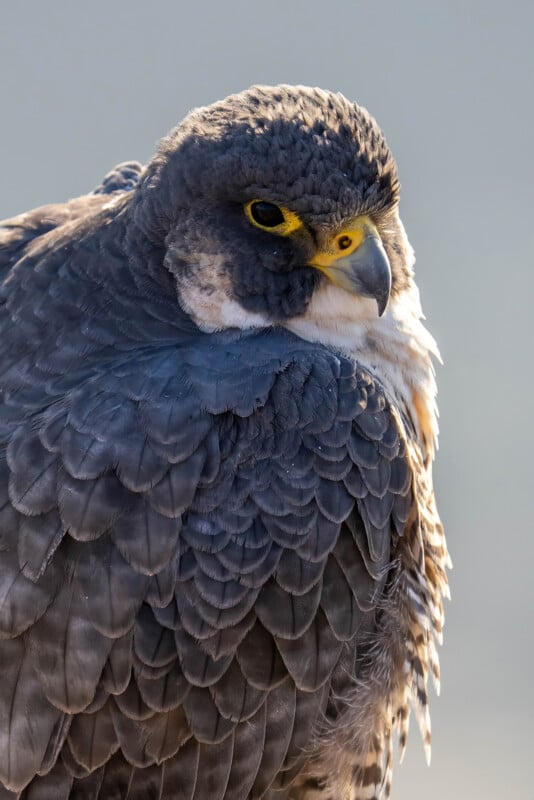
My greatest issue with using my older adapted glass for wildlife is that it occasionally loses focus for no reason whatsoever. The lens will hunt and get stuck either out of focus or on an area entirely outside the focus selection. Even trying to half-press the shutter to refocus will not fix it or get it to focus anywhere else. I usually have to click the lens switch to manual focus and then back to autofocus just to reset it. By then, the moment is often gone. As demonstrated in the image below, the adapted gear lost focus on a perched peregrine falcon I photographed that was close up and not outside the focus area. It only happens to me occasionally, but it is really frustrating when it does.
With that in mind, the aspect that I was most excited about testing for these two cameras was their wildlife eye tracking. The Sony a7R IV does have wildlife eye tracking. In the menu it’s under camera settings with a selection for animal eye display. Unfortunately, I find that with third-party lenses on an adapter, the tracking aspect doesn’t work very well, and it often also doesn’t even see the animal’s eye.
Conversely, the Sony a7R V has not only wildlife eye tracking but also a new AI-based autofocus system with advanced subject recognition and real-time eye AF for animals or birds specifically. The tracking is so advanced that you can even select its recognition target to human, bird/animal, animal, bird, insect, car/train, or airplane to prioritize whatever subject you’re working with.
Oh, how mad I am that I tried this camera — the tracking was ridiculous in the best way. Reminder: this article is not sponsored. I was allowed to try out this gear for my honest opinion. So when I gush about the wildlife eye tracking or anything else here, it’s sincere.
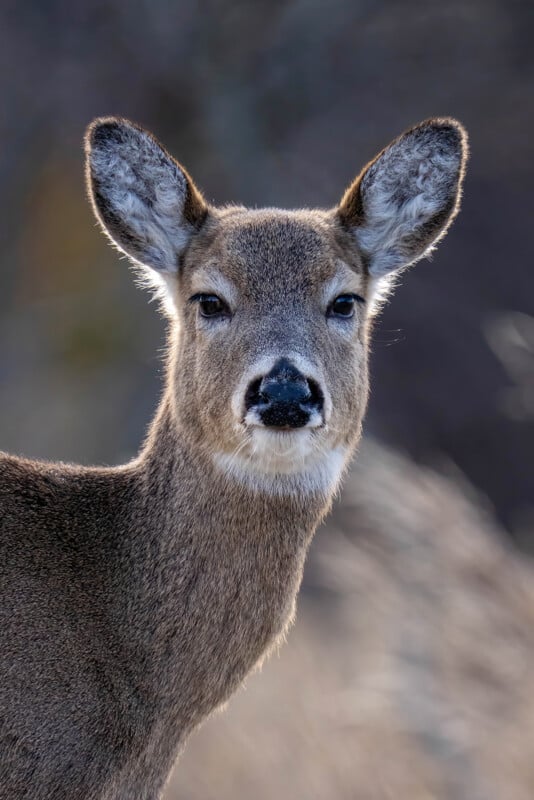
The tracking was very good. Too good. I’m so mad. There were times when I would be photographing either a bird in flight or a deer moving through tall grass, and when the animal would go out of view and then come back into view, the tracking would immediately detect the eye and focus. I didn’t have to move my point around, refocus, or struggle in any way. It was immediately locked onto the eye of my subject. It just worked. If you remember, I have issues with my adapted third-party gear losing focus even if something isn’t moving! The contrast of this camera with native glass when it comes to tracking was enough for me to reconsider my life choices.
Now, of course, one should practice as a photographer and work towards keeping your subject in the frame and achieving proper focus. Heck, I’ve been doing it the hard way my whole life, even before any tracking or digital anything. However, I don’t see a feature like this as a crutch. This type of technological advancement is a way to focus, pun intended, on creating rather than struggling with autofocus issues.
From an accessibility standpoint, I also see how this advanced wildlife eye tracking can help people with low mobility create images during action. There are many photographers that I know who can’t handhold these heavy telephoto lenses. Often, they use a monopod or tripod, but the wildlife moves too quickly, and this necessary grounding support limits their movement. That the tracking on cameras like the a7R V can effortlessly and immediately lock on to your subject gives you precious seconds where you might just get the shot.
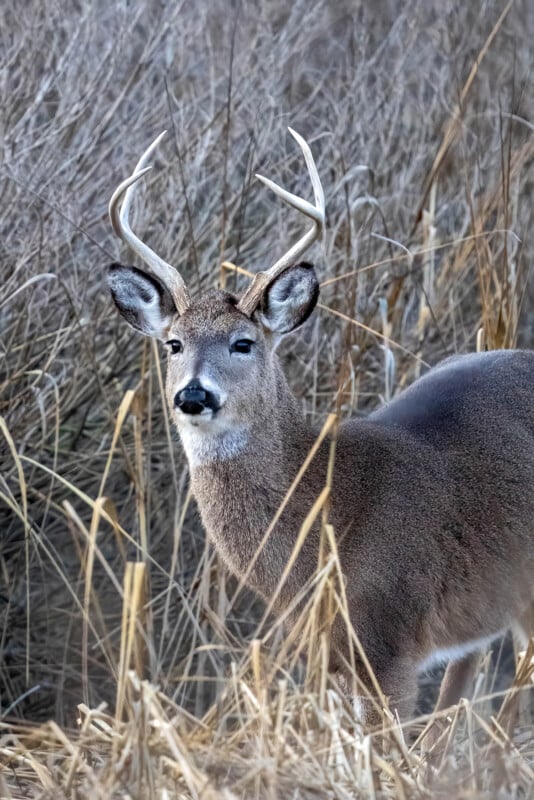
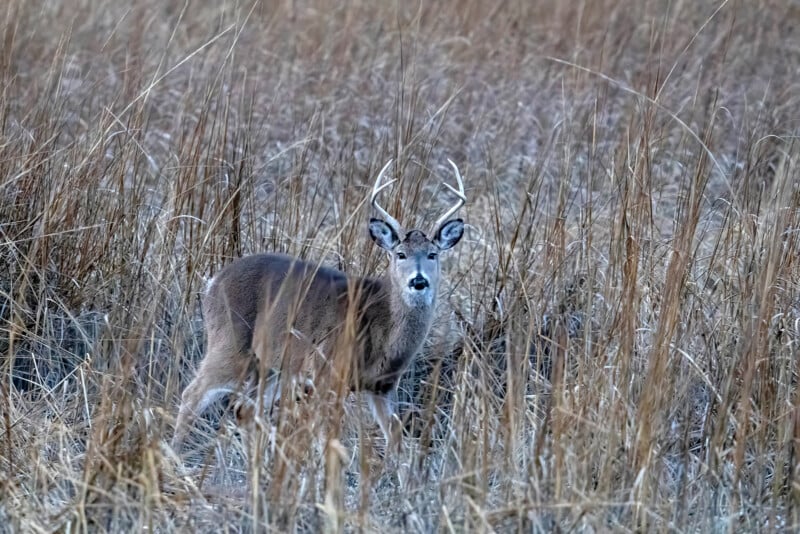
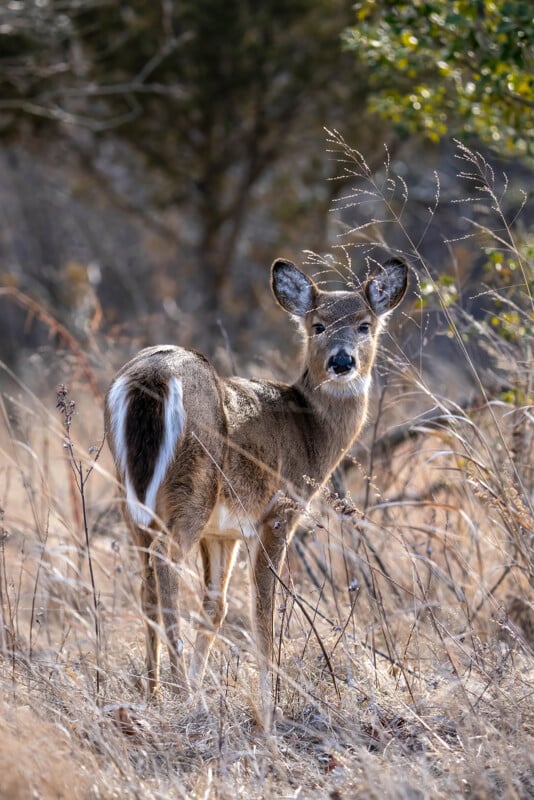
My keeper rate was significantly increased by being able to immediately focus on my subject. The key here is that the camera was seeing the subject’s eye, so it wasn’t accidentally focusing on random trees in the background. One time in particular, it was blue hour and I had deer wading through tall marsh grass, disappearing from view completely then poking out from the sea of grass, and it was picking up their eyes right away. I was surprised that even in such low light, it was not selecting the grass blades. For me, this is a game changer. If you’re looking for a new camera and you take nothing else from my very long-winded opinion article, let it be that this wildlife eye tracking on these newer cameras is outstanding and worth the coin.
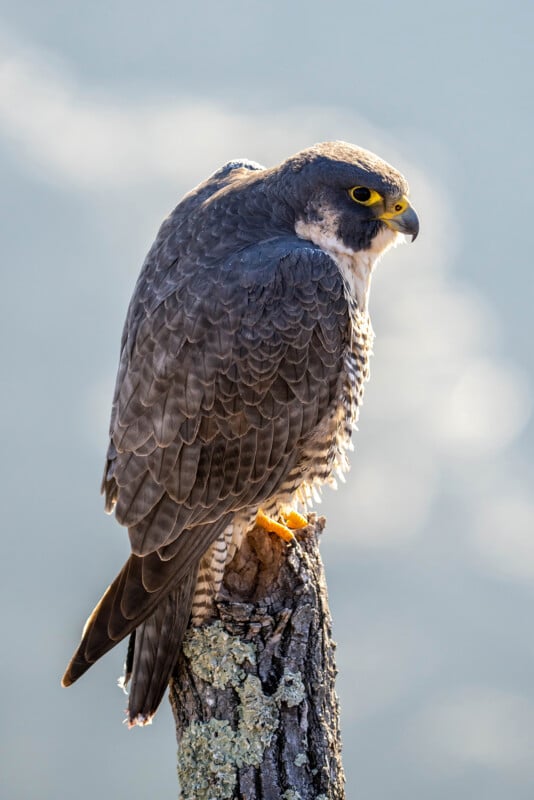
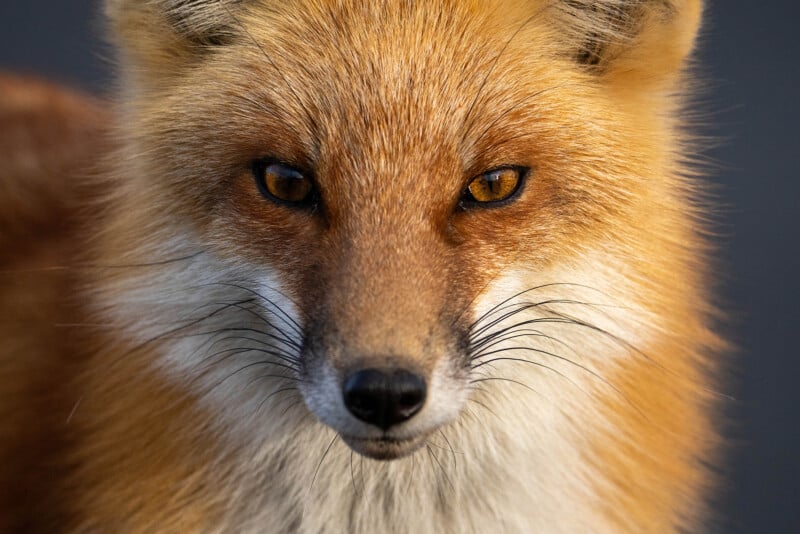
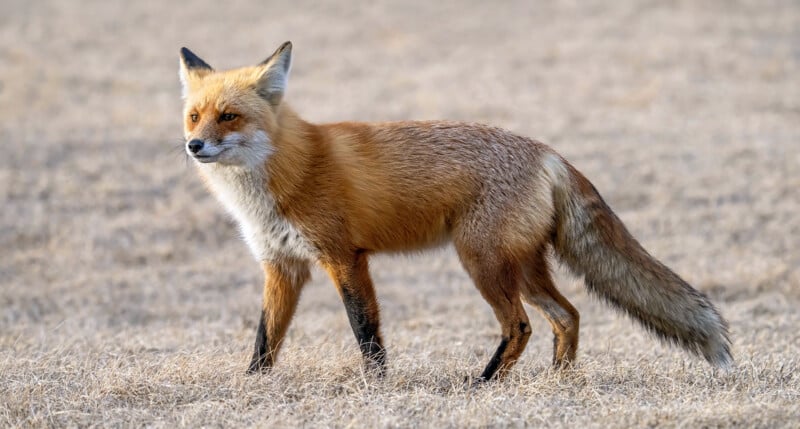
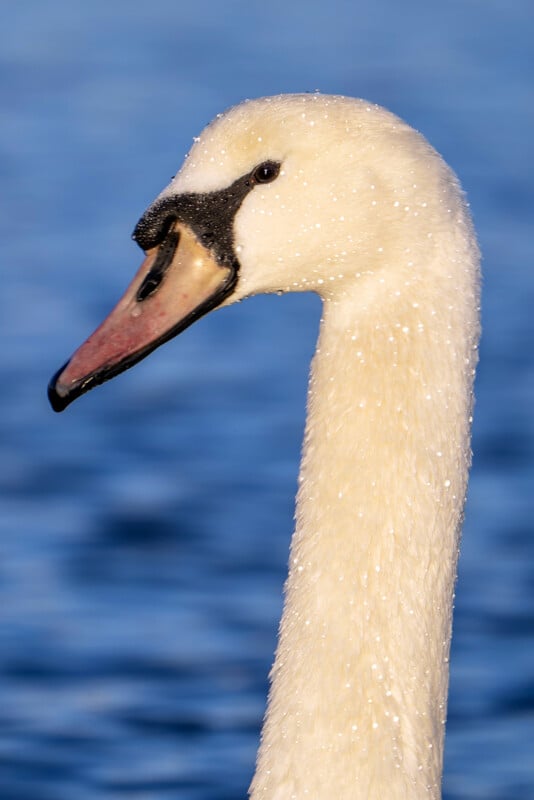
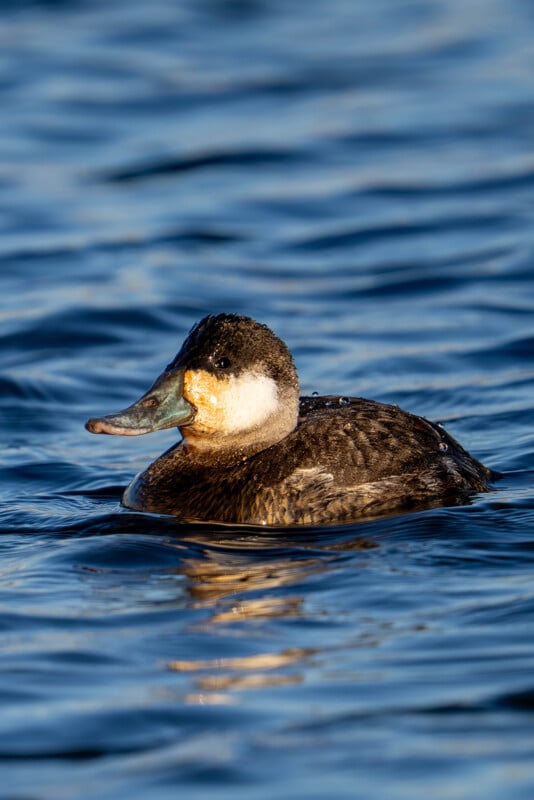
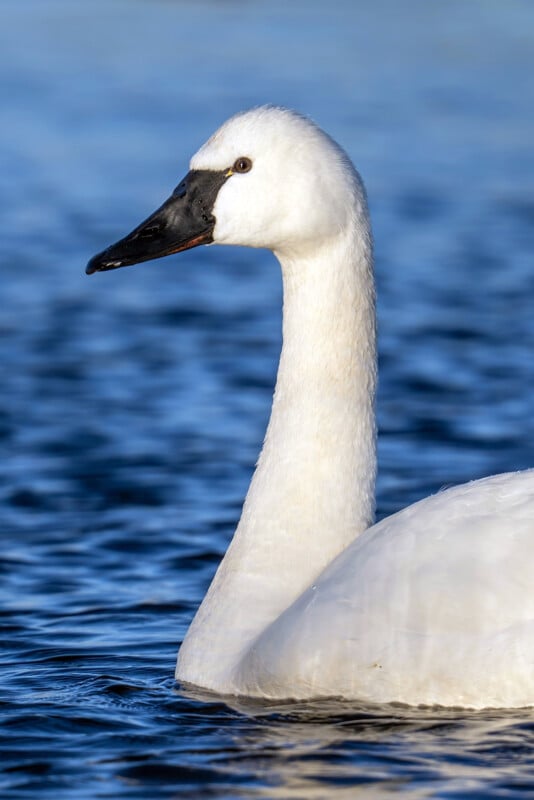
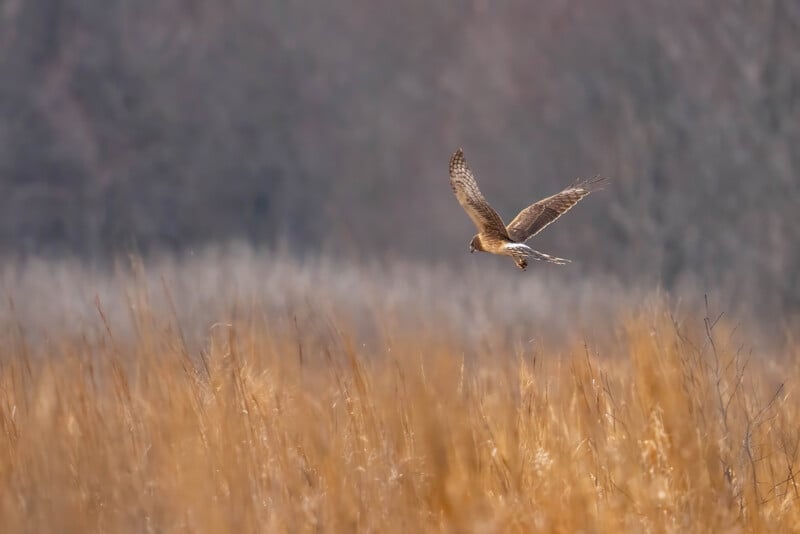
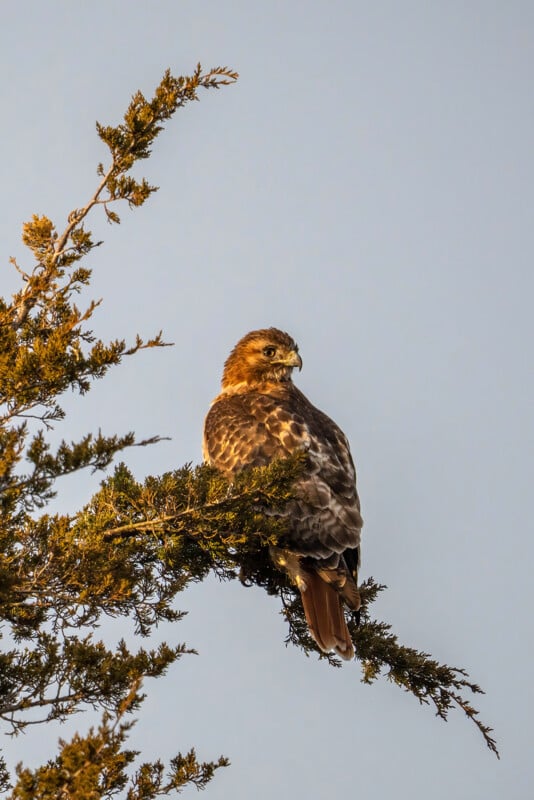
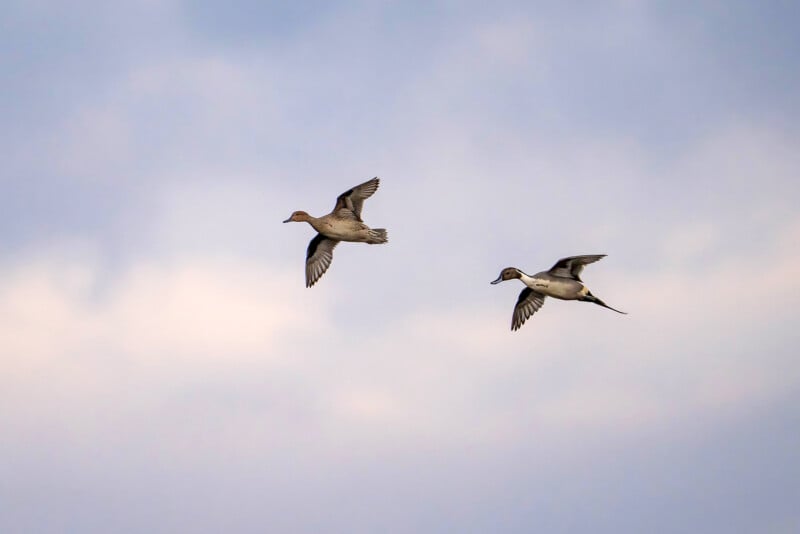
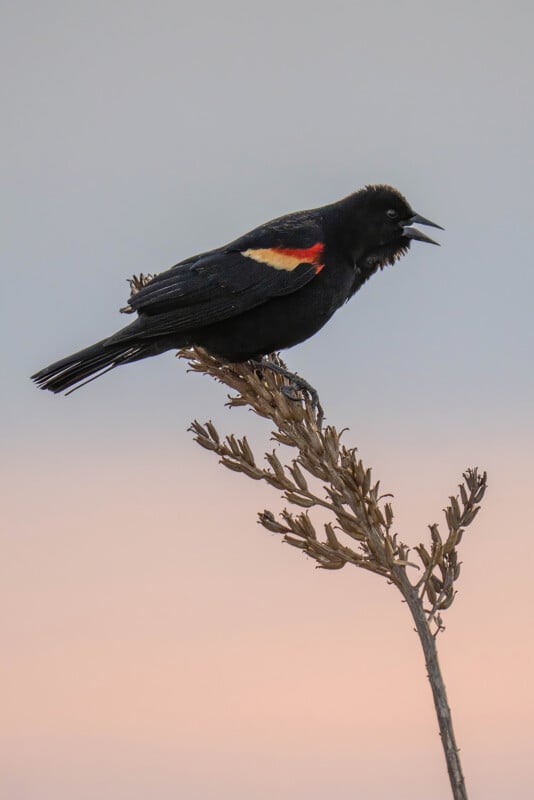
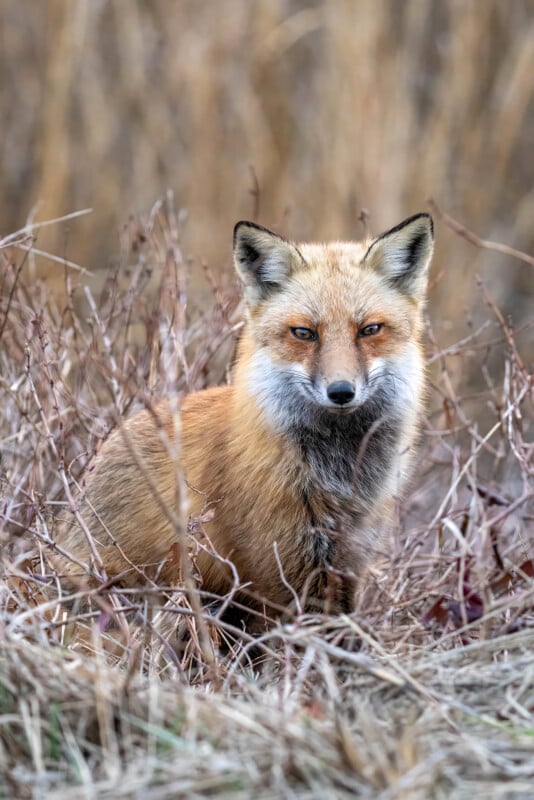
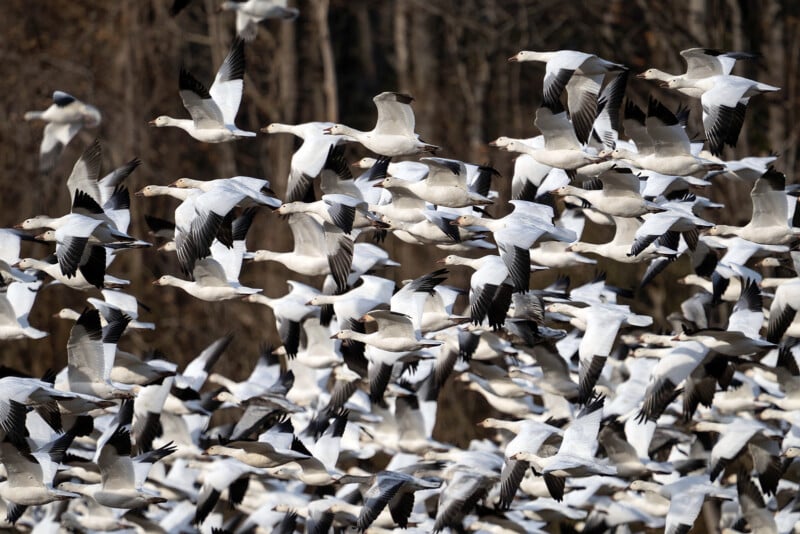
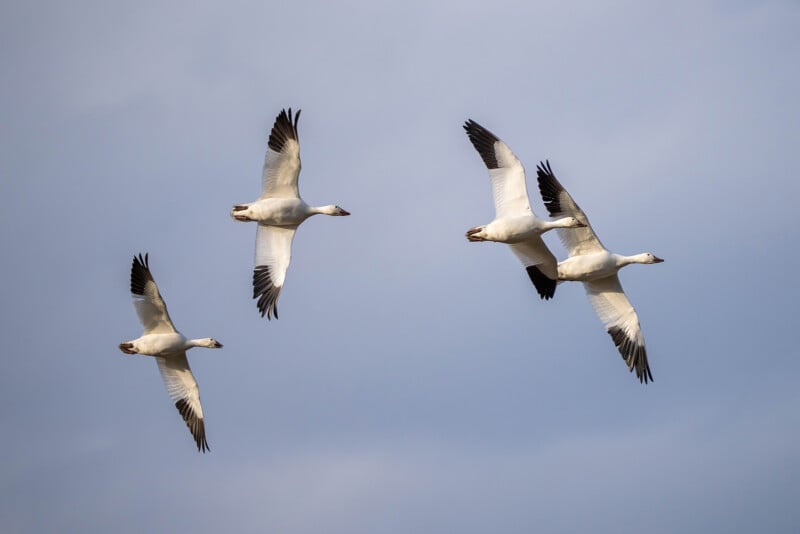
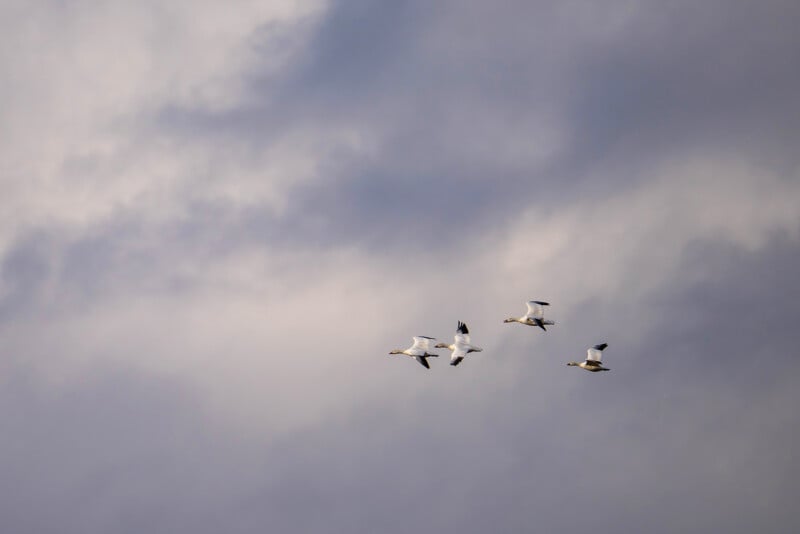
Sony FE 200-600mm f/5.6-6.3 G OSS Gallery
Testing the native Sony gear on wildlife was much easier than landscape this time of year. I’m very familiar with the states around me and with a few solid road trips, I was able to find a mix of animals from my favorite peregrine falcons to red fox, white-tailed deer, tundra swans, bluebirds, harriers, pintail ducks, red-winged blackbirds, and huge flocks of migrating snow geese.

Worth the Investment for Wildlife Photographers
To you, dear reader, I submit that what we all feared is true. While my older gear and adapted glass is fine, the newer, native kit is brighter, with higher image sharpness and overall quality, and the advanced wildlife eye tracking helped me capture photographs in even the most tricky situations. An upgrade, especially of this magnitude, can be well worth the investment.
As I have already returned my loaner kit to Sony, I begin to save my pennies. “For now, my gear is still alright,” I think as I cope with losing a fabulous kit I truly enjoyed. If you are considering the jump from adapted glass to native, I hope my experience and perspective help you in your photographic journey.
Image credits: All photos by Kate Garibaldi. Product images courtesy Sony and Sigma.