Hands-On with Lightroom’s Powerful New Masking System
In a new update, Adobe is greatly increasing the masking capabilities of its Lightroom applications as well as Adobe Camera RAW. While it is not as powerful as what is found in full-fledged Photoshop, you will find yourself wondering how you ever lived without it.
The deeper process behind bringing advanced masking in Lightroom to fruition was covered by PetaPixel last month, and I would recommend reading that article first to get acquainted with the tool panel’s concept. In summary, the Adobe team overhauled Lightroom to include the ability to perform bitmap-based masks which opens up AI-based smart selections. This is a complicated way of saying we now have tools like “Select Sky” and “Select Subject” in Lightroom, where once they were only available by diving into Photoshop.
![]()
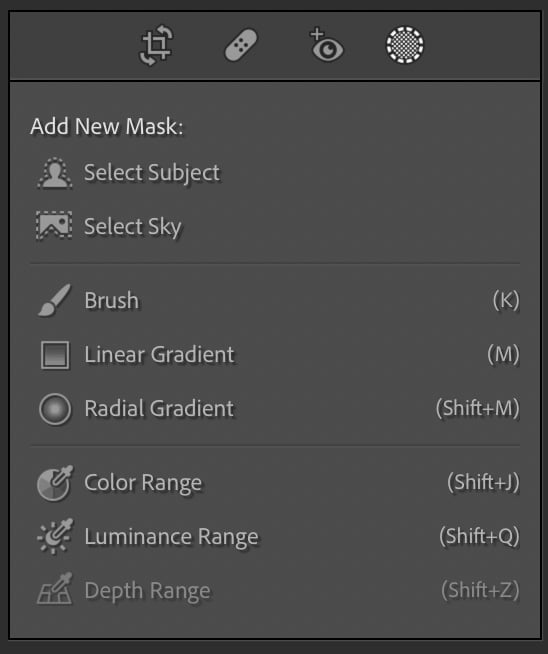
Adobe did not stop there, however, and the way masking now works in Lightroom has really stepped up. First, all types of masks have been consolidated under a single Masking panel. When I first opened it up, I was greeted with seven pages of introduction, so you won’t be alone if it seems intimidating at first. However, the explanations are necessary because there’s a lot of new power packed into these that you might not otherwise realize.
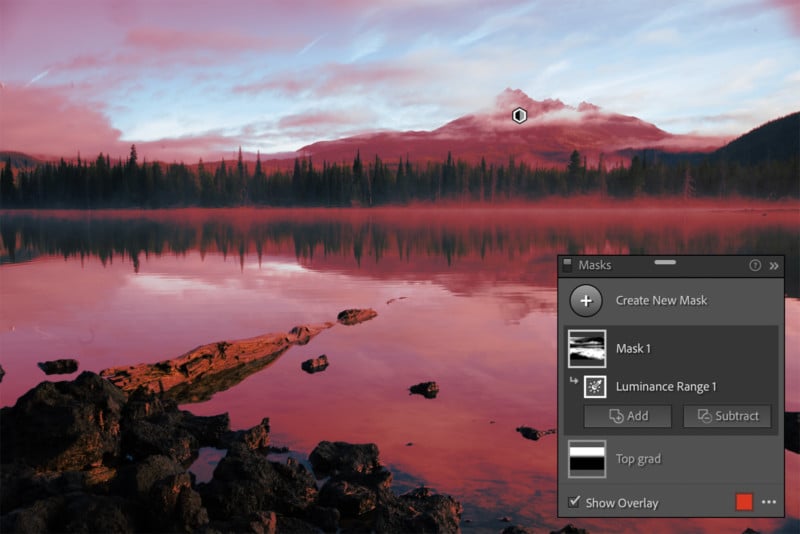
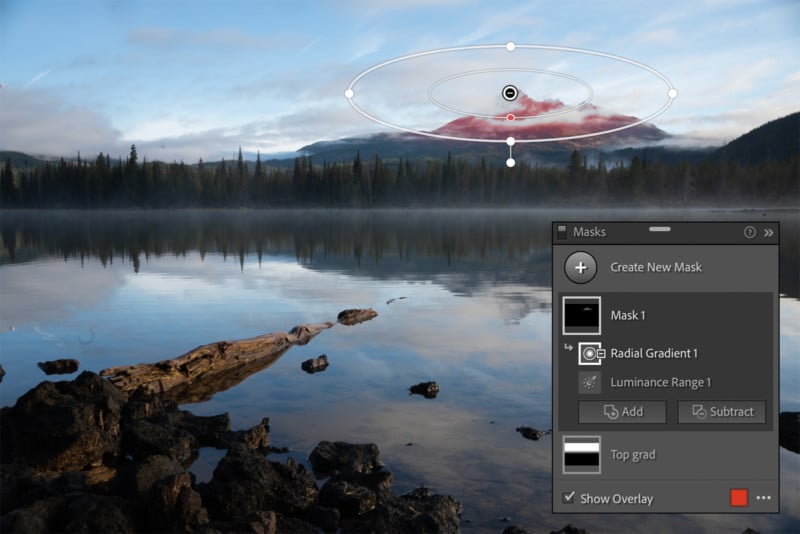
Any type of mask in Lightroom can be combined with any other type of mask. This allows us for very complicated masks to be created with just a few clicks. For example, in the photo below, I wanted the mountain top to pop out with more contrast. First I made a Luminance Range mask because the sky and mountain were greatly different and could get a defined edge. Then, from the Luminance Range mask, I intersected it with a Radial Gradient, meaning that only the parts of a mask that lands within both of these tools will be used. Just like that, my mountain top was selected without the sky, foreground clouds, or any similar luminance values around the photo included.
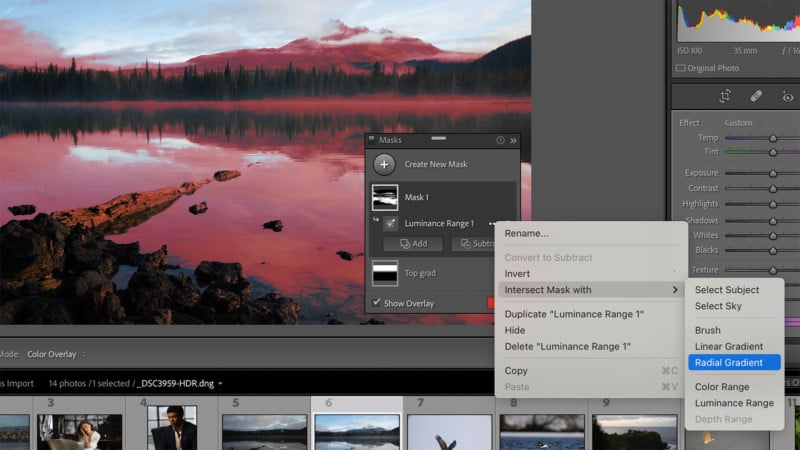
“Intersect Mask With…” is such a powerful way to work with masks and continue drilling down on what exactly needs local adjustment. Between luminance ranges, color ranges, graduated and radial filters, plus subject and sky selections, the possibilities to hone in on something without even needing the masking brush is fantastically clever.
In classic Adobe fashion, there are multiple ways to get the same results, and a lot of the time Intersect Mask can be replaced by doing a Subtract mask instead. Additionally, masks can be inverted for a whole new layer of possibilities in the workflow.
While there’s a lot to be excited for, some things I find to be missing with Lightroom’s masking tools are the ability to feather selections or change their densities post-creation like in Photoshop. Feathering masks of course can make certain transitions look more natural at the edges. Being able to alter the density, or opacity, of each individual component of an overall masking group would also be very useful to me. To that end, being able to tone down the opacity of a mask’s adjustments would also make this even better. If I make a bunch of changes to exposure, shadows, whites, blacks, clarity, and saturation on a mask then realize I went a little too far, there’s no opacity slider on the masks to quickly pull it back a little.
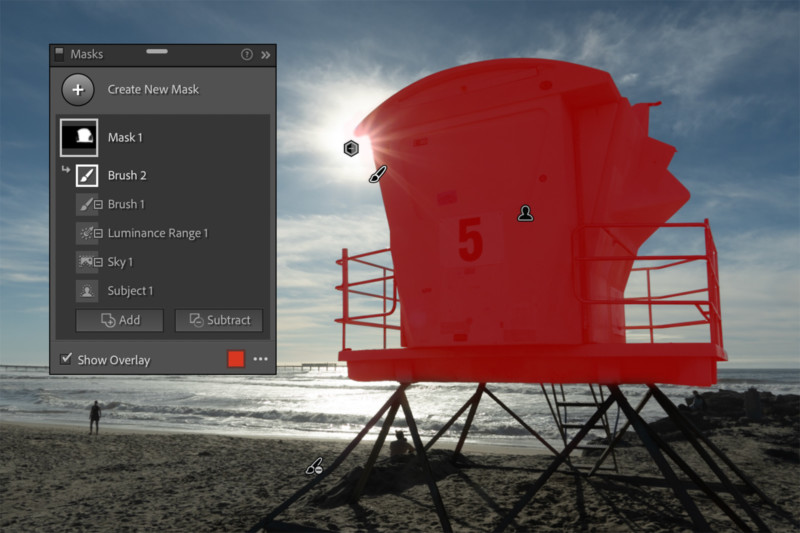
The headlining features in this release are the subject masking and sky masking tools. These AI-powered selections speed up the editing process by replacing endless brushing with a click.
Select Subject
For those with a background in using Photoshop, Lightroom’s new Select Subject masking tool works much like the one found there. I’ve always found a use for this selection in my edits, and in a large majority of my finished photos, it was utilized to some degree. One of the most helpful ways Select Subject can be used is for inverting the selection and targeting everything else but the subject, and as previously mentioned, Lightroom has that capability built-in as well.
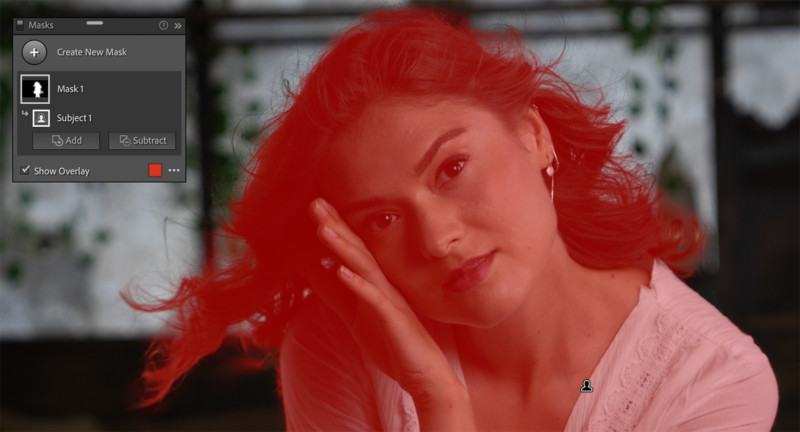
From an accuracy perspective, the tool works best when the subject stands out in either sharpness, color, or size. It still has trouble finding subjects when it’s plain to see it would have trouble finding subjects, for example, a green lizard sitting on a green leaf, but often the tool would get me a head start in some meaningful way if not make a perfect selection. This is especially true when it comes to stray hairs in a portrait where these difficult, time-consuming selections can be sped up with Select Subject.


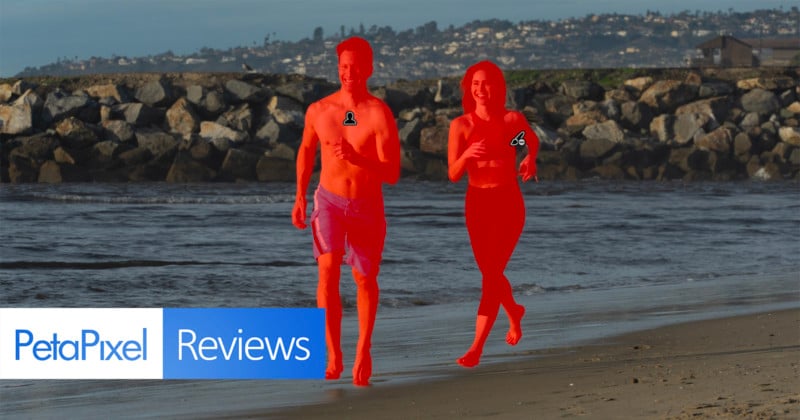
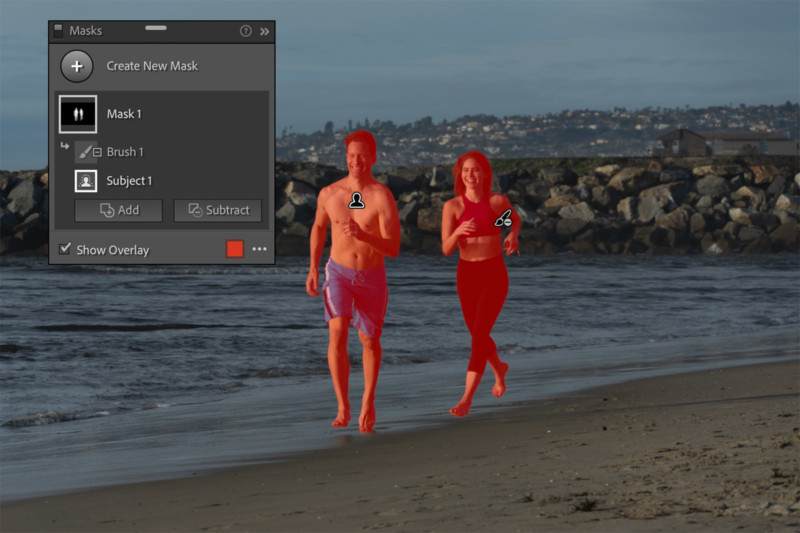
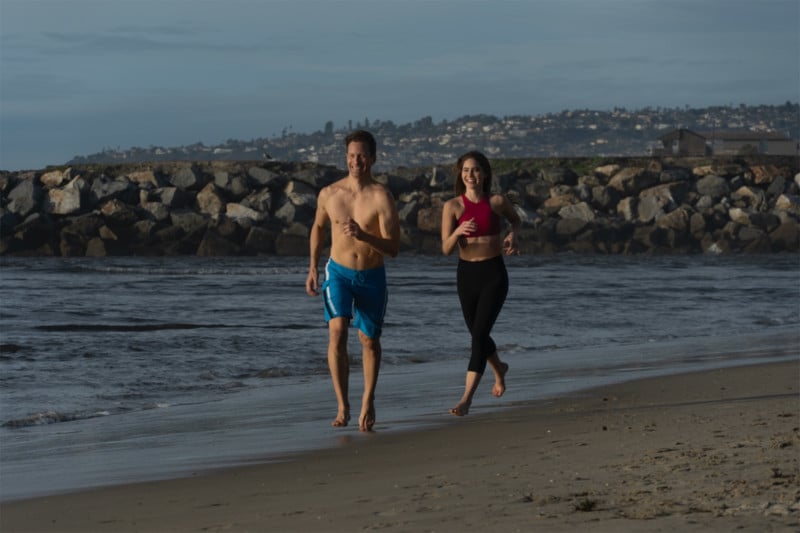
Select Subject can find multiple subjects in a photo, but there’s no way to cycle which specific subject you want to be selected without diving into the other masking tools to remove the ones you don’t want. In the photo below, two runners have been selected by default using subject selection. If I only wanted to target the one on the left, I would need to erase the other mask manually with either the Subtract or Intersect methods.
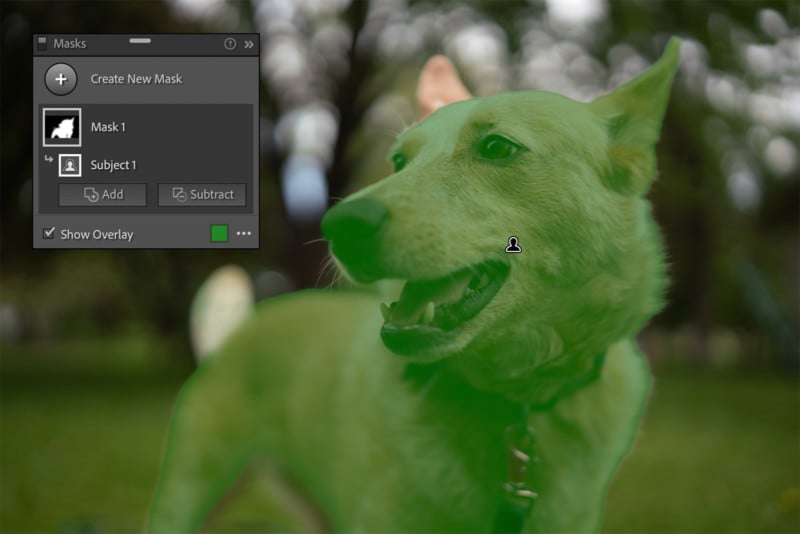
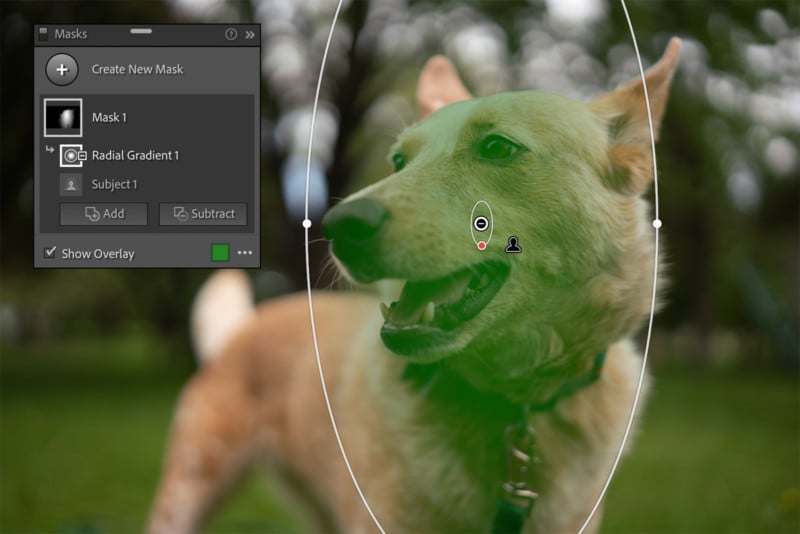
In the photo below, I used Subject Select to mask my dog. Although the photo has a shallow depth of field, Lightroom was mostly able to pick up on the out-of-focus areas and include that in the mask as well. If I wanted to draw attention to the head though, I could simply intersect the subject mask with a radial gradient mask and produce a clean selection with a smooth fall off. The tools are all incredibly easy to work with once you use them a few times and get a feel for how they can interact with each other.
Select Sky
Another feature coming over from Photoshop is the ability to select and mask the sky in an image. If I’m calling Select Subject pretty good, then Select Sky would be pretty OK. It’s not so much correctly identifying a sky that’s the issue, but when things get complicated, they get complicated fast. Between trees creating numerous pockets of sky between the branches and leaves, or structures with gaps of the sky inside them, or any other photo not taken in the middle of an ocean, getting all of a sky with a single AI selection alone is tricky. What we have here gives a good foundation to start from, at least.
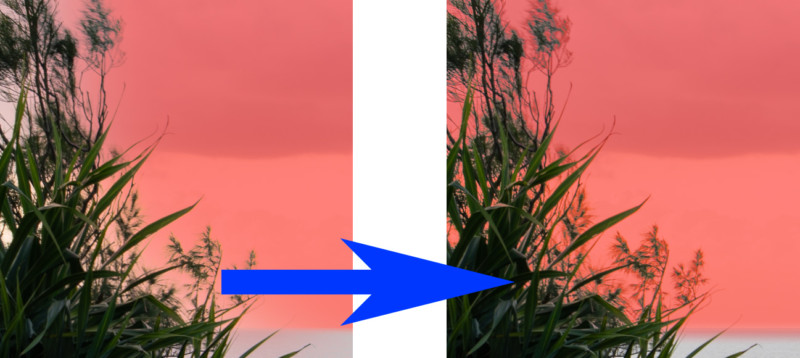
On the plus side, as I’ve already covered, Lightroom’s ability to fine-tune masks with more masks makes this complication a little less troubling. In the example below, most of the sky selection was simple enough since it is out over an ocean. However, on the left side, there was an issue with a tree poking up. When I intersected my sky mask with a luminance mask and then a linear gradient mask, the problem was solved to my needs without another thought.

Laying Some Powerful Groundwork
Lightroom’s revamped masking panel jumps out of the gate with many powerful features that are implemented in a way that’s easy to learn and use. While I wouldn’t consider it “fully featured” at this stage in comparison to the nearly unlimited possibilities of Photoshop, it provides many improvements that users have been asking for in a package that doesn’t overcomplicate it from the start. After a couple of days working with these advanced masks inside Lightroom, you’ll wonder how you ever did without them.
These changes to masking will ship to all customers starting on October 26.