Randomizing Photo Shoots to Stretch My Creativity
I am a fan of light (honestly what photographer isn’t?). Hard light; reflected light; dappled light; low-key light; colored light — I love it all. Light makes or breaks not only my images but my mood. I’d venture to say that light is sandwiched between “belonging” and “safety” on my hierarchical pyramid of needs.
As of late, however, my need to explore studio lighting has waned. I still have the drive to create, but I find myself at a place where I am uncertain how to proceed. Light exploration no longer alone satiates my creative needs. There’s no more mystery in the discovery for me. It’s time to push my limits again. I need to get outside my head and my go-to techniques. But how does one simply pull themselves up by their artistic bootstraps? I need something to force my creative hand.
After a great deal of thinking I decided that randomizing my shoots would be a fantastic way to surrender control and get into some new creative territories. My thinking is that the more constraints I am forced to work within, the more creative I will need to be. It’ll force me to work in new ways (meaning innovation, hopefully) to pull off an image that I’m happy with.
The solution that I came up with is a short, randomized list of letters that I offer to my subject when they arrive at my studio. What they select will determine the specifics of how I must execute the shoot, thus turning them into an accidental art director of sorts. Here’s what my subjects a presented with at a shoot:
Circle one:
1. A/B/C
2. A/B
3. A/B/C
4. A/B/C/D/E
Only applies if you answered B-E on number four:
5. A/B/C/D
6. A/B/C/D/E/F/G/H
They have no idea what the letters represent, but this is what the letters determine for me:
1. The location of the shoot: (A) shoot in studio; (B) shoot at an indoor location (not studio); (C) shoot at an outdoor location
2. The color grading that I can use in post: (A) images will remain in color; (B) final images will be converted to black & white
3. Lens choice: (A) 16-35mm f/2.8; (B) 85mm f/1.2; (C) 100mm f/2.8 macro
4. Lighting: (A) natural light; (B) one strobe; (C) two strobes; (D) three strobes; (E) four strobes
5. Lighting modifiers: (A) bare flash; (B) soft box; (C) snoot with barn doors; (D) spot grid
6. Colored gels: (A) no gels; (B) red; (C) orange; (D) yellow; (E) green; (F) cyan; (G) blue; (H) magenta
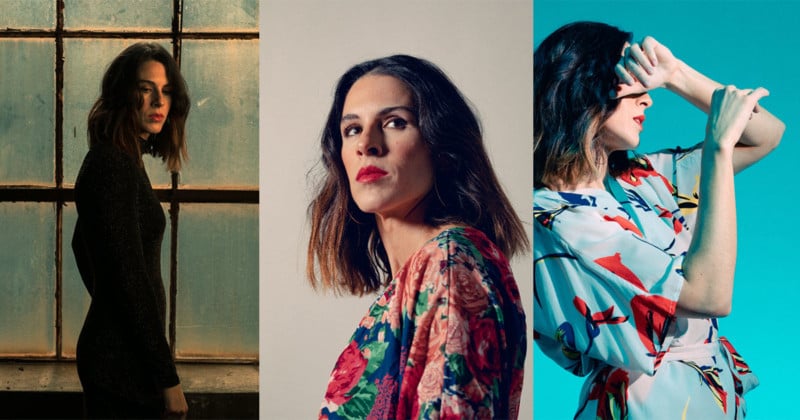
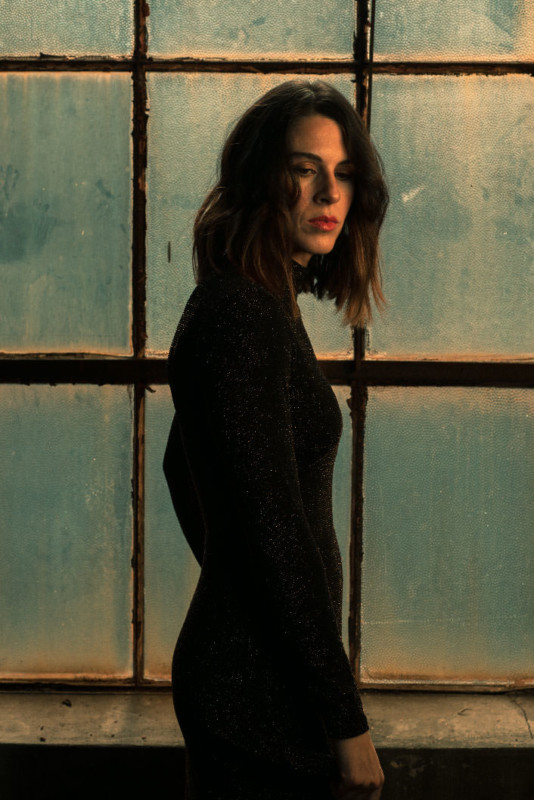
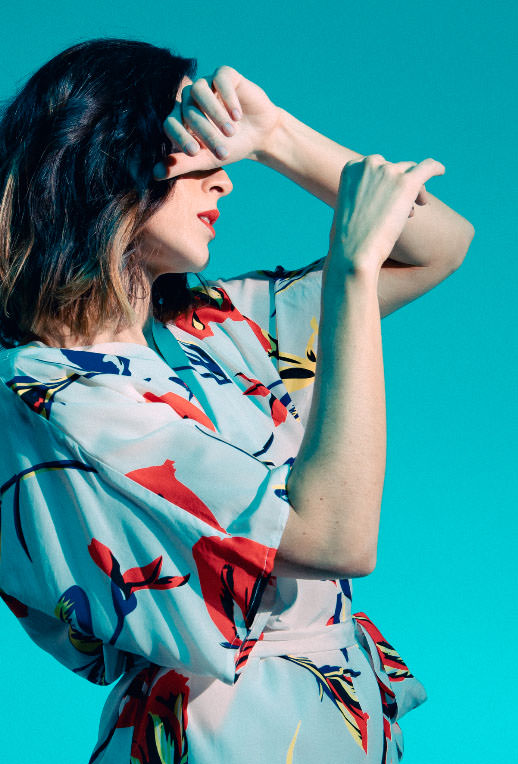
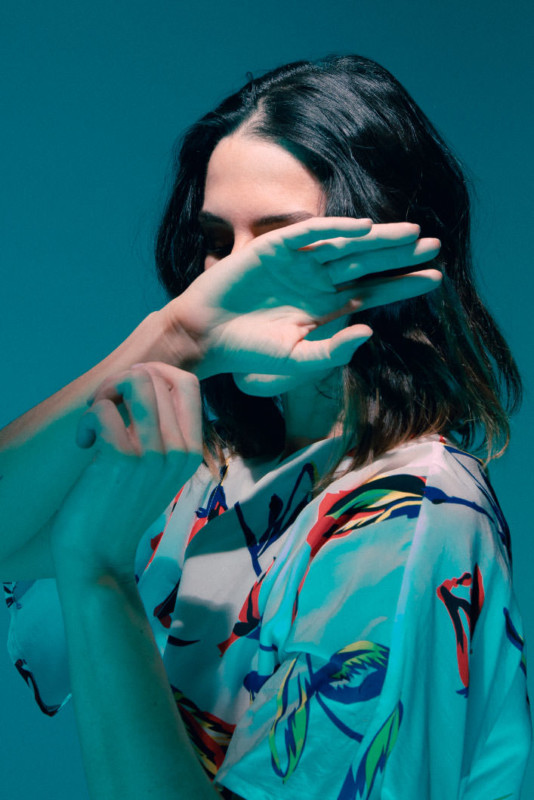
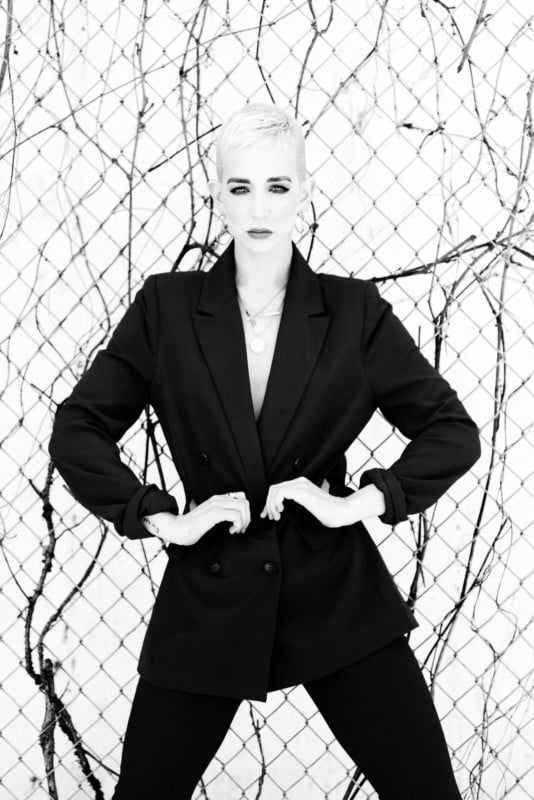
For the trial run of this, I brought in Pilar, a friend and frequent collaborator. We shot three looks. For the first look, Pilar selected the options B, A, B, C, B, D. This determined that I needed to shoot at an indoor location (luckily my studio resides in a huge warehouse with plenty of great indoor locations), with my 85mm lens and two lights. The lights were to be used with softboxes, and I need to incorporate yellow gels (a color I rarely use by itself). Fortunately for me, the color grading choice fell in favor of retaining the color, allowing the soft yellow light to remain in the final images. In post I decided to add some subtle blue notes in the tone curves in order to complement the yellow light.
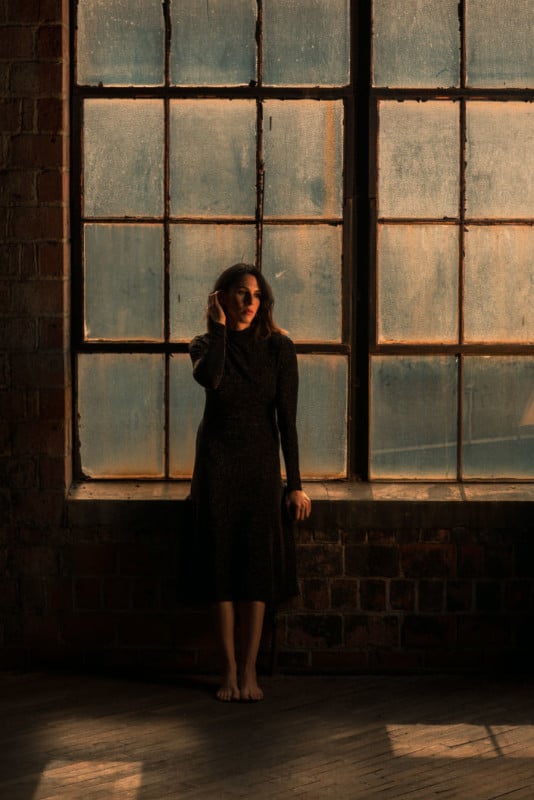
For the second look, the randomized creative direction dictated that we were to shoot in my studio with a 100mm macro lens, using one light with softbox, and no gel, with the final images again remaining in color. I decided to carry over the blue color grading from the first look to the second, creating a bit of unity between the two scenarios.
Side note: I can’t remember the last time I lit something so simply that wasn’t shot for a client. My default is to over-complicate and never replicate, which is an impossible standard to live up to. This exercise could prove to be really helpful for my brain as well as my image-making process.
For the third look, fate decided that I was to adhere to the following parameters: studio shoot; wide-angle lens; must use four lights; cyan gels; spot grid; final files are to remain in color. Four lights?? I typically use two, or maybe three at the max. After a bit of brainstorming, I decided to use two cyan-gelled lights to create a cyan background to mimic a clear sky (a rare thing in Columbus these days). I added a cyan-gelled light with a softbox on my subject (two-stops underexposed), and a spot grid on her face, mimicking bright sunlight.
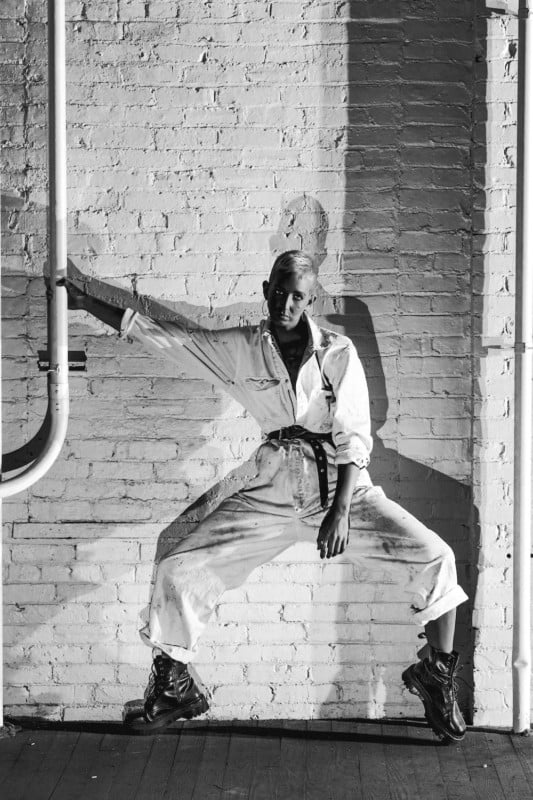
I was happy with the trial run but wanted to keep pushing. A week later I brought in Emily, another frequent collaborator of mine. This time, between each scenario I changed the order of the questions to prevent her from figuring out what each choice represented.
We shot four looks. Her selections ranged broadly in location (studio, indoor location, and outside), lighting (everything from window light to four lights), and lens choice (literally every single lens I own). Somehow she managed to select black and white for the color grading in all four scenarios.
This time my task was to figure out how to unify such a broad range of locations and lighting setups. These restrictions led me to look for textures and patterns to unify the four looks.
My first look was with four lights, one of which needed to be gelled green, though it would be later converted to black and white. I knew that if I used the green light was a soft fill, I could later decide to raise or lower the luminance of the green channel in post to brighten or darken portions of the image.
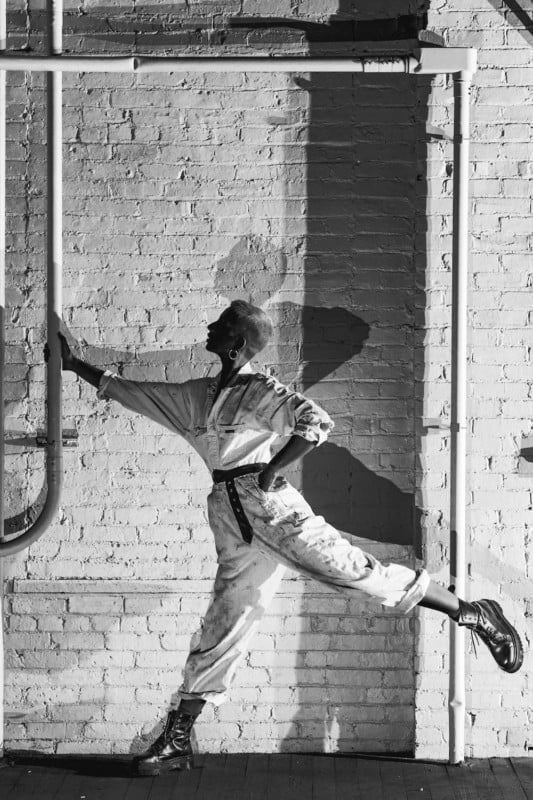
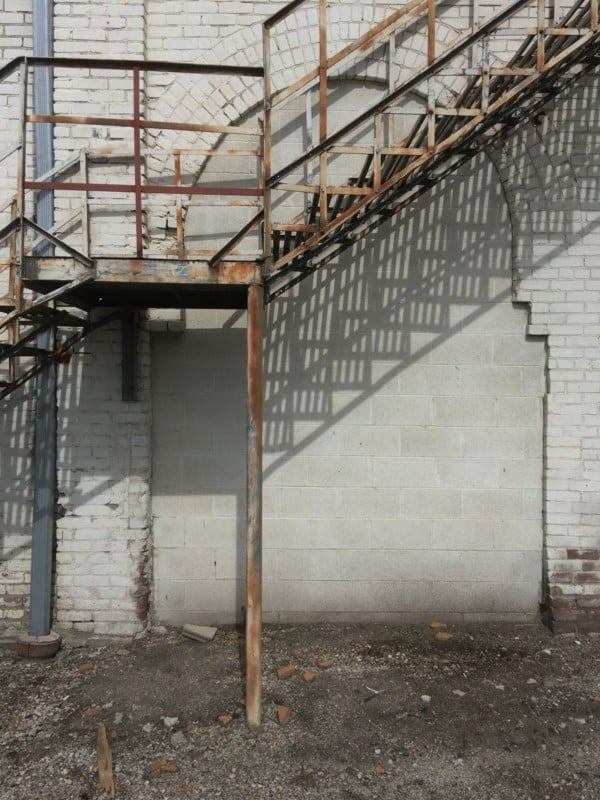
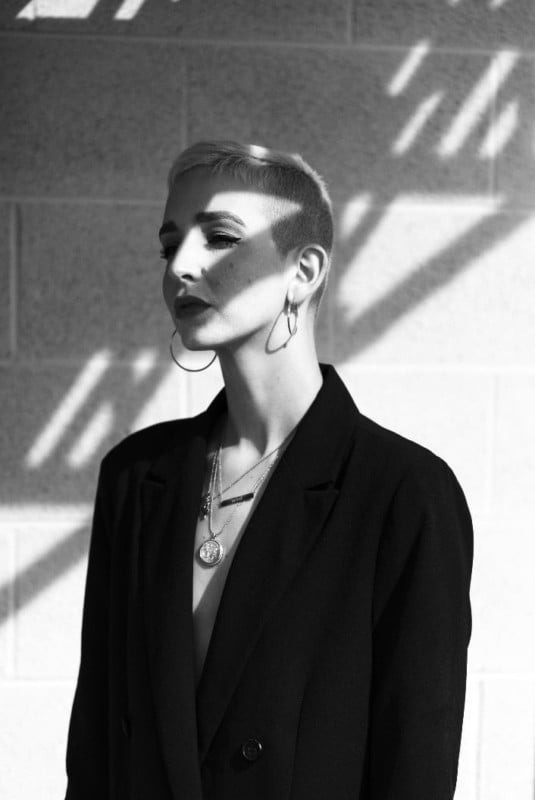
We returned to the studio to regroup and figure out the next scenario. The second look was to be shot with natural light outside. How would I unify images that were harshly-lit in an industrial environment with those shot in soft outdoor sunlight? The sun was going in and out of the clouds, meaning I couldn’t rely on shadows to carry the shot. I put Emily in front of a fence covered in vines in order to get some nice contrast shapes. Lucky for me, on our way back inside the sun popped out for a moment, so I had her stand under a fire escape to incorporate some hard shadows.
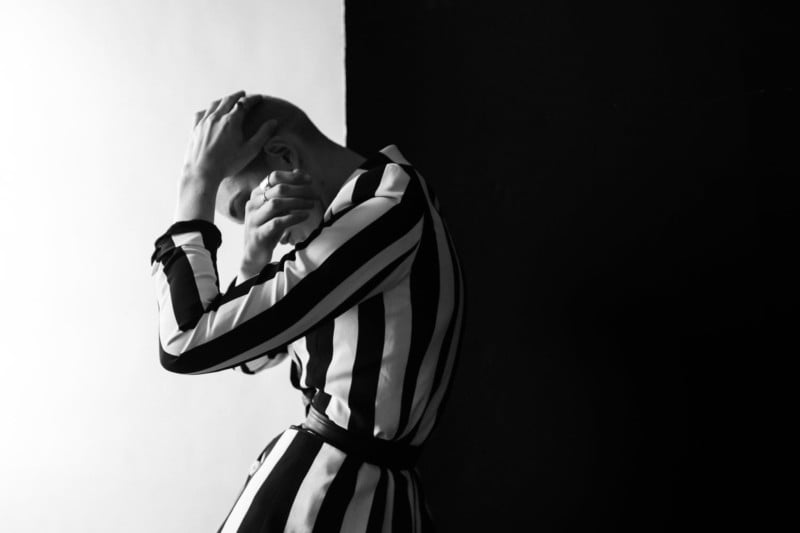
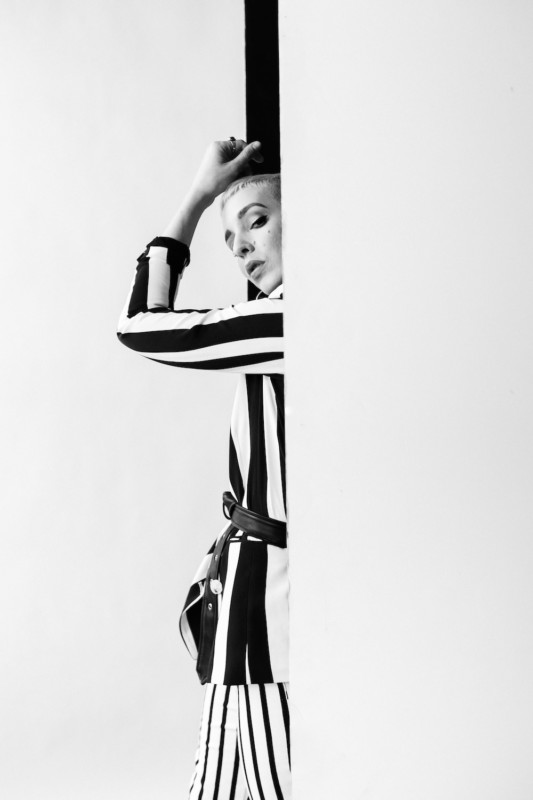
The third look was to be shot in studio with available light and a wide-angle lens. Now that I had a hard light/shadow theme going, I really needed to get innovative to tie this look in with the first two. I have a 4×8’ v-flat that I painted black on one side and left white on the other. I started by having her stand in front of the edge of the black side, with the white backdrop on the left side of my frame. Then I had the idea to close the v-flat around her, sandwiching her in the black part, with the white side facing the camera. The contrast of black and white with her garment really brought the images together. Since I had to shoot with my wide angle lens, I needed to stay far enough away from her that her features didn’t distort.
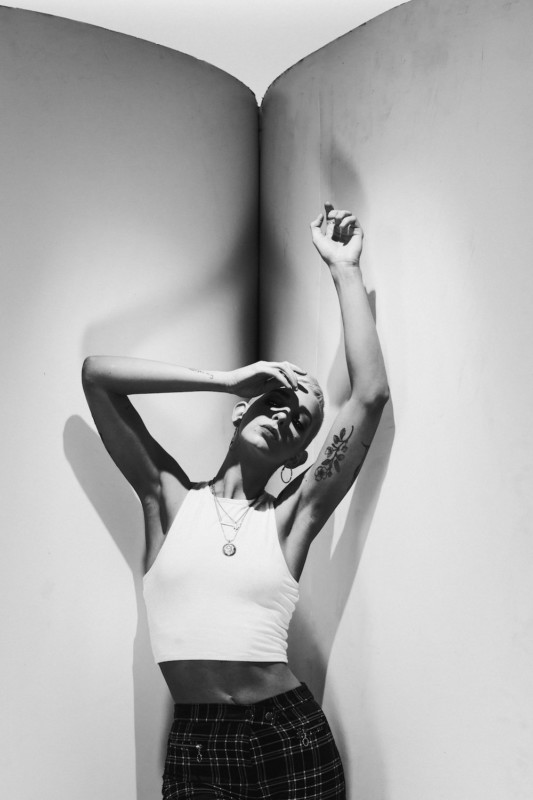
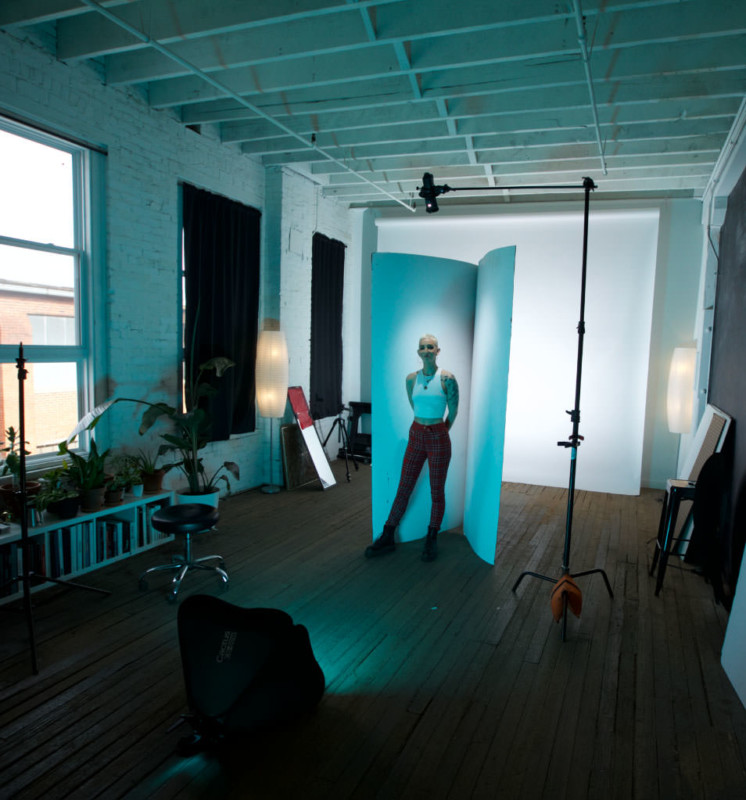
For the fourth look, I needed to incorporate cyan (not so different from the green), a spot grid, and shoot in studio. For the sake of cohesion, I decided to use the v-flat once again, this time placing her in the middle. By showing the top of the v-flat in the shot, it mimicked the shape of an open book, which I kind of liked. I lit the whole the model and v-flat with a cyan-gelled softbox (a stop underexposed). I lit her with a spot grid. I lit the backdrop behind the v-flat with a third, unmodified flash.
At the least, these tests have been fun. I love a good challenge and it’s exciting to see what randomness will ensue. On a more macro level, these tests are pushing me into new creative territories and out of stagnation, and I am here for it.