3 Reasons to Create Your Own Lightroom Presets
When I first began dabbling in the world of landscape photography, I was enticed by the instant gratification of purchasing Lightroom presets. I was originally drawn in by the fact that I could instantly download these presets and I could instantly import them into Lightroom and instantly “improve” my own photos.
1. Better Workflow Efficiencies
I found that when I began my editing process I would repeatedly start by applying the same “robotic” edits to my images – Enable Lens Profile Correction > Boost the Vibrance > Reduce the Saturation > bring down the Highlights > bring up the Shadows and so on. I thought to myself why not create a preset that would allow me to apply all of these initial edits without having to select each individual adjustment.
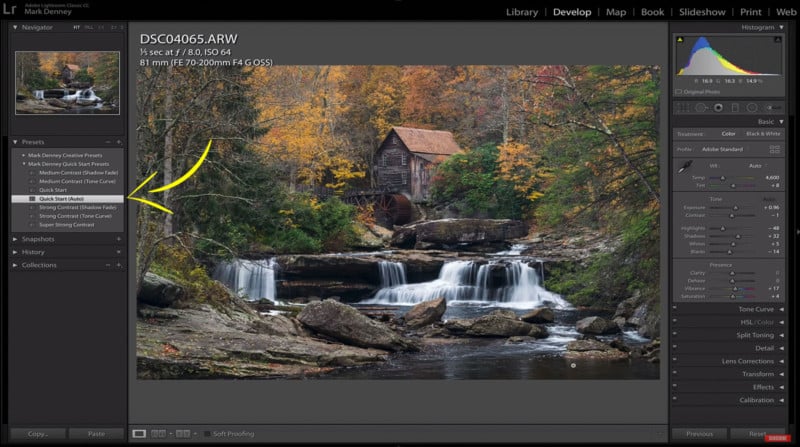
With that said, I created a series of “quick start” presets that have proven to be an incredible time saver for my Lightroom editing workflow – I just apply them at the start and then make the fine adjustments after that. If you have your own set of mundane steps you habitually apply to your photos, then a quick start preset might be beneficial to your overall editing workflow.
2. Find Your Own Creative Style
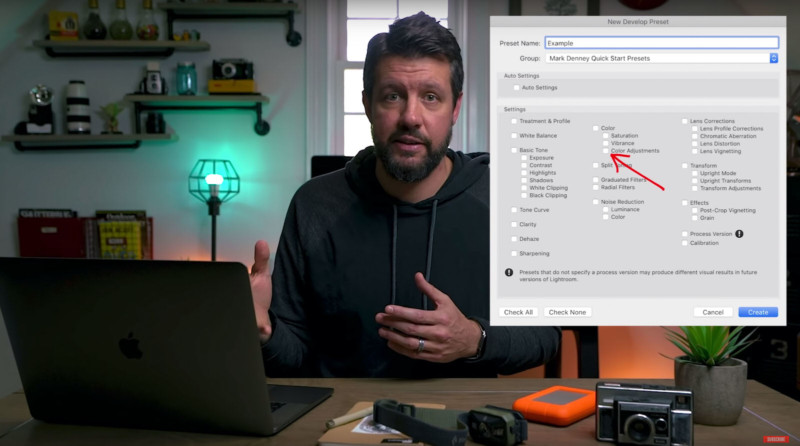
In the past when I would purchase presets I felt that I was suffocating my own creativity as I was leaning on someone else’s creative style as a way to “improve” my own photos. I ultimately ended up constructing my own creative presets where each individual preset contained a singular edit like a split-tone combination or a specific tone curve that I liked as opposed to an entire edit contained within a single preset. I consistently struggled when applying purchased presets to my photos as they always contained an entire edit of an image and the odds that an entire edit is going to look good on any photo is slim to none.
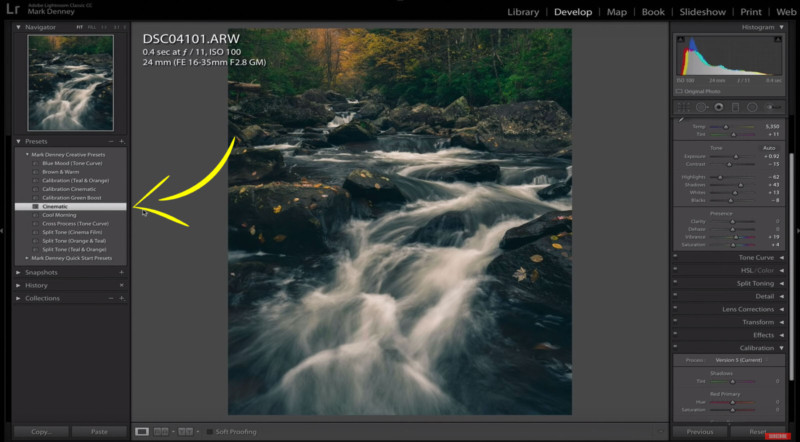
Once I built my own creative presets, I would apply an edit to a specific image and then apply a split tone or tone curve preset or both on top of my original edit – this approach is when I began having success with presets.
3. Practice Practice Practice
I know it sounds cliché, but it’s true – practice makes perfect. When I was using purchased presets I never took the time to dig into the specific edits that were used to create said presets, I would just apply them, spend about 20 minutes trying to make them look good and then export them – that was my workflow. But, it wasn’t until I started making my own presets that I began to understand the specific edits that I liked and what worked well and what didn’t work well on my own images.
Putting the block on purchased presets is one of the best choices I made not only from a creative aspect but also from a post-processing stance — plus saving a few bucks along the way is always a good thing as well.
P.S. If you enjoyed this video and article, you can find more by subscribing to my YouTube channel.