Shooting Portraits with Colored Shadows
Finding new ways to create isn’t always easy, so you have to keep your eyes open for inspiration. One day while making my way down the rabbit hole of YouTube, I stumbled across a video. These guys had created 3 colored shadows off this pencil while keeping a perfectly white background. What in the world was this sorcery? Turns out it wasn’t sorcery, it was science.
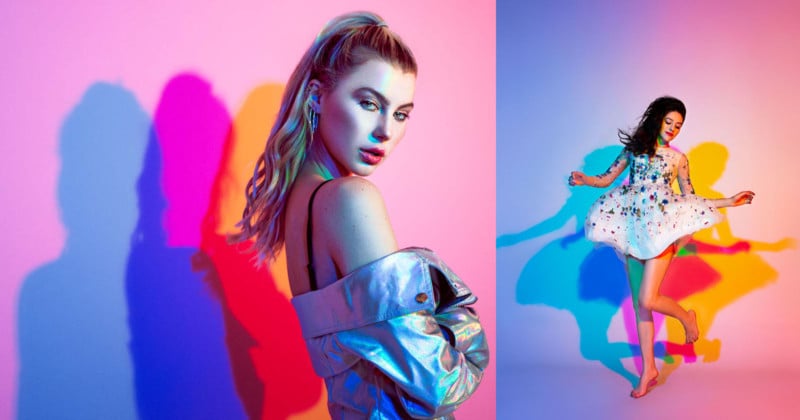
Being a portrait/fashion photographer here in Downtown Los Angeles, I thought to myself “what a great series of images this would make”. So the first thing I did was Google this phenomenon and see if I could find anyone else who had created a portfolio out of this lighting setup. To my surprise, I couldn’t, not to say it wasn’t out there, but I now knew that I had something I could work with. So I set off on this little journey to create this series of images.
I’ve been a photographer for 17 years now — I picked up a camera when I was 14 and never looked back. At the age of 19, I enrolled into Brooks Institute of Photography and started to learn studio photography, and I’ve been a working photographer ever since. With all the years of experience under my belt, I knew I could get this, so I started to experiment with this 3 colored shadow setup.
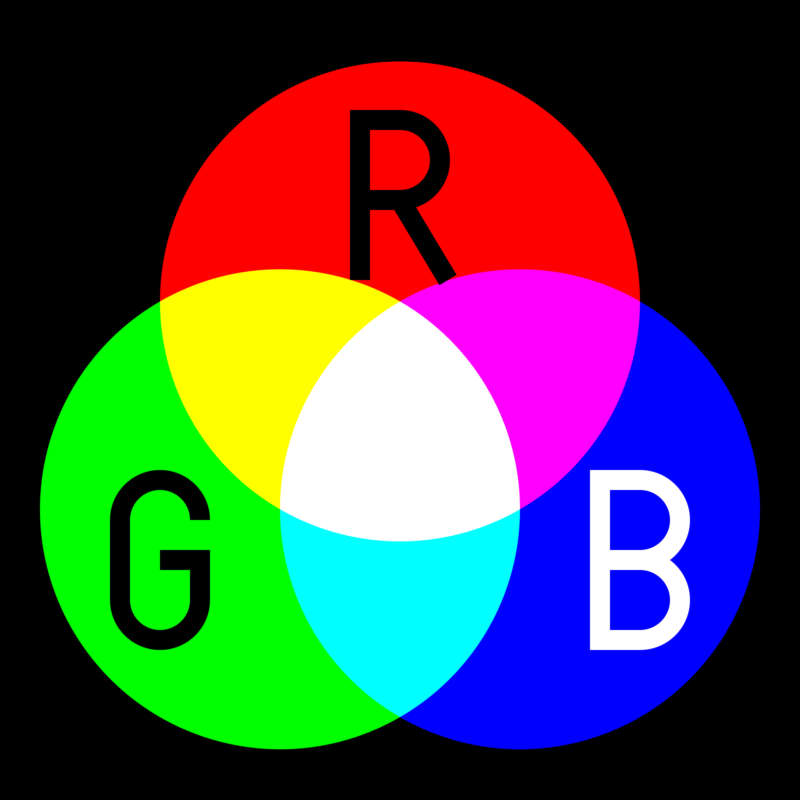
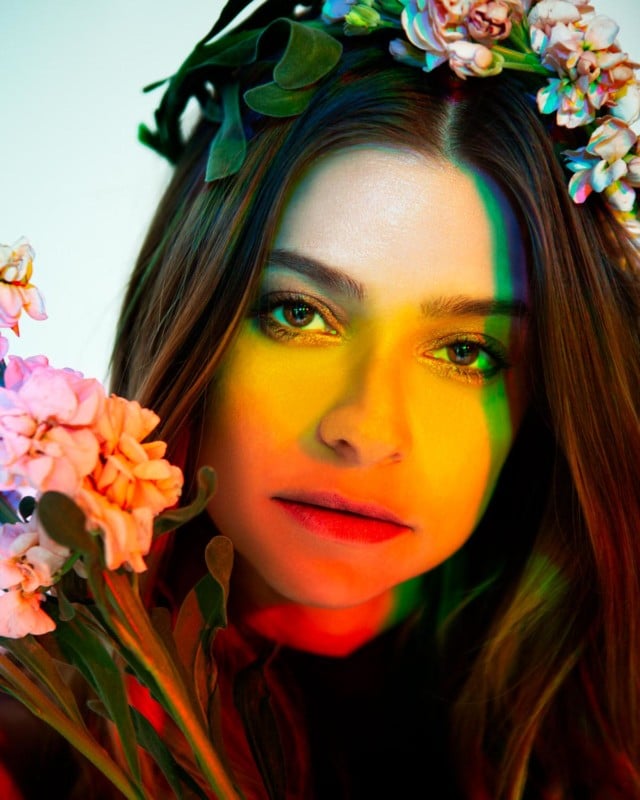
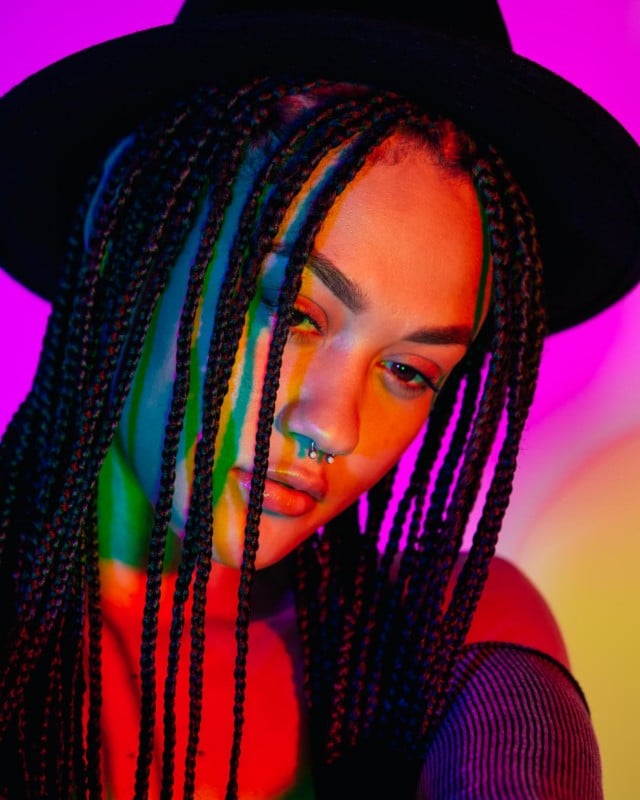
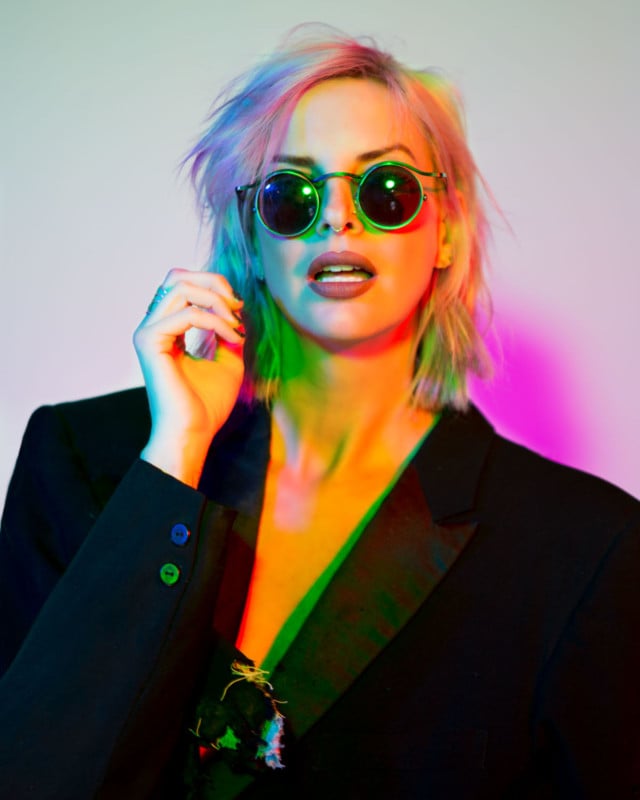
I think in order to grasp this concept, the first thing you need to understand is the mixture of additive colors. Additive color mixing is when you overlap three spotlights with primary colors (red, blue and green) in equal amounts on to a surface in a dark room. When you do this, all the colors mix together and it creates white. It’s a like a reverse rainbow. I use this and light my model with this white light.
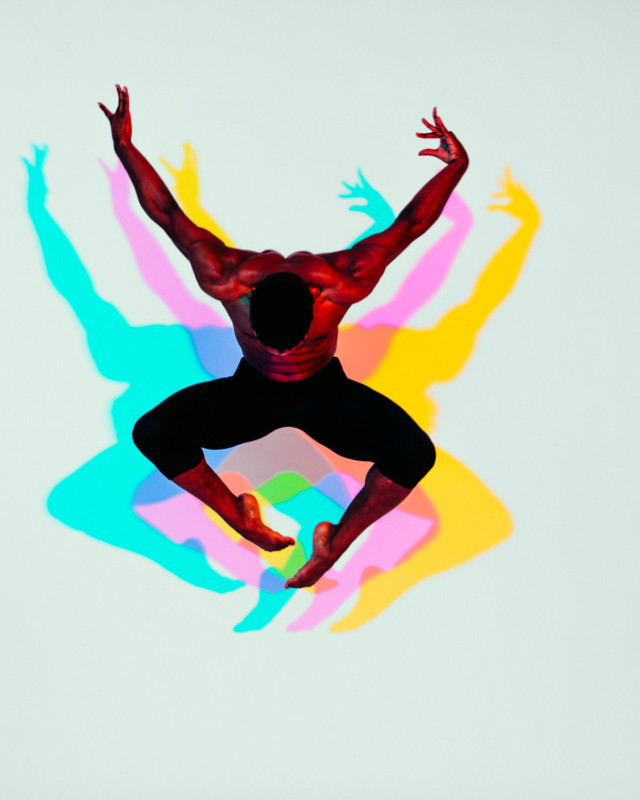
Now to me, this is the fun part. After lighting my model with the three colored lights to create the white light, we are left with some shadows — colored shadows. These colored shadows are created from 2 of the 3 lights.
If our blue light is casting a shadow from our model, that shadow gets filled in from the red and green lights to produce yellow. Since all three off these lights are casting shadows, all three shadows are going to have an additive mixture from 2 of the three lights. A yellow shadow from red and green. A cyan shadow from blue and green. A magenta shadow from red and blue.
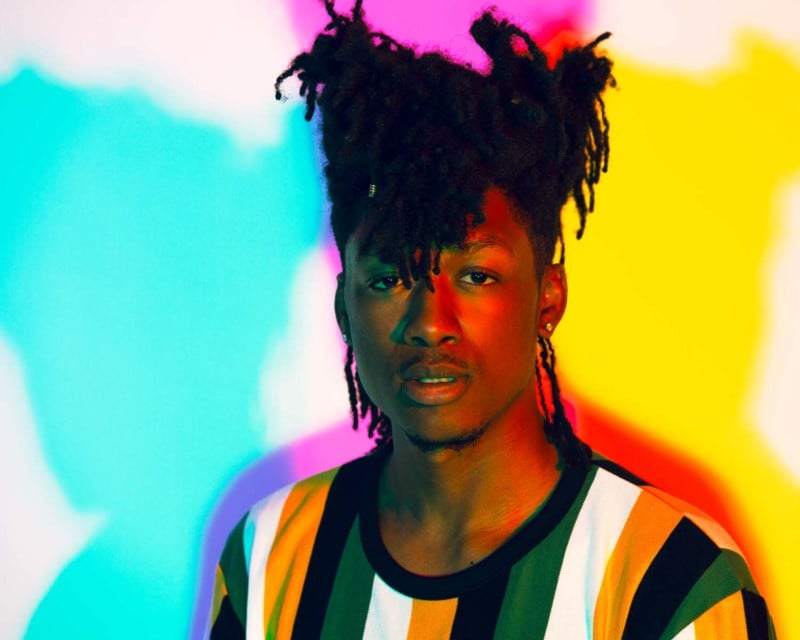
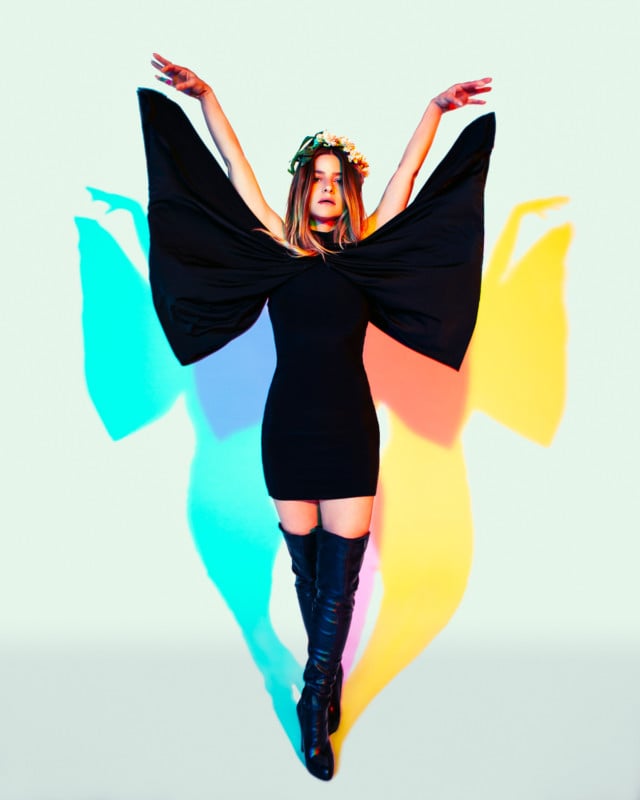
Now that we understand where the colored shadows are coming from its time to think of order and placement of lights. My go-to order is; standing behind my camera, red on the right, green in the middle and blue on the left. This will produce a cyan shadow on the left of the model, magenta in the middle and yellow on the right of the model. Feel free to play around with this order to produce different sequences of colors behind your model.
Placement of the light is the most important thing in my mind. Remember that all the lights have to be at an equal distance with an equal amount of power. Keeping the lights above camera and close together is where I would recommend starting. This will produce the 3 colored shadows right behind your model and will cause fewer complications.
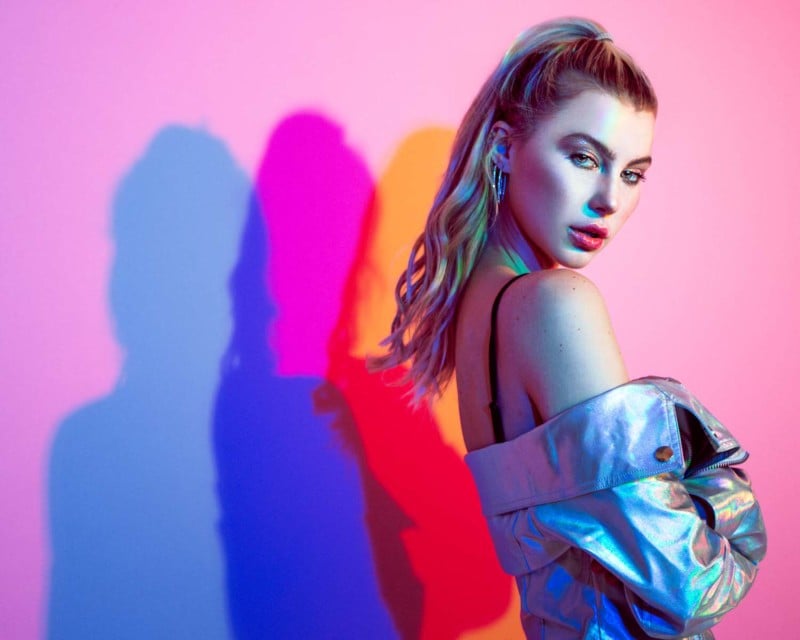
You can also try spreading them out to create more dramatic shadows or staggering the light to cast shadows in different directions. Just a word of caution, when you spread the lights out, you start to deal with light falloff and it can produce a colored gradient at the edge of your frame. I don’t mind this effect, I just want you to understand where it comes from.
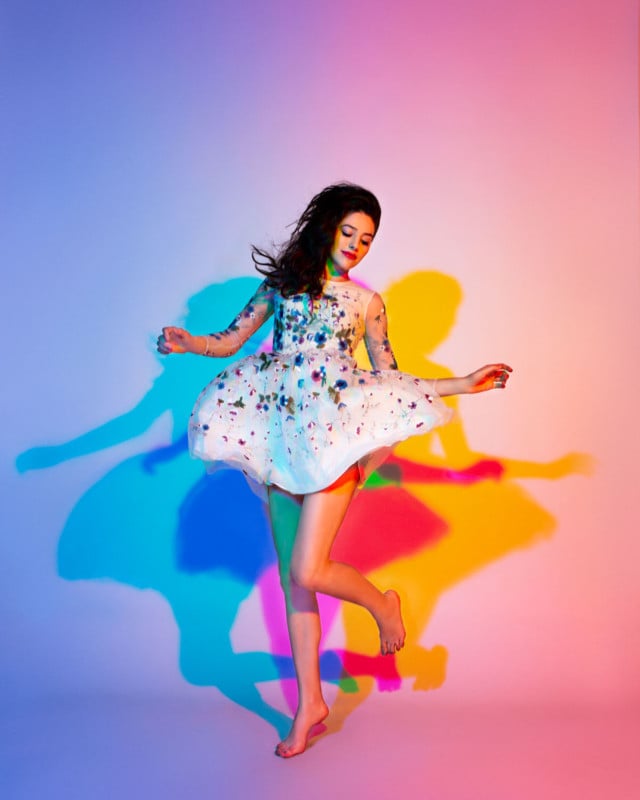
Last but not least is model placement. The closer your subject is to the background the tighter the shadows will be. Start your subject as close to the background as you can and then play around with distance to find a spread of shadows that you like.

And there you have it. That’s how I created this three colored shadow setup.