How to Dramatically Shape the Light of a Landscape Photo in Lightroom
Lightroom’s adjustment brushes allow you to apply local adjustments to specific areas in your photos — great for landscape photography. In this 18-minute tutorial from PiXimperfect, learn how to use the brushes to “shape light” in landscapes.
Pressing ‘K’ will open the adjustment brush tool, and you can then paint a mask over the areas in the image you want to adjust. Once you’ve done that, move the sliders (the same ones you’d see for a more global adjustment) to create the edit. Ensuring that your adjustment brush is sufficiently feathered will ensure the changes look natural.
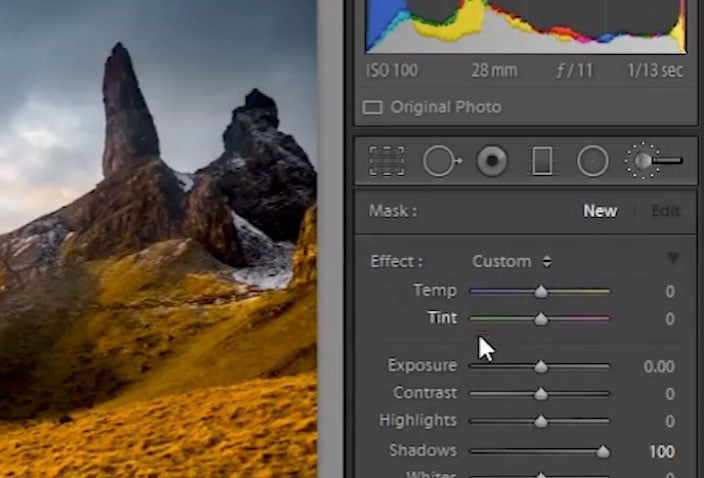
If you want to add warmth and color to an image, such as bolstering the look of a sunset, you can simply locally adjust the white balance. Just select a new brush, pull up the temperature slider, and paint on the orange.
If you adjust the tint for the brush you’ve used to introduce a white balance change, you can make it a little more magenta in color. This introduces some nice, subtle pink/red tones into the shot.
And don’t forget about the “flow” setting for your adjustment brush. It describes the opacity of the adjustment, so if you have a flow value of 10, you’re painting on your change at 10% opacity. You’d have to paint 10 times to get the same effect as 100% opacity (or flow). This is a great way to reduce the intensity of your change.
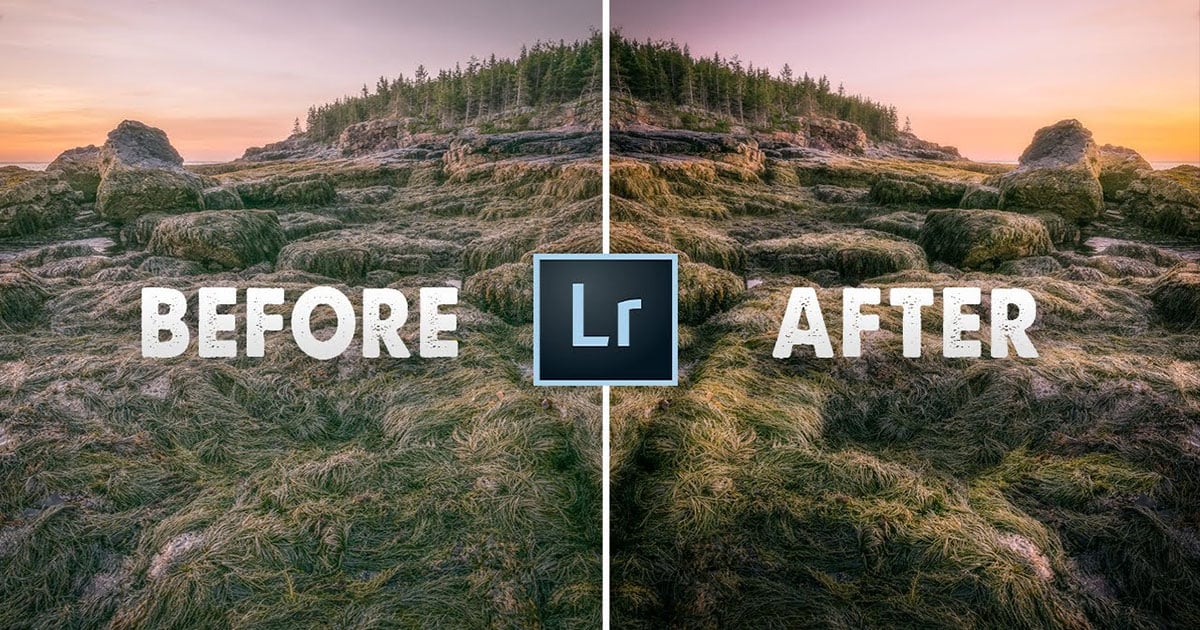
When you’re done, your changes can look something like this:
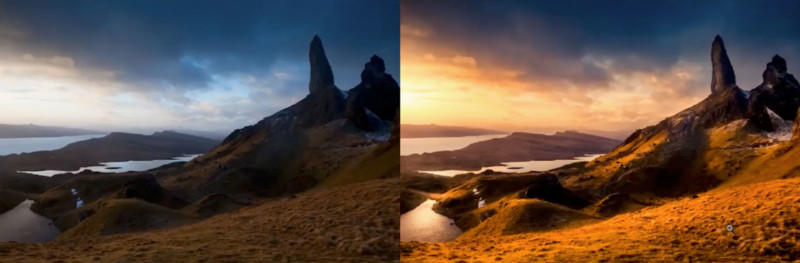
The secret is to keep in mind where the light is coming from in the original photo when you’re making the adjustments — that way you can keep things looking natural.