How to Remove Color Casts in Photos Using Curves in Photoshop
The curves tool is a powerful one in both Photoshop and Lightroom, with the ability to change both the tones and colors in an image. This 7-minute tutorial from PiXimperfect examines the tool in the context of removing color casts from the shadows of a photograph.
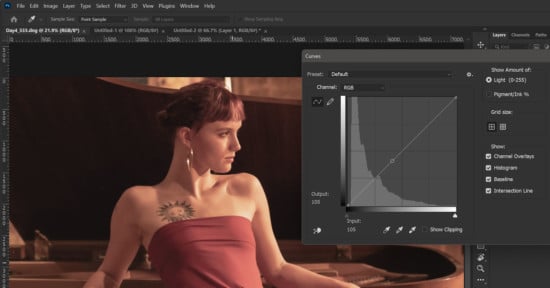
Unmesh Dinda adjusts the image by creating a curves adjustment layer. He selects ‘green’ in the drop-down color menu and then chooses the On-image adjustment tool.
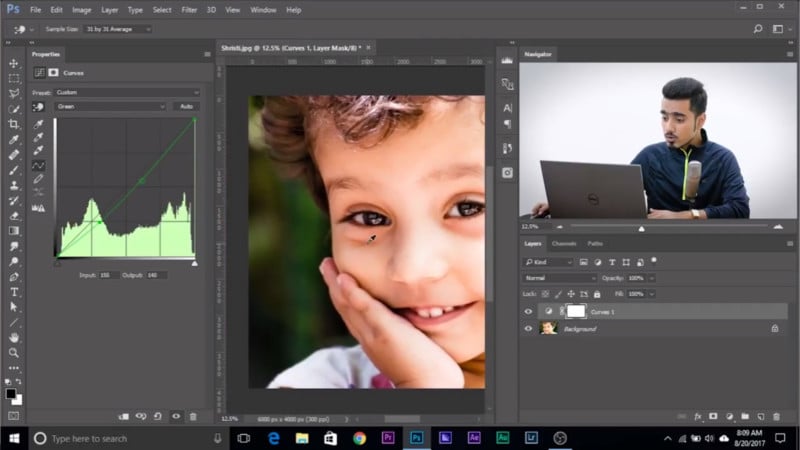
This tool allows you to target your adjustments to just the color that you select. To remove the green, simply click and drag down in the shadowed area with the color cast. This will increase the magenta in the shadows because magenta is opposite to green. If you were to drag up, it would introduce more green, removing magenta.
At 1:25, Dinda gives a crash course in masking. By masking out the areas that you want to leave as they are, you can make sure your color corrections apply only to the part of the image that you want to target.
From 4:30 onwards, Dinda goes on to visually explain exactly how the curves tool works to adjust colors in an image.
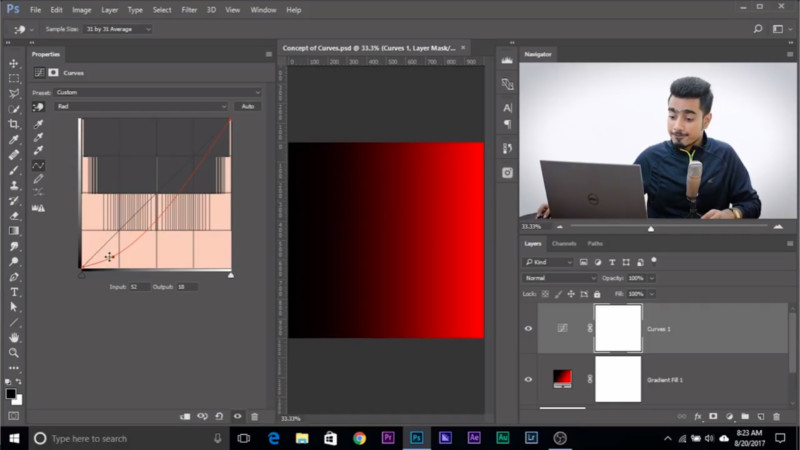
Much of this knowledge can be applied to Lightroom or any other photo editing tool with a Curves adjustment panel. Once you know the way it works, it’s simple to apply the same techniques using different applications.