Ghetto-Flo: How to Create Your Own DIY Kino-Flo-style Lights for Portraiture
We were introduced to the “Ghetto-Flo” lights after reading the excellent blog of New York-based photographer Brad Trent. He had mounted 4 standard workshop fluorescent light fixtures into light-stand mountable strip lights. “Ghetto-Flo” because they’re similar in use to the much more expensive Kino-Flo lights, though there are advantages to the later (variable power and output).
We wanted to, for once, produce something on a budget. Here’s a tutorial on how you can build your own Ghetto-Flo lights.
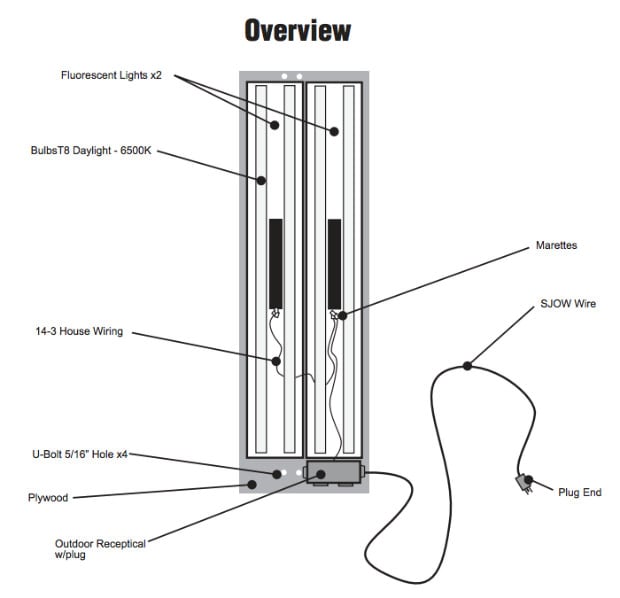
First off, let’s look at the core elements of the units to be fabricated. We’re using three sets of standard neon fixture work lights commonly available at Home Depot for about fifty bucks. In order to mount these fixtures to standard light-stands, we had three Avenger F805 6” Baby Wall Plates the end of which can attach to any Manfrotto C-stand arm. A simple project: securely affix the plates to the light fixtures.”
What you’ll need
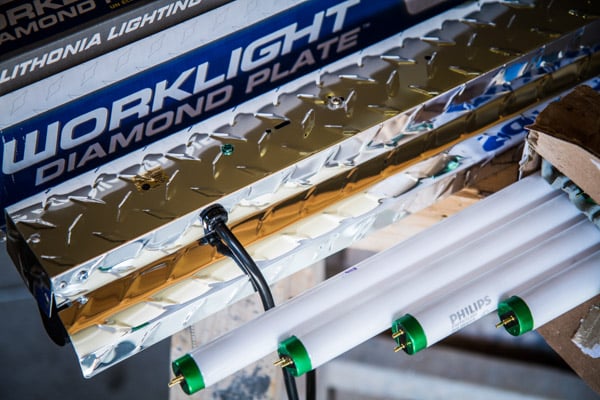
- Neon Worklight Fixture
- Avenger F805 6.0” Baby Wall Plate
- Custom 2.5x6x0.250 aluminum backplate
- 4x 0.250 diameter hex bolts
- 4x 0.250 diameter washers
- 4x 0.250 locknuts
- 4x 0.250 lockwasher
- Threadlocking fluid
- PL Premium glue
Tools
- Drill
- ¼ sized bit
- ½ sized bit
- C-Clamps
- Ratchet wrench with 7/16th box
- 7/16th wrench
- Philips head screwdriver
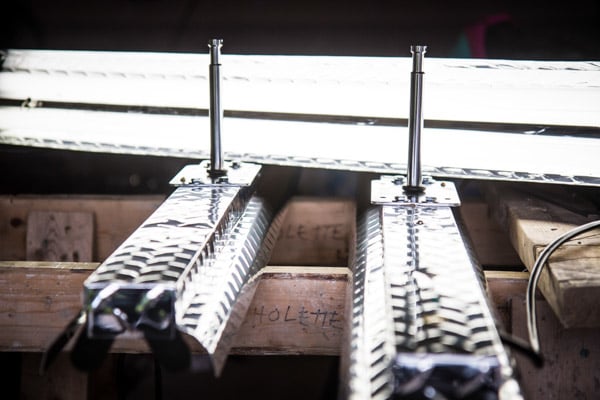
These fixtures are designed to be suspended from a ceiling, not to be moved around, battered, and re-adjust on a light-stand. The material they are made of is a cheap flexible aluminum and I was afraid that straight-up bolting the plates would allow some movement which, over time, could shear and wear out the holes attachment. I like to build things that last, and I know Justin breaks his gear all the time, I figured we’d spend an extra $25 to make it as sturdy as possible.
To prevent potential shearing, we reinforced the back side of the fixture with cut-to-size metal plates and sandwiched the fixture’s aluminum between this and the Wall-plates. It gave extra strength to the nut side of the bolts and make sure they would not eventually bend and tear the fixture’s thin metal.
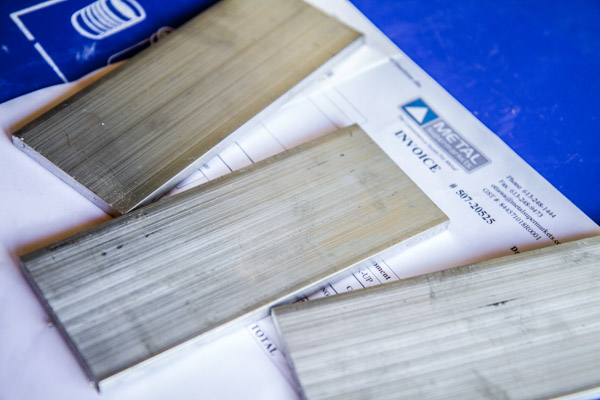
Ian from The Federal pointed me in the direction of The Metal Supermarkets which has a franchise here in Ottawa. They do custom metal orders and have no minimum, making them a perfect provider for our little custom needs on the Ghetto-Flo’s.
We ordered plates 2.5 inches wide, and the same 6” length of the Avenger baby plates. I ordered .250 inch thick plates because I had misread the website and thought it was their thinnest available. Let’s be clear: .250 inches is massive overkill, and had we talked to the guys over at the shop first we would’ve gone with half that. Still, the plates cost less than $5 each and they were a very light aluminum. Also, for even better support, resistance and margin of error, I recommend you go slightly longer than 6 inches: perhaps 8 inches. 6 inches will work, but you’ll spread your shear and bend resistance more with longer plates. Keep this in mind when you do your own.
Mea Culpa: We opted to use the four small holes on either end of the plates to attach them to the fixture. When taking hole measurements on the plates keep in mind that the holes on its shorter side are ever so slightly smaller than the ones on the long side, which are .250 inches in diameter. I had mistakenly guestimated them to be the same size and realized later that the .250 wide bolts I had gotten were slightly too wide, and thus had to drill out those holes to .250 too. No big deal, but more work.
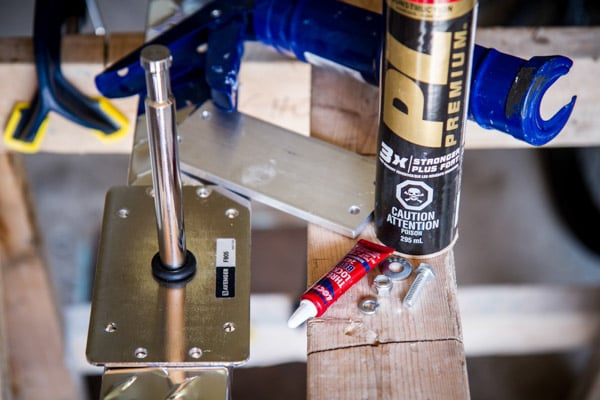
We picked up 12 .250 bolts and 12 regular washers. Make sure you use bolts that are long enough for both of your plates and washers; you’ll probably need at least 1 inch long bolts). Then I kicked the overkill mode on. I picked up 12 locking washers, 12 nylon locking nuts (locknuts) and a small bottle of thread-locking fluid (they only had the medium blue level strength, but you can double-overkill it if you can find red level strength). Finally, since I was still not satisfied with the locking potential of the plate-sandwich effect, I also used some PL Premium on both sides of the fixture’s backside to prevent any torque on the bolts which would cause shearing on the cheap fixture’s metal. PL Premium is the Frank’s Hot Sauce of construction and DIYs, you use that $#!T on everything. Massive overkill, but this thing will not move.
Construction
We’re going to use some power tools and potentially toxic glues, make sure you have your parents approval and take all necessary precautions. Safety first!
With all this hardware, I set myself up in my ghetto workshop. You would want a good work table, but since we’re talking ghetto workshop, I had to make do with two a-frames. Ideally, you’ll have removed the back part of your fixture already to know its precise measures (you may have picked a different model than ours). Step 1 in construction will be to center the plate on the back side of the fixture. Here you have another choice. You’ll notice that most of the weight of the light fixture is on one of its side, due to the the ballast being on one end. You can choose to keep the baby plates centered on the fixture, keeping in mind that it will be unbalanced and heavier on the ballast side, or you can compensate a bit for it by fitting your plate closer to the ballast. We chose to keep it centered because symmetry is awesome!
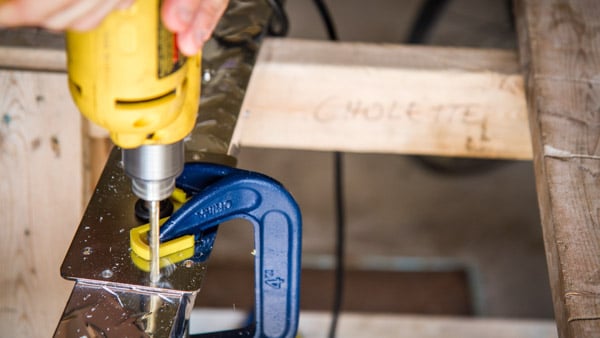
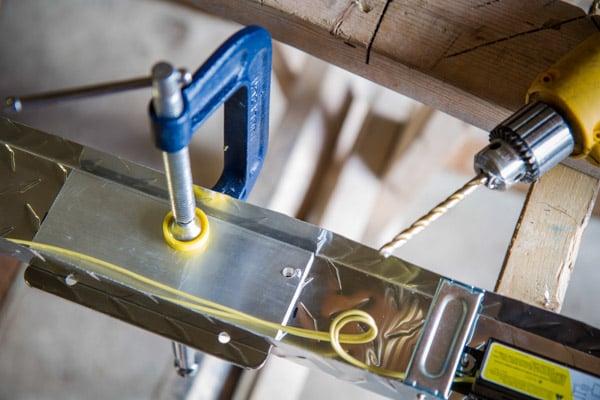
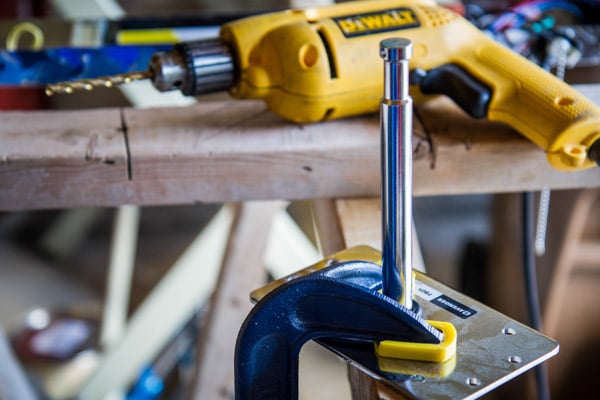
Once you’ve properly centered the plate, you will want to use a C or G-Clamp to fix it solidly in place. I recommend you use clamps that have plastic caps on their ends to limit the marks they can make on your metal surfaces.
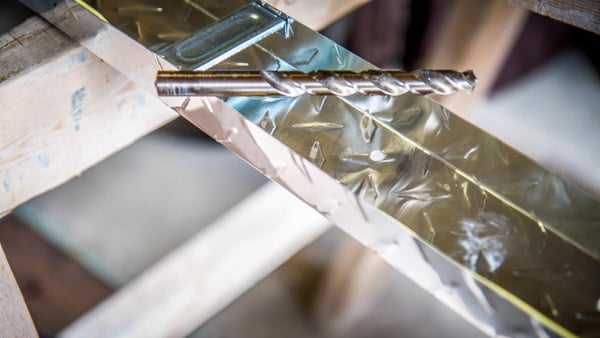
Once you’re satisfied that it is solidly fixed by the clamps, you can then use a center punch for each of the plate’s holes you’ll be using. Using a fine drill bit (1/16th, for example), you can then drill your pilot hole in the fixture’s backside, and then switch to the ¼ sized drill bit (.250 in our case) to make the hole the same diameter as your Baby plate’s holes. You then remove the clamps, and clean up the holes from any burr. Clean up the edges of one of the aluminum plates with a metal file, replace the baby plate, and line it up with the holes you just drilled.
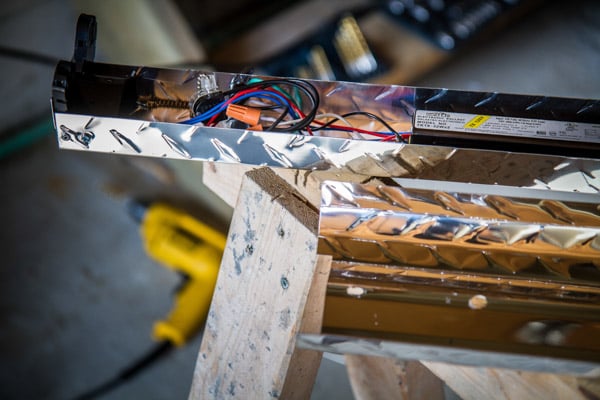
Be careful you don’t squeeze the fixture’s wiring under the aluminum plate. You can approximately line up both plates and then apply a bit of torque with the clamp; just enough so that they can’t move on their own anymore. Drill into the aluminum plate using the lined up holes (no need for a center punch here since the baby plate’s holes will act as a guide, assuming you have properly clamped the whole thing down). Once that is done, you should clean up all holes of all parts of any burr, and clean up everything of any floating metal particles.
Clear all the debris, you can then apply the Premium PL glue on both sides of the fixture’s backside, as wide as to the holes. You don’t have to put a lot here, but make sure most of the surface is covered. When the plates are bolted in, it will spread.
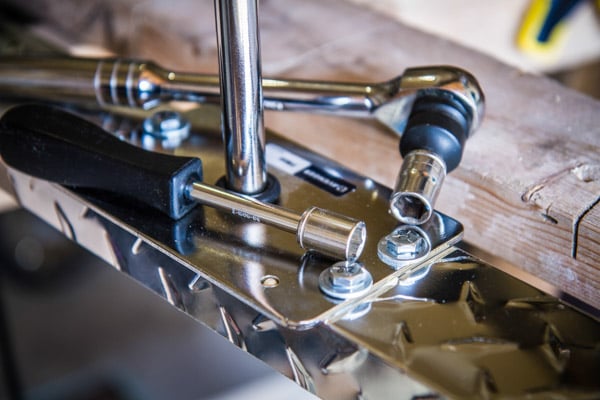
Put both plates back on and clamp them lightly, being sure to line up your holes. You can then put your bolt in a washer, and apply a drop of threadlocking fluid on the bottom end of the bolt’s thread. Insert that bolt from the baby plate-end, and from inside the fixture add a locking washer on the bolt and then the locknut, turning by hand until you reach the nylon lock. Repeat for the 3 other bolts. Grab wrenches or ratchet wrenches and tighten the bolts. You can then remove the clamp since the bolts are now doing their job. Re-assemble the fixture with the face plate you removed at the beginning, and allow 24 hours for the PL Premium to cure.
As I said, this take is our own little bit of overkill. You can scale it accordingly, based on your own familiarity with tools and your own use of gear. For us, it was important to create ghetto-flo lights that would hold-up to some not-so-ghetto professional use.
Conclusion
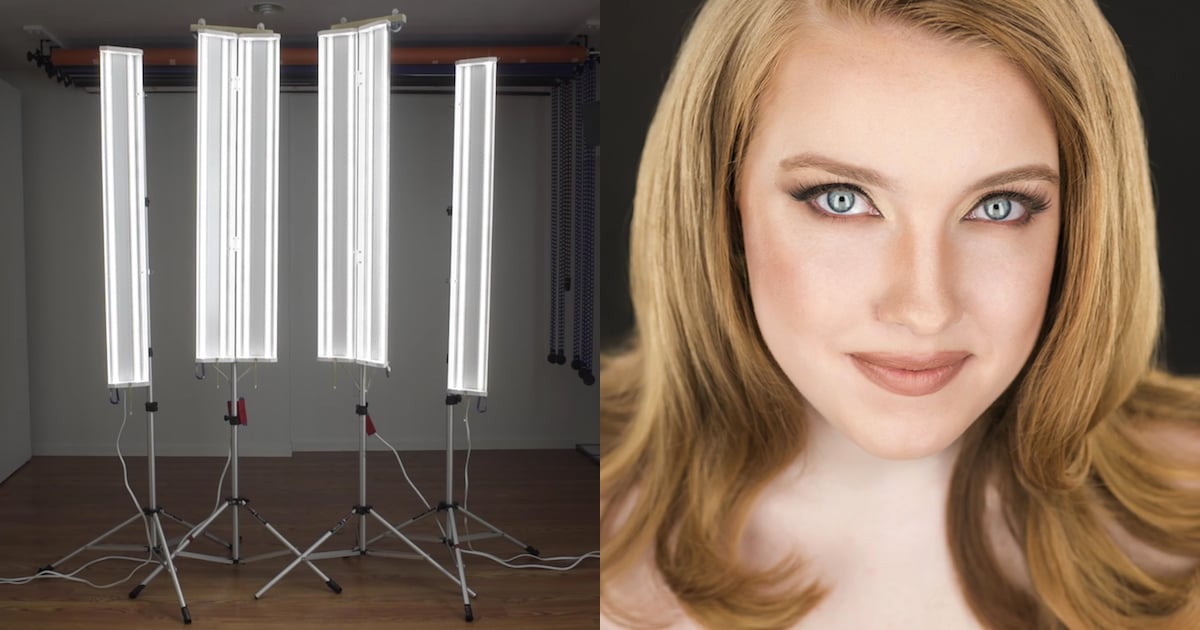
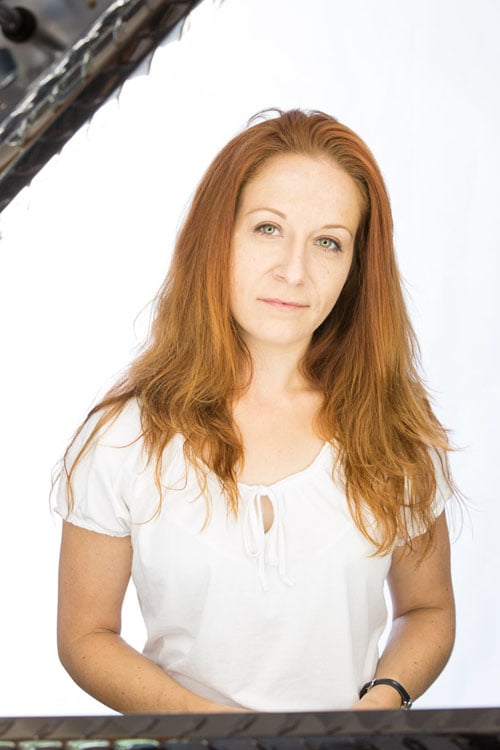
You’ll still need bulbs; I picked up a 10 pack of “Natural Light” T8’s at Home Depot for about $40, they had the colour temperature listed on the box (5000k) so I was able to dial that exact number into my camera’s white balance when shooting. Other temps were available which would come in handy if you plan on using them to blend with other flourescent bulbs in a location. My first setup was to try the “Hurly” look of a boxed off triangle of lights. My space had very little ambient light, and the bulbs were right up in front of my subject, so I was able to get a very clean look. Of course these bulbs don’t have the 200+watts of studio lights, each bulb is only 32w, to get a decent depth of field I was shooting at ISO 800, 1/200th at f/7.1.
Here are some sample portraits that were created using the Ghetto-Flo:


When you add it all up, $250 is a pretty great deal for this kind of setup assuming, of course, that you already have three stands to mount them on.