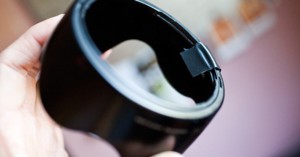
Tighten a Loose Lens Hood with a Little Tape or Glue
Lens hoods can become loose over time, leading to annoying rattling sounds or problematic vignetting if the …
Lens hoods can become loose over time, leading to annoying rattling sounds or problematic vignetting if the …
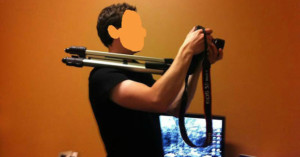
If you ever find yourself needing some quick stabilization when recording video with your DSLR, but don’t have a …
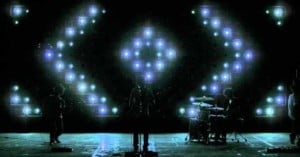
For their music video for the song “Bright Siren“, Japanese band …
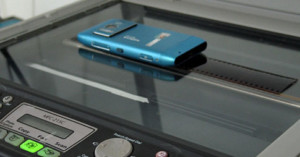
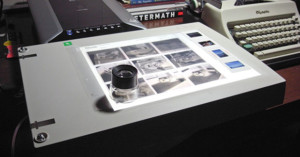
We shared a couple weeks ago that it's possible to scan film using an ordinary flatbed scanner and a DIY cardboard adapter, but did you know you can also use a large-screen cell phone or tablet computer to provide the necessary backlighting? All you need is a way to turn a large portion of the screen entirely white (e.g. a "flashlight" app). Simply place the device facedown over the film on the scanner, and scan it with the cover open.
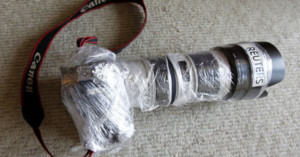
Check out this mummified camera used by Reuters photographer Jo Yong-Hak. Yong-Hak was assigned to cover the popular Boryeong Mud Festival this year in South Korea, and decided to protect his gear with some good ol' fashioned plastic wrap.

If you've tried to scan film using an ordinary flatbed scanner as you would a piece of paper, you've probably discovered that it didn't turn out very well. The reason is because film needs to be illuminated from behind, while conventional scanners capture light that's reflected off what they're scanning. Before you give up hope and shell out money for a film scanner, here's some good news: you can build a cheap and simple cardboard adapter that turns any scanner into a film scanner!
Photographer Adrian Onsen wanted to use the AI Servo autofocus mode on his …
Reflector mounts (the things that attach a reflector to your bike) are so cheap that bike shops often give …
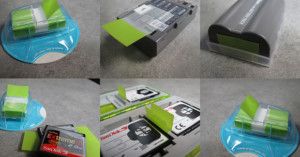
Do you have an efficient way of keeping track of which batteries or memory cards are fresh and ready …

Here's another quick tutorial by Destin, the guy who helped popularize using chickens as a cheap Steadicam alternative. It was made on an airplane flight when he wanted to shoot some photographs of the ice forming outside his window. If you're ever in a situation where you want to shoot a macro photo but don't have a macro lens, try flipping your lens around for a cheap and easy macro photography solution.
If you have an old or broken flatbed scanner lying around and gathering dust, a neat thing you can …
Andrew Lathrop came up with this novel way of building a simple radiation detector using an old compact camera, …
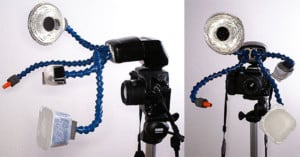
If Doctor Octopus were to design a DIY flash accessory, it might look …
Cinematographer James Miller spent two years developing a technique for converting 8mm footage to digital by beaming it directly onto the sensor of a Canon 5D Mark II. He replaced the bulb on an old projector with LED lights, and used elements from a disassembled lens to focus the light. You can read a step-by-step walkthrough of this project here.
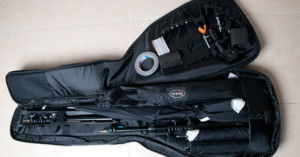
Rather than using more expensive bags or cases for moving around your lighting gear, you can buy a bass …
Having a camera with you may get you better customer service at places like restaurants, retail stores, and hotels.
Last year we posted a tip on how you can use jar openers to remove stuck lens filters, but have you ever thought of using them as a cheap follow focus? Tony Carretti was shopping at Bed, Bath & Beyond when he came across a twist jar opener in the kitchen aisle that he realized could be used on his camera.
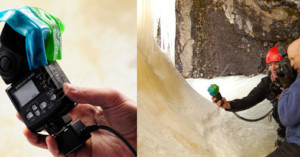
Photographer John B. Crane was ice climbing in Colorado when he came upon a little ice cave full of "tiny wonders". Wishing he had a green gel, he suddenly had the brilliant idea of using some Fruit Roll-Ups he had brought along for that purpose.

How do photographers get those wide images that bleed through the edges of the negative, showing the sprocket holes? It's a technique that allows your to create stunning panoramic images -- these little bits of film become art in themselves. These photographs are achieved by loading 35mm film into a 120 medium format camera. This tutorial was written with the Holga in mind, but the same technique works for other 120 cameras as well.
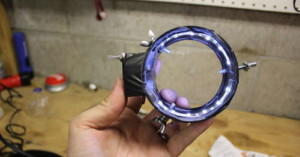
I had some stuff lying around as well as saw some parts as I was out and thought this would be fun to make. I have around $20 invested in parts. On eBay I saw ring lights for anywhere around $40 on up, so this will save you money and it was fun to make.
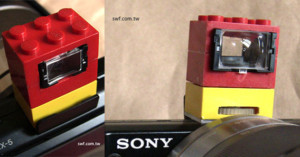
This DIY viewfinder was created using LEGO bricks and components from a …
Need to hold down the shutter release for extended periods of time, but don’t want to shell out money …
Here’s a clever trick to keep in mind if you use SD cards for your photography: if the locking …

You’ve probably seen the special keyboard covers for Mac keyboards that show you the Photoshop shortcut each key is …
Here’s a quick photo related life hack: if you have a lens filter that just won’t come …
Want more precision in your focus adjustments when shooting video with your DSLR, but don't want to shell out money for a pricey follow focus? Flickr user Adam Lisagor shot this photo showing how he created his own DIY follow focus for $6. All you need is a steel hose clamp, drawer handle, nut, and bolt. Drill a hole through the clamp, and put it together as shown above.
This neat DIY video shows how you can convert an ordinary digital camera into a night vision camera. The …
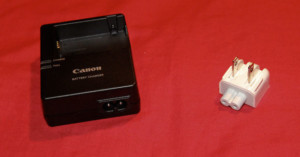
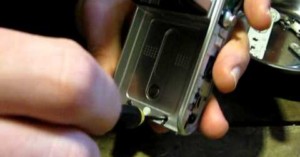
Some battery chargers (e.g. those that come with Canon's pro and prosumer cameras) plug directly into the wall and have prongs that fold into the charger, while others (e.g. the Canon T2i charger) connect to the wall via a removable cable. Though this may be more space efficient when connecting to a socket or surge protector, the extra chord takes up space and can be a hassle. CheesyCam has a clever solution: use an Apple wall plug duck head adapter to transform the charger into a wall charger.
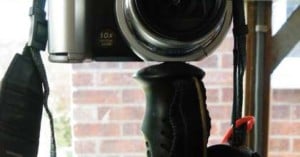
My boys have started getting into photography, but often have trouble keeping the camera still enough for really clear shots.
The obvious solution is to buy a mono-pod, but why buy when you can make, especially when you have Sugru?
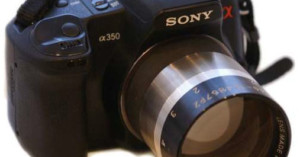
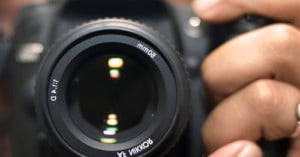
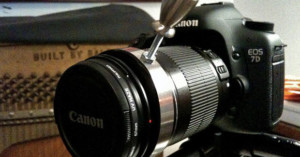
The ratio between the focal length and the aperture (diameter) of a lens is called the f/number. The smaller the f/number, the more light is let in. Fast lenses start around f/2.0, and the light let in goes as the inverse square. Compared to f/2.0, f /1.4 lets in twice as much light, f/1.0 four times, and f/0.71 eight times. The fastest camera lenses designed for DSLRs and widely available are between f/1.4 and f/1.2, but lenses as fast as f/0.75 have been made in quantity for special applications, and some of those are available quite cheaply via scrap yards, surplus stores, or eBay.
These ultra-fast lenses usually are branded either Kowa or Rodenstock and were designed for use in medical or semiconductor industry equipment, etc. They are not well-suited for use on DSLR cameras, and are no substitute for an f/1.4 or f/1.2 lens that was designed for your camera. However, they easily can produce very distinctive images. Here's how to use one on a DSLR.