How to Set Up Your New Camera: A Step-by-Step Checklist

Getting a new digital camera is an exciting time for photographers and videographers. A world of possibilities and learning lies ahead as well as doors to new adventures and places to visit. But it’s not always smooth sailing when it comes to using a new camera as a beginner. There are lots of complex numbers, letters, and acronyms to wrap your head around, let alone figuring out how to operate the numerous dials, buttons, and switches. But by following the simple steps included in this checklist you should be up and running in no time.
Table of Contents
Charge the Battery
Cameras will have battery and card slot ports located underneath concealing flaps that latch and unlatch to reveal the port. Not sure where it is on your camera? Look in the manual.
Most new cameras will come with a battery that is partly charged so it’ll work straight out of the box, but it’s best to charge the battery fully before using it. The reason for this is that rechargeable batteries for digital cameras come with lithium-ion (Li-ion) batteries. They have a limited lifecycle and so are limited by the number of times they can be recharged before failing to hold charge sufficiently. Topping up the battery, rather than letting it drain to empty also helps to preserve the battery condition over time, which may result in better longevity. Charging the battery fully will also give more time to play with the camera.
Format the Memory Card

Memory cards store photos and videos taken with the camera. Be sure to put this in before taking photos or videos so that they’re saved.
It’s a good idea to format the card inside the camera before use, even if it’s a brand new memory card. That way, the card will be empty and any proprietary subfoldering can be created by the camera for optimum storage.
If the card has been used before, make sure that all data is backed up before formatting, as this will wipe any information on the card.
Set Time, Date, and Location
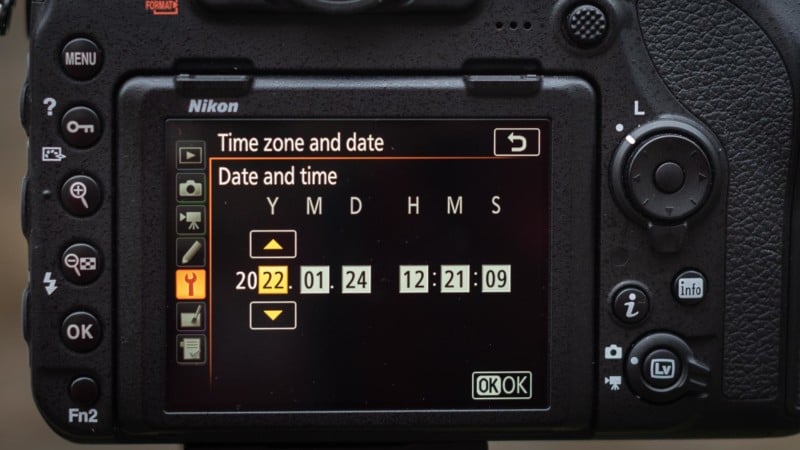
Now set the time, date, and location. New cameras will usually display this during the first boot, but used cameras may not, so take the time to check where this is in the camera’s menu and update it. This keeps EXIF data on photos and videos accurate, making it easier to search for media in the future. A time zone will provide a rough location but some digital cameras have GPS that geotags media, be sure to enable this if you require it.
Attach a Lens
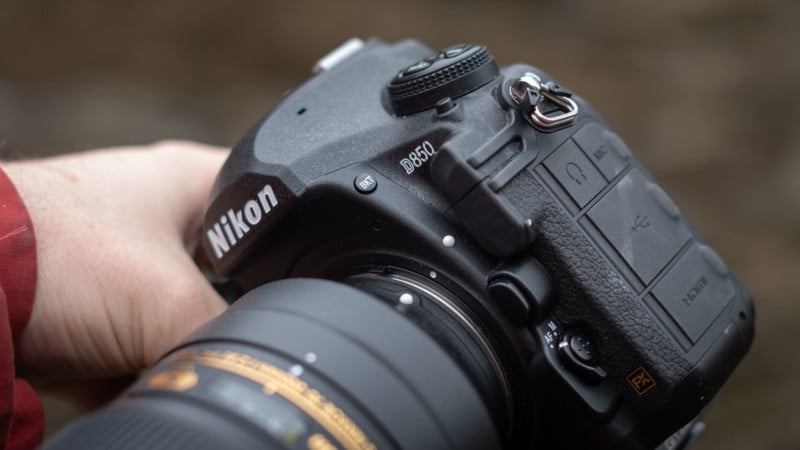
Lenses and camera bodies each have a marker to indicate proper alignment to install a lens. Line these markers up and twist in the appropriate direction to fit the lens to the camera. Markers may be different colors and in different locations depending on the make and model of the cameras — Nikon’s markers are white, for example, while Canon’s are red.
The lenses also twist to mount in different directions based on make, too, and it should always feel easy to attach. If any moderate to strong force has to be applied to mount the lens, it’s either because it’s: being twisted in the wrong direction (likely), has a faulty lens mount (unlikely), or has a faulty camera body mount (unlikely).
Check the Lens Settings
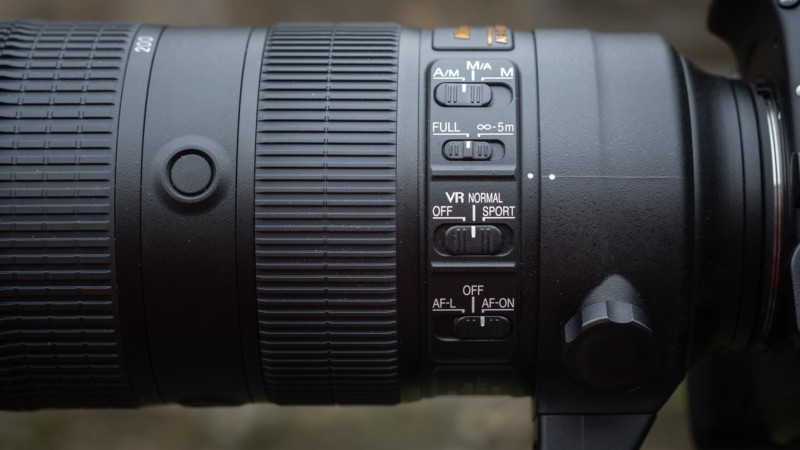
Lenses only have a few in-built controls but checking what they’re set to before shooting is important. A focus ring allows photographers to manually adjust the focus by turning it and often there’s a distance marker on the lens barrel (though not always). Zoom lenses also have a zoom ring that spins to adjust the focal length.
There are also sometimes switches or buttons on the side of lenses to change between autofocus and manual focus, engage or disengage image stabilization, and choose between different stabilization types.
If your camera is not autofocusing on subjects targeted by autofocus points, make sure your lens’s focus switch is set to AF (autofocus) rather than MF (manual focus).
When it comes to stabilization, it’s useful to keep this on when shooting handheld, but switch it off when mounting the camera to a tripod. That’s because the stabilization system can cause tiny vibrations when on a tripod and introduce camera shake blur during longer exposures. Though, some lenses are sophisticated enough to identify when they’re on a tripod and automatically switch off IS, so check the manual before operating.
Attaching to a Tripod
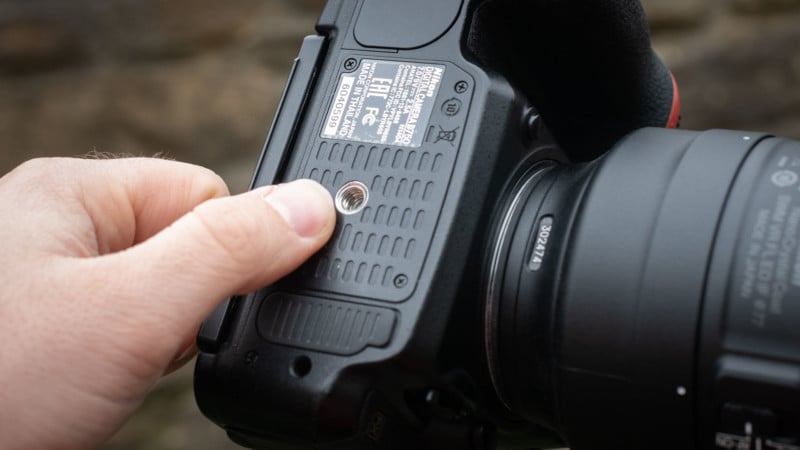
While it may sound obvious to some, attaching the camera to a tripod can go wrong. So let’s take a quick look at how to do it. First off, there should be a threaded connector on the underside of your camera (located at the base of the camera when looking through the viewfinder, shooting normally).
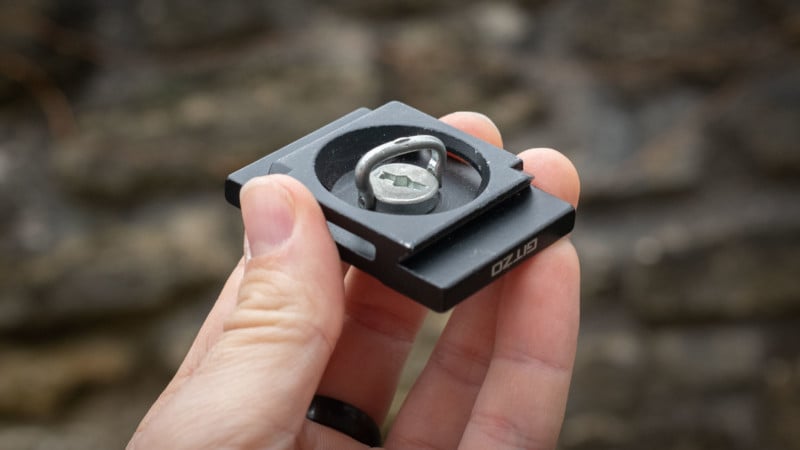
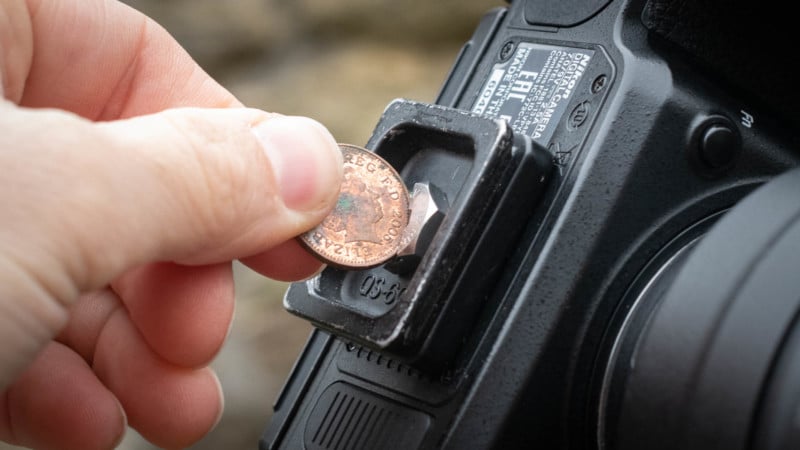
Once you’ve located this, disconnect the tripod footplate from the tripod head and use the screw to fix it to the camera. Some footplates have an in-built wing that makes it easy to turn the screw into the connector, but others have slots. Simply put a penny or screwdriver in this slot and turn it until it’s tight.
Next, slide the footplate onto the tripod head as per the instructions and ensure any securing set screw or quick release lever holds the camera tight. Tug on the camera a little to test the connection to make sure it’s fitted properly. Then adjust the tripod head until the correct composition is acquired.
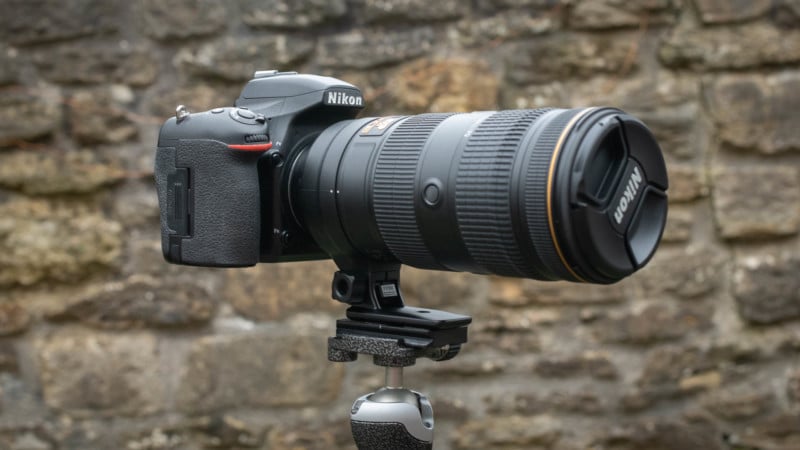
Large telephoto lenses are heavy and as such change the center of balance between the camera body and lens. Therefore, manufacturers fit the lenses with tripod collars. If shooting a lens with a tripod collar, always secure the tripod footplate to this collar and not the camera to avoid putting undue stress on the lens mount and potentially destroying the camera. And as an extra tip when traveling with the kit, always carry the camera via this tripod collar or support both lens and camera to prevent stressing the mount.
Get Familiar With the Modes
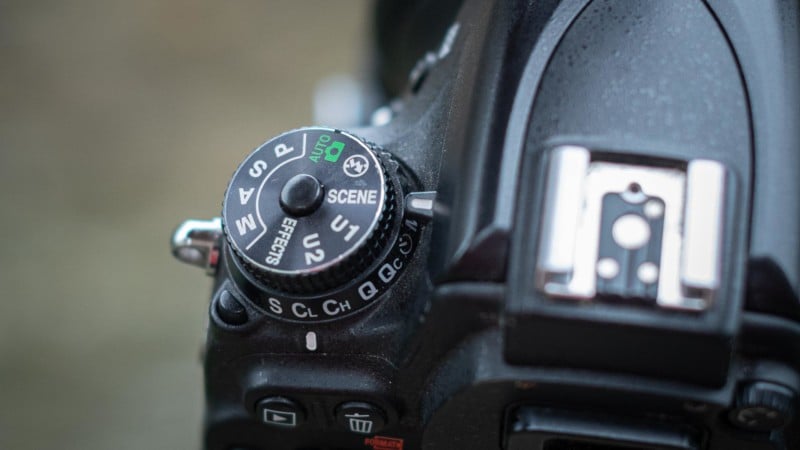
If new to photography as a whole, then use the automatic shooting modes (normally situated on a dial at the top of the camera body) to take images of subjects without inputting manual settings.
There is generally a full auto mode — often indicated with a green icon — in which the camera chooses all of your camera settings for you based on what it calculates to be best for each photo. There should also be a programmed auto mode — often found as the (P) option — in which the camera suggests the best shutter speed and aperture for each photo but allows the photographer to control other settings such as ISO, metering mode, flash, white balance, exposure lock/compensation, and more.
You may want to start with full auto or programmed auto when just starting out in photography to get a feel for composing and shooting photos before learning more about exposure and moving on to controlling shutter speed and/or aperture yourself.
Entry-level cameras also often feature modes like “fireworks” or “portraits” which make pre-determined settings and apply them to appropriate scenes. This is helpful for beginners, but one should be aware of the limitations of such modes.
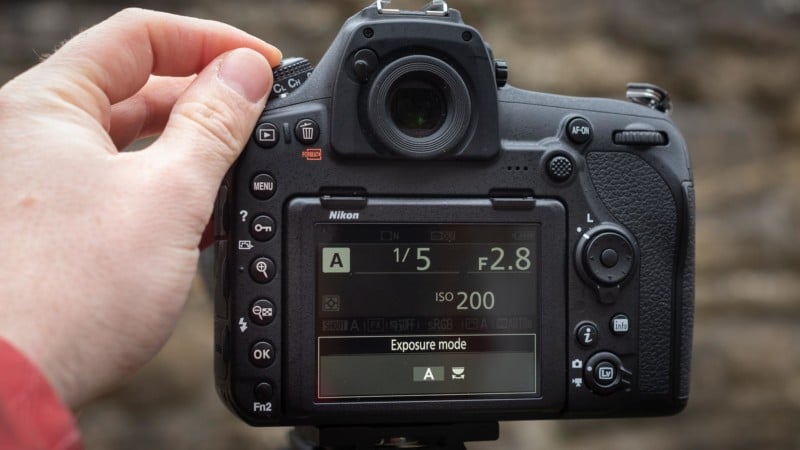
Since there is no creative control over the exposure triangle (aperture, shutter speed, or ISO) in these modes, it’s hard to predict results. Instead, it’s better to opt for semi-automatic modes such as aperture-priority and shutter-priority. By relinquishing control over just one setting at a time, budding new photographers can get to grips with manual control without having to juggle all three.
Select Image Quality
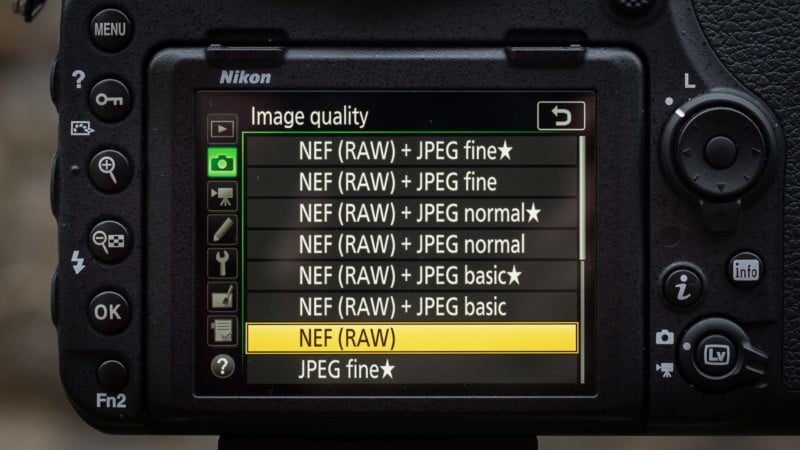
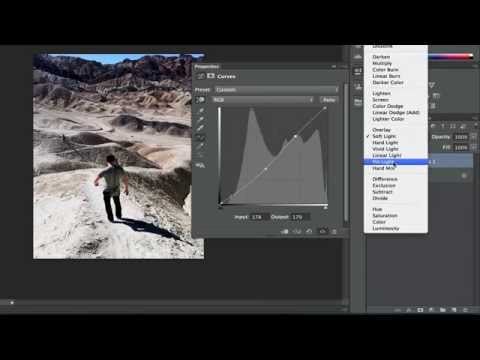
There are three main types of still image files: JPEG, TIFF, and RAW. Each has its own benefits and drawbacks, but it essentially comes down to how much original data they store and, therefore, how detailed the image is and how much flexibility the photographer has during editing.
To start, JPEG stores the least data as it compresses stills to save space, and it is the most common type of image file format. Next, TIFF stores more data and is often uncompressed, but file sizes are much larger. RAW files store the most data and are the largest in file size — it contains minimally processed data direct from the camera’s image sensor.
The larger the file, the more data there is, and the more flexible the image is when editing. RAW is the ideal format to shoot in because it can be edited much more flexibly, allowing for exposure, color, and tone changes without distorting the image.
JPEGs and TIFFs are useful to save space, (which isn’t really an issue anymore) but also to output straight for sharing/publication. Common modern uses for these two file formats might be a photojournalist who is sending images to a media desk straight from the camera, as they shoot, and beginners who want to share images without processing shots first.
In almost all other situations though, RAW files are the best way to make the most out of photos, but editing software compatible with opening these files is required.
Choose the Autofocusing Mode
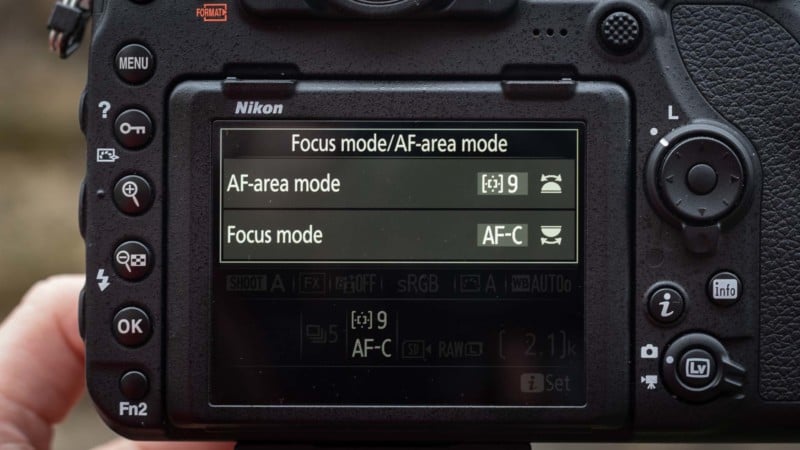
Autofocusing (AF) is the camera’s way to automatically attain focus based on where the AF point lies in the frame. It can either operate as single-shot focus, AKA one-shot focus (once focus is attained it will stay in place until the photo is taken), or continuous (focus adjusts on the AF point continuously until the image is taken). Single-shot focus is useful for static subjects, like a portrait sitting, or a building, whereas continuous autofocus may be helpful for tracking focus on a moving subject like a pet or a vehicle.
It’s also possible to change the size of the AF point, with common options including spot, multi-point, group, and zones. Modern cameras also have eye, face, animal, and subject detection to intelligently track focus even while the subject or camera is moving. Choose the most appropriate setting for each shooting situation.
Set the Stills Shooting Speed
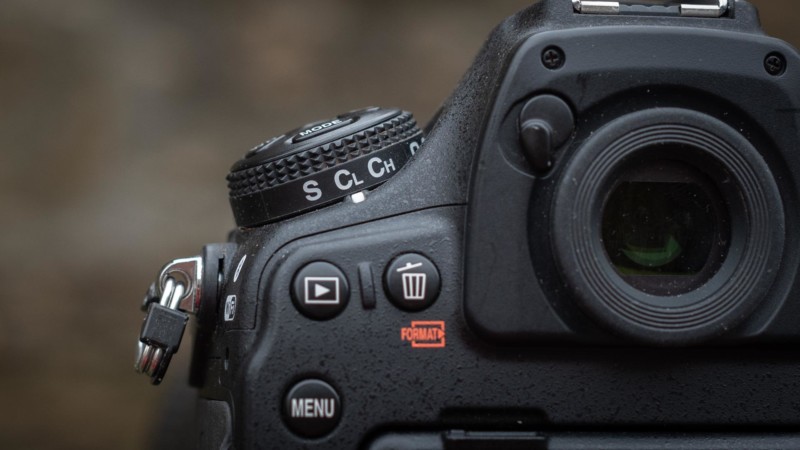
Digital cameras can photograph one still image at a time or multiple in succession. Commonly known as single-shot or continuous-burst, these drive modes offer differing levels of stills capture. A single shot might be all you need for a landscape, but to capture a skateboarder jumping over the ramps it makes sense to shoot a series of images and then pick the best after-the-fact.
Why include the single-shot mode at all, you say? Well, it saves going through deleting several photos of the same subject as the shutter release button can be quite sensitive, capturing more photos than you intend to when you press it in burst mode.
Video Setup Basics
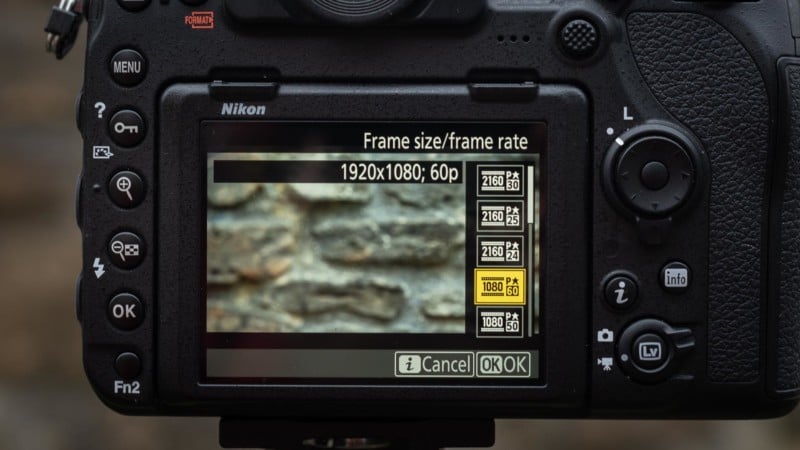
Almost every digital camera released in the past decade or so has the ability to record video. When switching from stills to video everything stays the same in terms of how aperture, shutter speed, and ISO affect the image, but users should be aware of the main difference between stills and video: resolution and frame rate.
Standard video resolutions in place on digital cameras are Full HD (1920 x 1080), 4K UHD (3840 x 2160), and 8K UHD (7680 x 4320). The numbers refer to how many pixels there are along the X-axis and Y-axis respectively. The higher the numbers, the more detail will be captured, but the bigger the resulting file will be.
Frame rate comes in standard speeds and as a point of reference for those new to video. A film at the cinema typically runs at 24fps (frame per second) whereas US TV broadcasts at 29.97fps (approx 30fps) and UK TV broadcasts at 25fps. The more frames that are captured, the smoother the resulting image. Cameras can now capture as high as 60fps for smooth footage, and occasionally at 120fps which is designed for true slow-motion capture as the 120 frames can be spread out by up to four times to match a 30fps project without the image stuttering. This would produce footage that’s 25% the speed of the original action.
It’s also important to remember that video files are much bigger than stills because of the increased frame rate and due to the audio which also takes a significant amount of space on the memory card. Standard audio recording settings are 48kHz (sampling rate) and 16 bit (bit depth) but some models have options to boost this higher for more detailed audio capture.
Your New Camera is Ready to Shoot
This guide should cover the most basic requirements to get your new camera up and running. When you’re ready to take it one step further, attempt to start using manual settings such as aperture, shutter speed, and ISO, or consider changing the white balance to suit the shooting environment. Metering can be changed, but only advanced photographers really need to alter this because exposure can be manipulated through the use of aperture, shutter speed, and ISO sensitivity.