How to Do Top Back Lighting in Product Photography
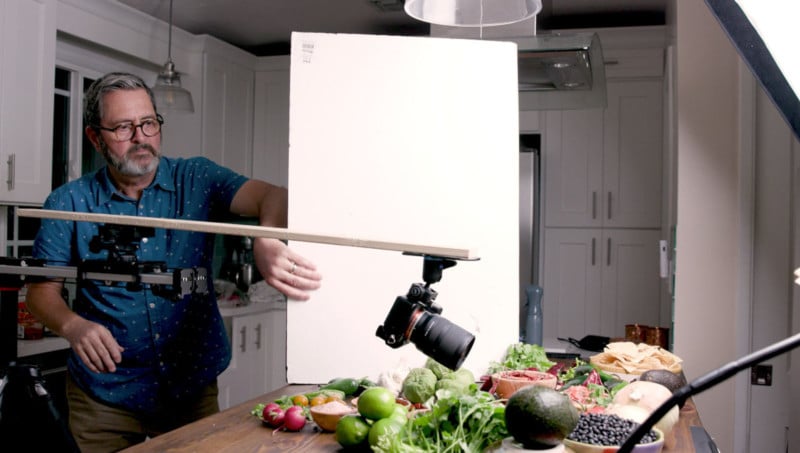
I’m photographer Jay P. Morgan from The Slanted Lens, and in this article and 10-minute video, we’re going to talk about my favorite lighting when it comes to lighting any kind of product: top back light.
I’ll share what each of the lights in my top back lighting setup does so you can set it up yourself.
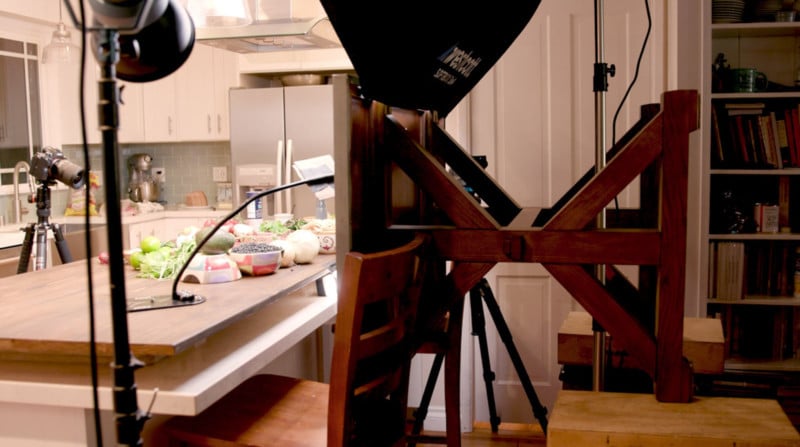
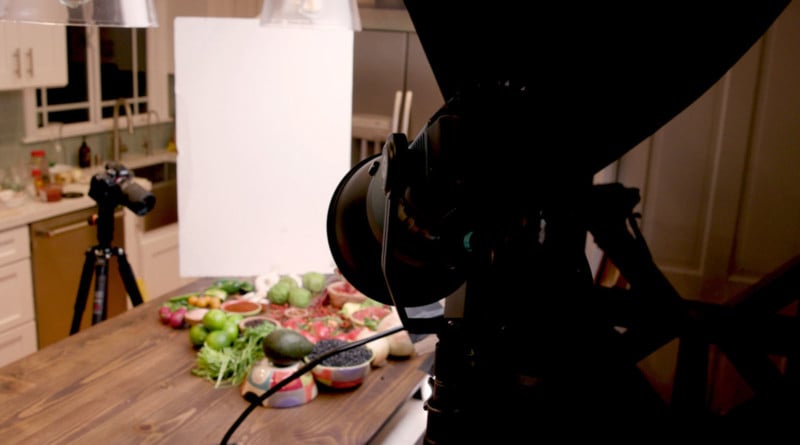
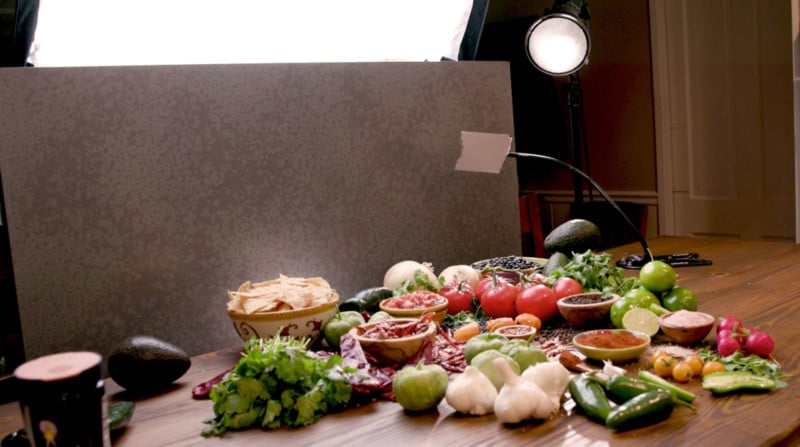
First off, we’ve got our Westcott large softbox that’s the 3’x4’ in the back. It’s just behind the background so that at that angle it’s not going to light the background.
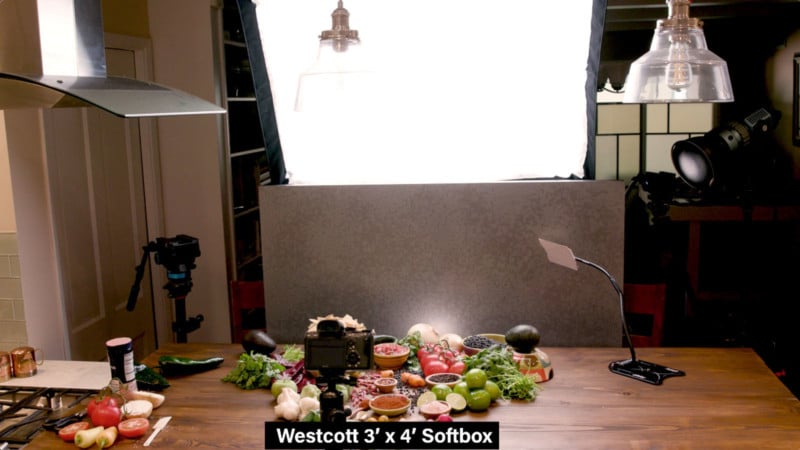
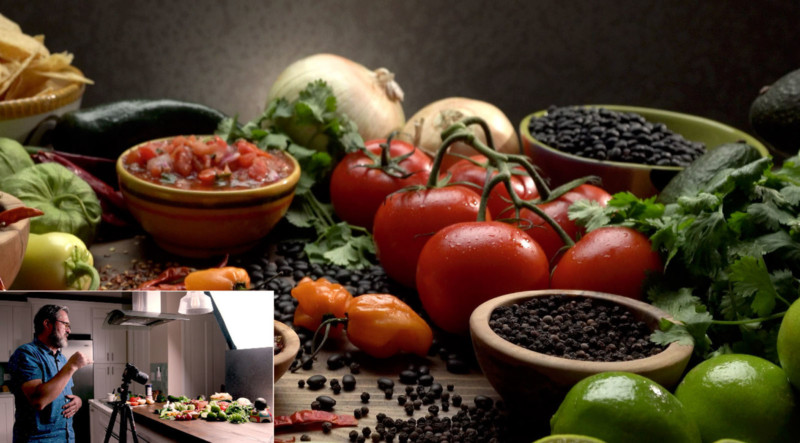
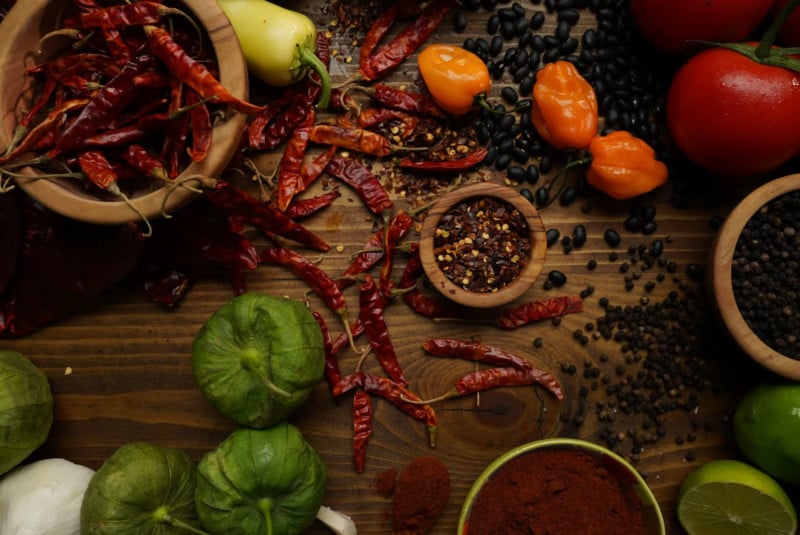
The softbox is throwing some pretty significant shadows forward. You see it underneath the little bowls. You see it on the limes. They have very strong shadows coming forward. You see it under the bowl in the back. You get strong shadows because the light is fairly low.
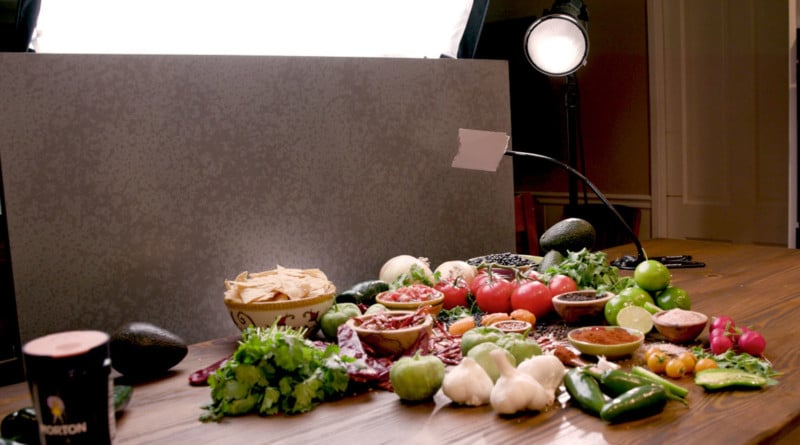
So for my background, I literally took the table that usually sits in our corner and set it on a couple of chairs in the foreground and apple boxes and stools in the background, and that became our background.
You could say, “okay I’m done, let’s shoot,” and that would be great, but is it done? No, it’s not done.
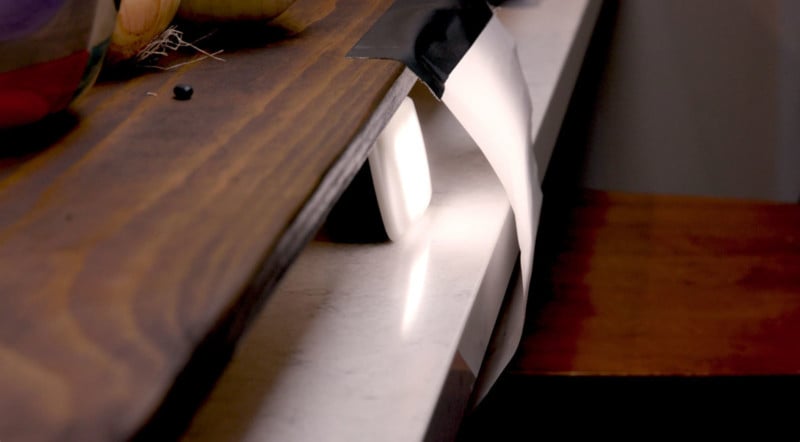
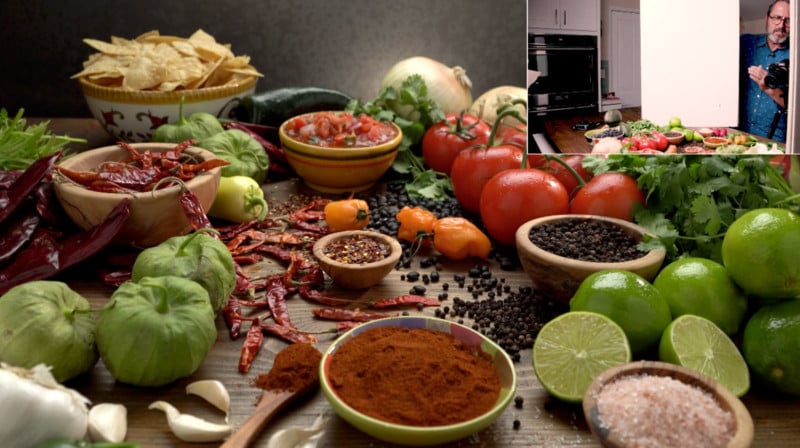
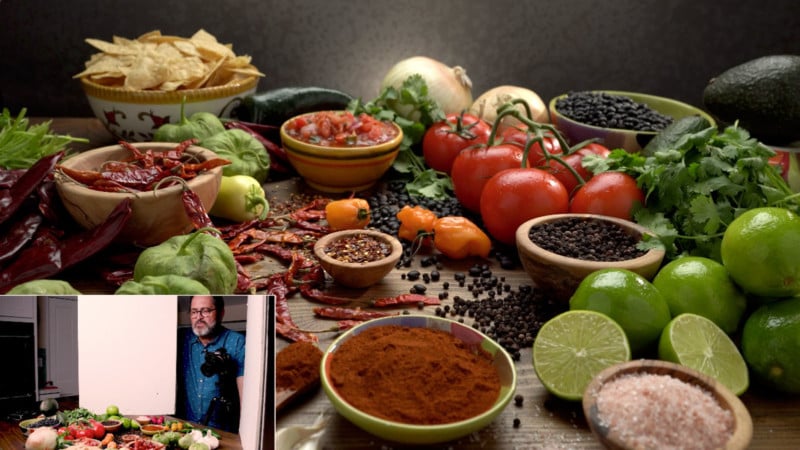
There are several things we can do to it, but the first thing is, I love mixing the quality of light. The next light I have is an Intellytech Light Cannon. It’s got a Fresnel lens on it. This is a directional and harder light and you’ll see it in our main image. The minute it came on, we see highlights in the salsa. We see highlights on the tomatoes. We see highlights in an area. I don’t have it covered in the entire scene.
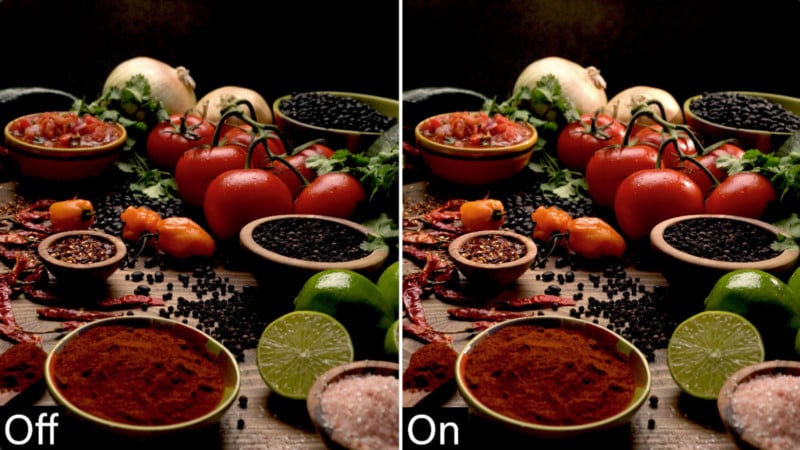
I have it just raking across the salsa in the back because in the little video move we did, our goal was to end up on top of the salsa. That was our hero and so that’s where I put the raking hard directional light. That gave us just a really beautiful light on the salsa and the objects in the back.

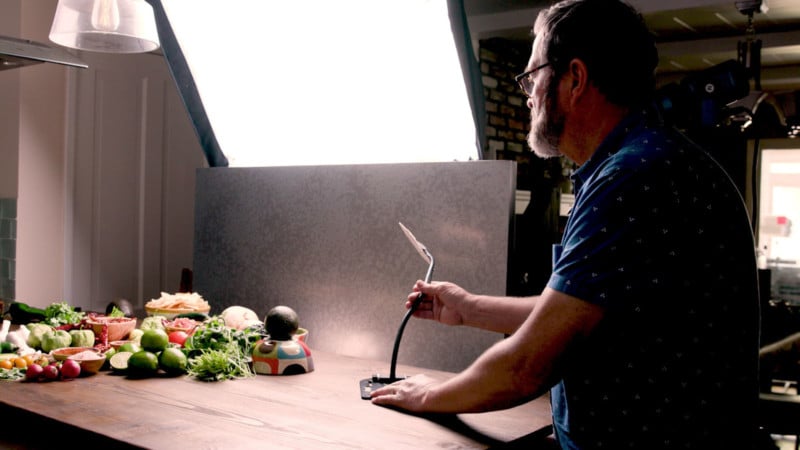
I didn’t want to just put it everywhere because pretty soon now it just becomes uninteresting. But if you just create a little shaft in an area it makes that area more interesting. You could now go in there and put a mirror and bounce a little light in on the side of the bowl. You could come in and just with mirrors, and people put them on things.
So soft light first, then hard light to create some areas of emphasis. And now we want to see some depth in the background.
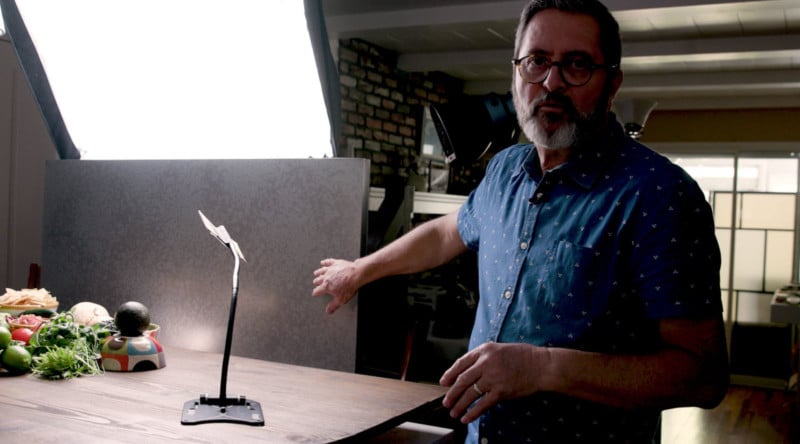
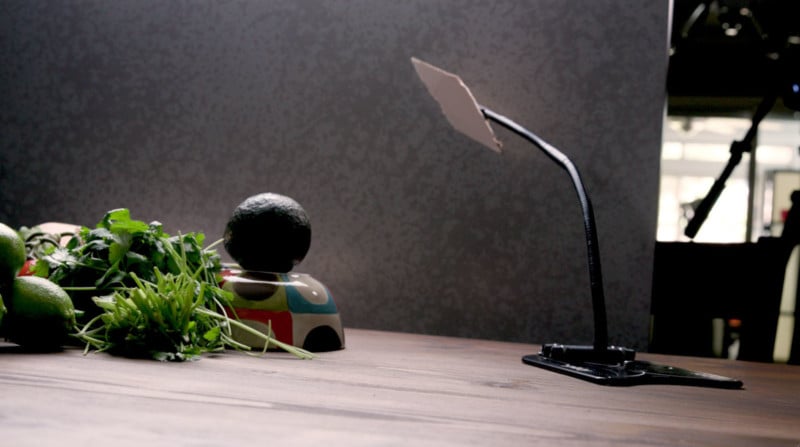
Another light I use is the Litra Studio Pro light. With this light, I have a piece of diffusion back there so that it would diffuse the light.
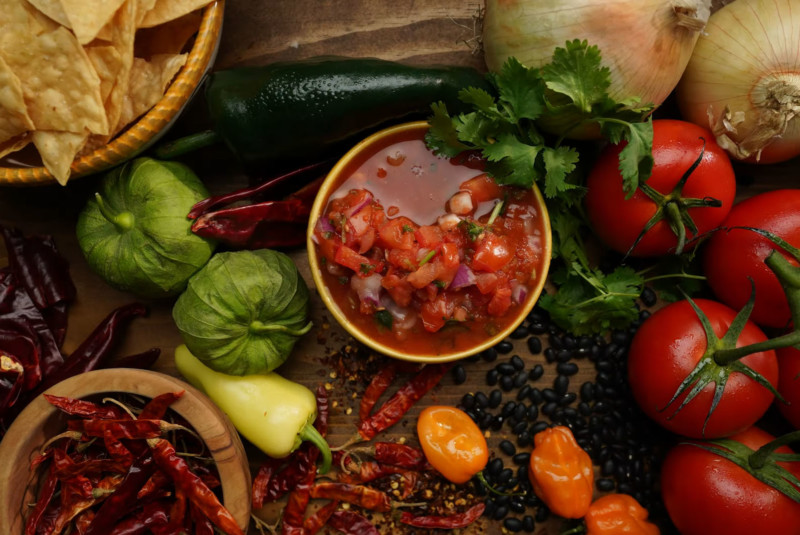
My backdrop is a very reflective surface, so I just want a little bit of light back there to give me some horizon. We see just a little bit. It’s almost too much.
In fact, it was too much in the middle, so I brought it over a little more behind the onion.
Now as I look at this scene, that onion in the back is very, very pronounced. It’s light-colored. I’m getting a really hard kick on it from that Fresnel directional hard light. That Fresnel light in the back is really hitting that onion pretty hard from the camera right side, so I’m going to flag that Fresnel light off and I’m going to cut it off from the onion.
Even though I have set a hard light, and my hard Fresnel light is really giving me pools of light, don’t be afraid to cut it off from different areas that may become too pronounced. Too prominent and you want them to recede a little more. So you start getting cards or maybe a piece of netting so that it can just take it down a little bit and not just knock it off completely.
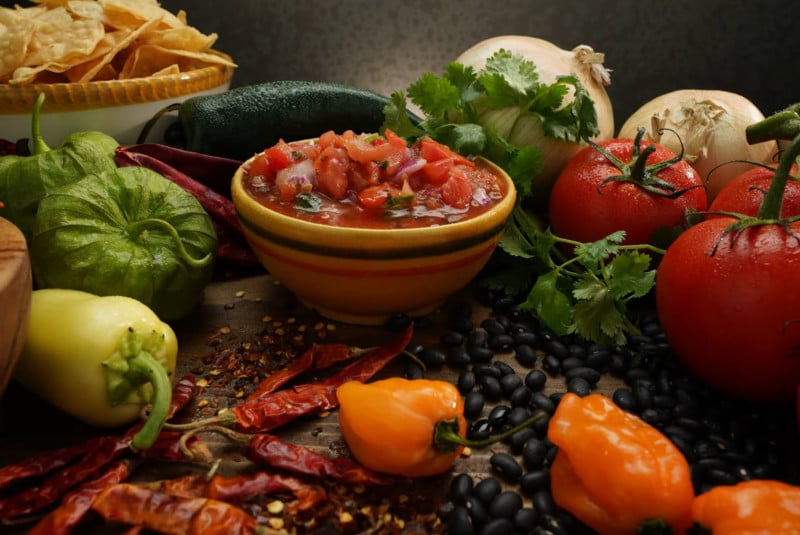
So now I’m looking at this now thinking you know what, this is looking pretty good. But the last thing to do with this is to just simply bring up the shadows or the floor. You use those terms, I use those terms interchangeably.
The floor is just the amount of light that opens up the shadows but does not create its own shadow. If I put a light right in there to open up the shadows, that light will create its own shadow, and then I’ve got a whole new problem — it looks like there are two light sources. So instead, I’m going to just bounce our large soft light back into the shadows. And I do this with two different V-flats.
I used little inexpensive foam board V-flats that I bought from a dollar store for like $1.30. I tape two of them together. They’re black on one side and white on the other. I can use it to reflect or just subtract light, and they’re very easy to work with. These are the last two cards I set just about every time.
If I don’t want the floor or the shadows to be too bright, I may only set one. If I want the shadows to be fairly open I’ll set two.
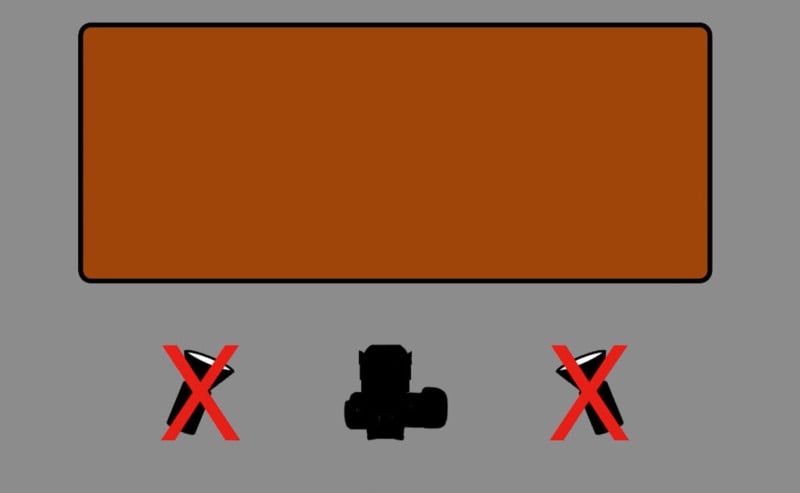
I put my V-flats to the sides where the angle of view is always on a triangle off from the camera. It gets narrow on the front and deeper at the back, obviously, so I’m going to put the V-flat on that angle of view. I’m going to slide it in as close as I can get it to my lens. And the large white vertical card now is going to start to bounce light into all of the shadows from its side.
Will it open up the shadows on that side? Nope, not going to do that. That’s why I’m going to add a second card on that other angle of view.
Adding my second fill card to the other side and sliding it right on that angle of view up to the lens opens up all the shadows.
It becomes now a matter of really creative choice. How open do you want the shadows to be? You make that decision depending on how you bring these cards in or how you move them out.
I feel at this point like this is ready to shoot.
I feel like I’ve got nice raking hard light from that Fresnel lens on the right. I’ve got a great top back soft light that opens up and just draws and gives me dimension to all the subject matter. I’ve got great fill cards that open up the shadows.
And I’ve got that one card taking off light on the onion. If I was really working a scene like this and doing this for a major client, I would probably set up three or four mirrors and two or three cards cutting light off from different areas and really finesse this. Take a picture. Look at it in Capture One. Decide exactly what you want to change, what you want to work on. So this really becomes a starting point.
This is the point at which I would show this scene to my client and my client now would say, “Well I like this or I don’t like that.” And we would start working on the things that we do and don’t like. The hardest thing about this kind of setup right is controlling this many items in a scene.
It’s controlled chaos, getting things in in a way that gives them groupings and small simple areas design-wise. But the whole starts to work together.
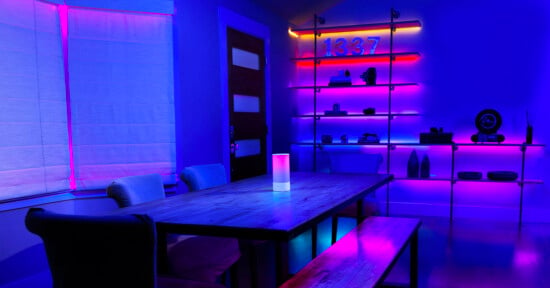
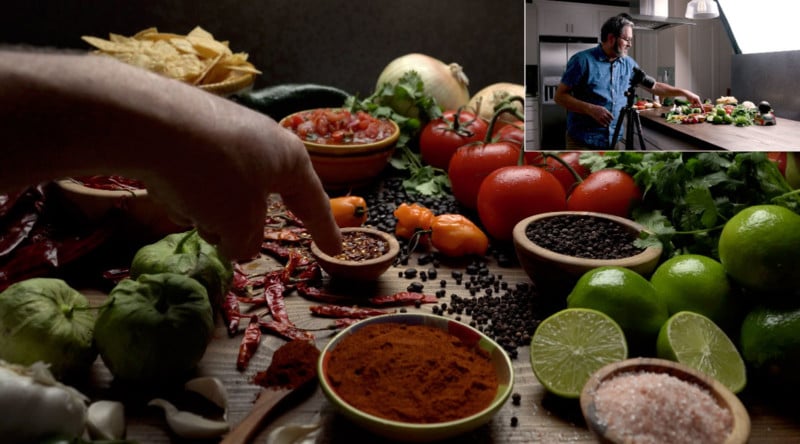
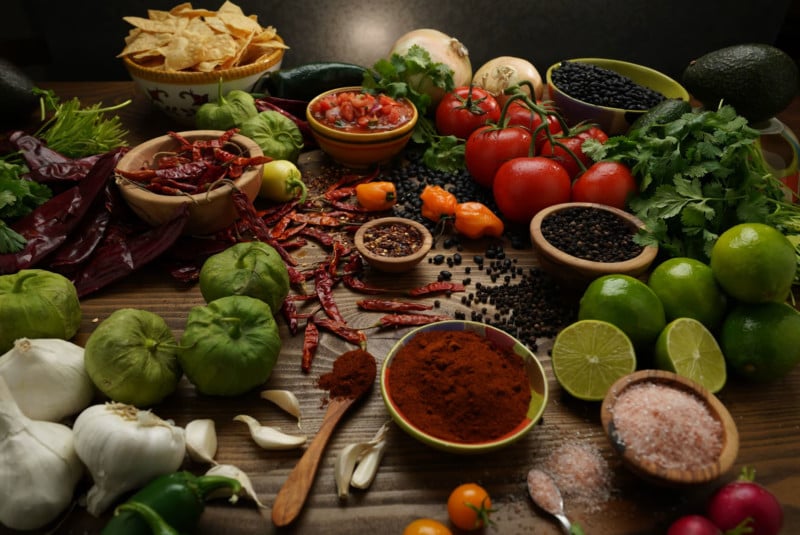
Here are some photos captured with this lighting setup:
So there you have it: a look at top back lighting. I love this look.