Instead of a New Lens for Astro Photos, Consider a Star Tracker Instead
![]()
Since Milky Way Core season is in full swing, in this article I am going to level up and discuss one of my favorite topics: star trackers.
Fear not, you are not alone. The name certainly sounds foreign, but after this write-up, I am hoping you can toss around the phrase at your next time-friendly family gathering—I don’t know, maybe that might not be the strongest topic.
One thing I will mention is that these are very niché devices. This is the type of product I would recommend getting after dabbling in astrophotography and nightscapes for a few nights and seeing if it is your thing. And if you do not know where to start, check out my tutorial on how to find and shoot the Milky Way.
A star tracker is some sort of motorized device which when properly aligned can follow the Earth’s sidereal rotation and thus compensate for the relative movement of the stars. The rotation of the Earth is why we need to use the NPF rule to shoot the stars, otherwise the stars will begin to trail if the shutter is dragged out too long. This means that we can expose shots of the stars for much longer. Why is this a huge benefit and what does that have to do with buying a new lens? Keep reading to find out. This gets shifty.
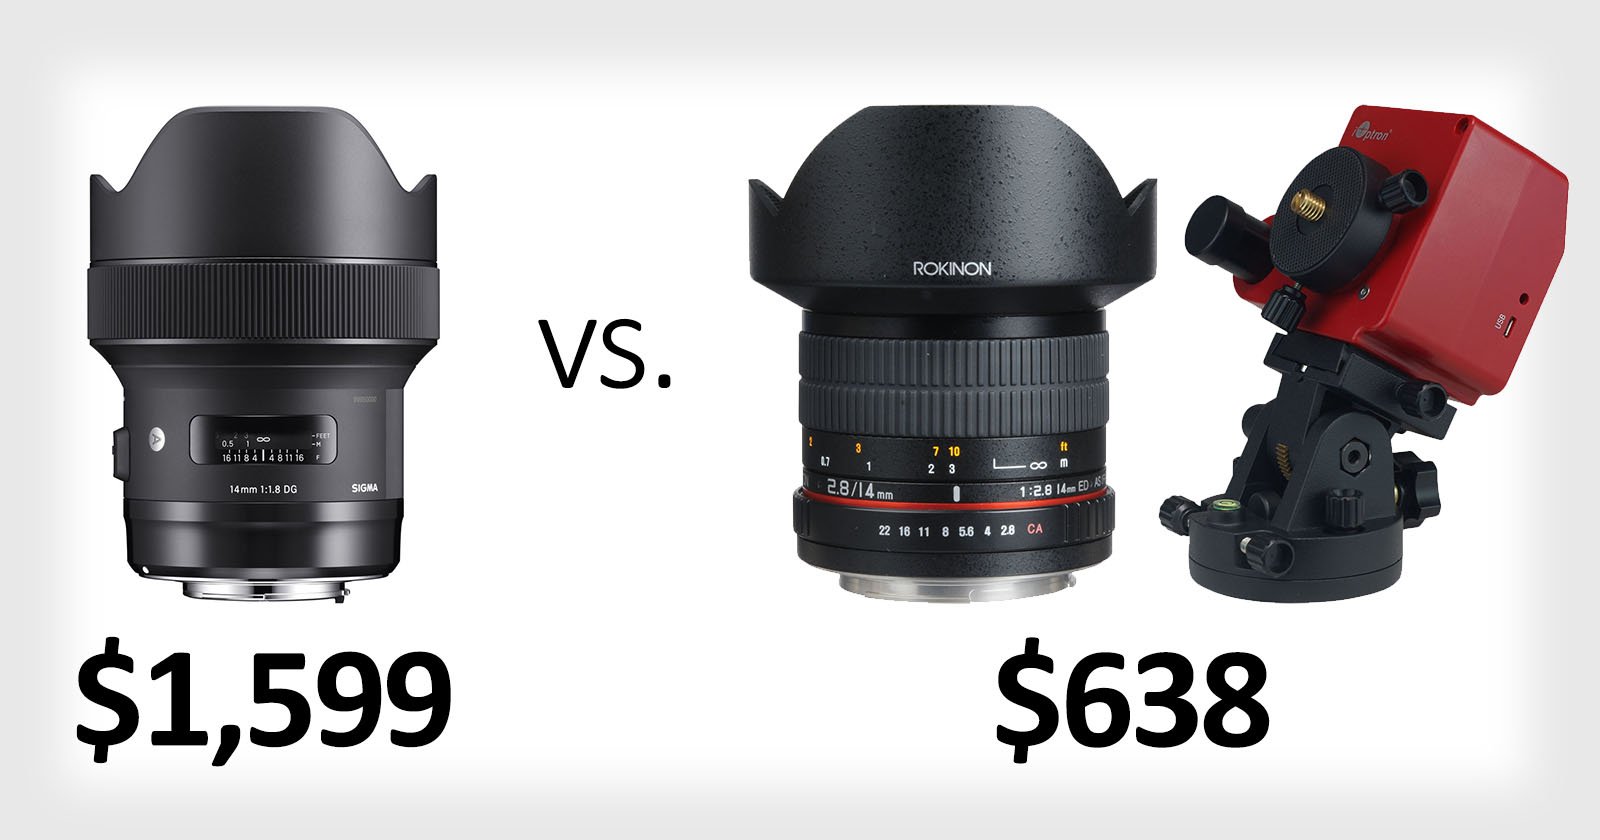
You may have started researching a new lens to pick up to improve your astro work. And this is precisely where I would say freeze. Record scratch. Lemme tell you a little secret…. your money is much better spent on a tracker than it is on new glass. Now okay. Full disclosure. A tracker is not going to entirely replace the need for a new lens, but it will essentially bring new life to your current lenses. You are still far better off buying a $250 tracker over even a $500 lens because of how much capability these things have. I will stand by that statement to the max because…
A Tracker Can Make a Mediocre Lens Great
Yeah, you heard that right. No bamboozles. Why? How? What? Dan, you can’t just turn an 18-55mm kit lens and pretend it is a 24-70mm f/2.8. No. No. You are right about that, but listen in on a little secret here.
In astrophotography, many properties commonly discussed when using a lens in the day become irrelevant. For example autofocus speed, depth of field rendering, etc. But on the counter, some distortions not typically seen during the day make their way into astro shots. Things such as coma, astigmatism, and longitudinal chromatic aberration (loCA).
So then how does a tracker fix these distortions? Simple. Because the tracker is “following” the stars, we can expose for longer. Say 2-, 3-, and even 4-minute shots, wow! With that being possible there is much more light reaching the sensor and thus not only can we bring down the ISO to reduce noise, but we can also stop down the lens! When we stop down our lenses, we are mitigating some of these distortions. This is true for any lens. Simple physics.
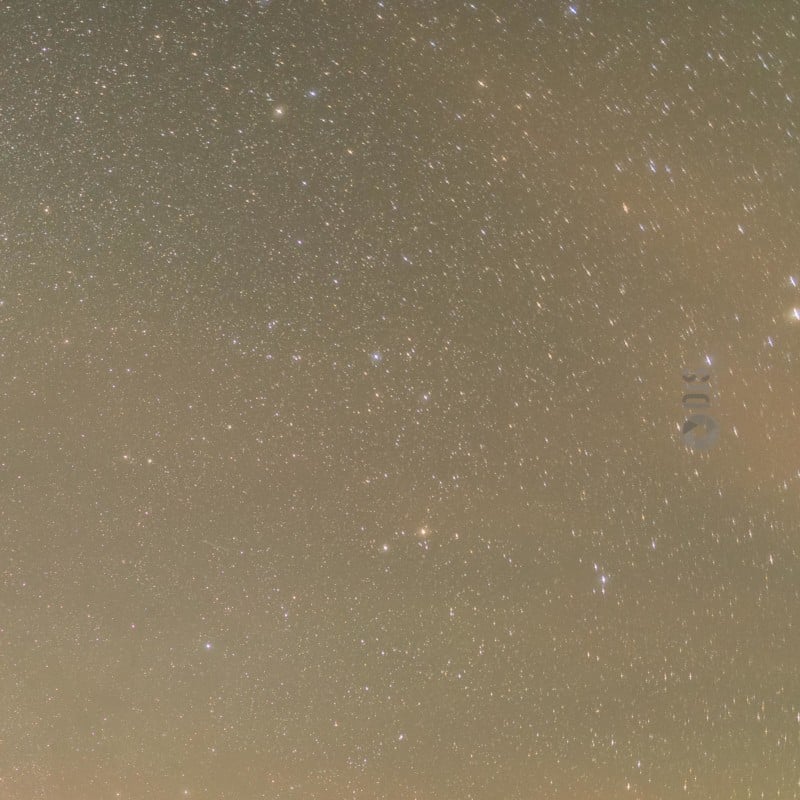
Look a the difference in corner sharpness by stopping down a Nikon 20 1.8G f mount lens by just one stop. I would not recommend using this lens wide open for instance.

A Tracker Will Increase Detail in Astro Shots
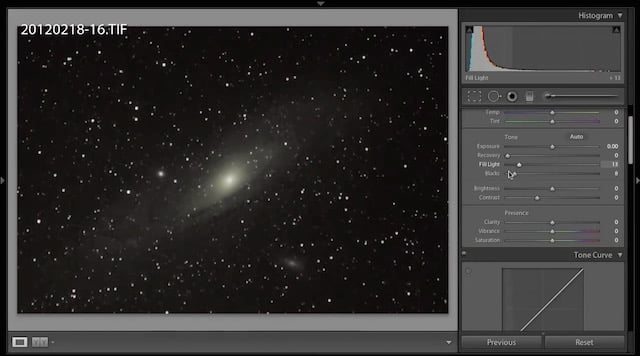
I mean who doesn’t want the juiciest astro shots out there? Well, a tracker can allow you to get that juice. This again goes back to longer exposures. Longer exposures will allow you to not only stop down enhancing the sharpness of your glass as mentioned above, but you will be able to lower your ISO. With a lower ISO, there will be much less noise in your shots. And again, the reason we can lower the ISO here is because you are getting more data in your shots.
Quick note: Noise is not a product of ISO. Lack of signal is. ISO is the “volume dial” essentially at which you can adjust your sensor to in an effort to brighten your shots. It does not compensate for a lack of light. Trackers DO because, again, longer exposures. So with more signal, there is less noise, and thus far more detailed shots. Pretty wow, right?
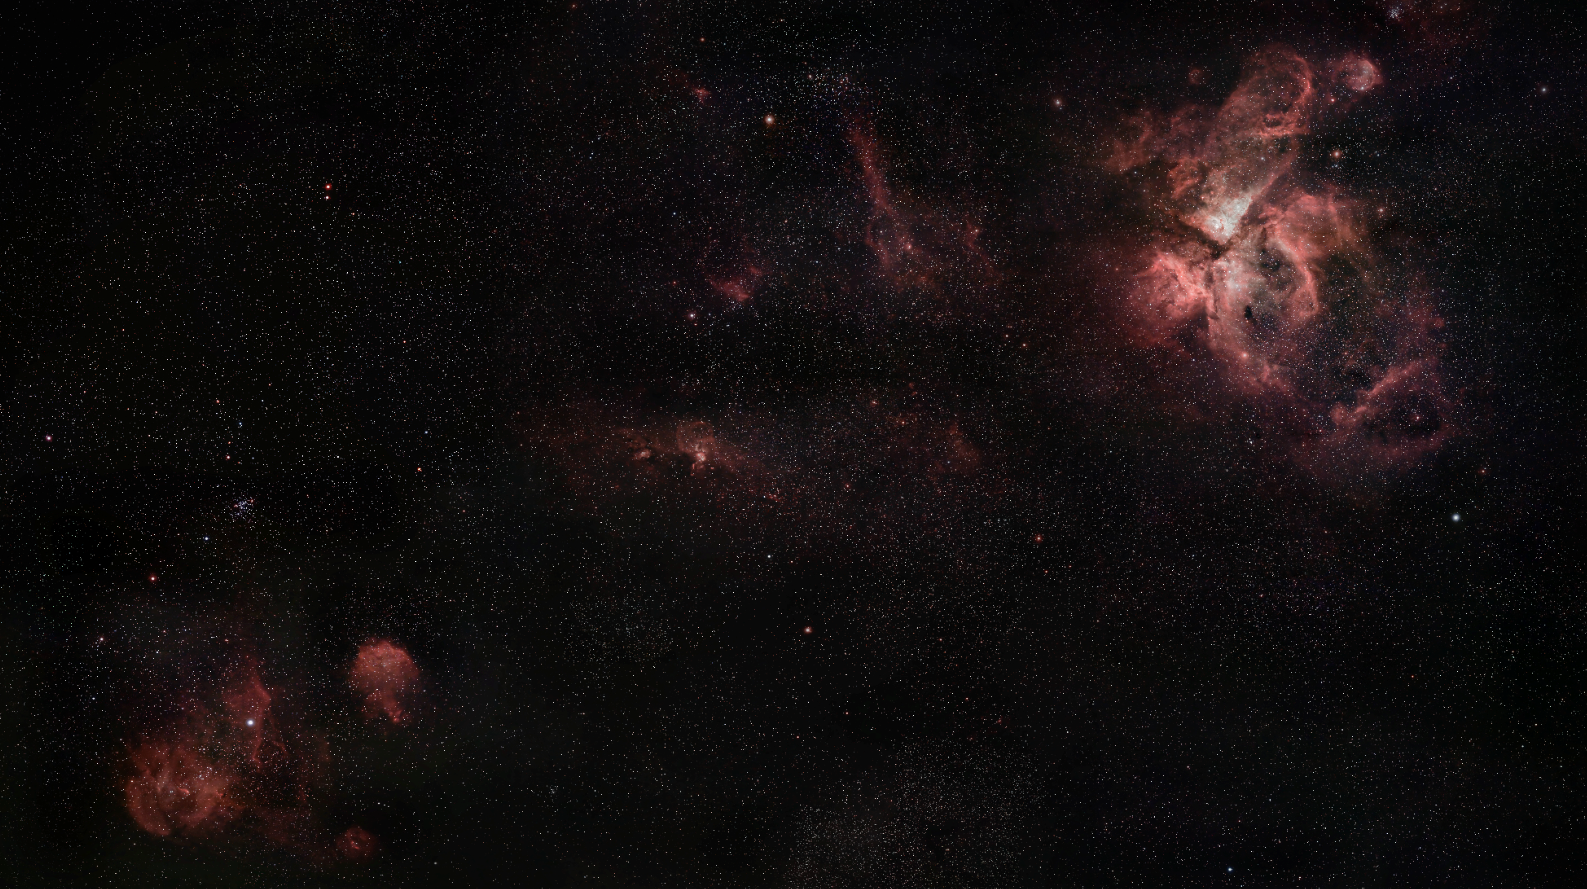
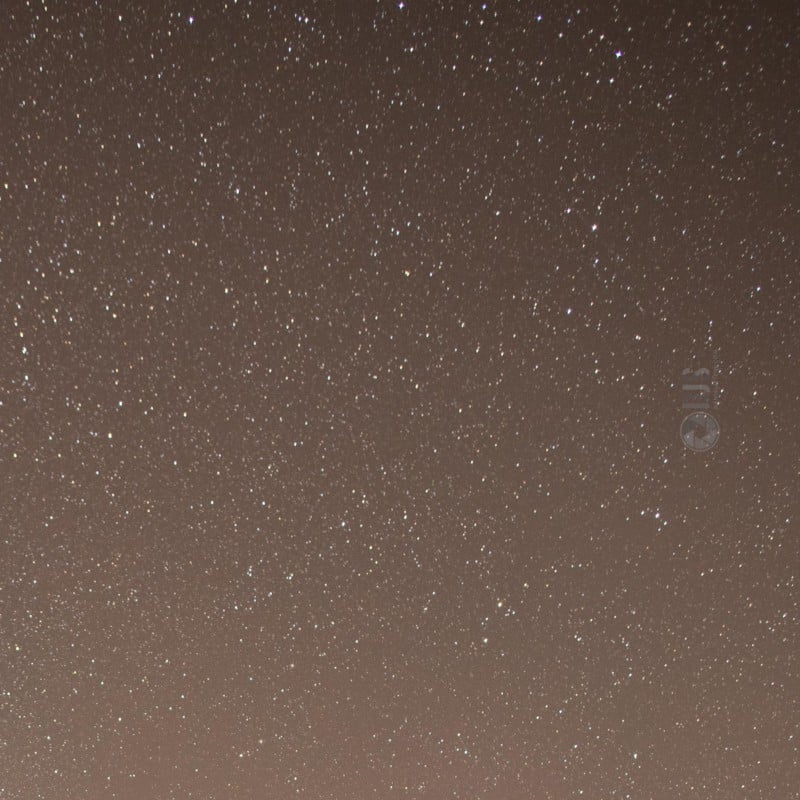
Check out this comparison between an untracked and tracked file.
The same camera and lens were used in this setup. Notice how also the stars are much sharper in the tracked shot? This is because I was able to stop down as a result of taking advantage of longer exposure.
The Caveat: Trackers Require More Work
With every action, there is an equal but opposite reaction (I guess that kind of works in this sense)? What I mean by this is a tracker not only requires more work to use and set up, but it is an additional item to keep in your bag, take on hikes, and travel with. I personally think the added bulk is worth the results, and I hike with mine and will always bring it, but it just needs to be said.
Also, and this is a biggie, you may be wondering what happens to the landscape when the tracker is rotating your camera. You guessed it, the landscape becomes a blurry blob!

Something has got to become blurry in this equation, and that is just the way the cookie crumbles. To combat this blurriness then, you will need to shoot an additional shot(s) with the tracker off and use Photoshop or Gimp or other software to mask and blend them together.


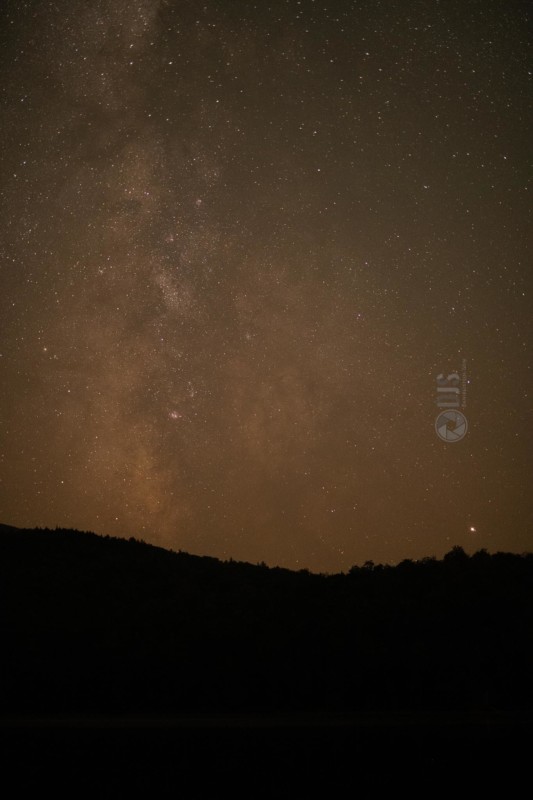
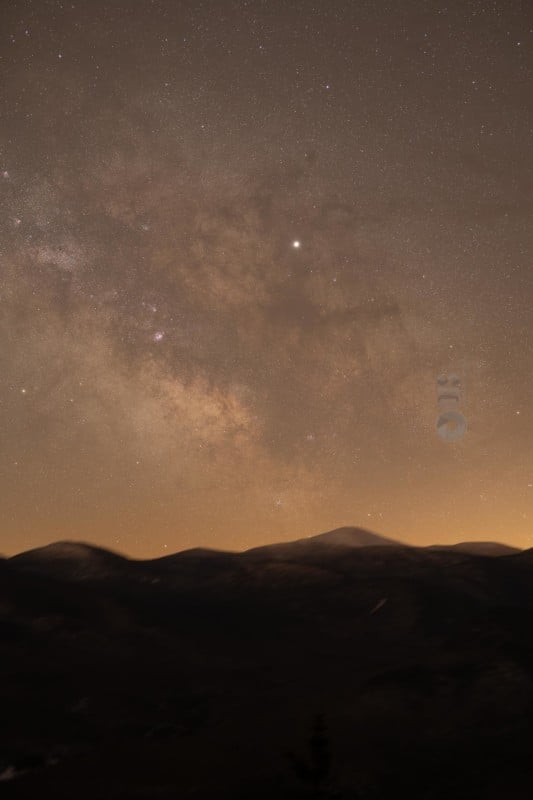
However, I see this as kind of an upside as it allows you to take separate long exposures of the foreground and thus have a nightscape shot that isn’t just a silhouette of the landscape. (See examples above).
Trackers also require you to be in a location that has access to a clear view towards your celestial pole (Polaris for Northern Hemisphere, Southern Cross for Southern Hemisphere) to properly align them. This is called a Polar Alignment. I rarely find this to be an issue, however. But of course, your mileage may vary depending on where you are shooting so it needs to be said.
Choosing a Tracker
Trackers come in all sorts of shapes, sizes, and price ranges. You can even make them yourself for like 20 bucks if you are handy (do a search for “barn door tracker”). I have seen some of the cheapest models on the market listed for like $80 which are perfectly capable of handling something like a Canon EOS Rebel and lens, all the way up to the full-on mega big and expensive equatorial mounts which are meant for shooting deep space targets and planets with telescopes.
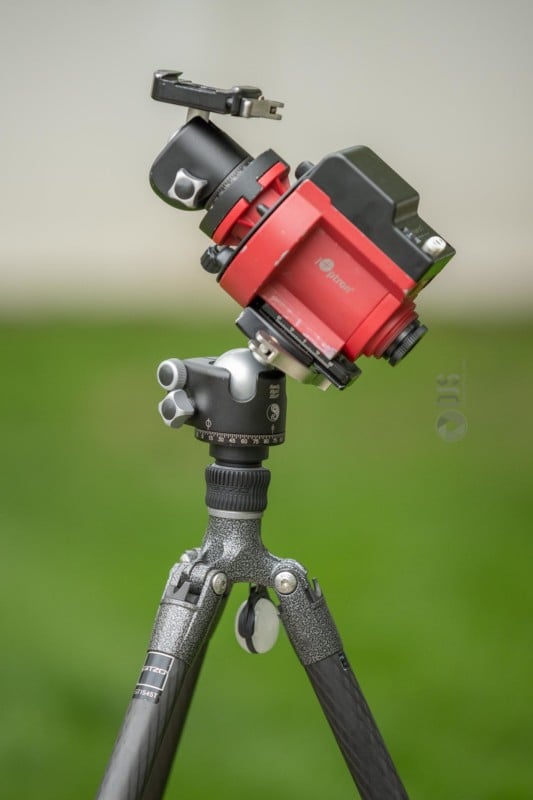
I am not going to get into the specifics of which one you should buy in this post, but if you have already done some preliminary research on a model or two you are eyeing up, feel free to lemme know in the comments below and I can chime in with my recommendations based on your budget and what you want to shoot. Since we are talking about widefield nightscapes however, models to keep in mind are the Sky Watcher Star Adventurer (both Pro and Mini), iOptron Skyguider Pro (what I use personally), iOptron Skytracker Pro, Move Shoot Move Tracker, Omegon Lightrack Mini, and the Vixen Polarie.
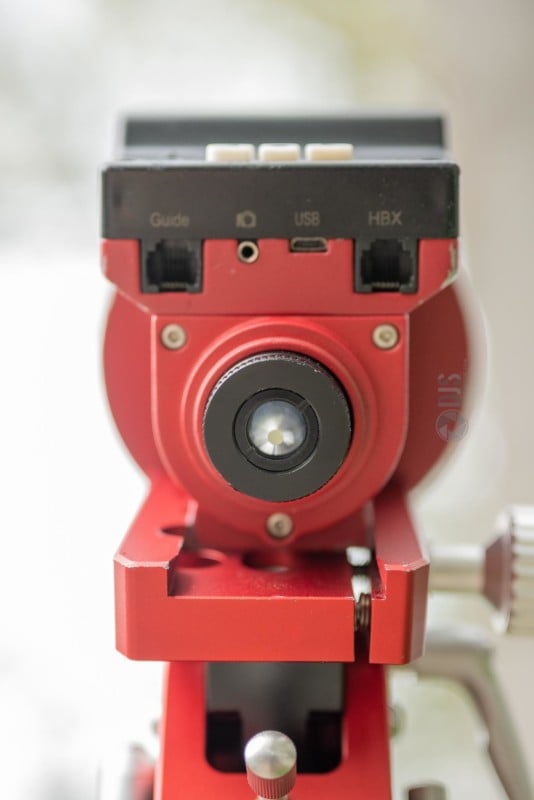
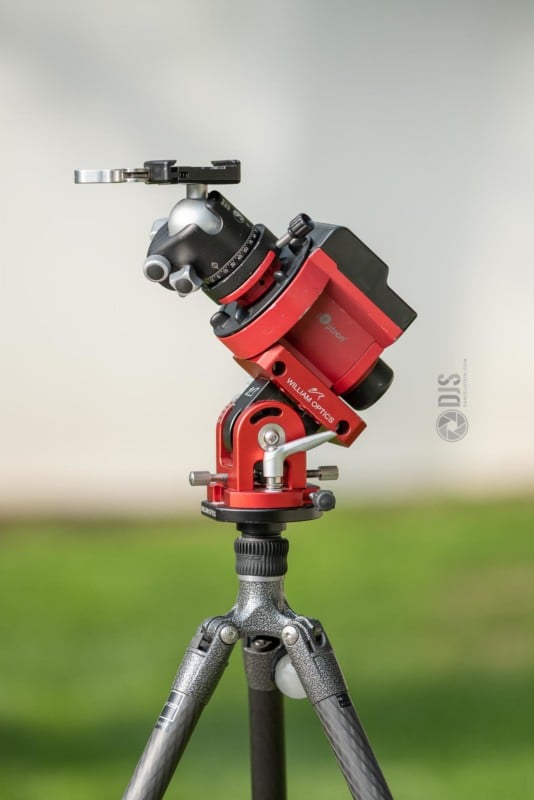
Note: I am not affiliated with any of the products mentioned above in any way. The links used are direct links to each respective manufacturer. I will be referencing the iOptron Skyguider Pro going forward in this tutorial because that is why I own, but again, no affiliation with iOptron (or the William Optics Base, Gitzo, Vello, and Really Right Stuff products for that matter).
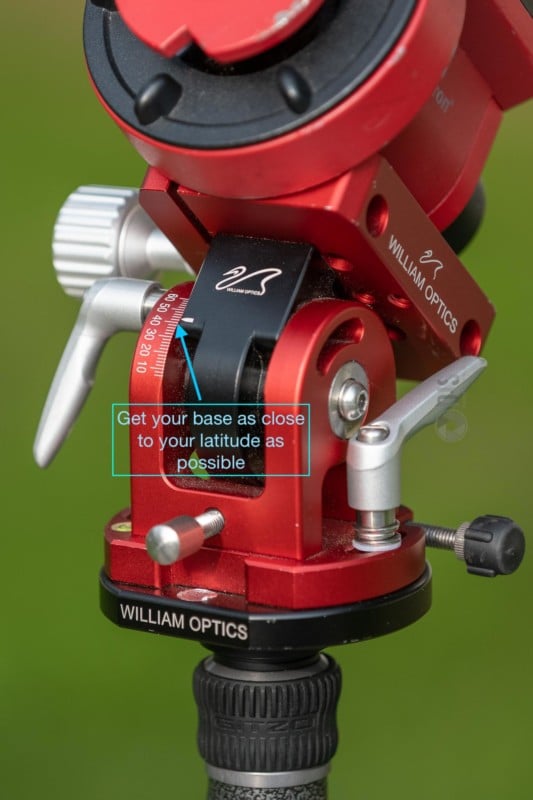
I highly recommend getting a tracker with an altitude-azimuth base or adding one in if the model you want does not come with one and you can afford it. This will make polar alignment a lot easier as they have latitude markings printed on the site and will always keep your tracker level so long as the tripod is level. If not, use what you have for now. It will still work.

Polar Alignment
This is the fun part! Like I said earlier, I am not going to focus on polar aligning your tracker specifically as all models differ in some small ways. Instead, I am going to give you a basic overview as well as tips and tricks to get any tracker setup and nail a polar alignment, which some would argue is the most difficult part of the setup. Of course since I will be using my tracker as an example in the following steps it may seem I am talking about my model specifically, but I think if you use this guide as a basis for understanding how these things work you can apply this knowledge to ANY tracker.
My best advice is a few days prior to heading out is to familiarize yourself with the night sky using the free Stellarium program. Toy around in there with the stars in the night sky and how you can understand where to look to find either Polaris or the Southern Cross.
I highly recommend going through the steps during the day to get a feel for the controls of your tracker, as well as looking through your tracker’s polar scope if yours has one while moving them knobs on your alt-az base or ball head to see how the tracker moves. Understanding this movement will make it a lot easier to align everything when it goes dark.
If your tracker has a polar scope instead of a laser, you will need to download a Polar Scope app. This will make it a lot easier to get a bang on polar alignment. The app will also display your latitude for dialing it into your alt-az base.
1. When you are out in starland, be sure to let your eyes adjust for 15 minutes, and follow the steps using red safe light to keep your eyes dark adapted.
2. Look up. Embrace the stars. They are beautiful and are a rare site these days because of light pollution.
3. Find the pole star with the naked eye. Don’t lose sight of it.
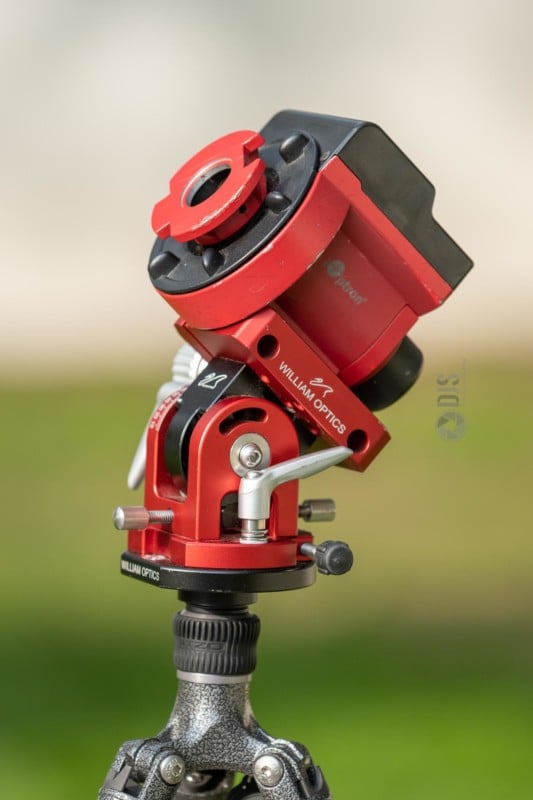
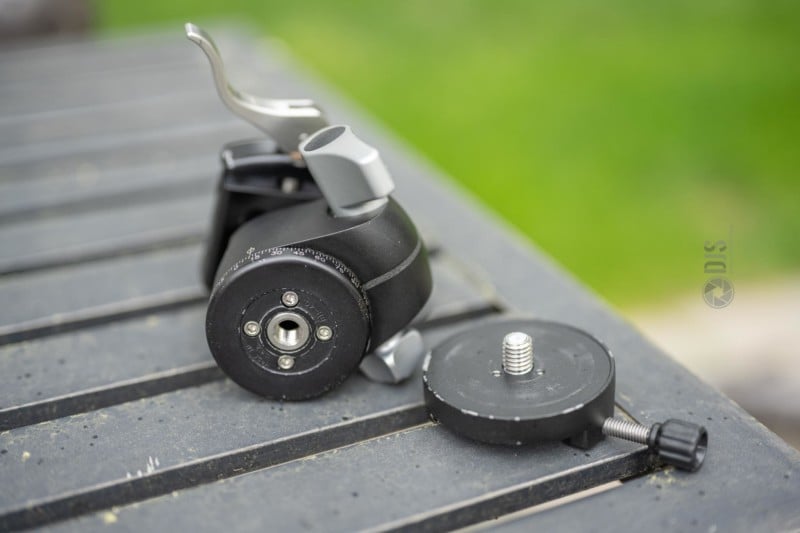
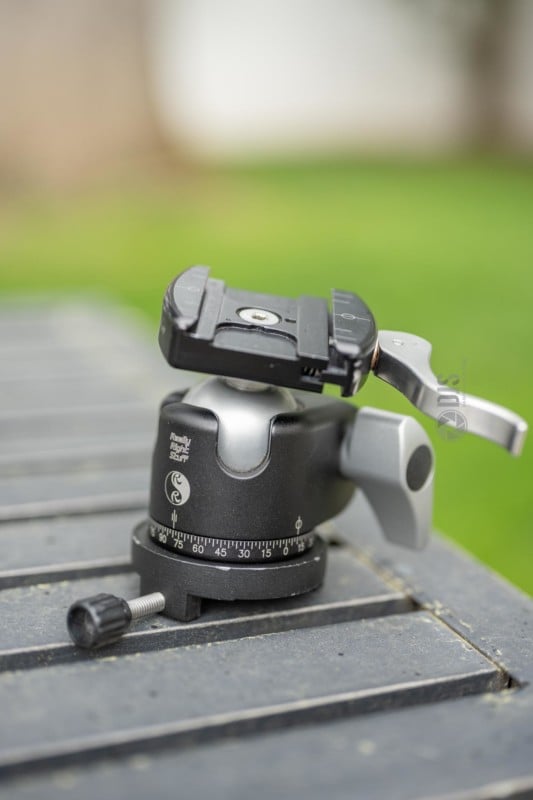
4. Grab your tripod and open it up. If your tracker came with an alt-az alignment base, you will need to remove the head. If you are using an additional ball head on your tracker and keeping the head on your tripod to align, you don’t need to do anything at this point.
5. Next remove the head if required. This will expose the 3/8”-16 standard thread at the base.
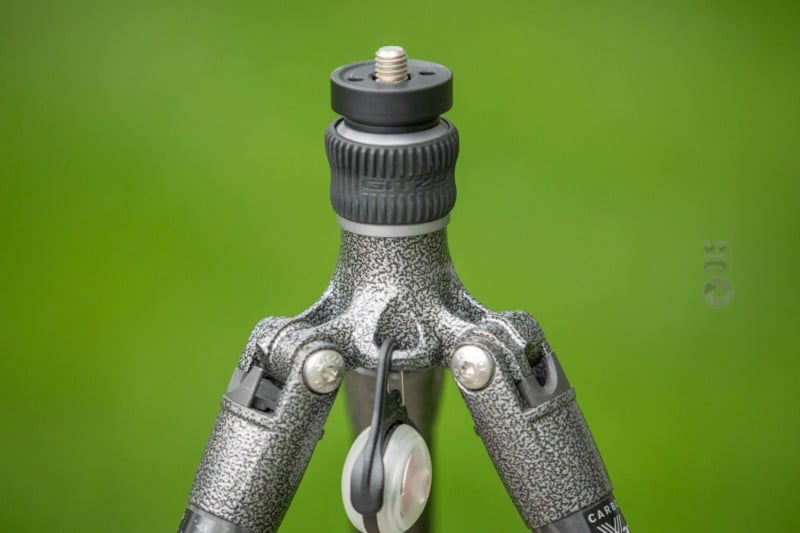
Nine times out of ten it will be this size, but if yours has a 1/4”-20 thread you can grab a 1/4”-20×3/8”-16 bushing for cheapies.
6. Screw on the alt-az base your tracker came with, or if you are using an additional ball head to align your tracker, attach your tracker to that head at this point.
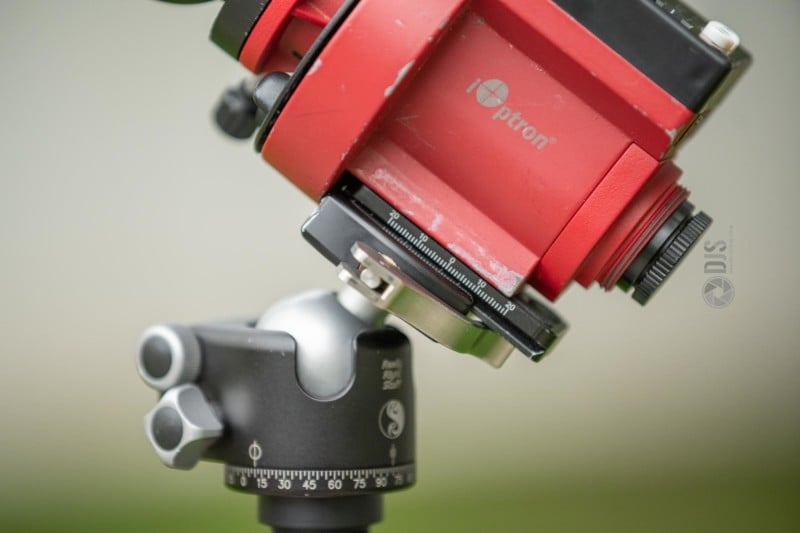
Reference the linked pictures to illustrate the two ways to set these babies up.
7. Next, and this a little secret I love telling people to help out with a polar alignment, use the compass on your phone to roughly place the direction your polar scope looks towards when mounted on the tracker vaguely towards the pole.
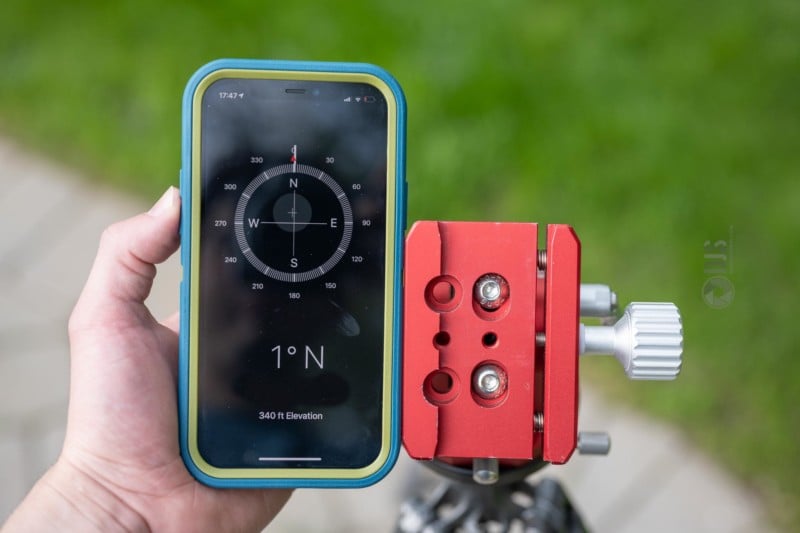
Ok, that sounds like a mouth full, but hear me out. Your tracker either uses a polar scope or a laser to align with the pole. Whichever direction your alignment tool looks towards, is the direction you want to have facing 0º.
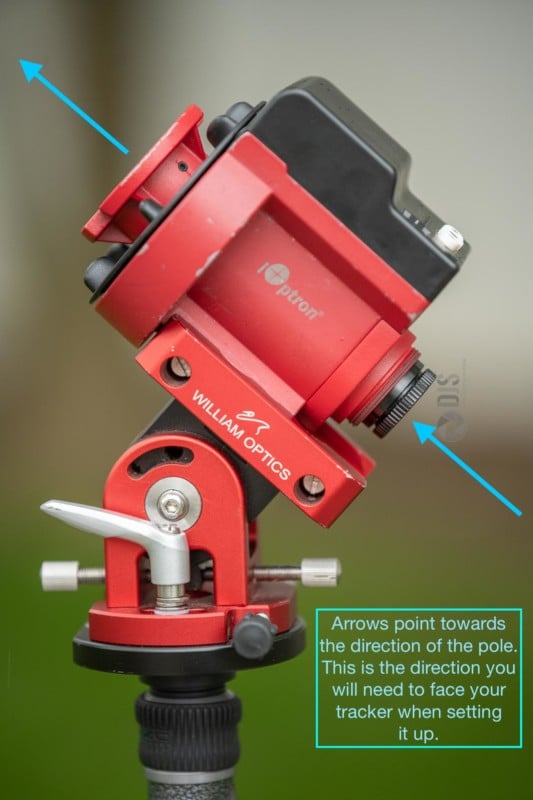
It does not need to be spot on at 0º, there are adjustments to correct this on final alignment.
8. At this point, use the spirit level on your alt-az base or tripod if it has one, and level the tripod.
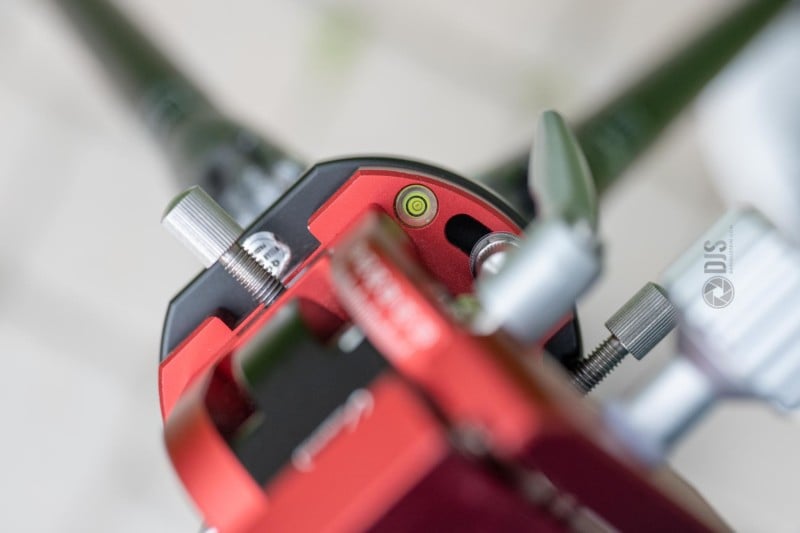
If you don’t have a base or tripod that has a level, you can use your phone. Try to get this as close to perfect as possible.
9. Attach your tracker to the alt-az base or ball head.
10. Fire up your polar scope app and notice the number slapped next to the latitude reading.
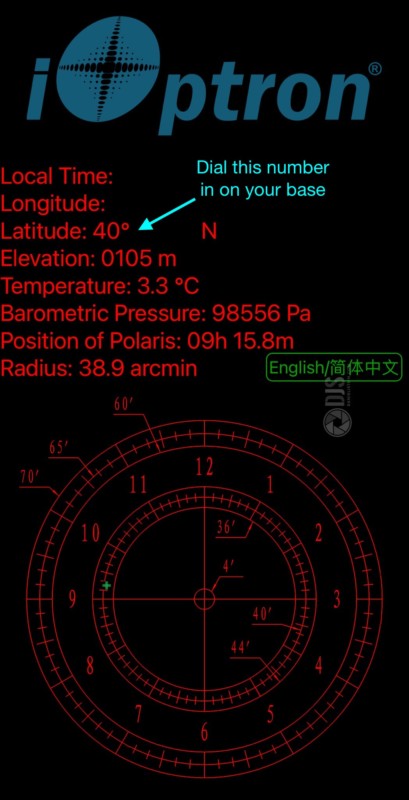
Use the altitude knobs on your alt-az base to dial this number in as the numbers on your base correspond to the latitude.
This is already a great start to quickly finding the pole as now half the work is pretty much done.
11. Turn your tracker on.
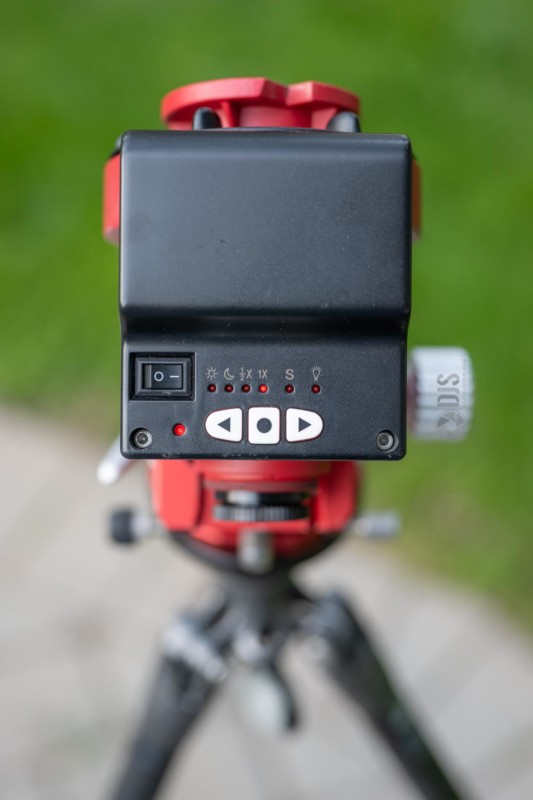
If your tracker has a polar scope, at this point it should be illuminated with the tracker in the on position.
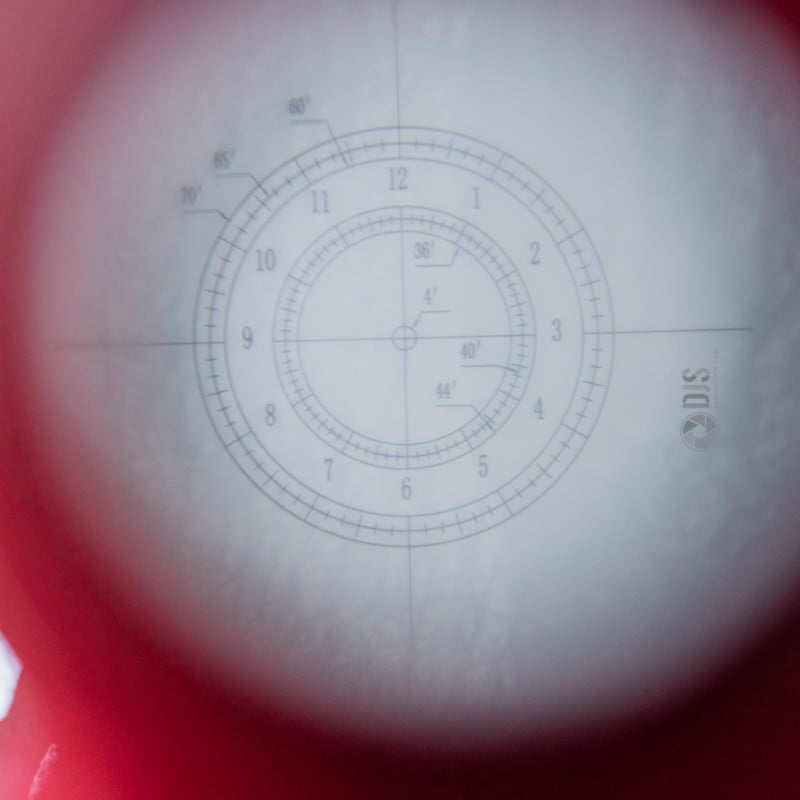
12. Look through the reticle of your polar scope.
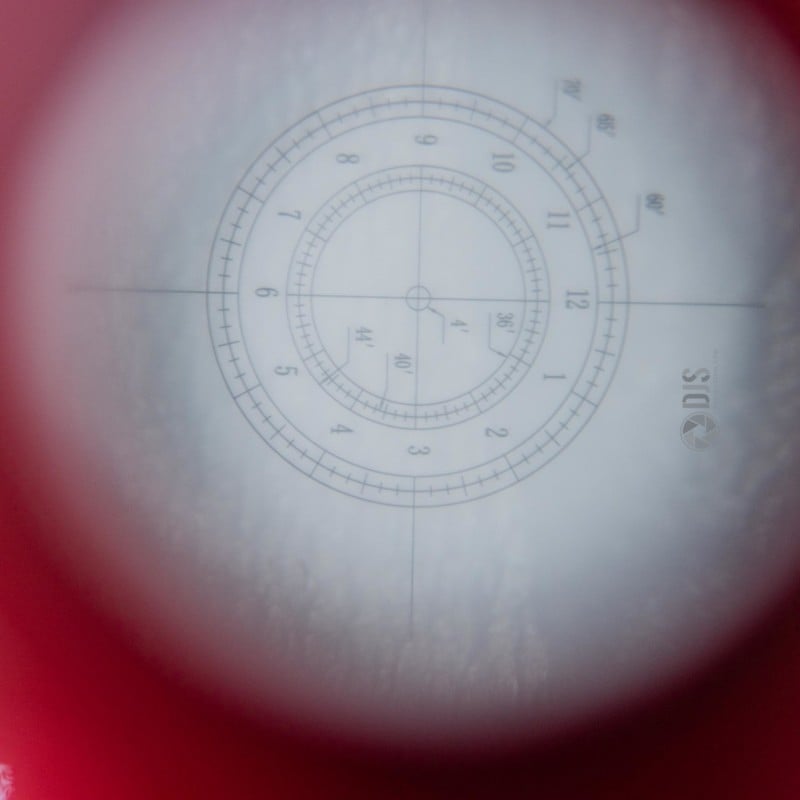
It may need to be rotated to a certain position for the red light to illuminate it.
Note: Some trackers have a detachable polar scope illuminator. At this point, you should attach it.
13. If your tracker has a laser instead of a polar scope, attach it.
14. Remember when you found the pole star in step 2? Now it is time to find it with your tracker.
15. Look through your polar scope or laser and simultaneously use the knobs on your alt-az base or ball head to move the entire tracker to the pole star. Once you can see the pole in your scope or the laser is pointing directly at it, congratulations, you won.
16. At this point, laser-aligned trackers are pretty much good to go, but trackers with a polar scope are a little more precise and require a few extra steps.
17. Refer back to your polar scope app and find where the pole star is located for your given time and place. Use your adjustments on the alt-az base or ball head to get it as close to that location as possible.
18. Once complete, attach your ball head (or 2nd ball head) to your tracker’s bracket, then attach the bracket to the tracker.
19. Attach your camera to the ball head on the tracker. From now on, all movement of the camera will need to take place using the ball head. DO NOT MOVE THE TRACKER ITSELF. This will mess up your alignment and you will have to start all over again and that is no fun.
20. Pro tip, rotate your ball head so the little notch faces directly up so you can easily correct for the angle of the tracker due to your alignment.
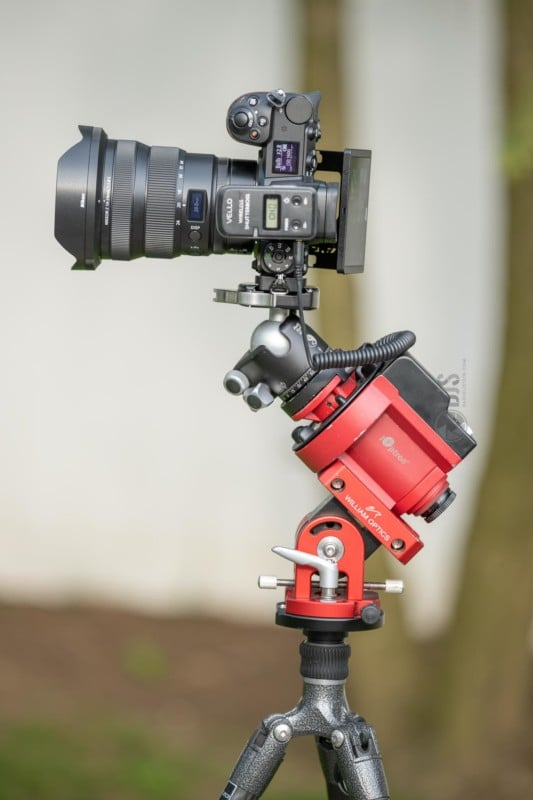
21. Time to shoot!

Frame up some compositions, and use a remote or bulb timer to take a few minute exposures.

The better your polar alignment is, the longer the exposures can be!
As I said, this is more of a general overview of trackers and how to get started with any one. Good luck!