5 Basic Mistakes to Avoid When Post-Processing Landscapes
While landscape photography is a lot about composition and on-location practices, one can never dismiss the importance of post-processing (or editing) the images. One question I am always asked is: “Why is editing necessary?”
There are points where beginner landscape photographers make mistakes while editing their landscape photos. I have compiled 5 basic editing mistakes here. They are not in any order of importance since all these points are equally significant and are to be kept in mind for your post-processing.
1. Crooked Horizons
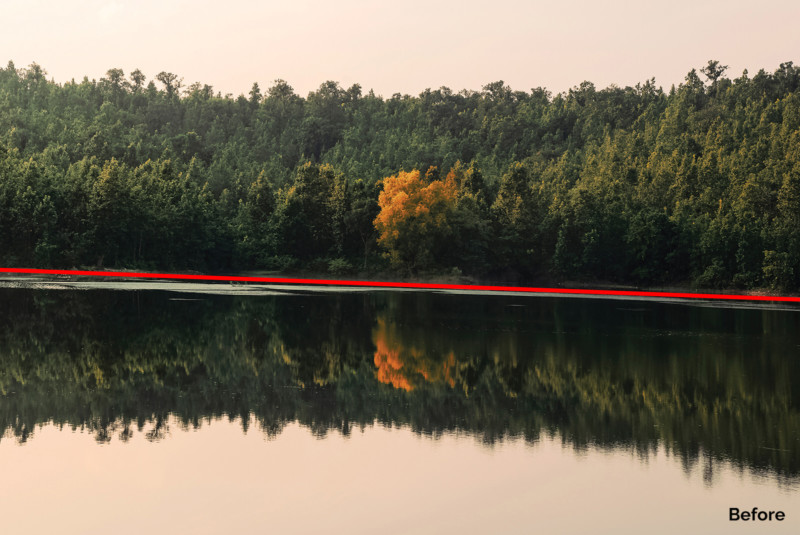
You will almost always come across horizons if you shoot landscapes, ain’t it? You’ll find them differentiating foreground from midground, or midground from background, or in reflections like this one. Well, if the horizon is tilted or crooked, the viewer will find it extremely displeasing to the eyes. It should always be kept in mind that the horizon should not be tilted, whatever the case is. Make sure to straighten your photo during post-processing.
Correction Steps
- In the Crop tool, you will find the straighten option (in both Lightroom/Camera Raw and Photoshop).
- Click on that and drag across the horizon in your photo. It is going to straighten it.
- If you are not interested in the edges, you can crop it (which is also the default option). If the edges are interesting, you can expand the canvas size by dragging the endpoints and filling the blank edges.
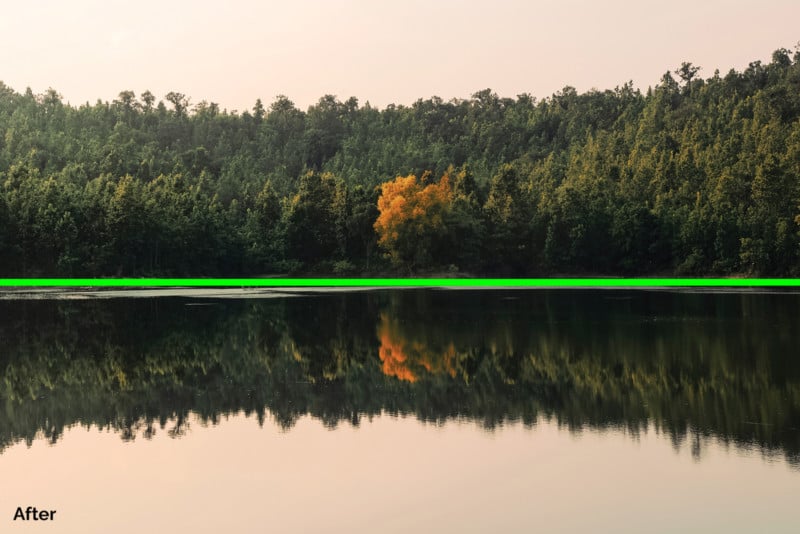
2. Dust Spots
These are spots caused by dust particles in the atmosphere on your lenses and filters. This mostly happens when you are not careful (lol) while cleaning your camera gears, like me in this case. I had loads of spots on my filter which I did not notice in the beginning. It only came to my notice during the post-processing phase. You can generally find them easily on your images once you see them up in the bug screens, but the best way to detect them is the ‘Dehaze’ slider in Camera Raw or Lightroom. Crank it up to +100 and all the spots will come up easily. Another way is to go to ‘Sharpening’, and hold the Alt key and increase the masking slider — the spots will come up as white in black backgrounds.
Correction Steps
You may do it in Camera Raw or Lightroom but I recommend using Photoshop.
- In Photoshop, create a new blank layer (Ctrl + Shift + Alt + N).
- Select the Regular Healing tool (J).
- Make sure to select the sample size (on top bar) as ‘Current and below’.
- Press Alt and choose an area or point which you want to clone your spot with.
- Paint or dap on the spots, and they will be gone.
Make sure to not drag between two spots because that will create some unnecessary marks.
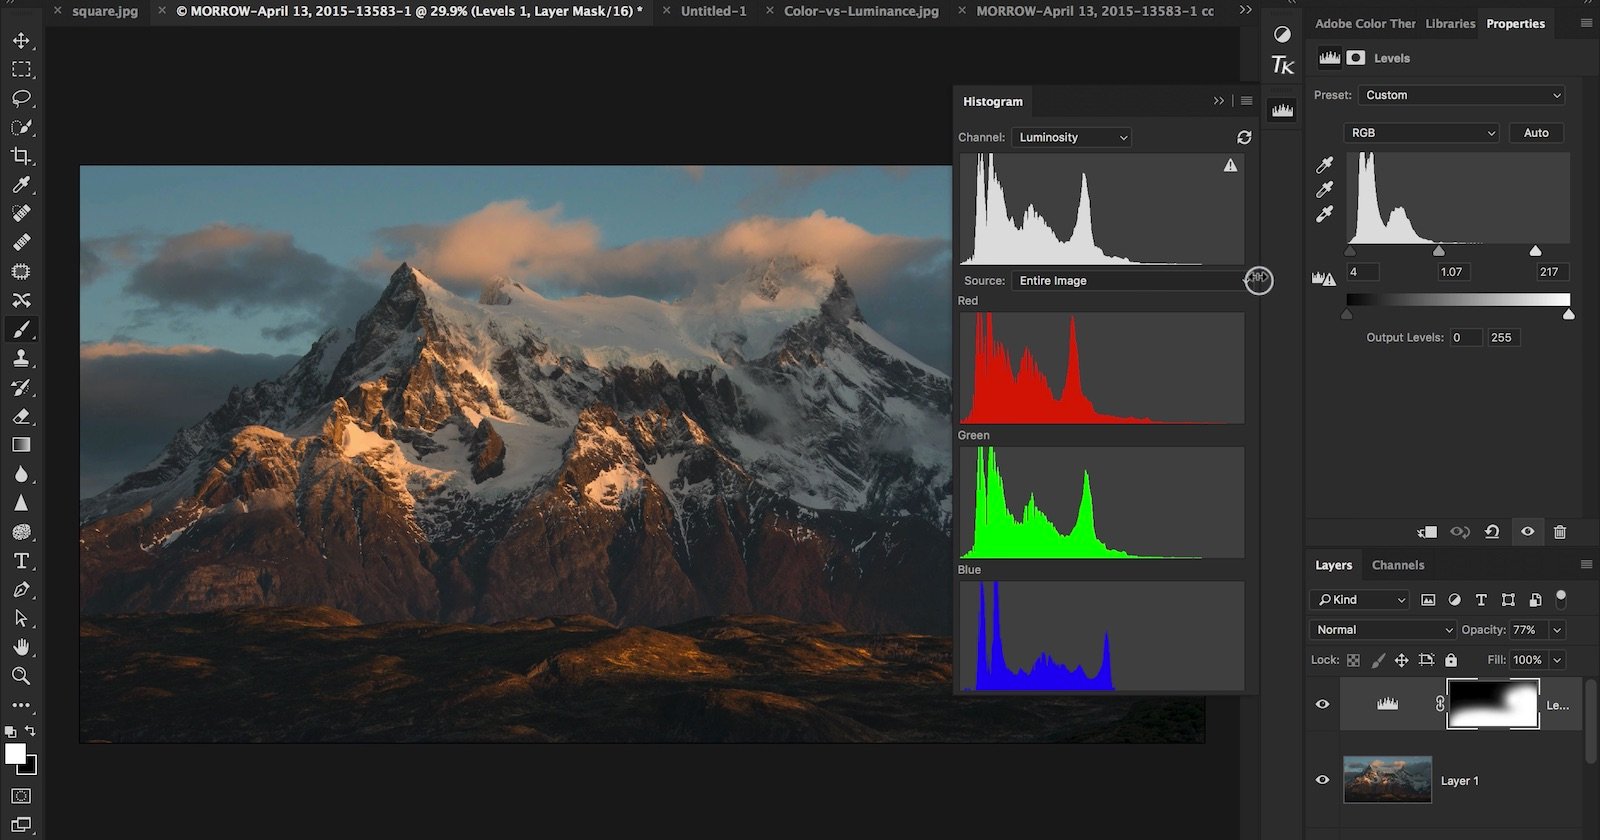
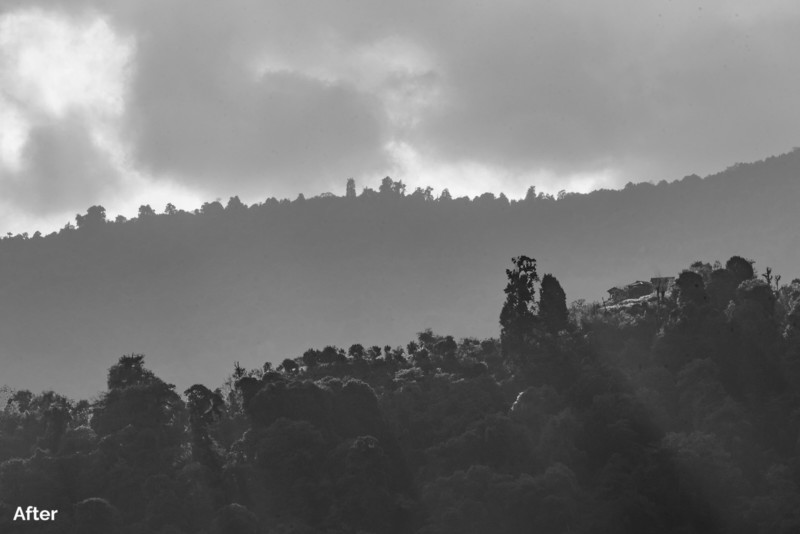
3. White Edges/Haloes

These are mostly created if the editing has gone wrong somewhere. Mostly, cranking up the clarity/texture/sharpening sliders cause these white edges. They look very artificial and takes away all the natural looks from the image. It is needed to be made sure that they are removed at the beginning and also, it is to be taken care of that they do not come into existence in the first place.
Correction Steps
Well, there are tons of ways to correct these white edges. Doing them in Camera Raw or Lightroom is nearly not possible. In Photoshop, Luminosity Masks is one of them, color range is another, but my favorite one is:
- Create a copy of the layer (Ctrl + J), to make sure we have the original layer with us.
- Select Clone Stamp Tool (S).
- Change the blending mode of the tool (top bar) and not the layer to Darken.
- Simply do regular clone stamping around the edges.
- Make sure to take the samples from areas very close to the edges to avoid getting bands on the edges.
Once removed, they look much more natural and your photo will stand out.
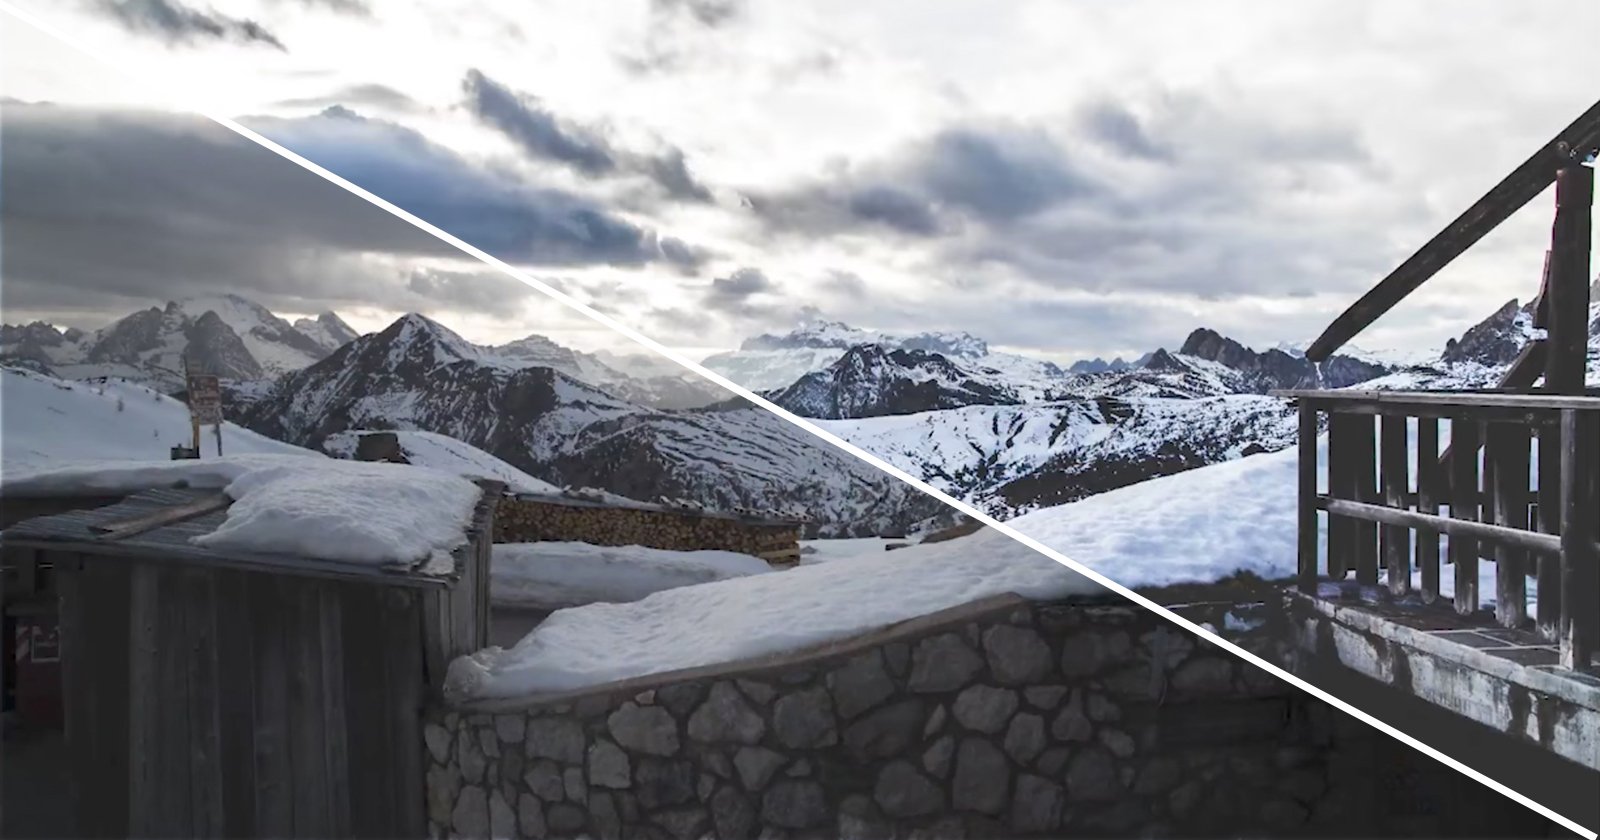
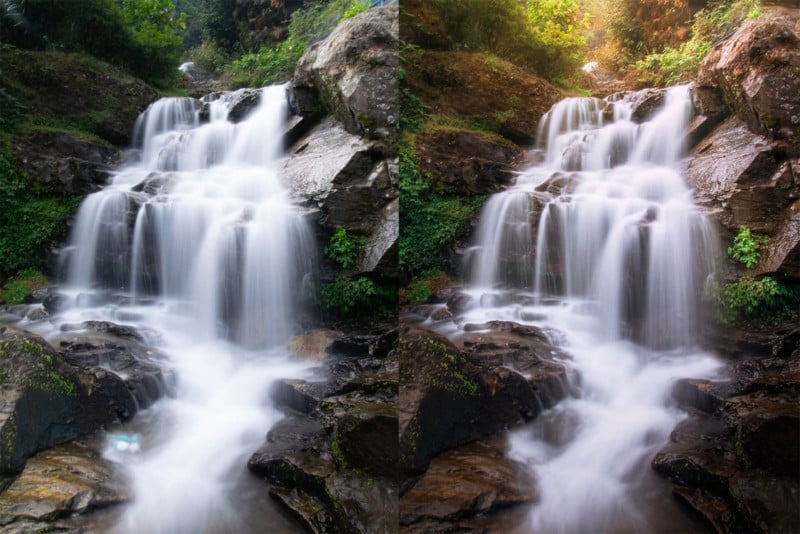
4. Over-Processing
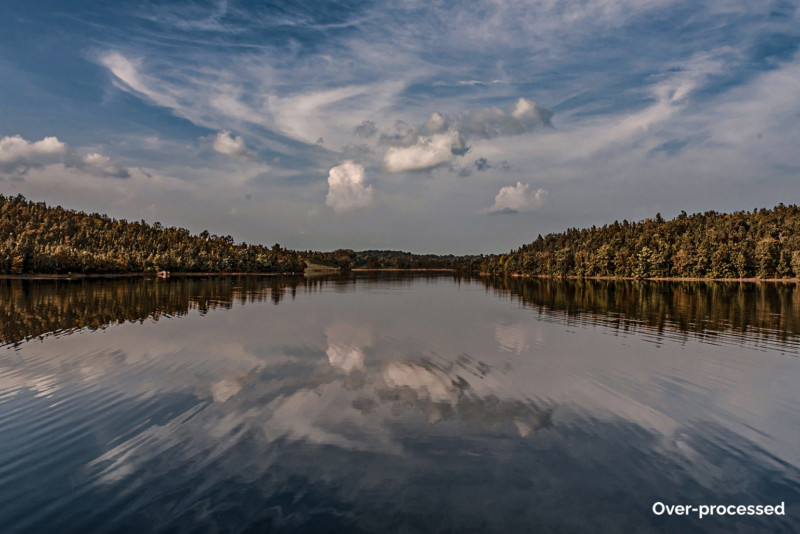
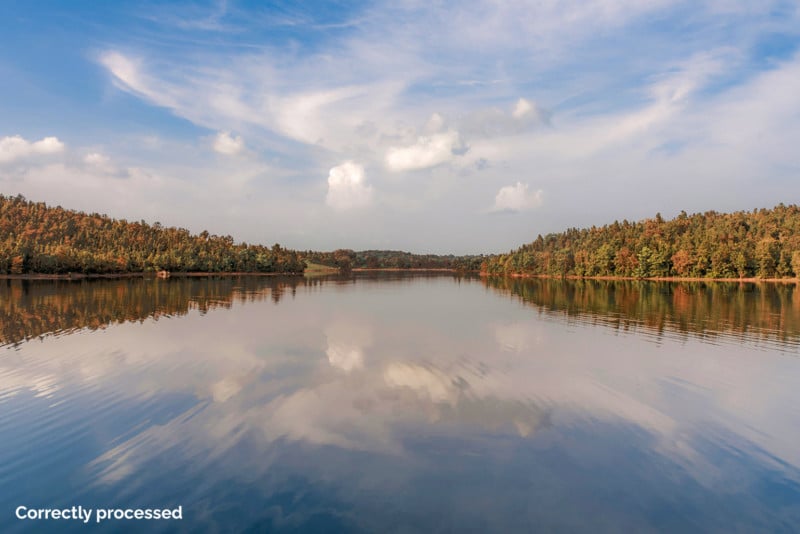
This is easily explained from the images above where, in a trial to get the maximum details in the clouds, the rest of the image has been compensated with and there is absolutely nothing that can be done here. You need to make sure that you do not overdo any of your processing steps. Use the sliders very carefully and do not just bump them up to their maximum limits.
Correction Steps
Well, there are none, to be honest. The best thing to do in this case is to take precautions so that they do not occur in the first place. I can give one useful piece of advice regarding this: Make sure to have a look at the image 5-10 minutes after you are done editing it. You will automatically notice the over-processing errors.
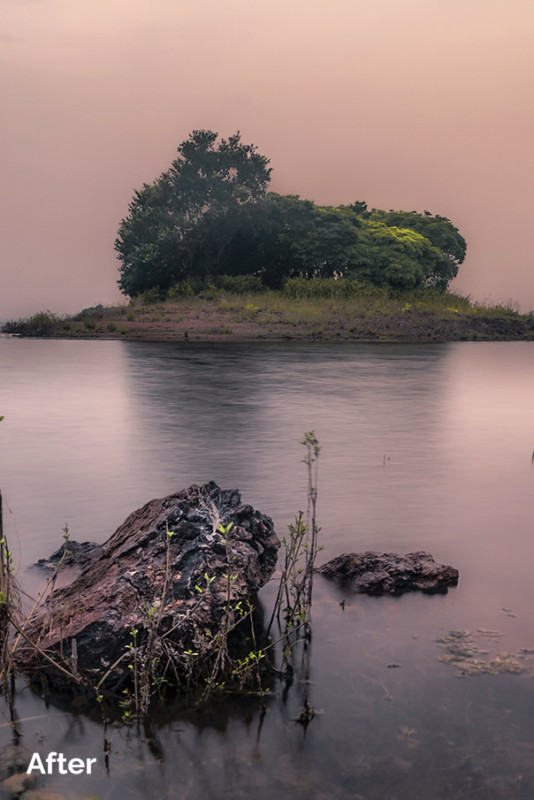
5. Distractions
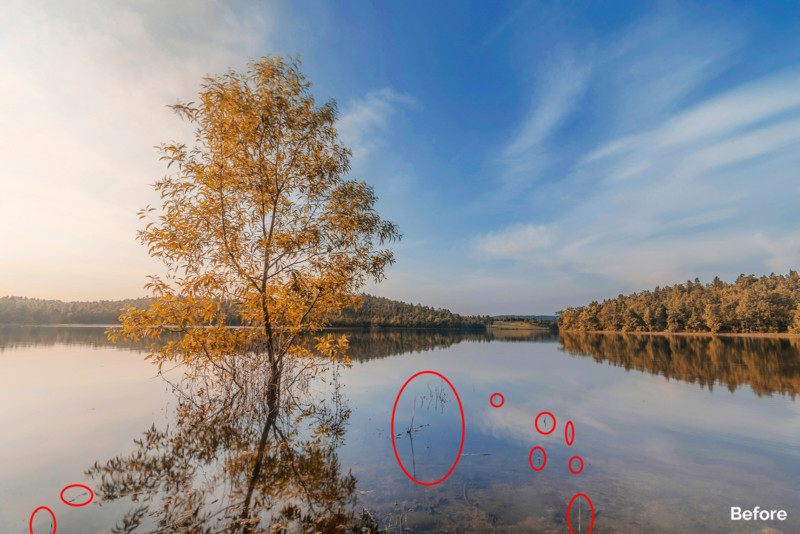
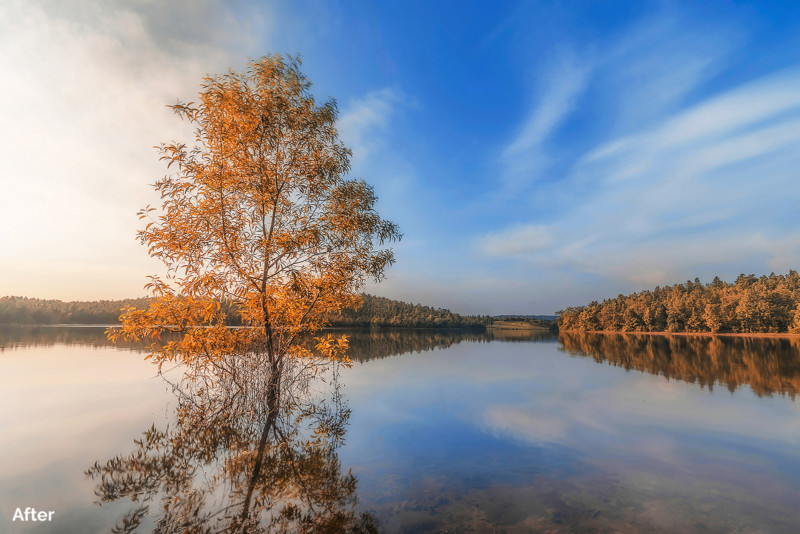
While you edit your photos, you might, at times, find some distractions in the foreground or midground. It is extremely necessary that you remove them and get a clearer image which will appeal to the eyes much more than it would have with the unnecessary objects there. These distractions might include some plastics left on the ground, or some stones of different colors which are trying to draw the attention of the viewers, or, like this case, some extra branches and leaves fallen on the water. Clearing them out makes the main tree pop up even more and brings all the attention to itself.
Correction Steps
- The first thing to do it detect the distractions. You should not omit objects that will disbalance the composition.
- After detecting all the distractions, removing them is similar to removing dust spots. Let me repeat the steps again.
- In Photoshop, create a new blank layer (Ctrl + Shift + Alt + N).
- Select the Regular Healing tool (J).
- Make sure to select the sample size (on top bar) as ‘Current and below’.
- Press Alt and choose an area or point which you want to clone your distractions with.
- Paint or dap on the objects, and they will be gone.
Conclusion
So I hope this article will help you as much as realizing the mistakes has helped me in the past, and that you will be able to edit your landscape images in a much better way once you get accustomed to these errors and their corrections.
Keep shooting! Keep creating!
About the author: Subham Shome is a landscape and travel photographer based in Agarpara Kolkata, West Bengal, India. The opinions expressed in this article are solely those of the author. You can find more of Shome’s work on his website, Facebook, and Instagram. This article was also published here.