How to Add Believable Snow to an Image in Photoshop
PiXimperfect is an excellent resource for learning Photoshop techniques and in this 10-minute video, host Unmesh Dinda shows you how to add believable-looking snow to any image using Adobe Photoshop.
The first step is to isolate the background that you want to add snow to. To do this, navigate to Select and then Color Range. You’ll want to change the Selection Preview from Grayscale to None to allow you to see the image correctly and isolate the colors you want to change.
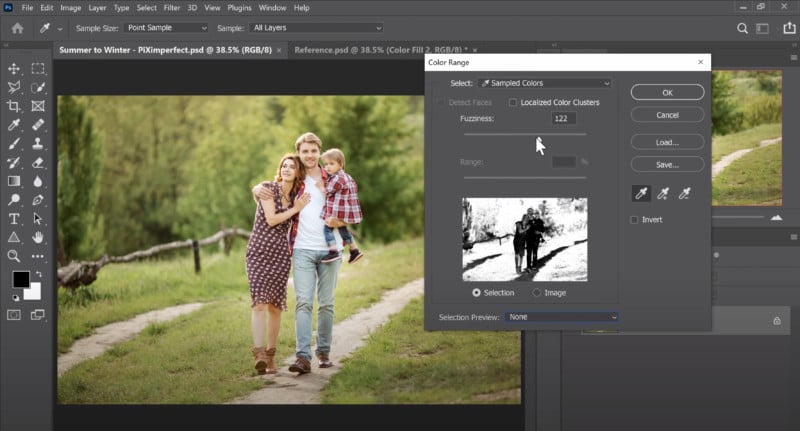
Next, decrease the Fuzziness to somewhere below 10 – the exact value will vary depending on your image. Then, choose the first eyedropper on the left, make sure the Invert option is unchecked, and then click on the area of color you want to adjust. After that, select the middle eyedropper tool (it has a plus sign on it) to continue to add color areas to the selection.
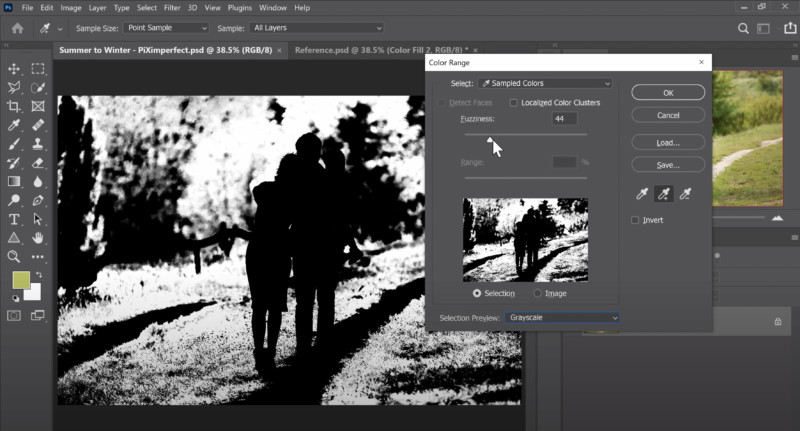
In Dinda’s example image, he’s attempting to make the green areas into white snow, so he selects as much of the grass and tree colors as possible.
If you then change the Selection Preview back to Grayscale, you can adjust the Fuzziness gradually back up until you hit a good sweet spot. If the Fuzziness is too low, you’ll end up with sharp edges in your selection. If it’s too high, everything will be selected.
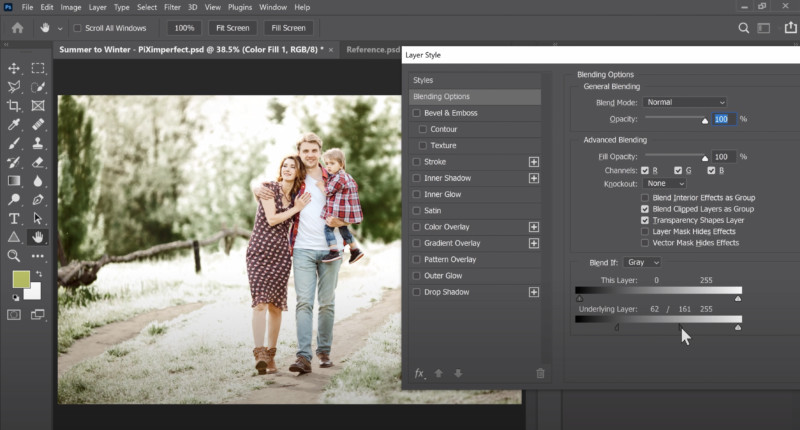
With the selection active, you’ll want to click on the Adjustment Layer icon, choose Solid Color, and then select white.
After that, double click on that layer to access the Layer Style panel and adjust the blending options. At the bottom of that pane is the “Blend If” section. Take the leftmost slider of the Underlying Layer from left to right, which takes the white coloration away from the darker areas of the image.
Next, holding either the Alt key on Windows or the Option key on Mac, click on that slider to separate it into two parts. You can then more naturally add a gradation to the way the color is distributed to the lights and darks.
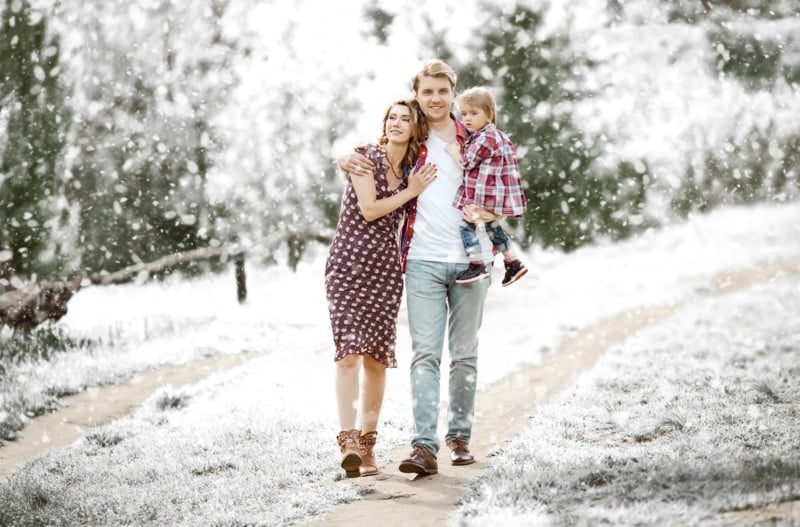
The instructions that Dinda explains beyond this build on these initial steps and I encourage you to watch the entire video to learn how to achieve his final result for yourself, which looks incredible given that the snow is entirely artificial:
For more Photoshop tips like this one, make sure you subscribe to PiXimperpect on YouTube.