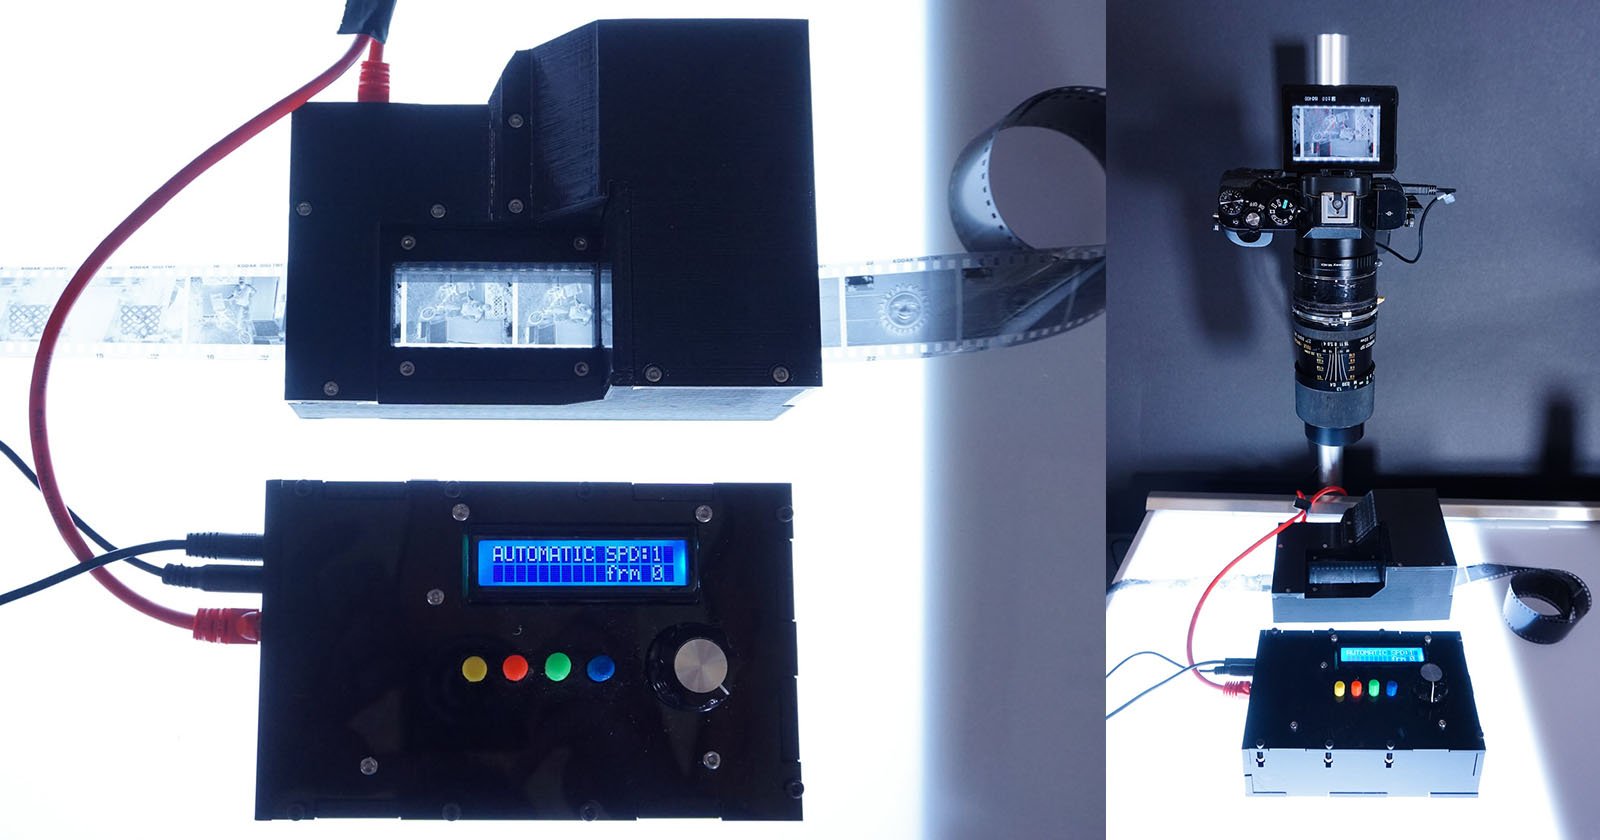
How I Built a Film-Digitizing Lightbox
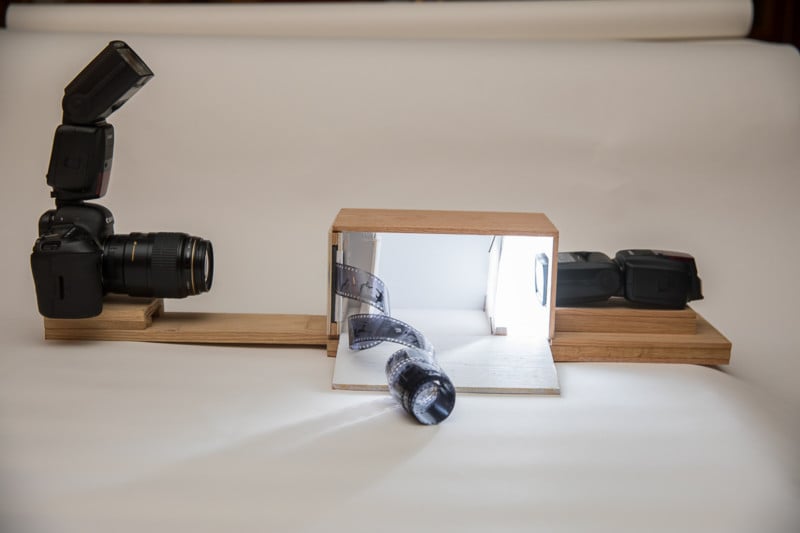
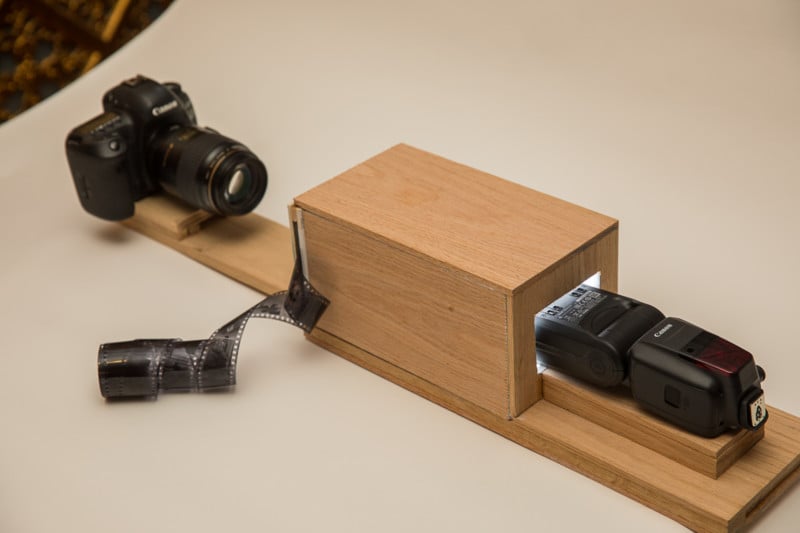
Shooting film is fun and developing film is fun, but tediously scanning film is not fun… so I built myself a film-digitizing light box to be used with a flash and a 1:1 macro lens.
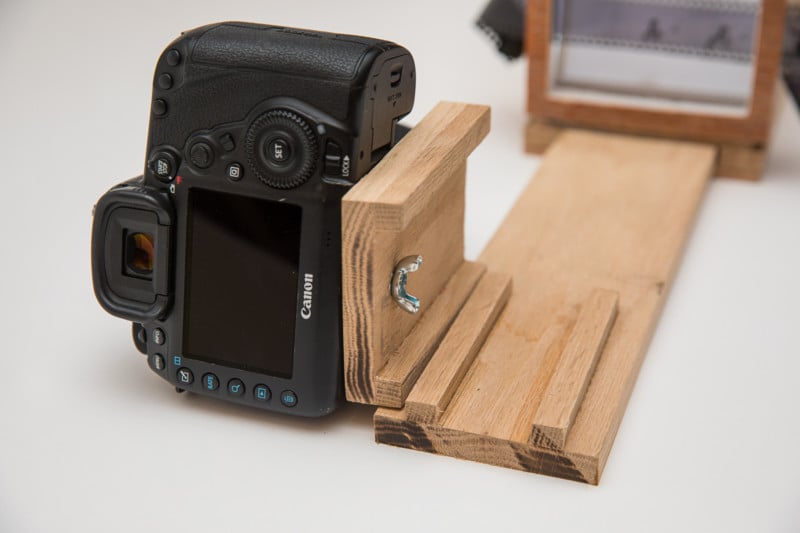
The camera is mounted to a wooden base on a sled so that camera distance can be slightly adjusted to account for how much of the film sprockets/frame you want to include. The wooden rail that the camera’s sled rests on is also adjustable, and can be pulled out further to allow for framing of 120 film.
It’s just a 0.5″x3.5″ piece of wood, set on a rail in a slot that runs under the length of the contraption.
Optimally, the camera sled would have some sort of lock in place, or use an actual tripod head, as distance adjustments for framing are possible by adjusting the larger rail rather than the small sled.
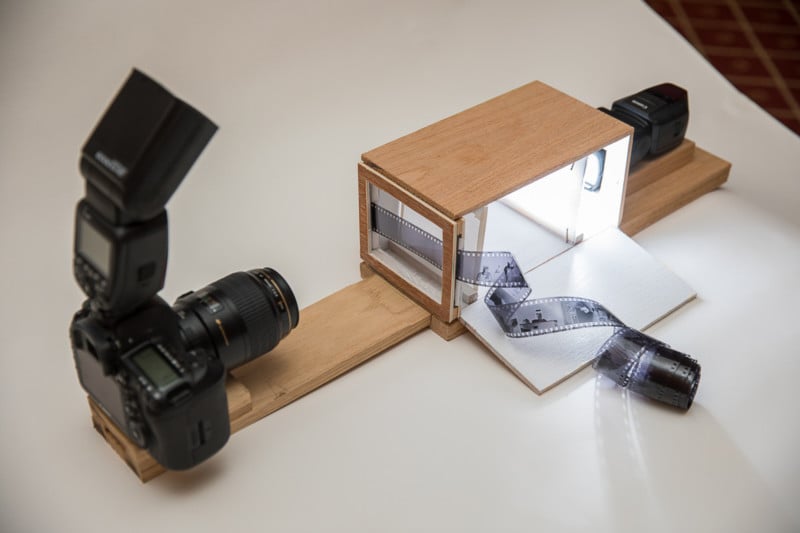
The flash, set at full power, gives me an f/8 @ ISO 100 exposure. There is one layer of diffusion material about 2″ from the flash head, then another further up the box, about 2″ from the film plane.
I recommend completely plain translucent plexiglass with no texture or pattern for the diffusion material – shooting at f/8 or narrower means that stronger texture will show through thinner areas of your negative.
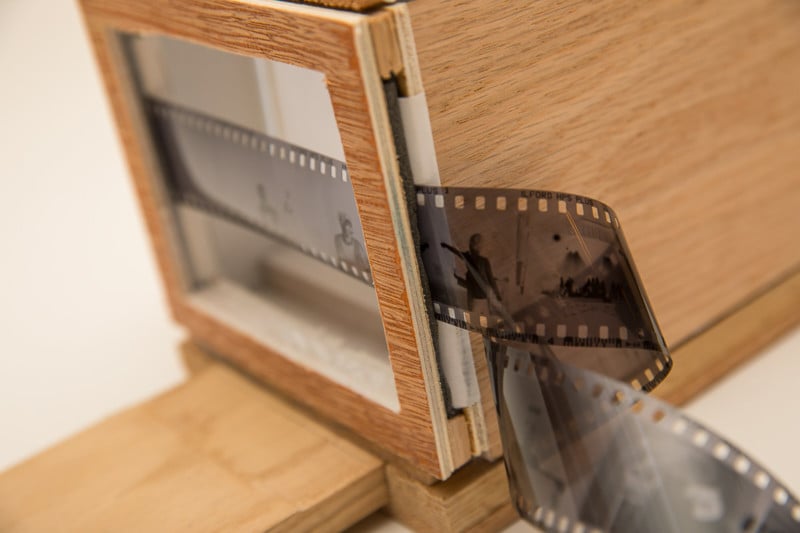
Optimally — and since I develop my own rolls and therefore leave the leader intact — I could adapt a camera’s film ratchet system to keep the film 1) level with the lens, 2) taut, and 3) avoid the foam-and-paper tension system. An interchangeable front-frame system could be built for different film formats and easier film progression, but as-is, advancing the film and framing it up in Live View takes 10-15 seconds.
Here are the materials I used:
- 2x ¼” x 5½” x 48″ poplar boards (I used oak – do not use oak, it splits and cracks)
- 1x ½” x 1½” x 48″ poplar board
- 1x ½” x 1″ x 48″ poplar board
- Wood glue
- White spray paint
- Diffusion gel or parchment paper
- Flash (with wireless operation or a flash cable)
- FF camera with 100mm macro lens (or calculate your operating distance with a crop sensor)
- Foam tape (or maybe thick suede?)
And the tools I used:
- Table saw or miter box
- Jig saw / router / scroll saw that can cut out the inside of frames (alternately, just cut the individual sides of the frames and glue them together)
- Clamps
- Scissors
- Butter knife
- Belt sander, or sandpaper and a ton of elbow grease (or careful use of power saw)
Keeping saw blade width ( ~⅛” ) in mind when measuring and cutting, use ¼” boards to make:
- 1x top of main box ( 10″ x 5½” )
- 2x sides of main box ( 9¼” x 4½” )
- 2x bottom of main box ( 5½” x 17″ )
- 1x flash frame ( 4½” x 5″ with 2¼” x 3½” centered cutout)
- 2x front frame ( 5½” x 4½” with 4½” x 3½” centered cutout)
- 2x spacers to go between front frames ( ½” x 5½” )
- 4x flats to stack for flash base ( 6½” x 2¾” ) – dimensions matter less here, just use your leftover wood
Use 3½” x ½” board to make:
- Camera sled ( 3½” x 4½” ) with hole drilled for tripod screw 1″ from end ( universal 1/4 x 20 )
- Main rail ( 3½” x 31″ ) – sand about ⅛” from the top and sides of 18″ so it slides easily
Use 1½” x ½” board to make:
- 2x spacer rails to go along the outside edges between the bottoms of the box ( 1″ x 17″ )
- 2x camera sled rails to attach to sled ( ½” x 4½” )
- 2x camera sled rails to attach to main rail ( ⅜” x 4½” )
- 4x interior cleats for diffusion material ( ½” x ½” x 4¾” )
- Cut out your pieces and sand all the edges.
- Sandwich your ½”x17″ spacer rails on the outside edges between your 5½” x 17″ bottom boards. Glue these all together and clamp them together.
- Sandwich your flash base boards together. Glue and clamp them separate from the base assembly.
- Get out your jigsaw or router or scroll saw and cut the centers out of your 3 frames
- Lean together the top, sides, and frames of the main light box and label them (on the inside) as they fit best. Mark where the flash base will abut the rear frame.
- Position and glue your ½” x ½” x 4¾” cleats inside the light box, centered horizontally roughly 2″ from each end, on the top and bottom of the box’s interior. Give ’em a squeeze but don’t bother to clamp because you’re about to paint.
- Unclamp your base board.
- With masking tape and paper, tape off the areas of the base that are not inside the light box.
- Spray paint the interior surfaces of your light box, including: the top, sides, bottom, inside of flash frame, inside of front frame, and cleats.
- Adhere 3½” of suede or foam along the 4½” edges of your front frames, leaving ½” at the top and bottom to make a sandwich of spongy suede/foam inside your wooden frame.
- Sandwich your two ½” x 5½” spacers between the top and bottom of your front frames, and glue these together. Clampy clamp clamp carefully at the top and bottom, as the white paint may not yet be fully dry.
- Glue on the flash base and clamp.
- Whistle and avoid eye contact with your project, as 13 is an unlucky number.
- Glue flash frame to flash base.
- Adhere diffusion material to cleats inside the box. It may be easier to adhere it to the “outside” of the cleats so if the material tips over, it will be easier to stand back up. Alternatively, glue it real good.
- Glue top, sides, and frames together and make sure it’s all square.
- Sand your main rail so that it can slide easily into its slot under your contraption.
- Glue the ½” x ½” rails onto the base of your camera sled.
- Glue the ½” x ⅜” rails so that the camera can slide forward and backward easily.
- Drill hole for tripod screw.
- Unclamp everything!
This took me about two days to design and build, but total building time is only a few hours. I had three rolls of film developed and waiting to be scanned, and when I finished this box I blasted through them all in 45 minutes and it was just WONDERFUL. This really streamlined my process and lets me enjoy my photos a lot faster and with less tedium, and hopefully if you shoot a lot of film and have a slow scanning workflow now, it can help you too!
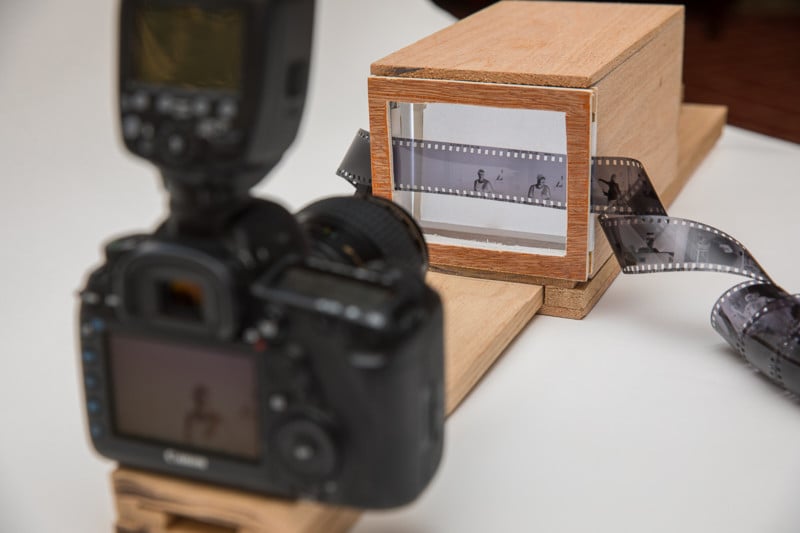
The film-intake is a work in progress. Right now the film is kept flat by tension — the front of the box is a frame, with a layer of weatherstripping foam tape on one side, and plain paper on the other (foam tape on both faces of the sandwich was too hard to feed the film into). The film plane curls slightly right now, but shooting at f/8, and setting critical focus on the center of the film, means that I haven’t noticed significant focus falloff around the edges.
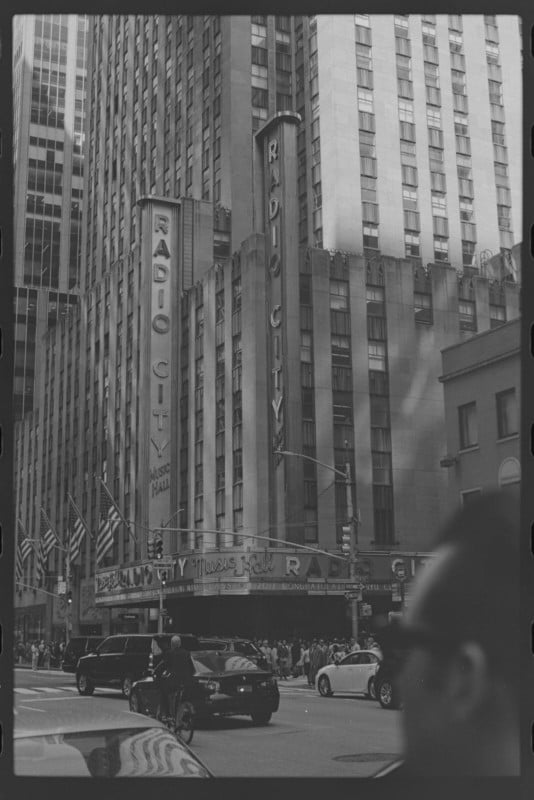
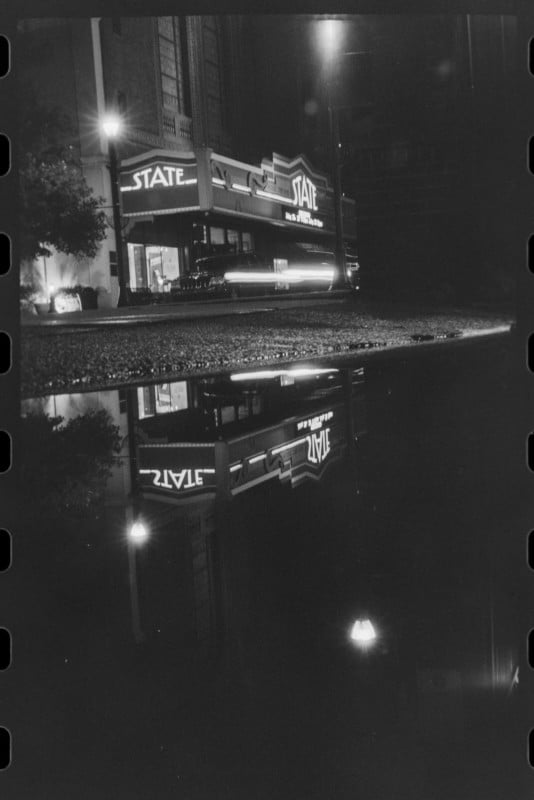
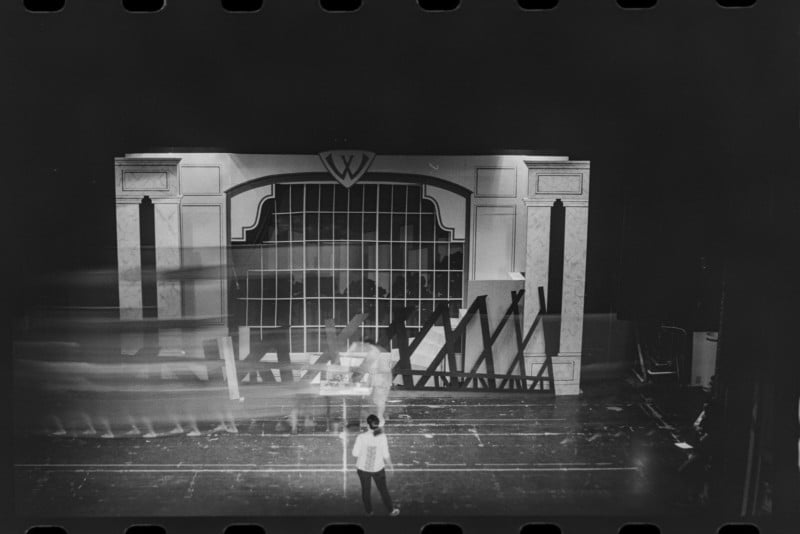
Here are some photos I’ve scanned using this lightbox:
About the author: Kelly Tunney is a 25-year-old photojournalist based in Brownsville, Pennsylvania. He mainly shoots performances, weddings, and portraits, but he shoots personal photos on film in his spare time. You can find more of his work on his journalism website, performance website, and Facebook.