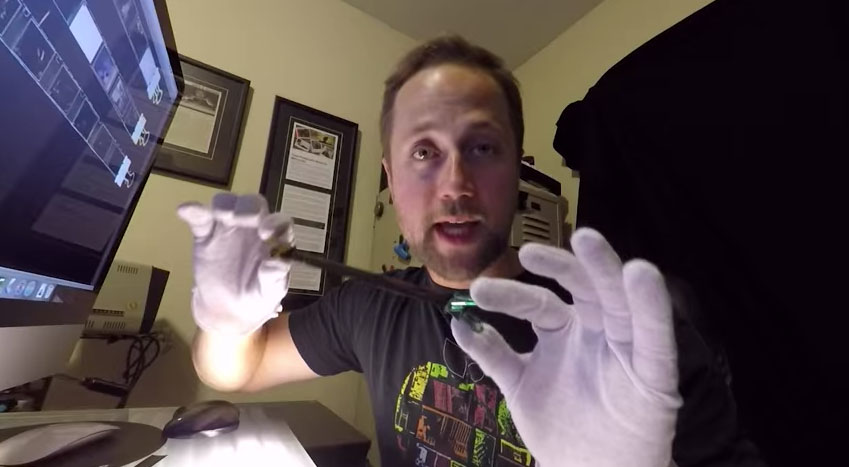
Digitizing 9×9 Film with an Automated X-Y Table and a 50MP Canon 5DS R
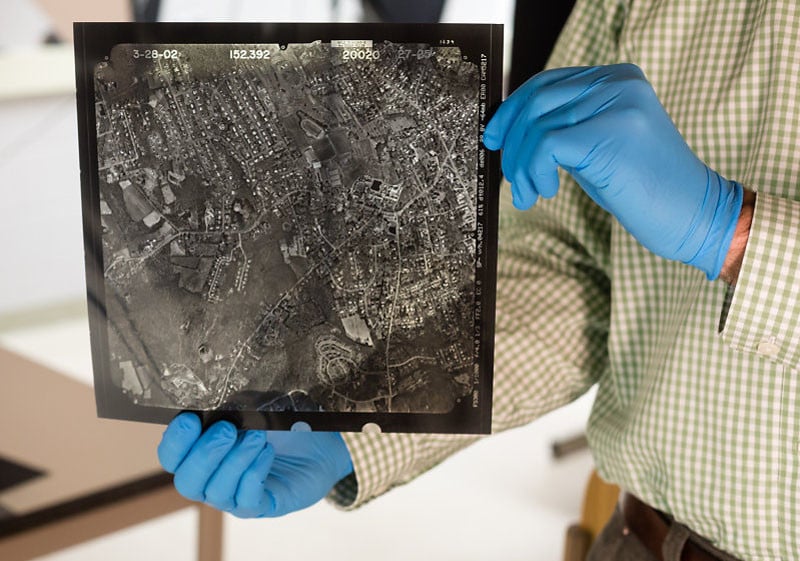
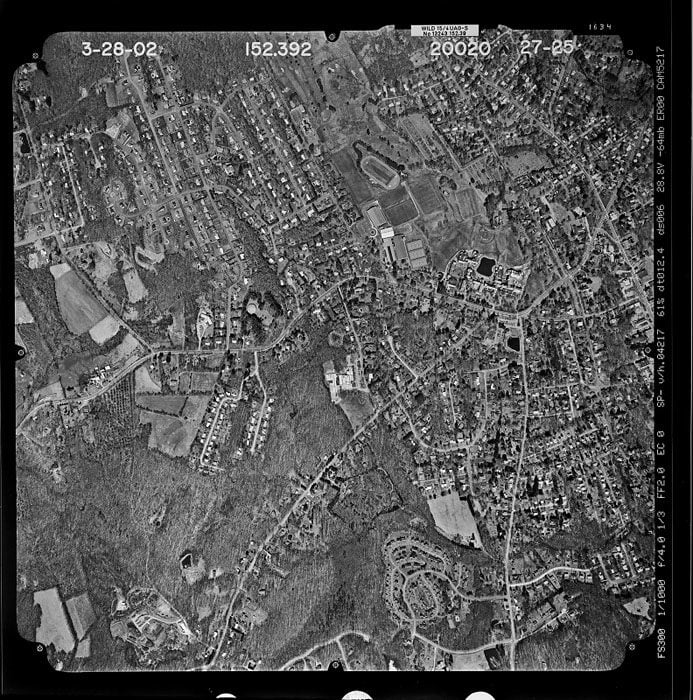
One of the challenges (and rewards) of managing a digital production lab for a university research library is working with the wide assortment of analog formats that are collected within its archives, special collections, and map library holdings. For instance, we’ve recently begun conversion work on a 2002 aerial survey of Connecticut that was originally shot on 9″x9″ positive black and white film.
When tasked with digitizing original transparencies, however, certain challenges arise. Unlike reflective media, light needs to be evenly shined through transmissives with a light sensing device placed on the opposite side of the illumination source in order to capture an image. Aerial photography service bureaus, for example, employ expensive specialized large format film scanners that can handle the film’s actual 10″x10″ physical size (both cut and rolled), lighting needs, and high spatial resolution requirements.

As a general rule, photo film contains considerably more visual detail than derivative prints made from film. And indeed, FADGI recommends a considerably greater spatial resolution for the digitization of film vs. reflective prints in this format: 10,000 pixels across the long dimension for aerial transmissives. So, the promise is there for some striking image data if you can engineer a suitable conversion process that is sensitive to both the format’s particular handling needs and visually rendered potential.
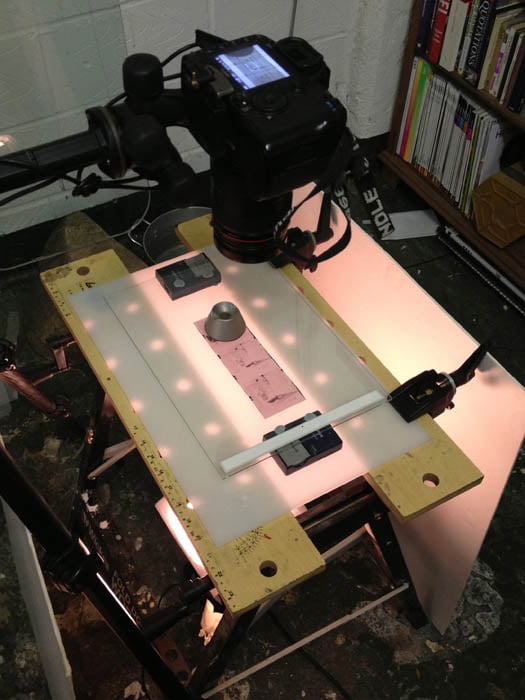
For my own initial thinking on workflow architecture, the demonstrated design concepts behind both high resolution multi-shot camera backs and DIY Arduino-controlled film scanners seemed like good theoretical entry points. In addition, I wanted to leverage and re-purpose gear that I already had in the lab. So, I thought, let’s start with one of the same light boxes that we use for single-shot medium format film conversion.
But instead of using a regular stationary copy stand, let’s put the light box on the lab’s new X-Y table. Then, let’s program the table’s movements and camera’s controls to create automated, high resolution mosaics of a given 9×9 aerial transmissive.
Finally, let’s see if the resulting image tiles can be merged into a single, high resolution image for the entire piece of film. If that proves successful, then we’ll be able to determine whether or not the image meets FADGI’s 10,000 pixel guideline and also better understand the entire workflow’s potential for production.
Here’s what the concept looked like in staging:
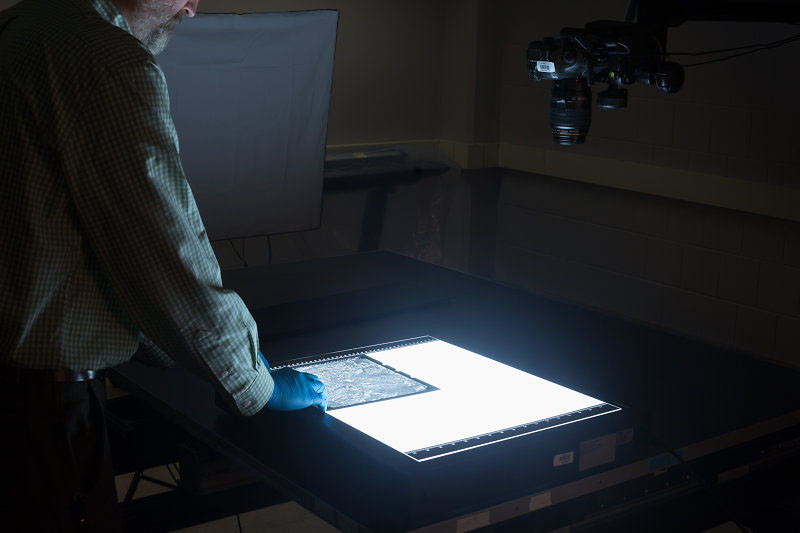
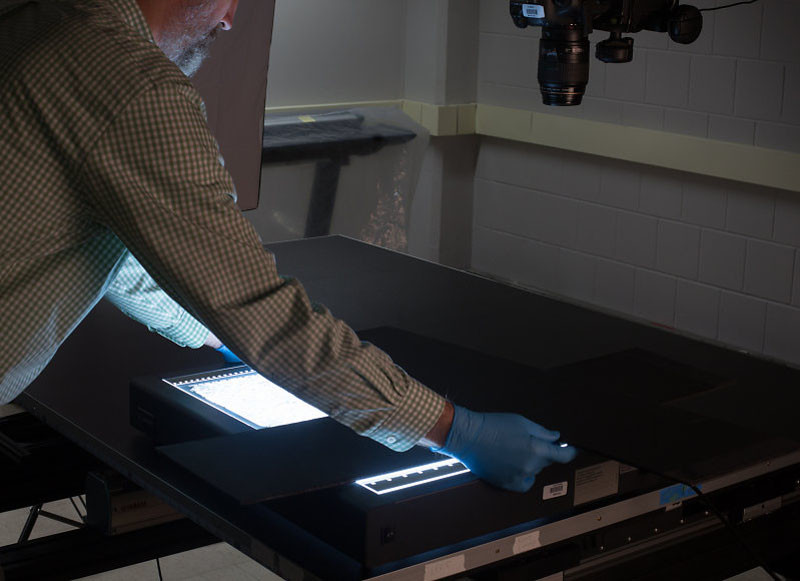
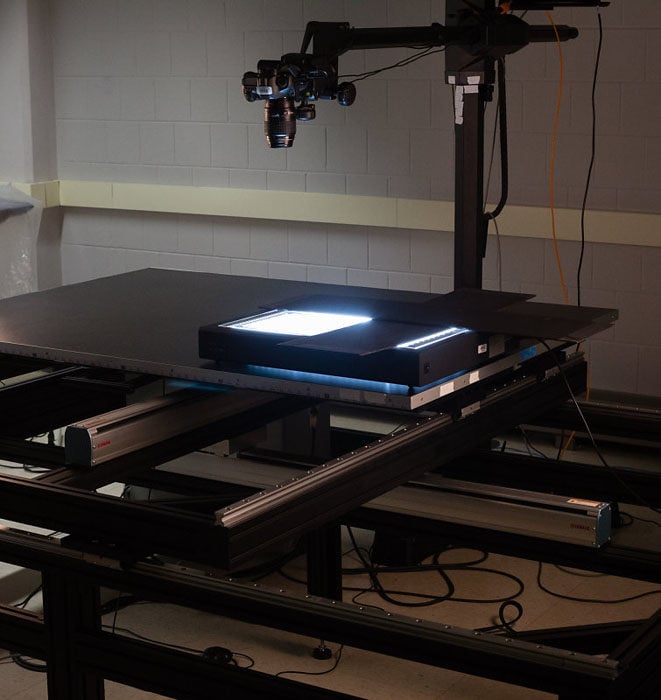
Initial shooting was done with a 50MP Canon 5DS R DSLR camera and a 100mm macro lens combo. The tandem geometries of the camera’s aspect ratio and the 10″x10″ (actual size) of the 9×9 format meant that I would make most efficient use of the rig when shooting mosaics in a 2×3 pattern for a total of six images per transparency. Here’s a video of the overhead camera’s view of the automated system during a shoot in this configuration:
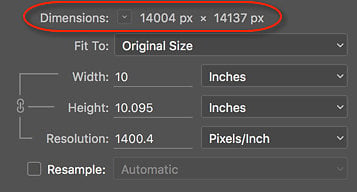
Image tiles were auto-imported directly into Lightroom off of the tethered camera as they were captured. From there, they took a quick trip en masse to Photoshop for final composite image merging. What resulted was an image that was roughly 14,000 pixels across the long dimension, captured as 16 bit data which left plenty of latitude for any needed tone adjustments to more fully express the image’s dynamic range. This was encouraging stuff!
Now I’d like to take a deeper dive into the resulting image and compare it with similar aerials taken through time that used different film stocks and digital technologies.
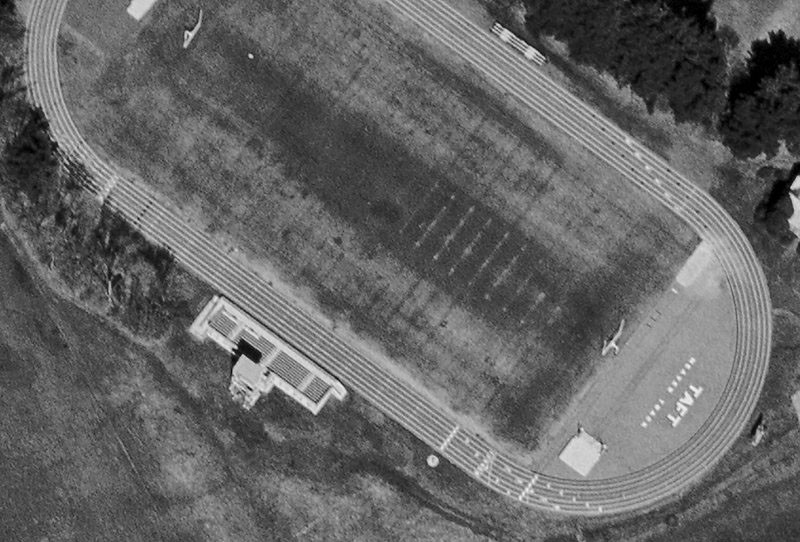
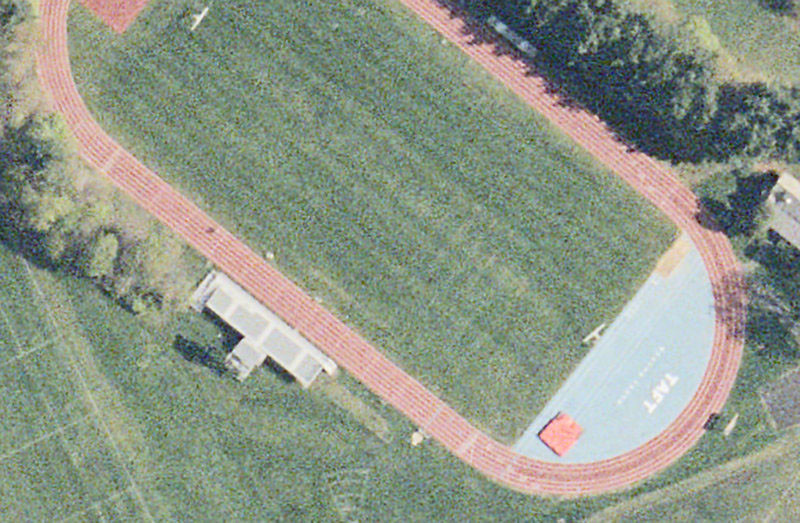
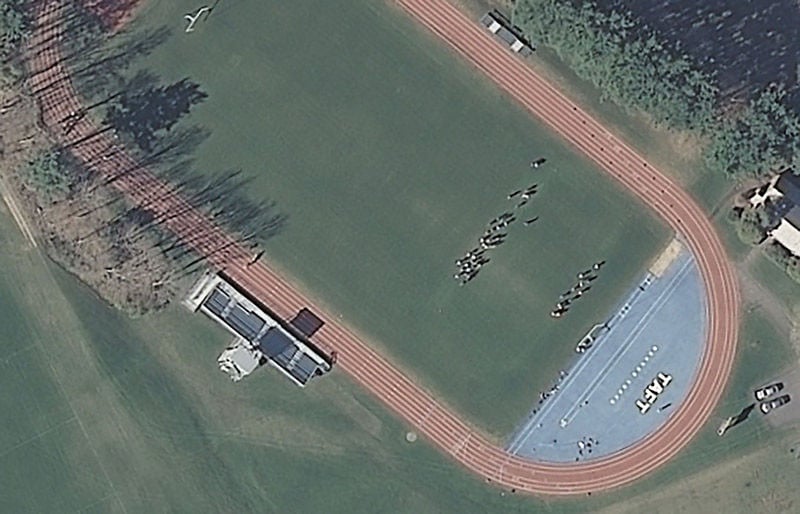
The 2002 image that I converted in our lab was taken above Watertown, CT. In addition, the USGS hosts Watertown aerial photos from 2008 and 2012. Here’s a look at these three surveys in succession:
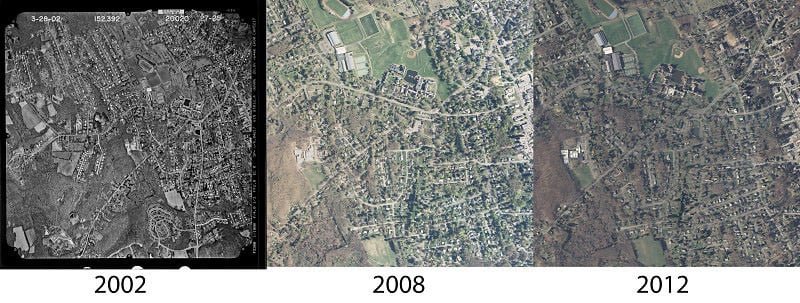
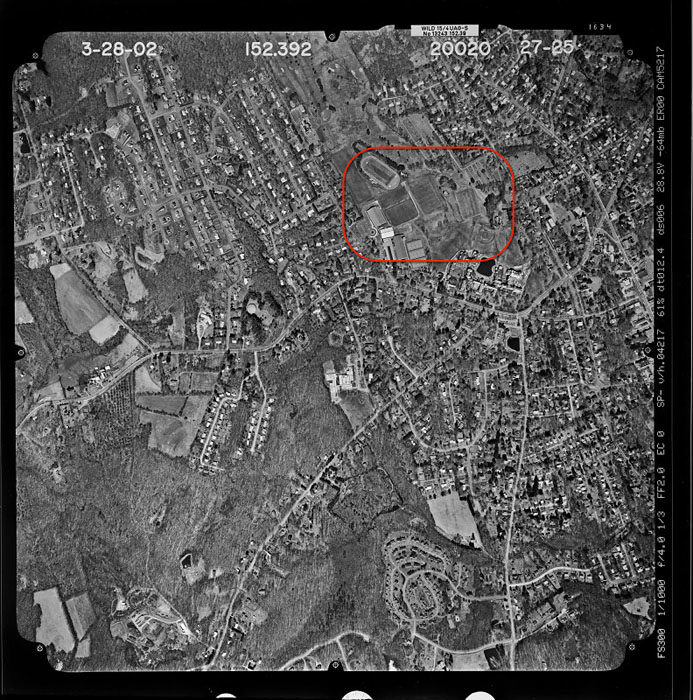
Though they all have the same 1:1 aspect ratio, only the 2008 and 2012 images were shot at the same scale. So, let’s zoom in to a particular area of common interest among the three, resize them all to a comparable resolution and do a more precise and balanced visual examination. On the 2002 survey, I’ve outlined part of the playing fields on The Taft School’s campus that appear in all of the aerials:
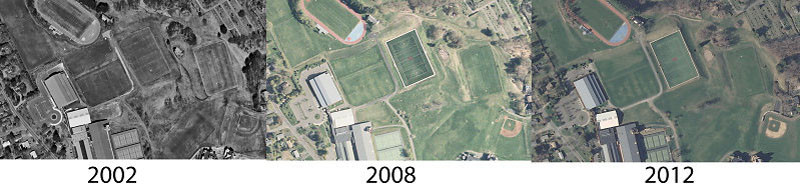
Here’s a look at the area of detail through time:
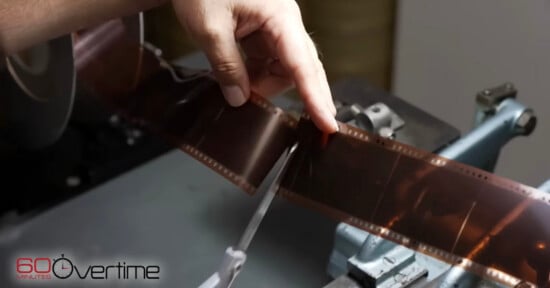
While digitizing the 2002 aerial photo, I also included the film’s edge information which like many types of film stocks can contain a multitude of coded technical information. In this case, “Wild 15/4” can be found along the film’s upper border.

This indicates a Leica aerial camera was employed in the original photography. Additionally, the dark manner in which water is rendered throughout the town and the clear separation of conifer and deciduous foliage suggests the use of black and white infrared (B&WIR) film. Digitized at 14,000px along the long edge, the film’s grain is clearly discernible. But so is Taft’s football field end-zone lettering and pole vault area:
For the 2008 survey, color film stock was the choice of the day’s flight which occurred on April 3rd of that year. Though the film’s edge information is cropped out of this USGS-sourced image, the file downloads from the USGS’ site as part of a zip-archived data set. Within this bundle, an invaluable XML file exists that contains interesting technical and process metadata on the image.
There you can learn that the USGS outsourced the original shoot to AeroMetric, Inc. who used a Zeiss Intergraph aerial photography film system. Interestingly enough, in the metadata’s
By 2012, the Watertown survey was a born digital asset. According to the metadata in the shoot’s bundled data set, USGS contracted with Kentucky’s Photo Science, Inc. for the work. Once again, a Zeiss/Intergraph imaging system was employed in the 2012 flight. However this time the device includes the “Digital Mapping Camera (DMC)” designation in its name. As a result, the view from 10,000′ was not projected onto large format film but was instead passed onto a mosaic of digital sensors, most likely DALSA CCD chips. The solely digital workflow resulted in a very clean signal:
Today’s current state of the art aerial camera rigs include the 250MP Leica Geosystems’ DMC III which can capture up to 25,000+ pixels across a single CMOS chip, and Vexcel Imaging’s UltraCam Eagle II, a system originally co-developed with Microsoft that can use a variety of interchangeable lenses on its multiple CCD sensor arrays.
Finally, if this tale hasn’t gotten you fired up yet about aerial imaging, then try Leica’s DMC III marketing video below. It’s like a great pre-game locker room speech, not necessarily for Taft’s football finest, but for those looking to further hone Occam’s razor in the name of supreme image-making geekery!
About the author: Michael J. Bennett is a Massachusetts photographer and writer currently based in New Braintree. As Digital Production Librarian, he also manages the University of Connecticut Library’s digital still imaging studio where archival, special collection, and museum objects are captured and reformatted. You can find more of his work at Tundra Graphics. This article was also published here and here.