Stitching a Panorama When You Forget Your Wide Angle Lens at Home

The first rule for any photographers, portrait, landscape, or weddings: always, always check your gear, count it twice, because the last thing you don’t want to happen is not having the right gear for what you want to shoot.
Trying to pack light with just one lens, I ended up carrying my 55-200 zoom lens instead.
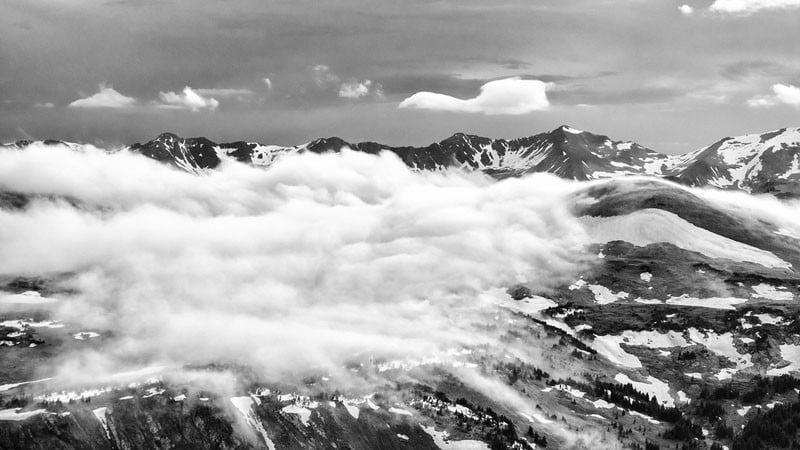
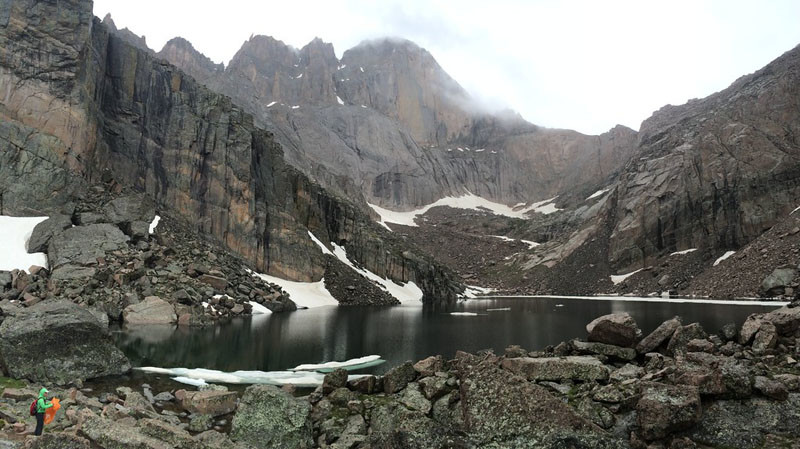
So when we hiked up Chasm Lake, coming up to a sweeping view of the craggy peaks, waterfalls and mists, I was pretty upset at myself for forgetting my 10-24mm. But then I harkened back to my early days starting this hobby, when I used to do a lot more panoramic shots with a kit lens before ponying up for a proper wide angle or even a tripod.
So here’s what I did to get a panoramic shot without a tripod:
1. Frame the picture in my mind, so I remember where to start and where to stop
2. Meter at one of the frames, and set everything to manual to fix the settings (aperture, shutter speed, focus, ISO, white balance). This is so that the exposures on each frames are the same
3. Hold the camera close to my body with my elbows squared on my torso, my left hand holding the base of the lens.
4. Start shooting at the center of the frame that I wanted to shoot for, and start spiralling out, pivoting the camera with my left hand as the axis. Basically trying to avoid parallax errors by pivoting as close to the base of the lens as possible. (Using LCD Live View mode is useful here because you want to try to stay as still as possible)
5. Take a picture of the ground or with the lens cap on, so I know when my series of panorama pictures ends
6. Put everything back to your previous setting, so you won’t screw up your next shot by leaving it in the last setting (lesson learned the hard way)
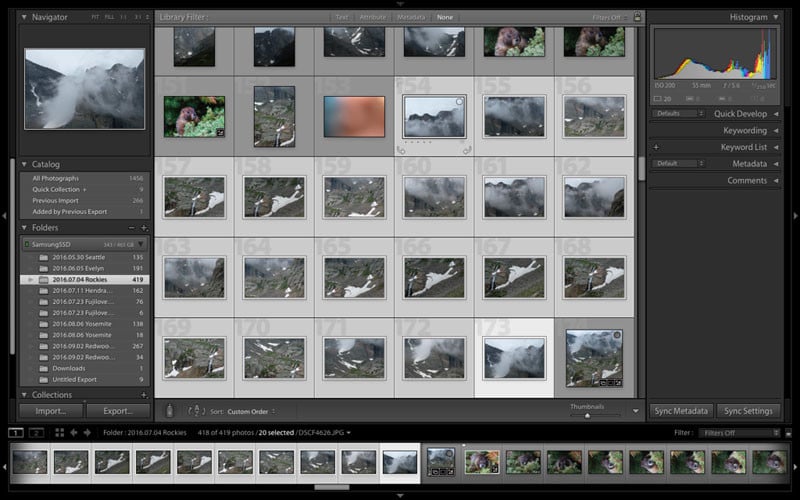
After my trip, I downloaded all the pictures to Lightroom CC and used the built-in stitching tool (Menu bar: Photo > Merge > Panorama). Which is a great tool since I no longer have to rely on third party apps, like Hugin, to stitch my photos. Granted, it’s not as much control as Hugin, but it works pretty well for the most part.
My panorama consisted of 20 pictures total, and with my aging 2010 Macbook the stitching takes a while to complete (but not too bad, like 15 minutes or so).
Once Lightroom is done stitching, I cropped the picture to remove the white spaces. And do my minor post processing after (exposure, contrast, colors).
Note: before starting the stitch, I do apply the image sharpening to all the frames first.
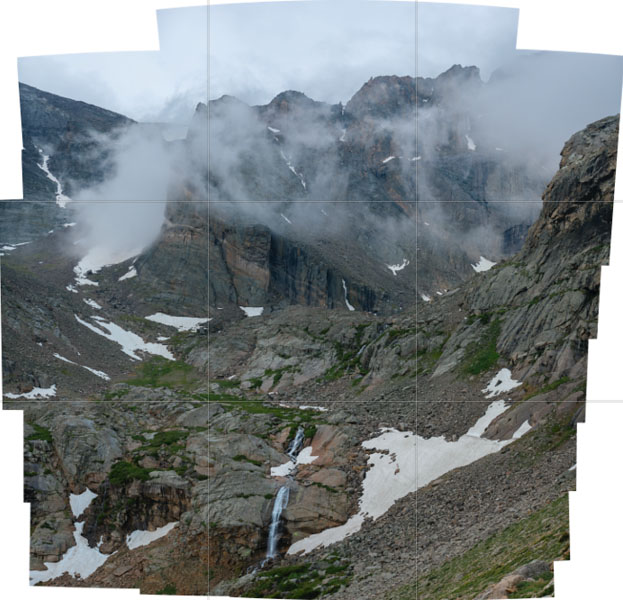
And just like that, I get to have a picture to remember the scenery even without my wide-angle lens. And on the plus side, I get crazy details on this picture (mind you the JPEG is about ~66MB at full rez).
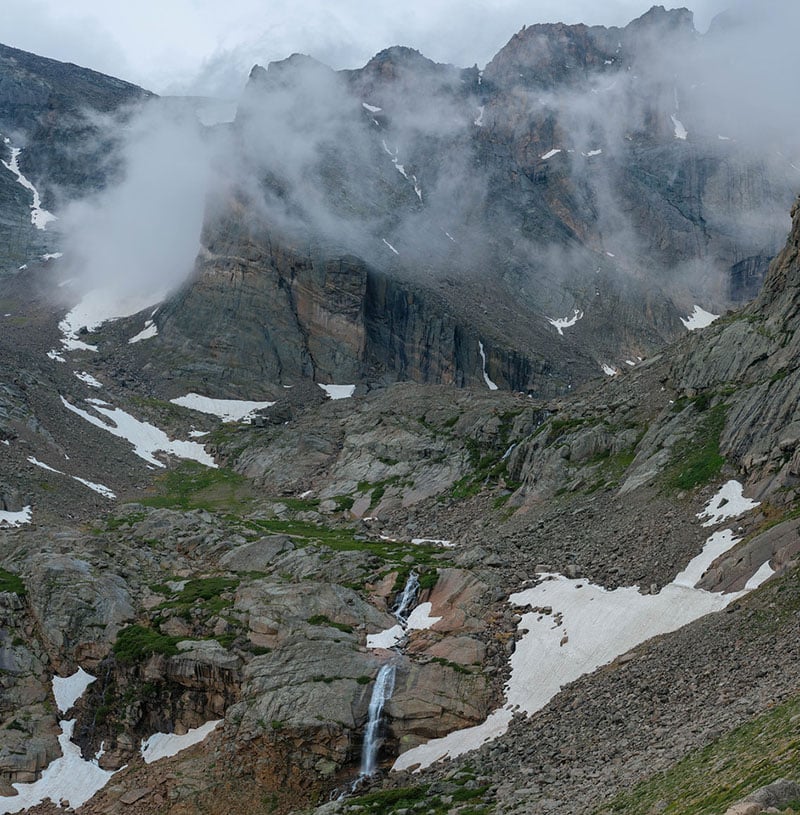
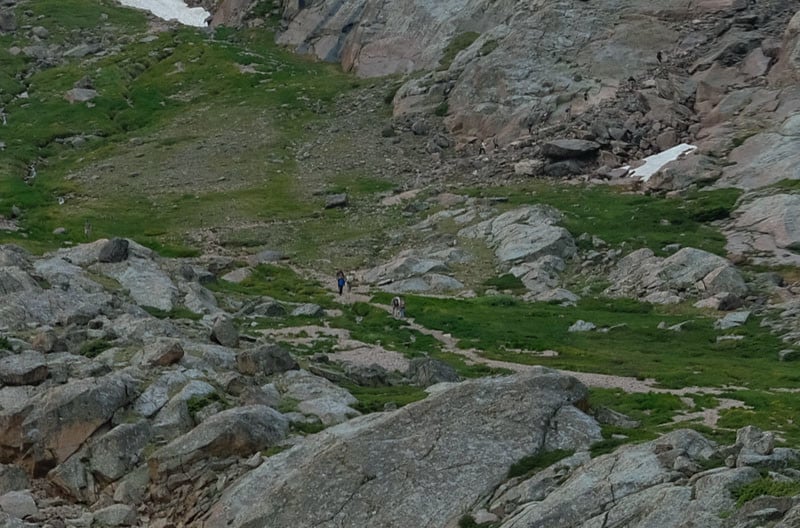
Can you spot the hikers at the trail just over the upper left of the waterfall?
So yeah, you can do a panoramic shot without a tripod or a wide-angle lens. It’s not perfect, and sometimes you do get parallax errors without having a proper tripod/panoramic plate. But hey, when you’re in a pinch, it never hurts to try.
You can always make do with what you got and it might just force you to think a little more creatively.
About the author: Ryan Prawiradjaja, who goes by Ryan P, is a photographer, runner, and traveler from the San Francisco Bay Area and currently based in Austin, Texas. You can find more of his work on his website, Instagram, and Flickr. This article was also published here.