7 Photo Tips for Capturing Epic Lava Shots 100% In-Camera
CJ Kale and Nick Selway long ago fell in love with Hawaii and founded Lava Light, a photography gallery focused on capturing the ever-changing landscape created by an active volcano and crashing waves — and sometimes both together when the conditions are just right. And if swimming with fire and dodging lava bombs weren’t challenging enough, these photographers believe in creating their images completely in-camera.
Balancing exposures between sky, water and lava can be incredibly tricky. Luckily, Lava Light has shared some tips to help you get the shot without combining exposures or using HDR.
Photo Tip #1
To capture lava and stars together, put a neutral-density (ND) gradient filter on your lens upside down to balance the extreme exposures between the lava and stars.
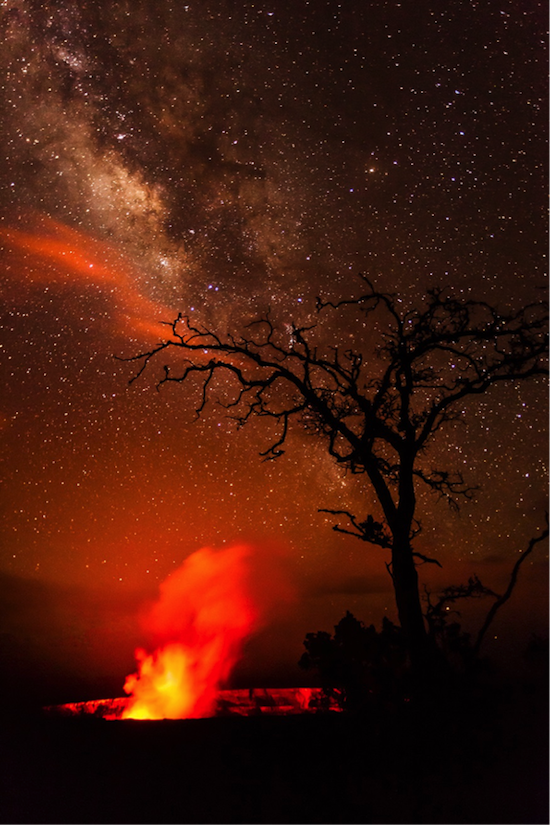
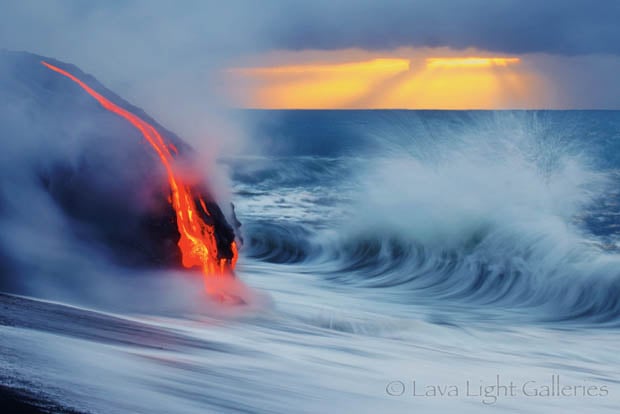
Photo Tip #2
When photographing lava in the daytime, use the ND grad right side up to balance the light from the sunrise, because the sun will eventually be brighter than the lava is.
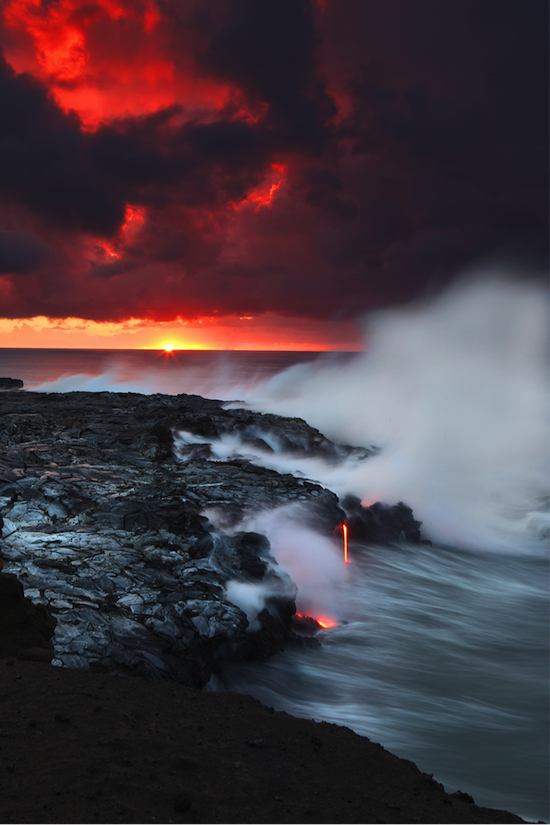
Photo Tip #3
For front-lit scenes, a hard ND grad balances light from a bright sky and a dark foreground, allowing you to darken the sky and deepen colors. For example, in this shot I used a polarizer to intensify the rainbow, but it left the sky a fraction too bright. So I added a 1-stop hard ND grad across the entire sky to darken it and get its depth and color to match with the lava and everything that’s front lit below.
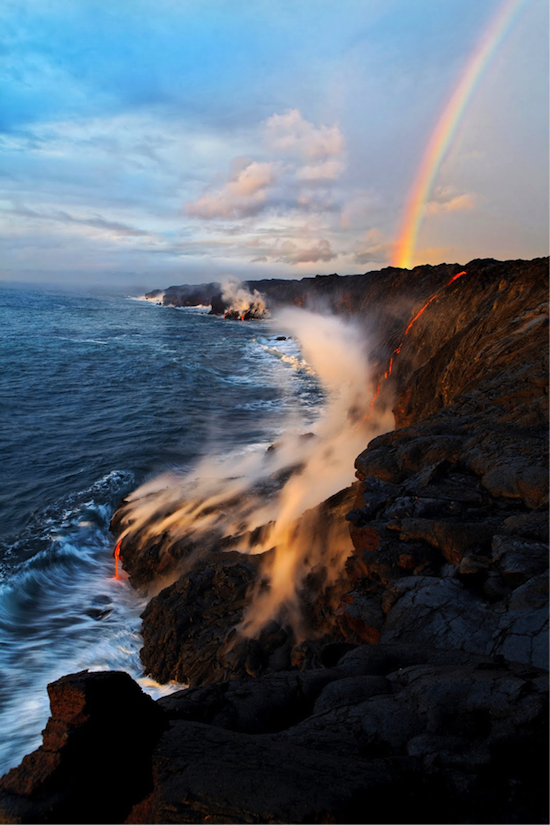
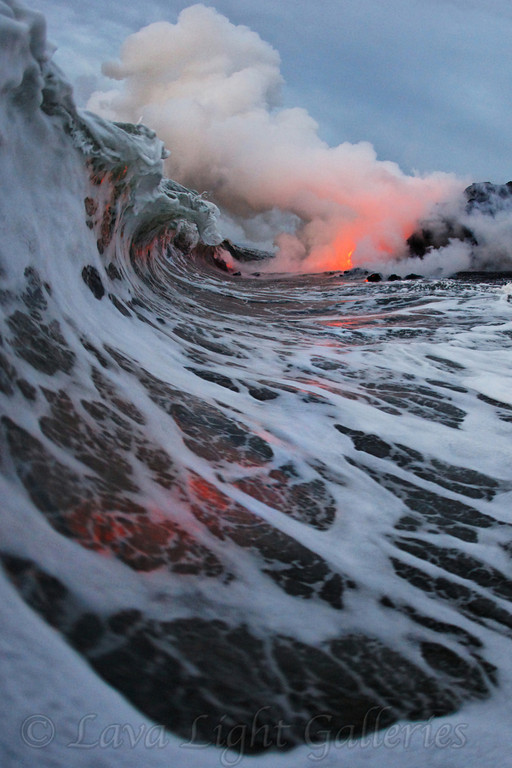
Photo Tip #4
To capture the little curvature of a wave, a shutter speed around 1/3 of a second is usually enough to get a little light blur to the water but keep that shape in the wave.
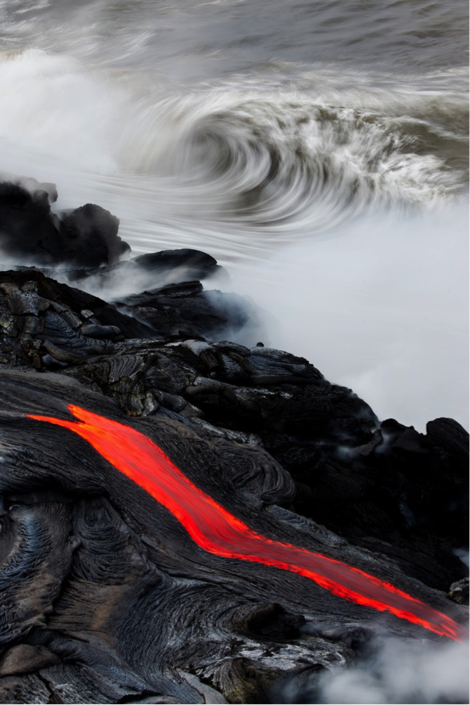
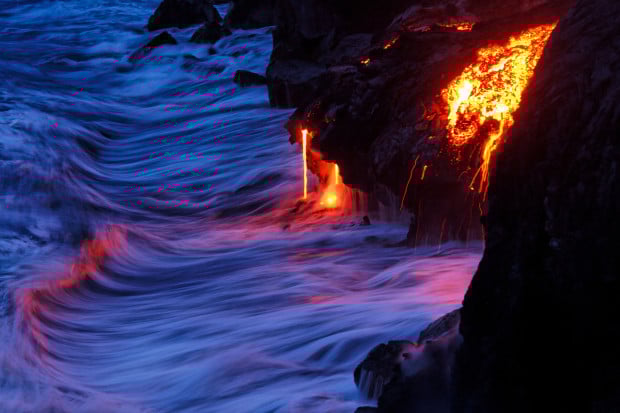
Photo Tip #5
If you’re trying to capture a really misty feel, where the water almost looks like fog, use a 2- to 3-second exposure.
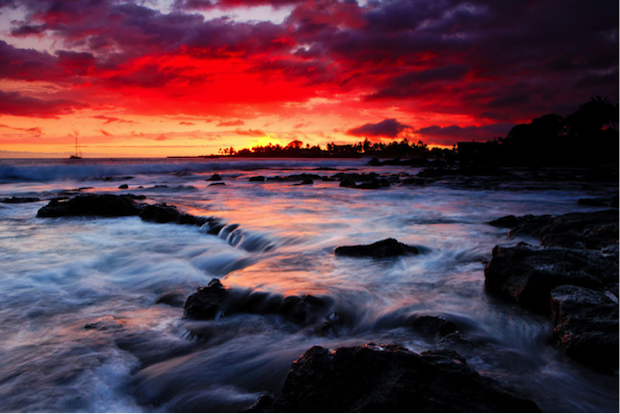
Photo Tip #6
Since we capture everything in-camera, sometimes we have to compromise on exposures and accept some clipping of highlights or shadows. So maybe a rock by the lava won’t have any detail in the shadows because I want to capture the detail in the lava instead, and I prioritize my exposure for the lava.
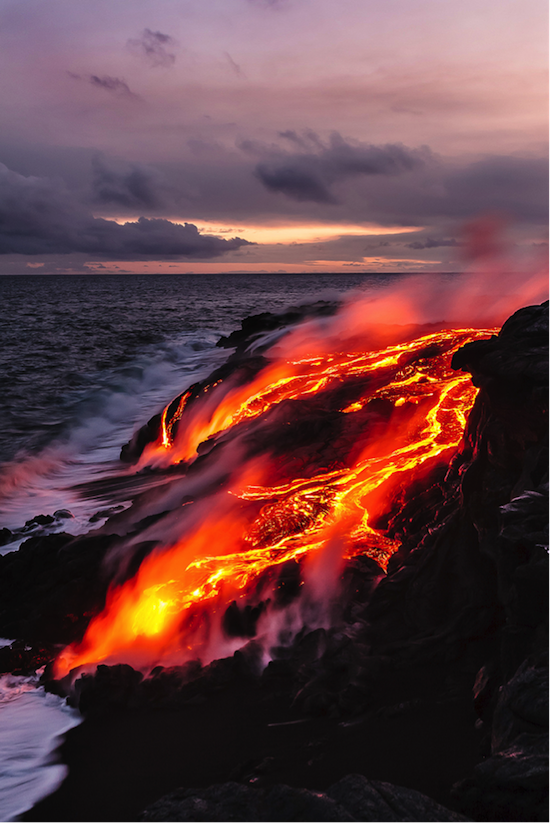
Photo Tip #7
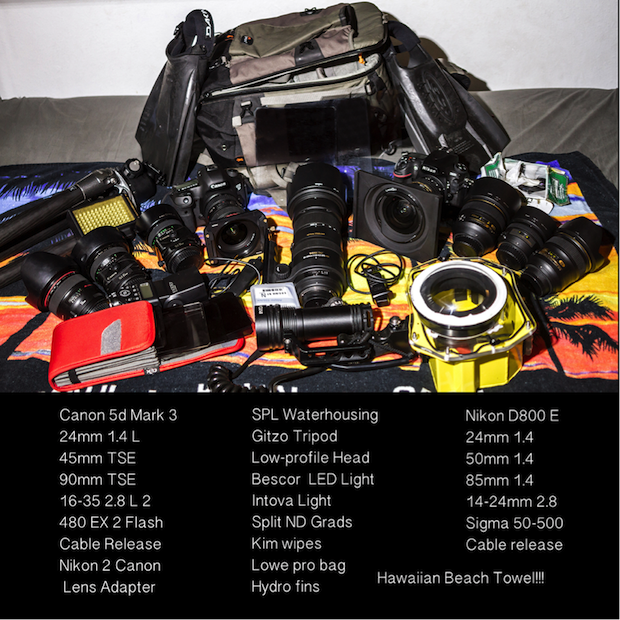
Prepare the right gear for the day. My normal, hike-out-to-the-volcano kit includes a Nikon D800e, Canon 5dMkIII, 16–35 L lens for Canon, 14–24 for Nikon, a 50mm and an 85mm prime, and a 50–500 Sigma telephoto. Because sometimes you want a wide-angle shot, like the rainbow and lava, and others you want to zoom in on the drip, which requires a telephoto.
Hope you enjoyed these lava photography tips! To see more from CJ and Nick, head over to Lava Light Galleries or check out the behind the scenes video and Q&A we posted just a few hours ago by clicking here.
This article was re-published with express permission from SmugMug and Lava Light Galleries. It originally appeared on the SmugMug blog here.
Image credits: Photographs by CJ Kale and Nick Selway of Lava Light Galleries and used with permission