Pixieset Helps Photographers Cull, Edit and Deliver in One Place
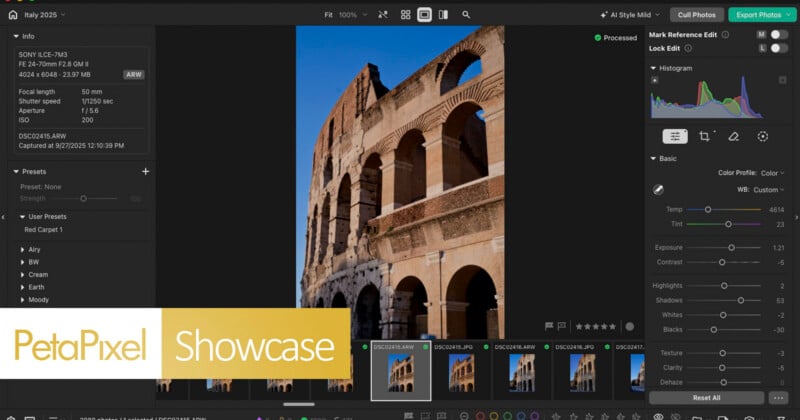
Pixieset offers a gallery system, a website builder, and a studio manager for bookings, but its new Photo Editor aims to close the one remaining gap in the photography workflow. It uses on-device AI to help cull and batch-edit, so photographers don’t have to move back and forth between their preferred photo editor and the Pixieset system.
Presenting a full-fledged editing stack capable of handling RAW files (and other file types) now runs contrary to the notion that Pixieset is only a place to upload finished images and nothing more. Pixieset Photo Editor completes the circle for what the company describes as a workflow that begins with booking clients and then runs through culling, editing, and delivery for the shoot thereafter.
A photographer’s workflow is a notoriously tough nut to crack. Pixieset is convinced it has the goods to keep users around and find a place for its software in the mix.
How Pixieset Photo Editor Works
Pixieset has been doing client galleries since 2013, later expanding into website building and administrative tools for bookings and invoicing. Photo editing was never really part of the equation until now. Those other pieces remain intact, while how you cull and edit photos changes through Pixieset’s new editor. It brings AI-assisted photo culling, professional RAW editing, and AI-powered batch editing into one workflow, with direct publishing to Pixieset Client Gallery
The basics are these: Photo Editor is a desktop app (Windows and macOS) that you can download as a Pixieset subscriber. There’s also a browser-based option for working on a computer where the app isn’t installed. Pixieset recommends at least an Apple M1 processor for macOS users, and at least an RTX 2060 or newer GPU for Windows users. Google Chrome is the preferred browser, though it also works in others, like Safari and Firefox.
The desktop app installs easily, and the initial setup is simple; it also explains key interface features. Images also come from your local storage (SSD and NAS storage are okay, too) for a largely offline workflow, except for two cloud-based features.
Apart from the editing features available, Pixieset Photo Editor’s other major value proposition is that most of its AI features run locally on your device, not in the cloud. The only exceptions are AI Generate and AI Erase, which use a cloud-hosted model, but that model is hosted on Pixieset’s own servers, ensuring no data goes to any third-party tools. That extends to any images, reference images, editing styles — basically, everything you do in the app. And these are never used to train AI models, including those Pixieset is using. That can be a relief if you’re concerned about AI privacy and client images running through the editor.
In addition, your own images can act as reference points for how the AI interprets and applies starting edits, but you can also use any image that represents the look you want to achieve. From these references, the editor creates AI Styles. Unlike presets in Lightroom, Capture One, or Affinity, AI Styles aren’t applied to individual images, instead they’re applied across the entire batch.
Culling with Pixieset Photo Editor
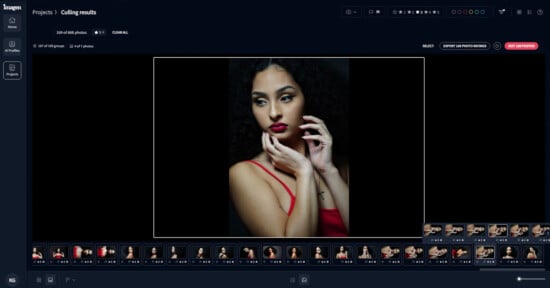
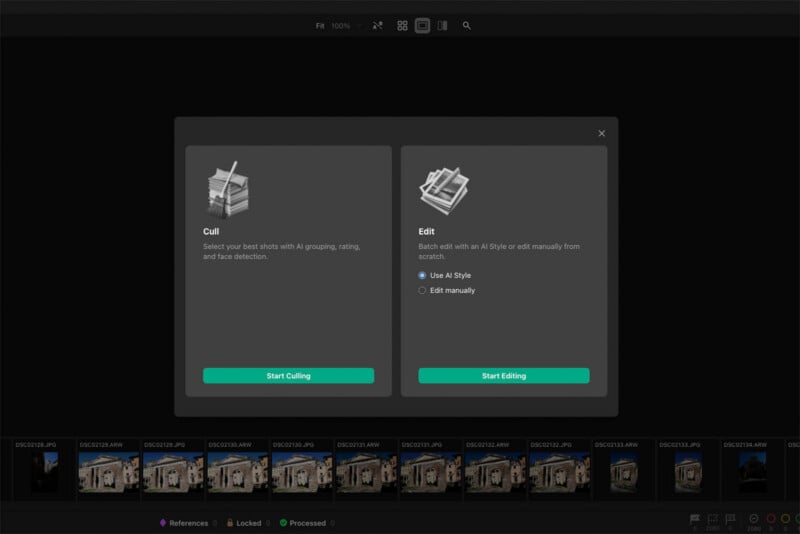
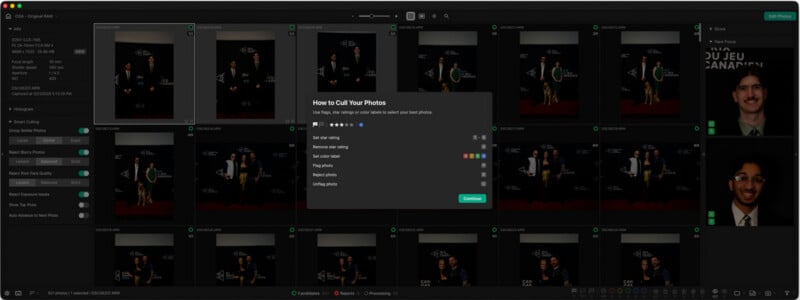
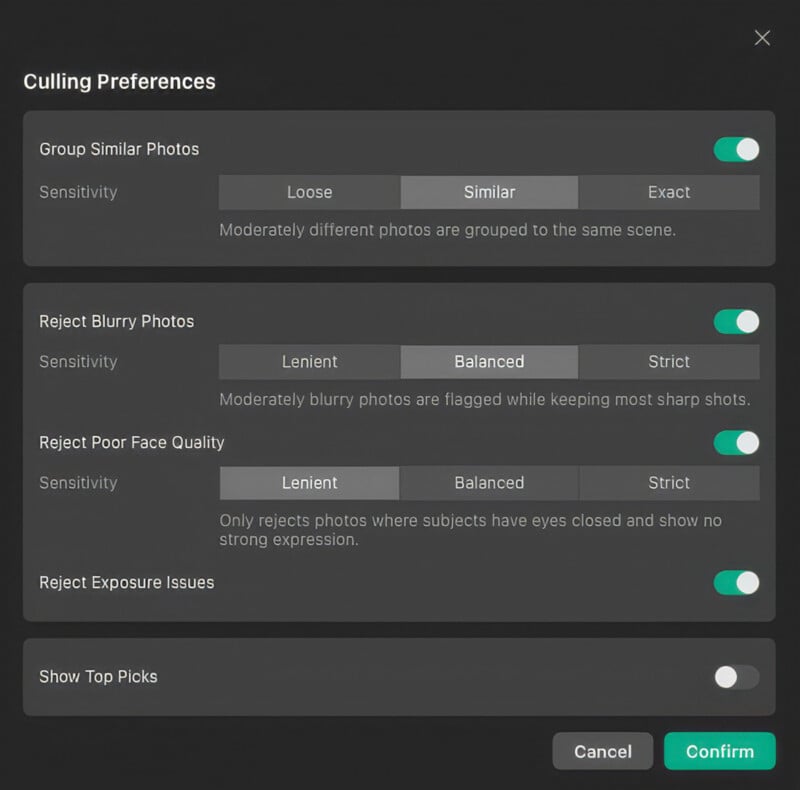
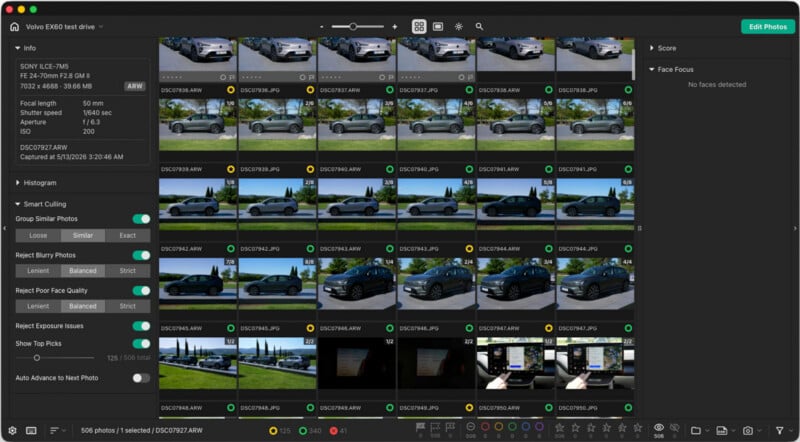
When you upload a batch of images into Photo Editor, that workflow starts as a project, where you can choose how to cull the batch and then either apply an AI Style or manually edit them yourself once the cull is done. It’s up to you to decide how lenient or strict you want the software to be in determining what should make the cut, like discarding blurry photos or closed eyes off the bat. It’s quite capable on its own, though it may make a few puzzling choices depending on how lenient or strict you set it. Either way, you can always make the final call on individual images yourself.
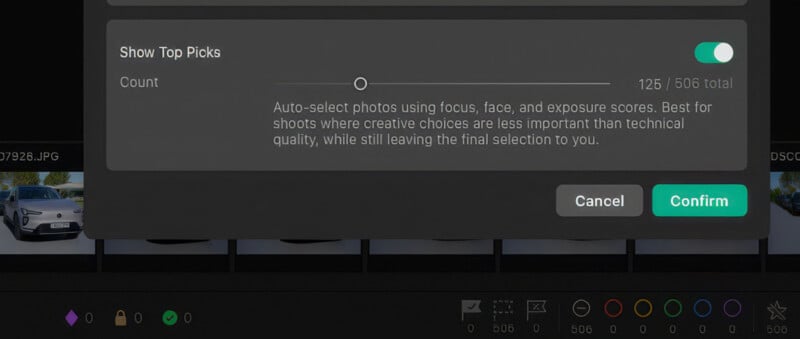
You can also hedge a little by setting a target number for Top Picks. For example, if it’s 300 photos out of a 3,000+ batch, it will oblige. You don’t lose sight of the rejects because the software groups them together, along with the top picks and good candidates based on factors like lighting, sharpness, and facial expression. They’re all accessible at the bottom of the interface in a color-coded layout, and as the photographer, you can override by using your own flags, labels, and ratings.
Since all the imported photos stay where they originated, Photo Editor catalogs photos through its project-based layout. That keeps different shoots contained and separate, rather than living in one continuous catalog. It also creates a clearer path to a waiting client’s gallery because you can move a project over directly.
The project also travels with its files. Photo Editor creates a catalog file inside the photo folder that lets you resume exactly where you left off. To work on the same project from, say, a home and an office computer, you just need the folder with the photos and catalog file on both machines. One workaround is to use an external drive and plug it into whichever computer you’re using; it works pretty seamlessly as long as you have the necessary files in place.
Where Pixieset’s AI Styles Play Their Biggest Role
There are a few ways to establish a starting look in Pixieset Photo Editor. You can select one of your past Pixieset galleries to create an AI Style based on your previous work, choose from existing Styles offered by Pixieset, or upload images to use as references with AI Color Match.
Once you start editing your project with an AI Style, the software shows four distinct images from the batch to illustrate how the style affects them all. Sliders for exposure, contrast, saturation, temperature, and tint let you apply some manual adjustments before committing to the style’s final look, all of which you’ll see reflected in the four sample images. The software does a commendable job finding images that differ in color, tonality, shadows, and subject to help you visualize what a blanket edit like this might look like.
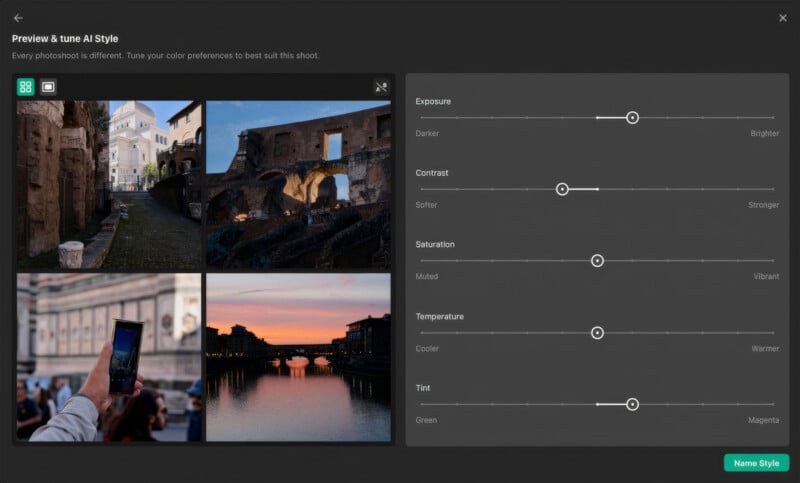
The point is to teach the software a look, something the company calls a “head start” before fine-tuning the rest. While it can’t know the exact slider values and settings, nor any masks you set while working on an image, the AI analyzes its visual characteristics to interpret the aesthetic. Looking for patterns in color, contrast, brightness, and tone, the company reckons it can get you about 70% of the way to the same result, leaving you to figure out the rest with the editor’s available tools.
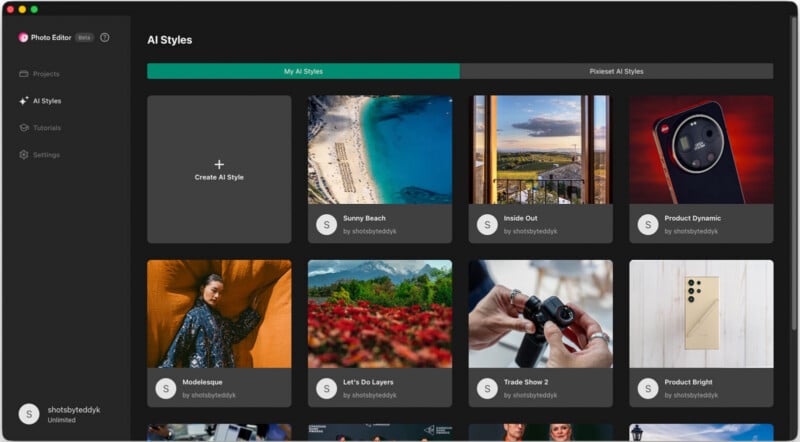
To refine the results, you can edit an image further after the AI Style applies and then mark it as a “Reference.” The software then applies similar changes to comparable shots within the same project, with accuracy improving through additional references. This isn’t a bulletproof solution, mind you, in that you’ll likely have to do it multiple times for a varied shoot, since different subjects, mixed lighting, indoor vs. outdoor, flash use, and daylight vs. low-light will probably be too much for one Reference to handle appropriately.
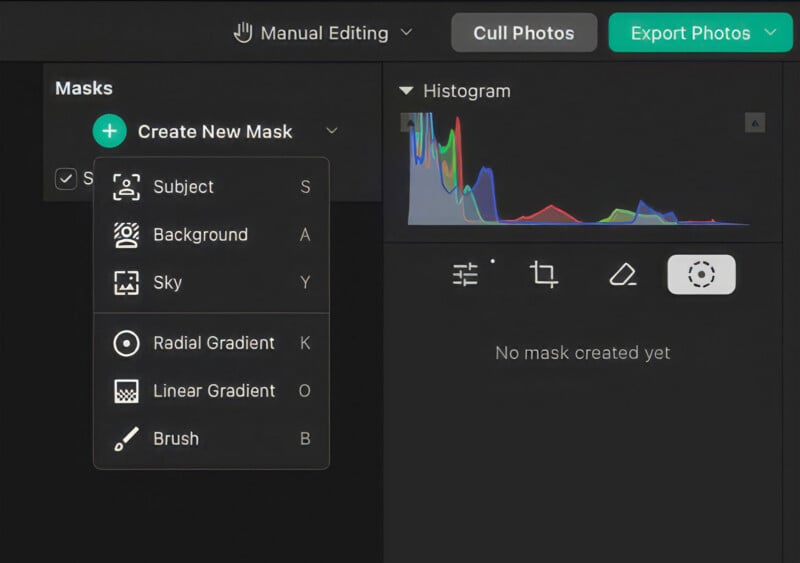
References can also carry masks. With Adaptive Masking turned on in settings, Photo Editor will try to apply the same mask across your photos when you mark a new Reference. It does this very well when images are very similar in composition, like the same subject and background, but you may need to mark more reference images as you go to repeat the feat with others. The software is engineered to recognize similarities, which is why a daytime reference image wouldn’t necessarily apply to a low-light shot if there is a better match.
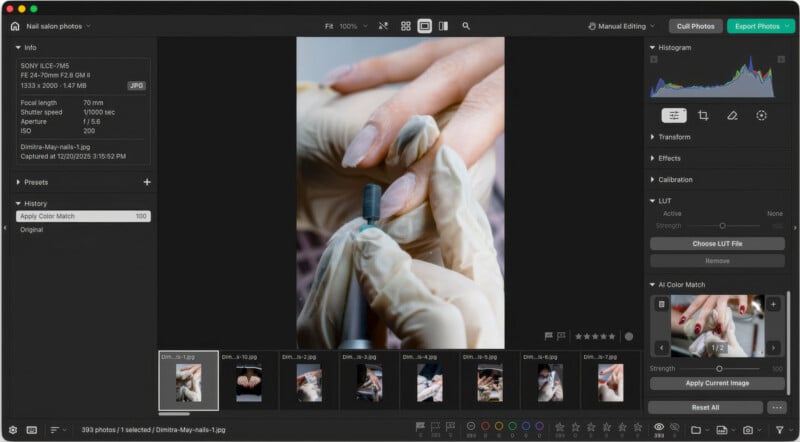
As mentioned, another option is AI Color Match. This lets you upload a separate photo to act as a reference point for how the Photo Editor should adjust the image you’re working on, analyzing it and trying to match the color and editing style as closely as possible. It delivers a different outcome than an AI Style does, and one that’s arguably the best at matching the color grading you want to start off with.
Exploring Pixieset’s Editing Tools
At the moment, there is no way to import Lightroom presets, but you can save the edits you make as an AI Style to use on other projects. Pixieset does also have presets, but they’re not the same as AI Styles. A preset, in this case, is like one from Lightroom or another program; it applies the same slider adjustments you make in Photo Editor to every photo. Choose one, make a bunch of edits to a photo, and then copy/paste them into others. An AI Style works at the project level instead, aiming for a consistent overall look by adapting its edits to each image rather than applying identical values.
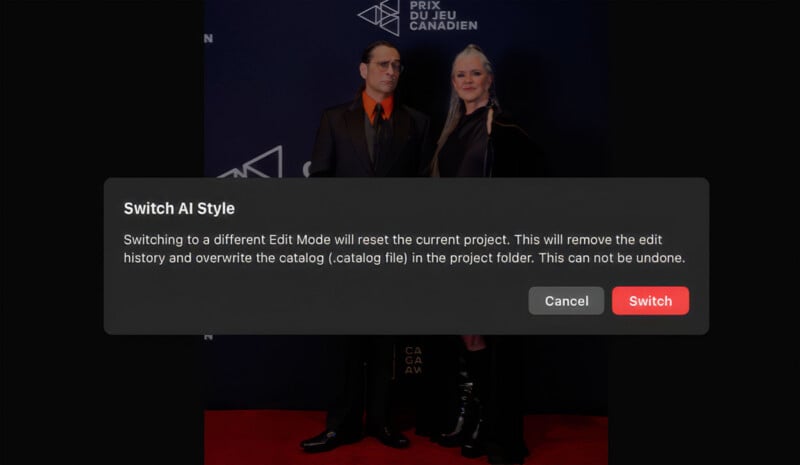
Lastly, you can also choose to edit your photos manually, without an AI Style applied. It’s worth noting that you can’t switch to an AI Style on the fly after starting a project with manual editing. Doing so resets the entire project, so your initial decision sets the stage for your workflow. A project that starts with purely manual edits also can’t use the “Mark Reference” option. That doesn’t mean you can’t access or apply LUTs and presets, but it does mean the starting point matters: either manual edits from an AI Style or a fully manual edit from scratch without the AI Style.
The layout, particularly along the right-hand column, bears more than a few similarities to Lightroom, right down to the order in which sliders appear and the variety of tools available. This also goes for color, where the necessary ingredients are available, be they HSL, point color, color grading, and calibration, along with the usual temperature, tint, vibrance, and saturation sliders. It also includes brightness, contrast, geometry, cropping, and masking. AI-driven masking for backgrounds and subjects is possible, along with the AI-driven erase and generative tools. Overall, Pixieset aims to provide toolsets that cover the majority of needs for photographers when it comes to editing.
Copying and pasting edits, as well as masks, to singular images or a selected batch gives you another route if you don’t want to commit to turning it into a Reference or AI Style. Right-click on a photo, choose Copy Edits (with masking ticked if you want masks included), then select the target photo(s) and choose Paste Edits. This is also the way to apply a specific crop ratio across multiple photos, since AI Styles don’t carry cropping.
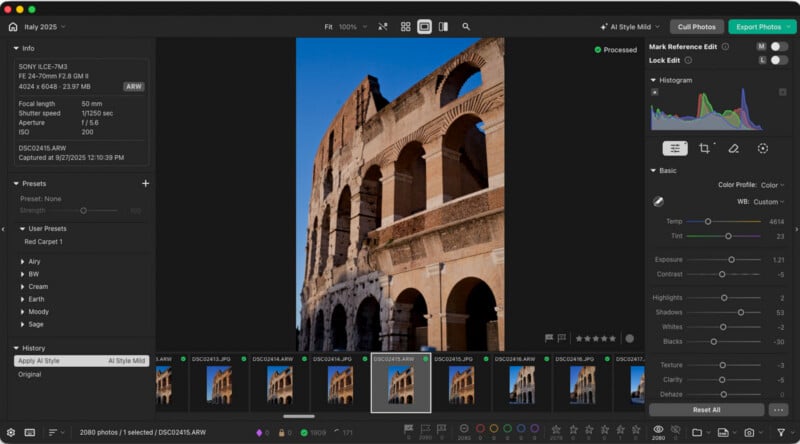
Photo Editor’s own presets — a section of which you can see in the left sidebar — are available from the start, and you can always create your own. Select an edited photo, go to Presets > + > Create preset in the left sidebar, name it, and choose which edits it carries. Like any photo editor, it’s always a good idea to build several presets or bring in LUTs to help. The right-hand column has a LUT section (especially .cube files) that enables you to bring in any that you like for either a single still or a bunch.
It takes a little time, but there is a way to get the best preset results in a certain sequence within Photo Editor. Use AI Style first to get as close as possible, fine-tune in the editing panel, including adding a LUT or AI Color Match, if necessary, and then save that as a preset. One caveat is that presets are generally better when you want specific slider adjustments rather than a unique look, but you can get a fair degree of granularity if you keep playing around with these tools. I found this worked the best for me and got me closer to what I would expect from Lightroom or Capture One.
Meanwhile, masking tools include the usual suspects, like subject, background, and sky, plus linear and radial gradients, with a brush for good measure. The mask’s accuracy can depend on the image’s complexity, and while it can’t match the accuracy and granularity of Lightroom or DxO PhotoLab, it can handle most photos fairly well. For instance, you won’t be able to isolate faces, skin, or clothing, even though face detection works during culling. And while it can mask a subject, it won’t necessarily know which one you mean if there is more than one in the frame. Nor will it know what is an object relative to, say, a hand or something attached to the subject. You can also refine a mask using a brush or gradient at any time.
From Culling, Editing to Photo Delivery with Pixieset
Exporting to a Pixieset gallery is pretty straightforward, though you’ll need to make a few choices beforehand. You can apply export settings, such as web-size files and watermarks for a private client, or full-resolution downloads for a paid commercial one. Watermarks appear only on previews and disappear from downloads. From start to finish, it’s a pretty quick handover.
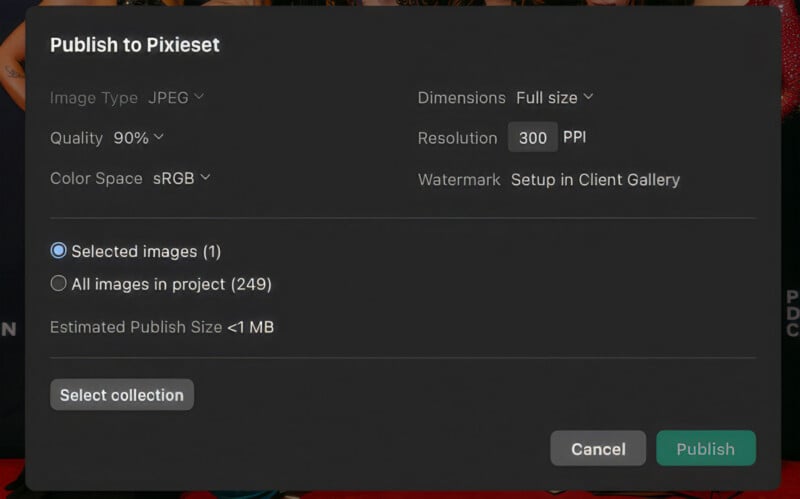
This creates a loop because clients can mark favorites in a gallery you can then copy into Photo Editor to fine-tune specific picks within the existing project. From there, sync them back to the gallery with the changes intact.
Photo Editor accepts JPEG and RAW uploads and exports JPEG, TIFF, or PSD. You can also upload formats like ARW, RW2, CR2, CR3, CRW, DNG, HEIC, NEF, ORF, PEF, and RAF. The gallery itself takes more formats, including PNG, GIF, and RAW. That support also extends to Apple ProRAW photos from iPhones in case smartphone photography is involved. RAW photos from Android devices should also work without issue.
Pricing and Availability
Pixieset Photo Editor is available on desktop and in the browser, but there is no mobile version.
So long as you have the folder with the stored photos and catalog file inside on whichever computer you want to use, you’re ready to work. For more flexibility, you can keep it all on a portable or external SSD and plug it into any computer. Hence, if you have a workstation at home or in a studio but travel lighter with a laptop, you can pick up where you left off.
If you have a Pixieset account, you get free unlimited access to cull and edit with Photo Editor. However, the free plan limits you to 100 exports and 100 Generative AI credits. You can still cull and edit as many projects and photos as you want, but once the credits run out, you’ll need to subscribe to get more, which bumps it up to unlimited photo exports and 250 Generative AI credits per month. If you run out of Generative AI credits, you can also use the Heal tool in Photo Editor’s AI section as a non-AI tool that isn’t subject to credit usage.
Pixieset Photo Editor is not part of Pixieset’s Suite plan, and full access to it as a standalone product is either $18 USD per month or $144 annually ($12/month). This covers unlimited culling, editing and image exporting, without per-image charges.