Apexel 100mm Macro Lens Kit Review: An Impressive Phone Add-On
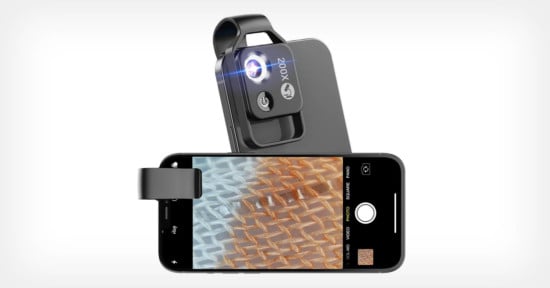
A little while ago, when Apexel asked me to review the 200X LED Lens microscope adaptor, I told them I was interested in both the microscope and the macro lens kit. Due to stocking issues, they were able to send the microscope adaptor.
Full disclosure: A free review unit of the lens was provided for the purpose of this review. Although I did not pay for the review sample, the links you see in this article are not affiliate links.
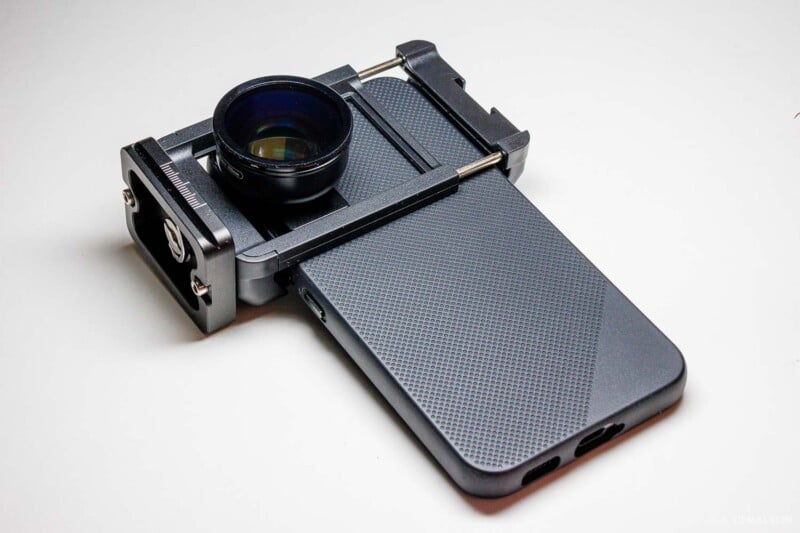
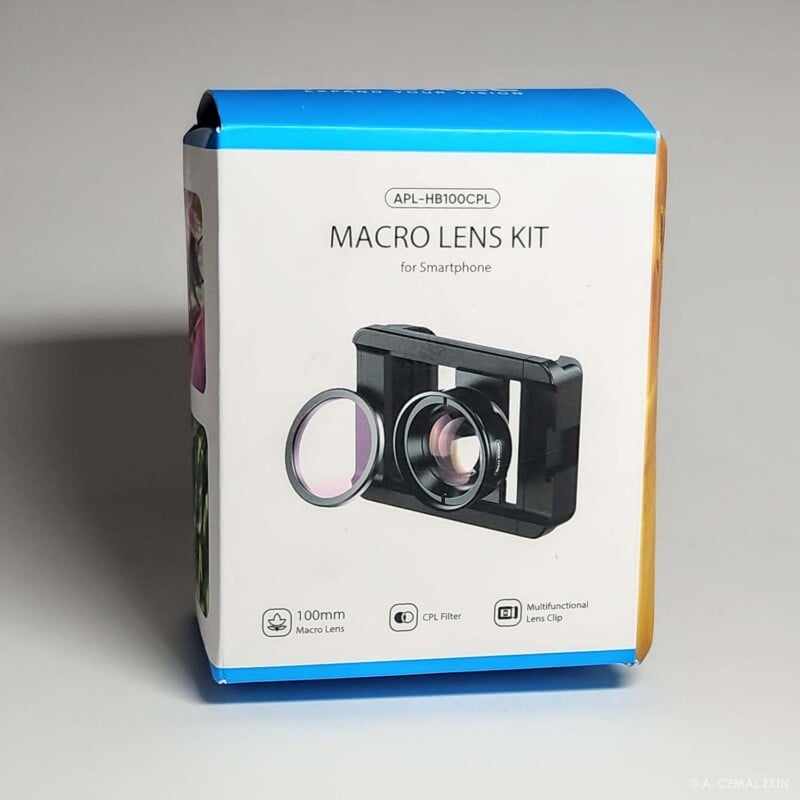
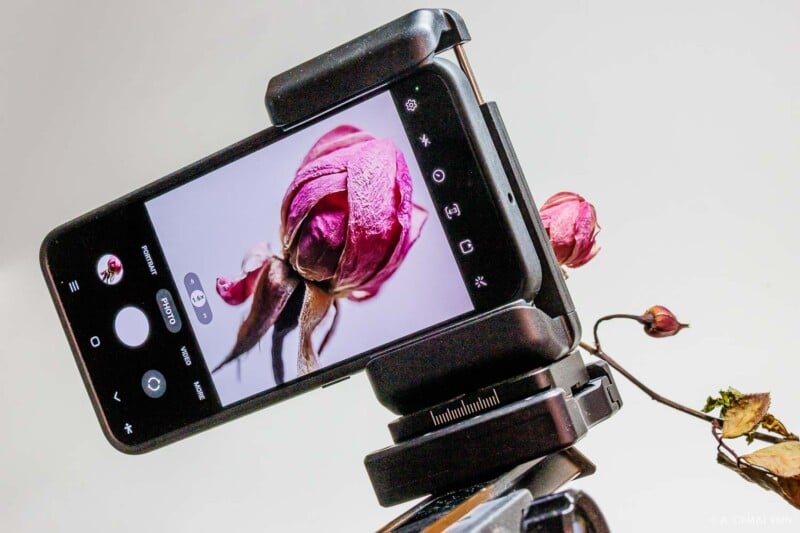
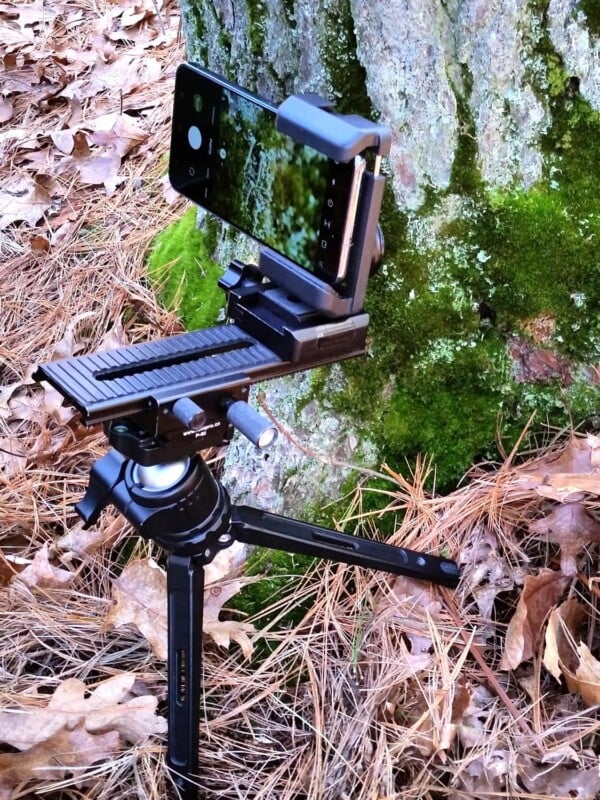
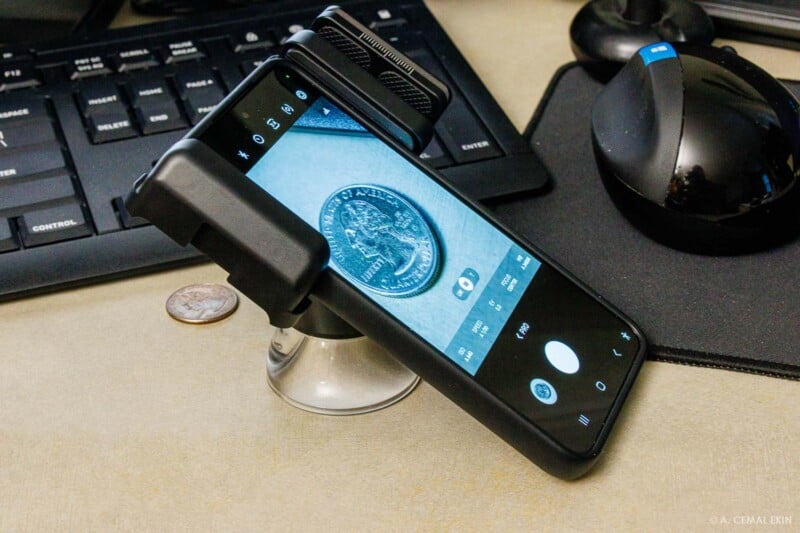
The kit I received, Apexel 100mm Macro Lens Kit, is different from what I thought I would receive. In the pictures below, you see the adaptor mounted on my phone, a Samsung S22, and some with the Arca-Swiss plate to mount the gear on my tripod.
A Firm Grip
This adaptor is built around a grip that latches on two sides of the phone with a sliding rectangular lens mount. The grip is quite robust and available separately if you want. They also provide foam padding if you want to use it. That may make it level and stronger, but I was fine without them. It is worth noting that all their lenses fit on the same grip or clip as they call it.
After you mount the grip on the back side of the phone, you can slide the lens mount right and left to align it with the normal lens if your phone has multiple lenses. The entire grip can slide up and down vertically to help center the lens behind the hole on the lens mount. The lens is a good hunk of glass with a removable circular polarizer in front. After removing the tiny cap on the back of the lens, it can be screwed in place.
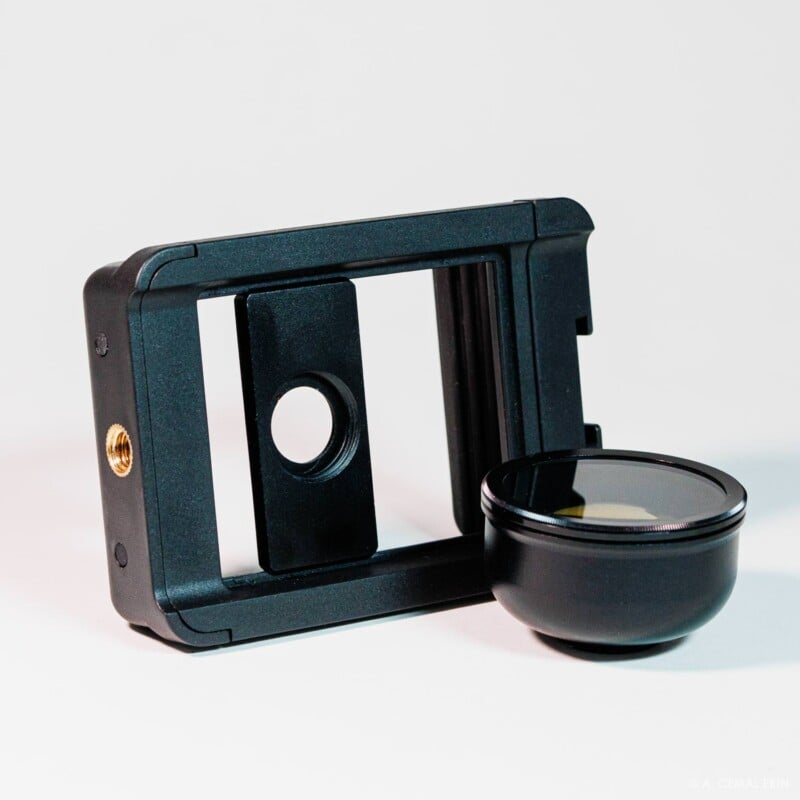

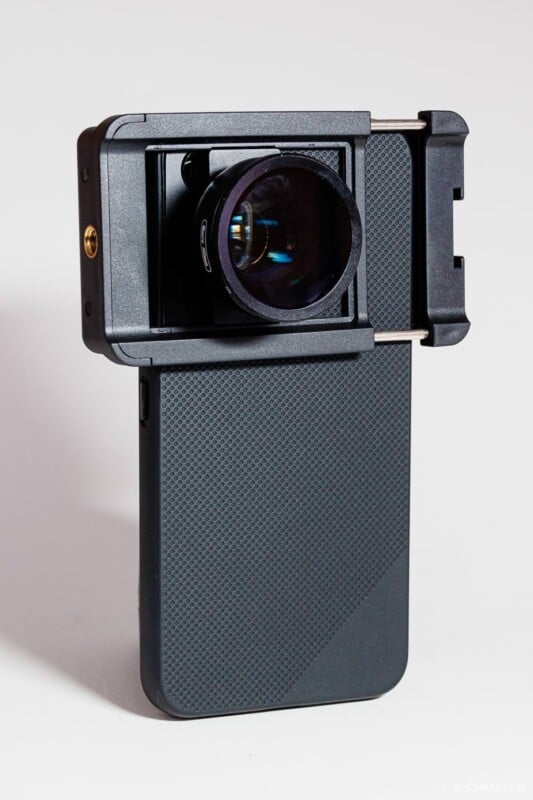
There may still be a little vignetting around the corners that can be eliminated by fine-tuning the lens position in front and then zooming in a little. I found the starting zoom setting around 1.25x comfortable. Although the macro lens does not require touching the subject like the microscope adaptor, it still needs to get quite close to the subject. One important feature of this adaptor is the built-in tripod socket and even a cold shoe to mount a small light. I screwed in an Arca-Swiss mount plate on the tripod hole and was ready to roll.
It Requires Steadier Hands Than Mine
Probably most users will not have the problems I have with my shaky hands. But, this time, I could mount the adaptor and the phone in its grip on a tripod. Even the mounting plate helped me as a small grip in my hand-held experiments.
I tried a small tabletop tripod as the first step in stabilizing it. I mounted the whole gear on it with a small LED light at the top. I tried and took several photographs with that setup, but the tripod height not being adjustable posed a problem.
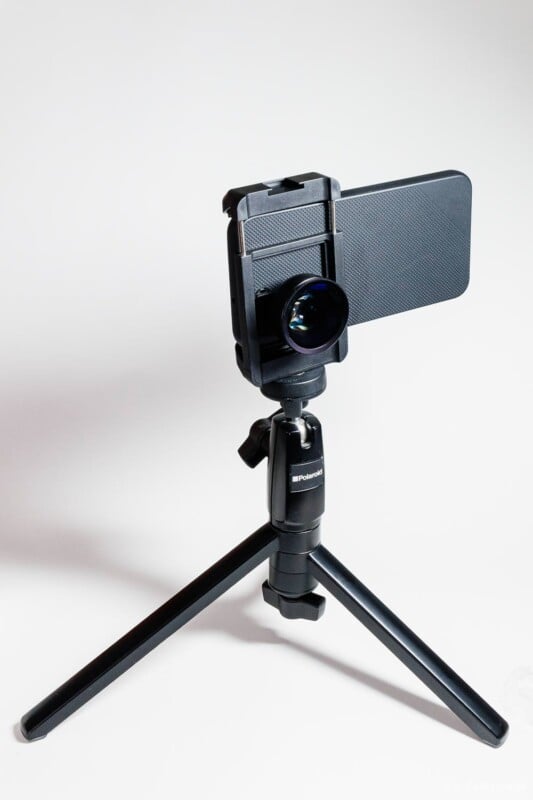
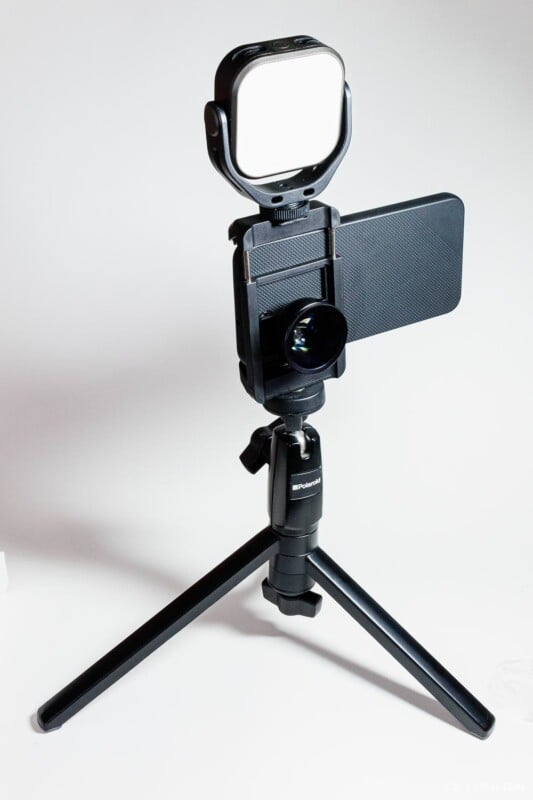
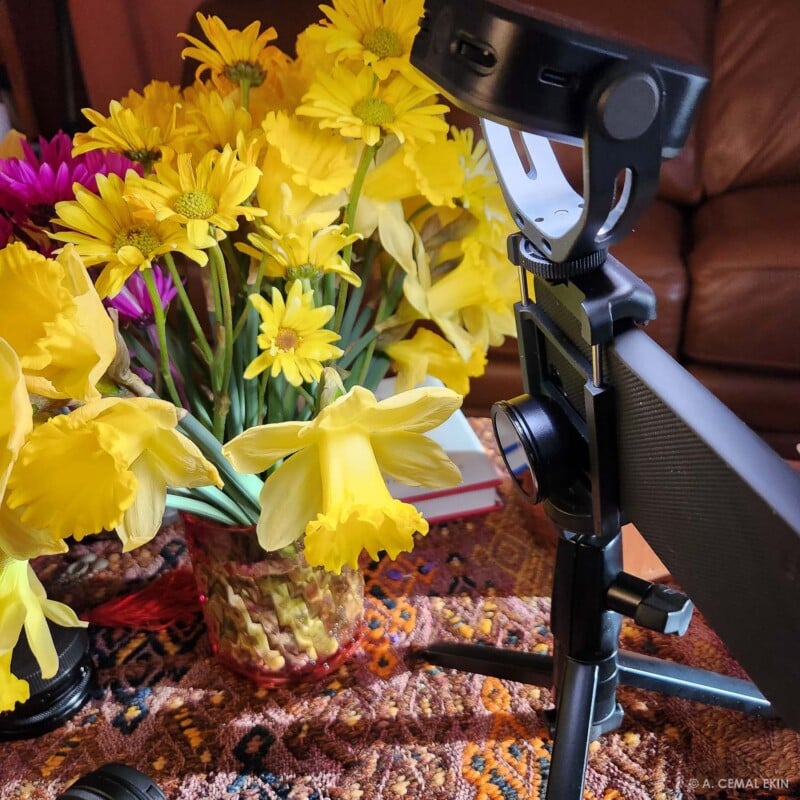
If you mount your kit on a tripod, have a subject stand that can get very close to the lens. It has to be within 4 cm – 7 cm from the lens front. That is approximately 1.75″ – 2.75″. For even more control, I mounted my adaptor and camera on a focusing rail that allowed me to move it back and forth as needed like in most macro photography.
Shallow Depth of Field as Expected
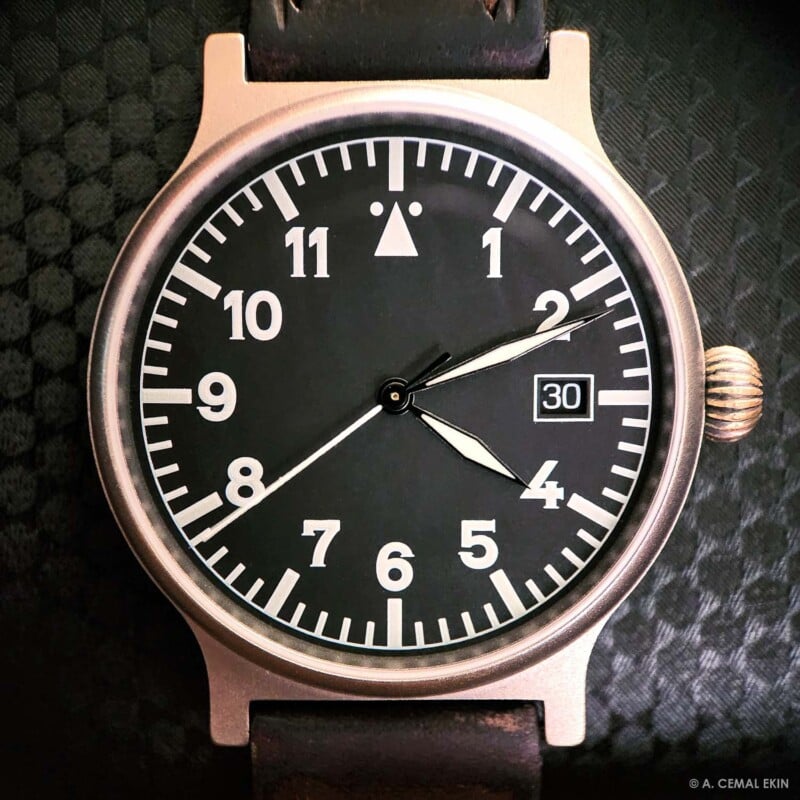
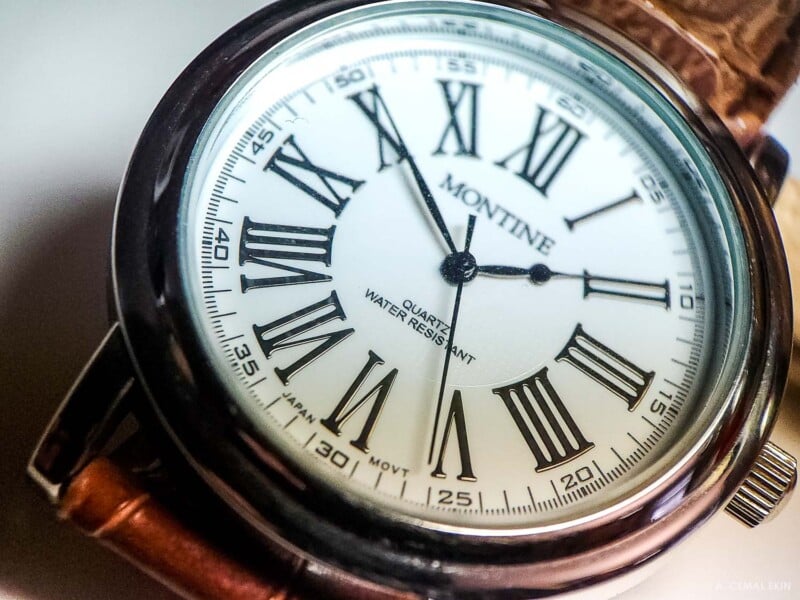
Working that close to your subject results in a shallow depth of field, which is not uncommon in macro photography. As you will see in the sample photos, you can get the face of a watch in focus, like the one above, so long as it is almost parallel to the lens. A little tilt results in some parts of the watch face rendering out of focus. It is not bothersome but something to be aware of.
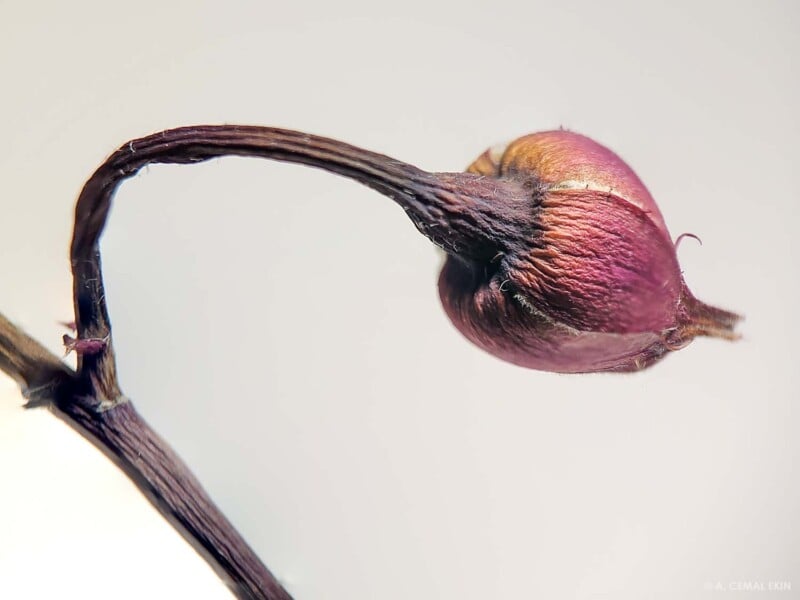
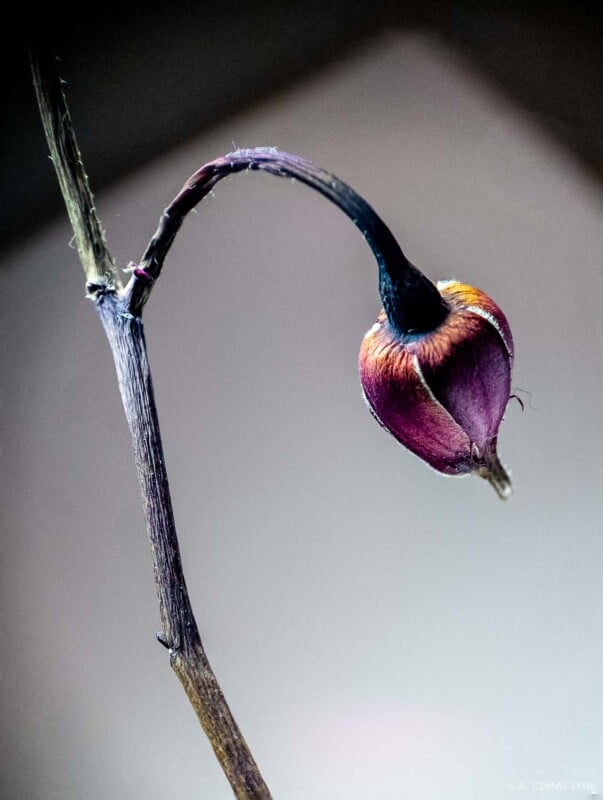
I even experimented with rudimentary focus stacking. After photographing the dried rose flower by focusing on different parts, I blended them in Photoshop. Since the gear was steady on the tripod, I even did an HDR blend of the little bud on the stem.

Cross Polarization Worked Like a Charm
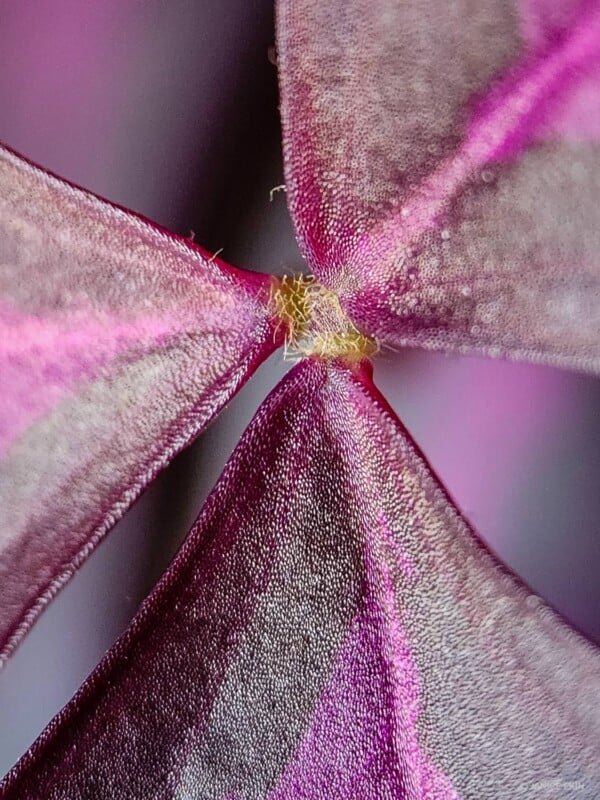
With its polarizing filter on the lens and a decent focus distance, I was able to experiment with cross-polarization once more. The rotation of the polarizer on the lens shifted the colors without disturbing the subject. I had fun playing with the setup. The photographs below show the result of rotating the circular polarizer on the lens while the gear is mounted on a tripod.

Different Subjects
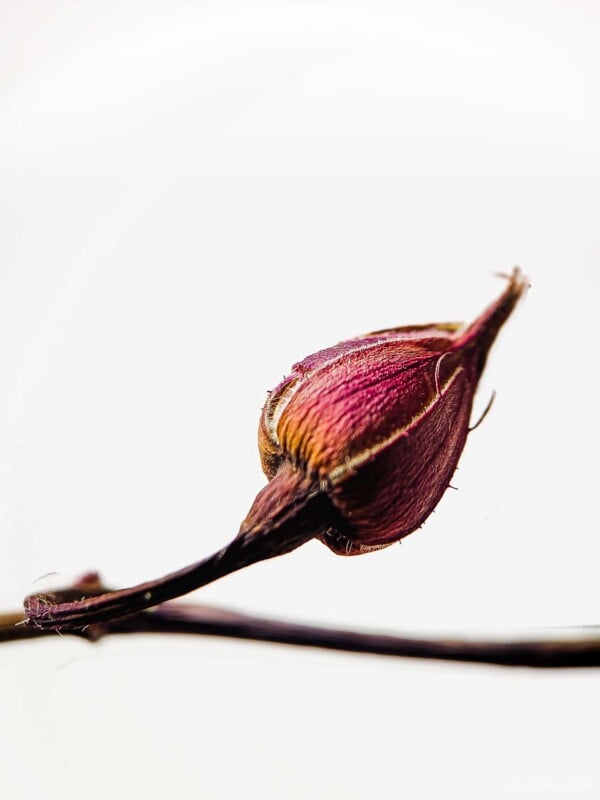
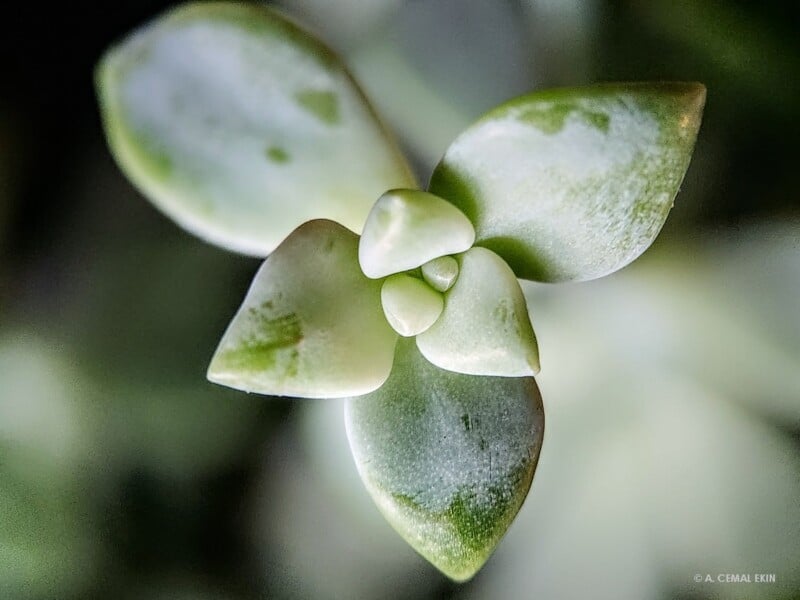
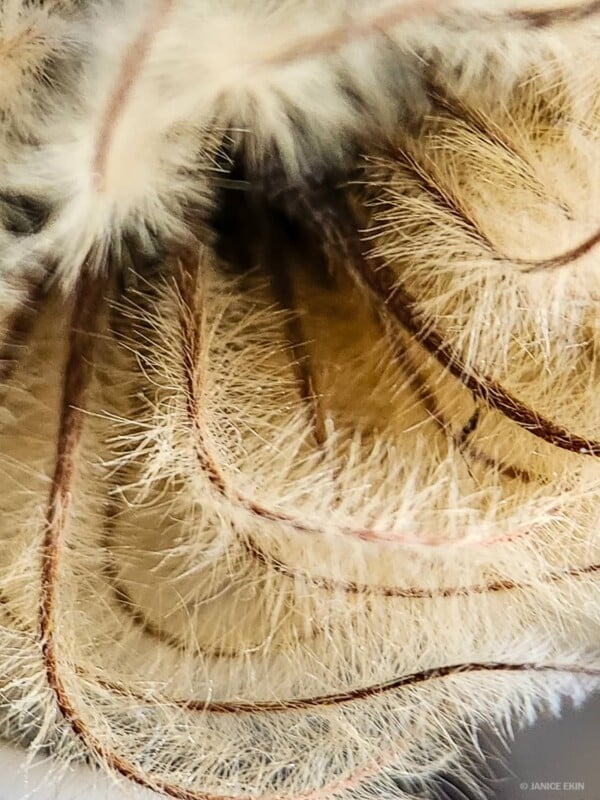
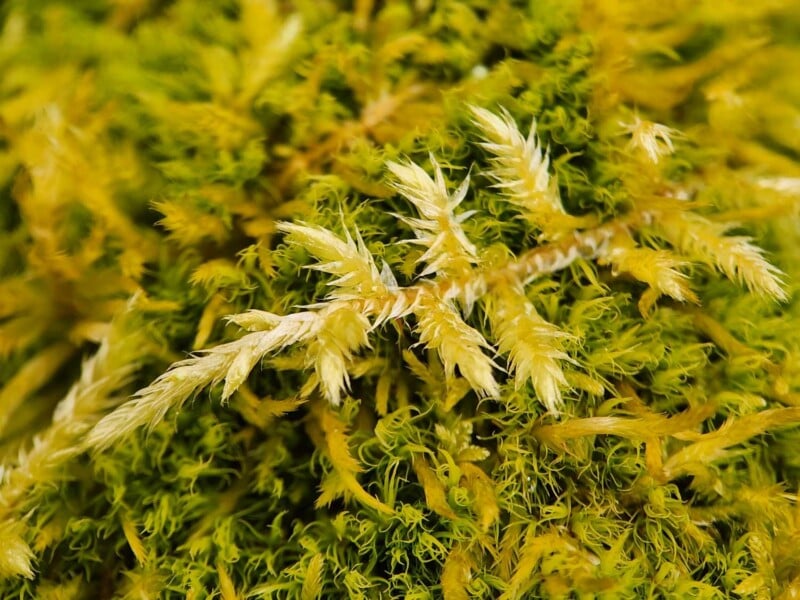
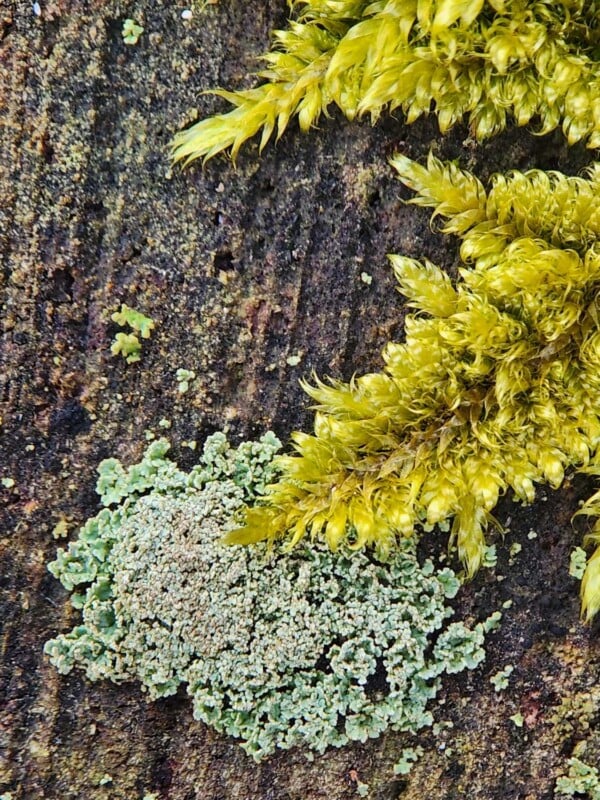
I photographed the tiny dried rose stem, under 8″ tall with its bud just under 1″, and many other flowers around the house. Many were not reachable with a tripod and came out a little soft. Some plump succulents may have no sharp edges and will only convey a sense of sharpness like the one below in the gallery.
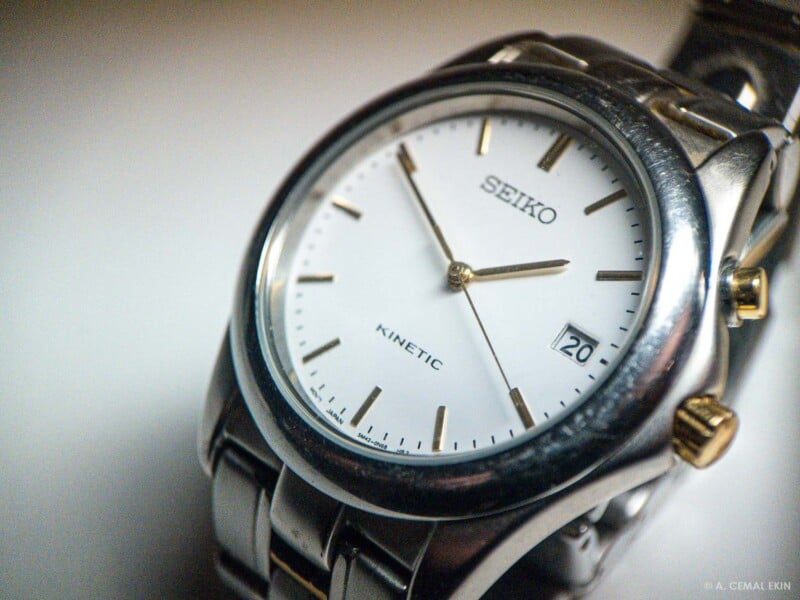
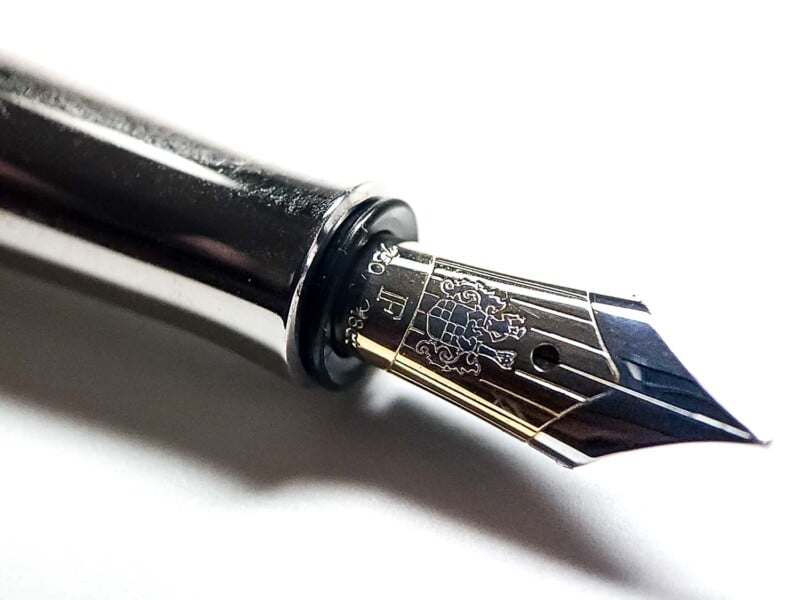
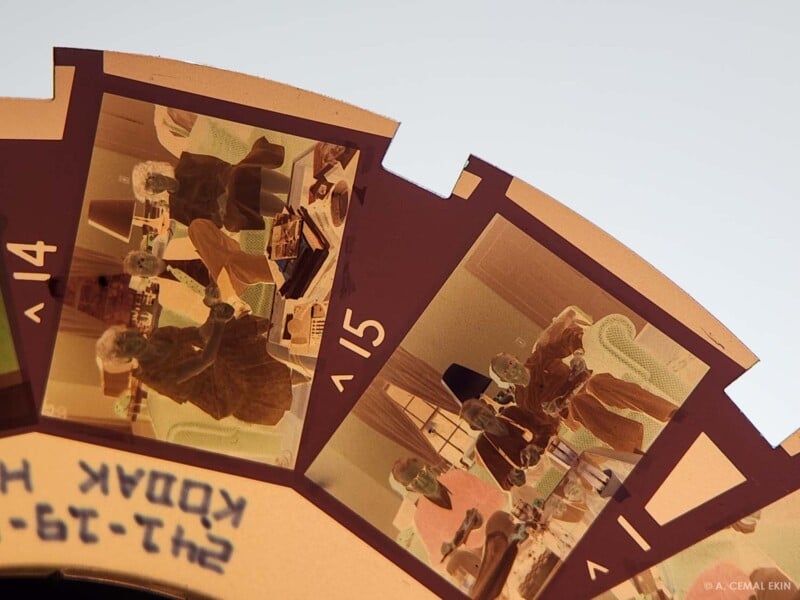
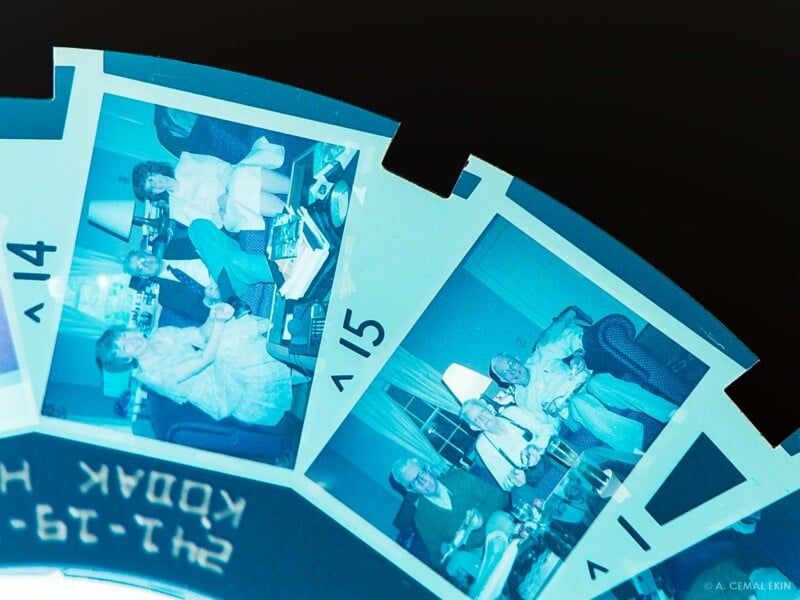
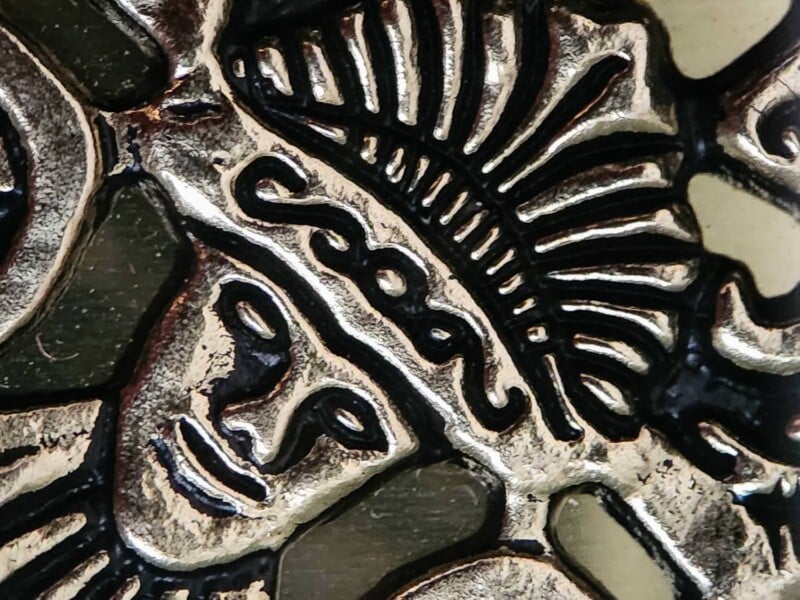
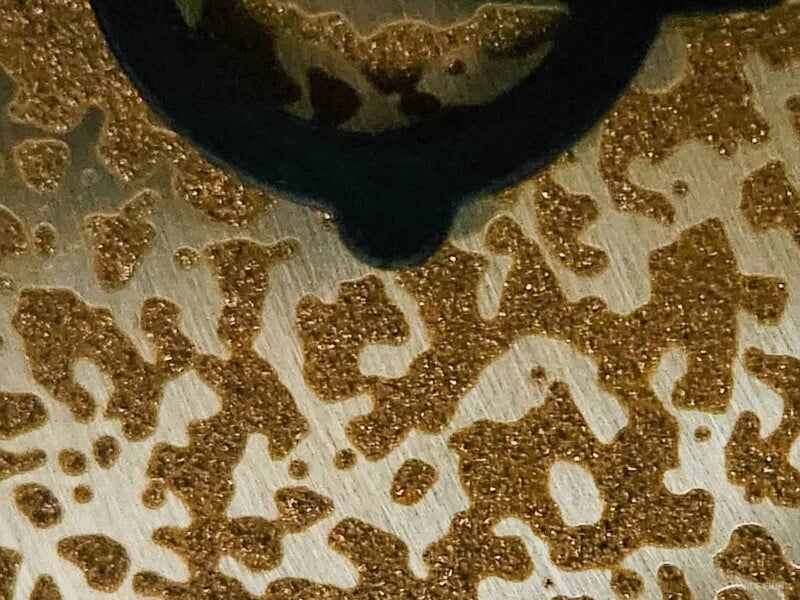
I pulled out a couple of watches and pens from my collection as macro subjects. Watches posed a little challenge, but pen nibs came out rather sharp. I love the tripod! And, I could not resist photographing an item some of you may remotely remember, Kodak Disc film. Below is the original negative next to its positive rendering, thanks to the digital tools.


A Second Photographer
I mounted the macro lens kit on my wife Jan’s Samsung. She loves abstract photography and macros. She wandered around the house with the gear and called me with a big smile: This is Fun! she said. Here are her photographs taken with the Apexel 100mm Macro Lens Kit.


A Third Pair of Eyes and Hands Yet
After we tried the macro lens kit at home, it was time for my friend Dennis to give it a shot, I highly recommend visiting his website. Dennis has extensive knowledge of macro photography and focus stacking. This section contains his experience and photographs.
When Cemal gave me the Apexel 100mm Macro Lens Kit, I noticed the improved lens attachment clamp. It is similar to a phone clamp used to mount a camera to a tripod or selfie stick, with the enhancement of a sliding lens mount. This secure phone attachment allows for the exact placement of the lens mount over the camera lens of the phone. Then the lens can be screwed into the lens mount. I found the lens mount to be a more secure place to hold the phone while photographing, being more substantial and easier to hold while pressing the shutter button.
Cemal and I both have Samsung S22 phones. He has a case installed that creates a smooth surface on the back of his phone. I do not. Apexel has considered this in their kit design and included adhesive foam strips of various thicknesses to install on the lens mount to ensure the macro lens is correctly aligned with the phone camera lens. The included instructions are clear and comprehensive.
Tripods Work Better for Macro
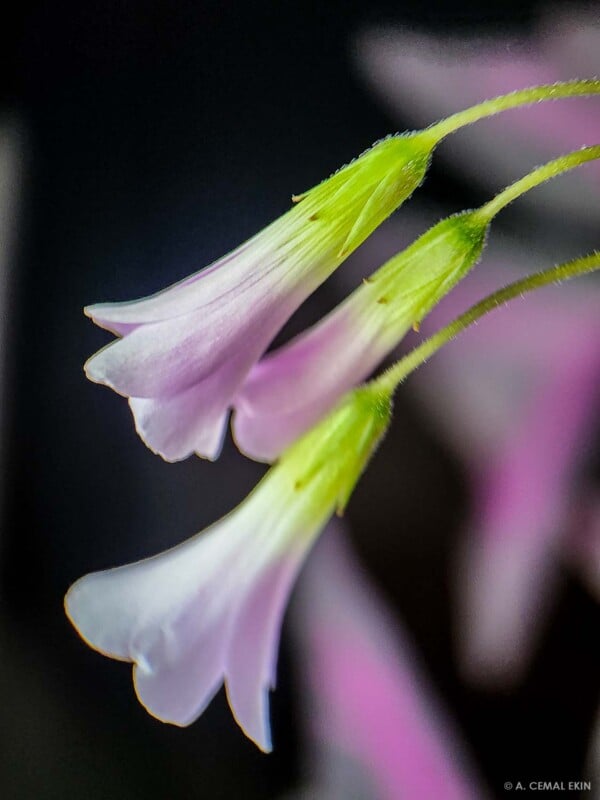
That being said, I am not a skilled phone photographer and have difficulty holding the phone steady due to my age. For lenses with significant magnification, such as telephoto and macro lenses, every tiny motion is more evident as motion blur in the captured images. This is true for full-size macro lenses on DSLRs or mirrorless cameras. To make the images presented here, I mounted the camera to a macro-focusing rail on a short tripod. The crocus photographs were made with the phone hand-held. The tripod allows the phone to be held steady, and the focusing rail allows the position of the camera to be shifted back and forth to achieve focus on the desired subject.

Phone Camera Zoom Range
I did notice that with the camera setting at 1.0X, there was a slight vignetting in the corners of the images. Setting the zoom of the phone camera to 1.1x eliminated that effect. The lens also works well within a modest zoom magnification of the phone camera. With the Samsung S22, zoom settings up to 2.8X had good results; more than 3X would cause the screen to go dark. That doesn’t seem to be a problem though as there is plenty of magnification available with this macro lens. Since the weather was good I decided to shoot outdoors.


The Polarizer Brings Out the Color
Apexel includes a polarizing filter in the macro kit. A handy filter when photographing subjects with reflective surfaces. Vegetation often benefits from the use of a polarizer. In these two examples, the polarizer eliminates the shine off the wet surfaces and allows more color to be visible. The polarizer is very thin and difficult to grab when attempting to remove it from the macro lens. I found that I was able to easily remove it by leaving the rubber lens cap on the lens, gripping it near the filter, and turning the lens with my other hand.


Shallow Depth of Field Revisited
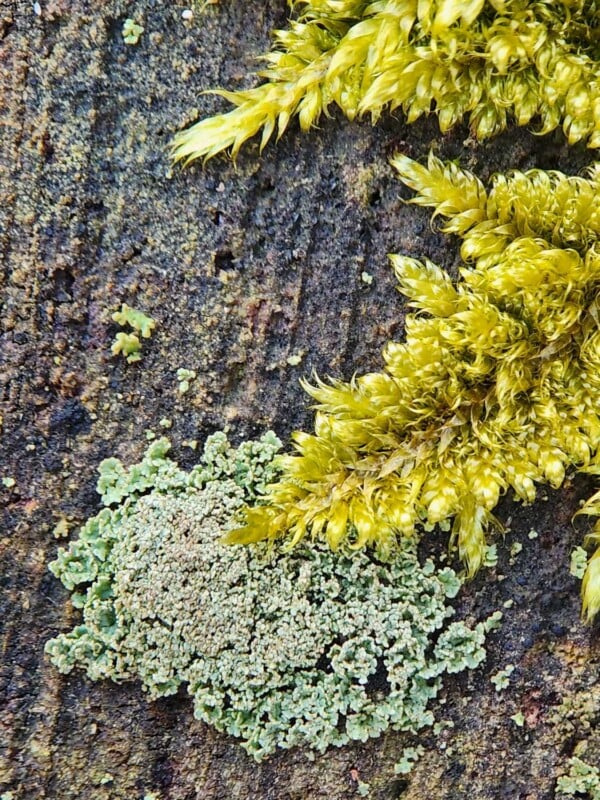
Depth of field is the distance between the nearest and the furthest part of an image that appears to be in sharp focus. This macro lens, as with any macro lens, suffers from a shallow depth of field when set at a large aperture. Accessory lenses such as this macro lens do not have an aperture control which could increase the depth of field. However, a technique known as focus stacking merges the sharp areas of multiple images to create a composite image that appears to have more depth of field.
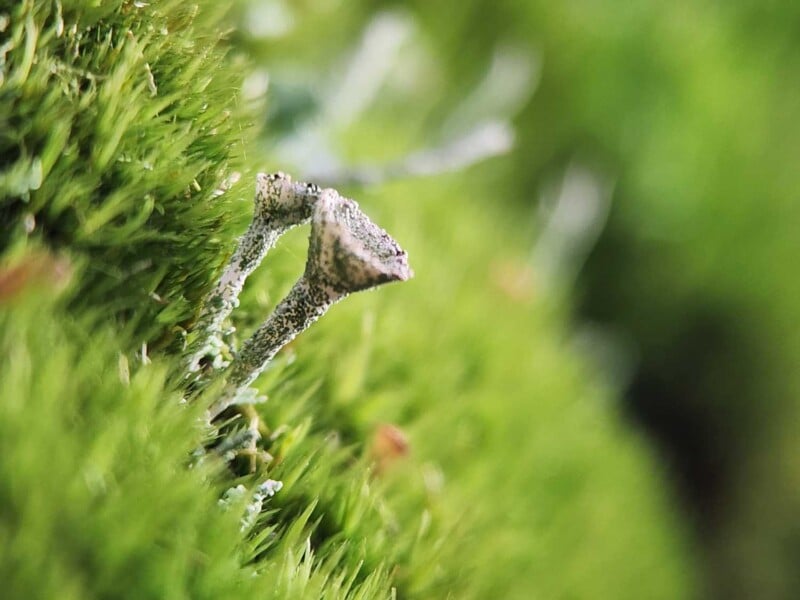
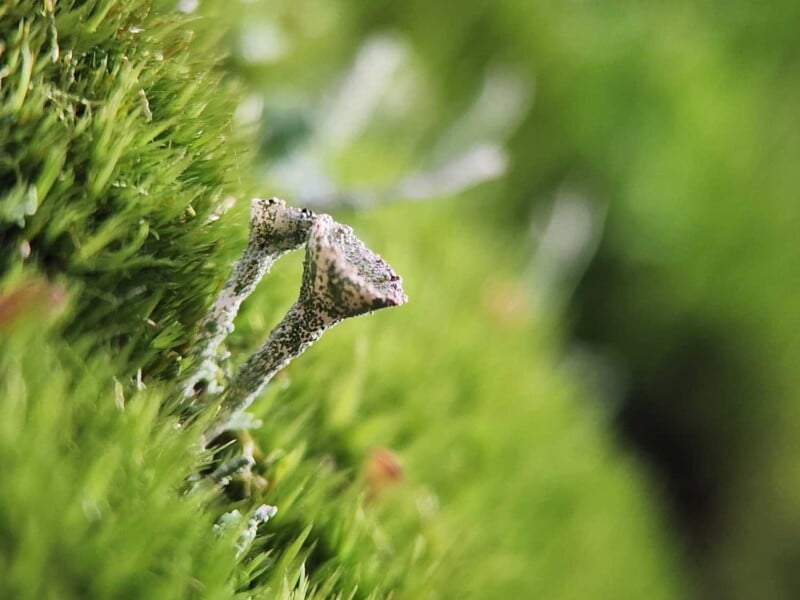
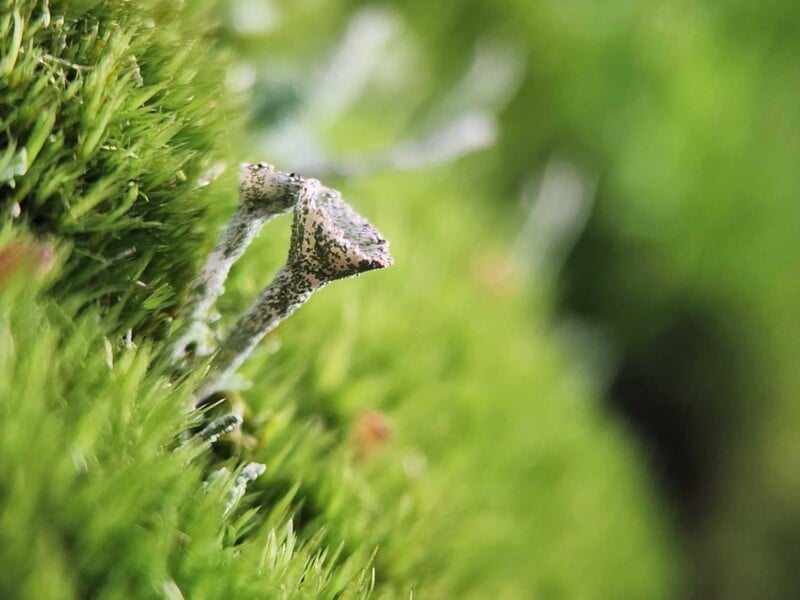
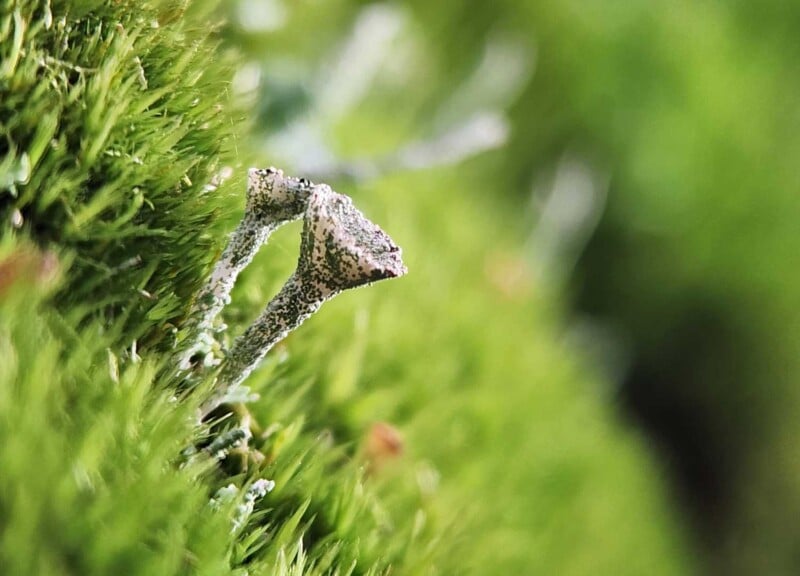
Focus Stacking May Help
I took multiple images of this pixie-cup lichen (Cladonia) and chose three that had parts of the cup and stem in focus. I brought the three images into the Helicon Focus program and merged the three images into one.
Overall, I was very impressed with the thought that went into the design of this macro lens and phone mount. The images appear sharp, and the device was easy to work with.
I have no idea if it would work, but if the optics work out, perhaps a small disk with different apertures placed in the mount between the macro lens and the phone camera lens would increase the depth of field to further improve the utility of this well-made macro lens kit.
Observations and Suggestions
- This mounting system is far better than the slide-in clip of the microscope adaptor I reviewed, we all agree.
- I think there is a version of the microscope available on this same mount which I would have preferred.
- The grip on the camera is quite strong yet easily removable.
- The image quality is very good, especially when you get a good angle.
- Small subjects, like pen nibs or flat objects, are particularly sharp.
- Mounting and positioning the lens is quite easy.
- I wish there was a short leg that could be flipped out at the bottom of the adaptor. That could serve as a leg to steady the phone away from a subject on a flat surface.
- I experimented by putting a small Agfa Loupe and the result was quite steady. See the picture in this block.
Summary
- The Apexel Macro Lens Kit is more user-friendly than the microscope adaptor, at least to me, and Dennis agrees.
- The lens mount has a strong grip on the phone retaining its position.
- The lens-to-subject distance is comfortable.
- Without any control on the f-stop on the phone, the depth of field is shallow but not a fault of the macro kit, see Dennis’s suggestion above.
- When properly positioned, the results are quite sharp.
- The tripod mount and the cold shoe mount for a small light are great additions.
About the author: A. Cemal Ekin is a photographer based in Warwick, Rhode Island who has been shooting for roughly 60 years. The opinions expressed in this article are solely those of the author. Ekin retired as a professor of marketing emeritus from Providence College in 2012 after 36 years of service there. Visit his website here. This article was also published here.