Testing the Apexel 200X LED Lens: A Microscope for Your Phone
I received a request from Apexel to review a phone accessory that connects to microscopes, telescopes, or binoculars. I replied to inform them that I had none of those pieces of equipment but I might be interested in reviewing a macro or microscope attachment to mobile phones.
Full disclosure: A free review unit of the lens was provided for the purpose of this review. Although I did not pay for the review sample, the links you see in this article are not affiliate links.
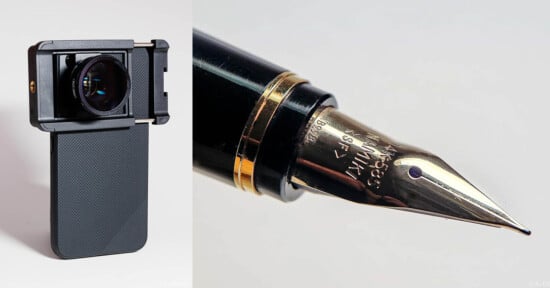
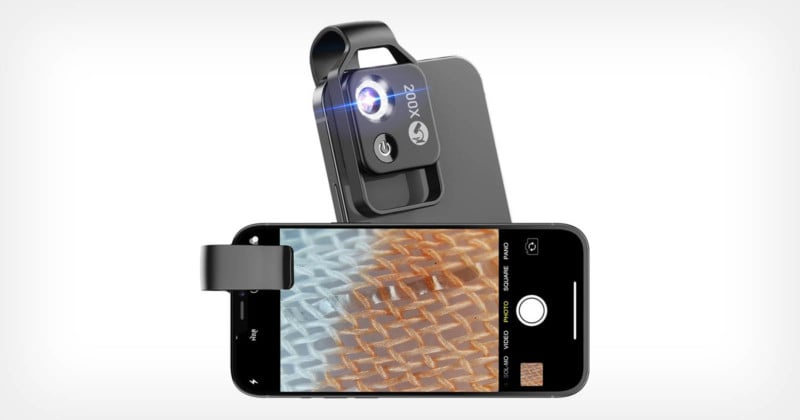
Apexel 200x LED Microscope Lens
I do not rely on my phone’s camera as my primary or even secondary photography tool. Yes, I take some pictures with it to record something or when I do not have a camera with me. The microscope adaptor intrigued me as it opened the possibility of using my phone camera for something I cannot do with my Canon R7.
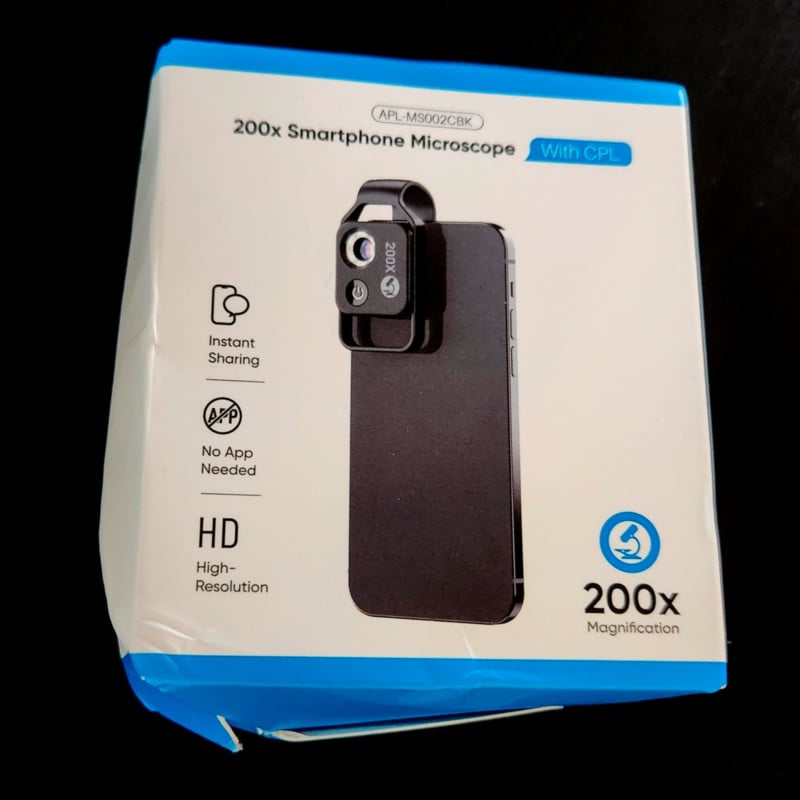
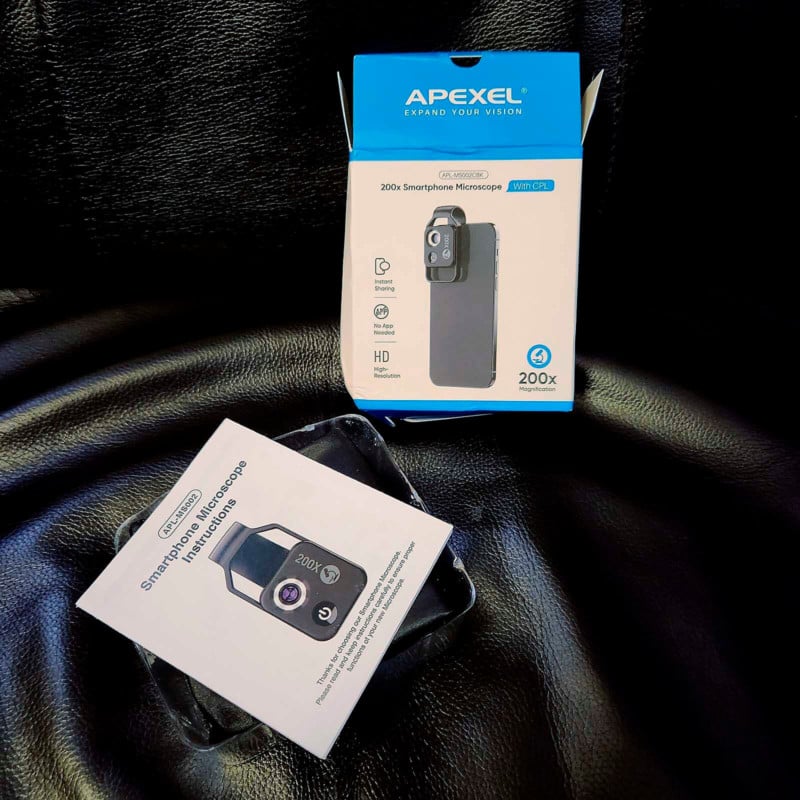
I was notified when the 200X LED Microscope Lens was shipped and I followed its travels over 8,300 miles from China. It arrived in a plastic bag with product packaging inside. The product packaging was slightly crushed but did not cause any harm to the microscope lens or its charging cable. Here are the package contents.
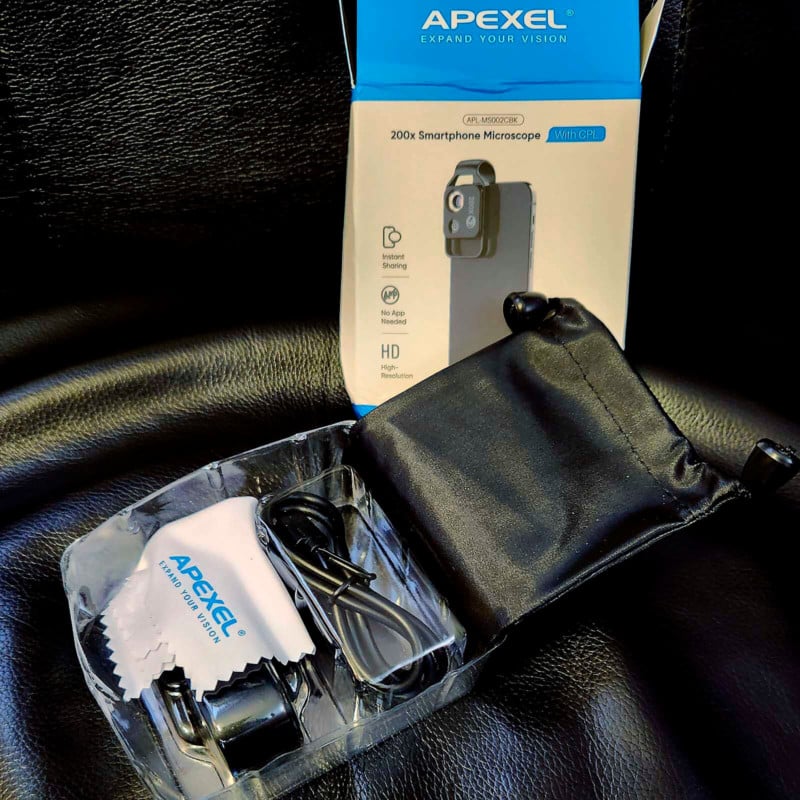
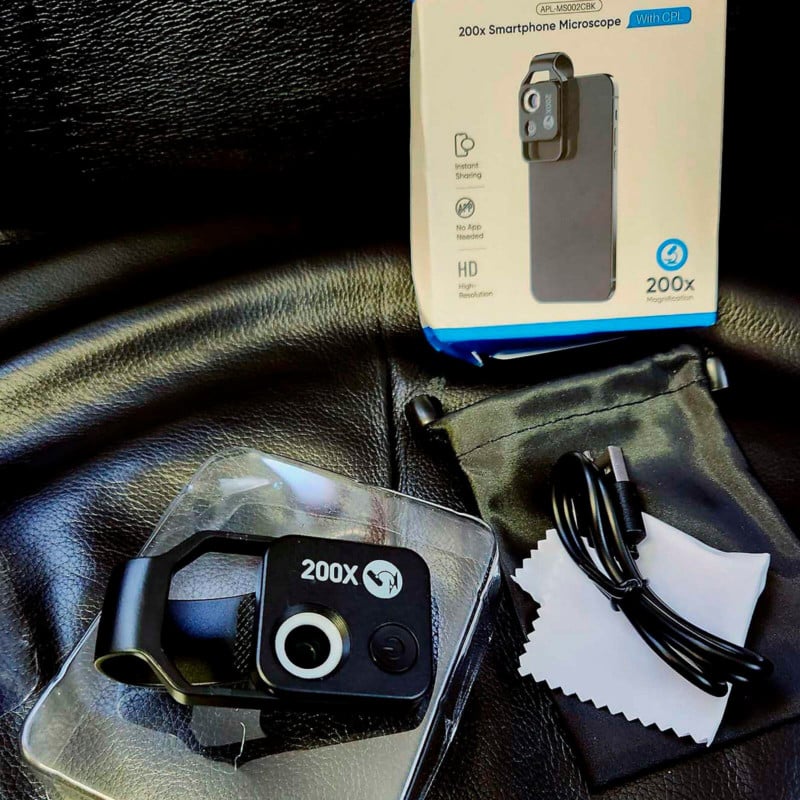
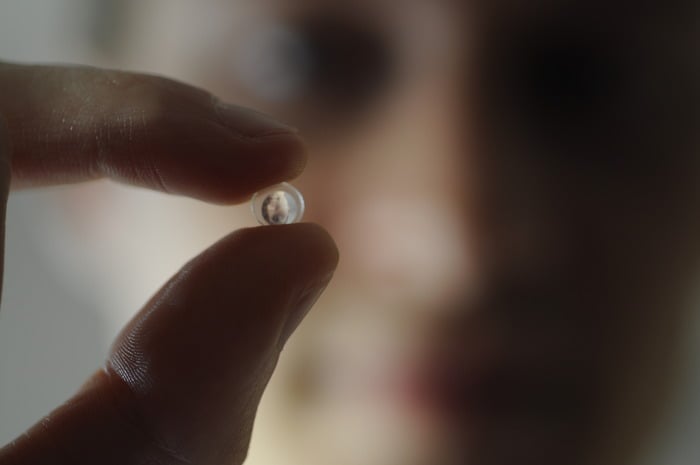
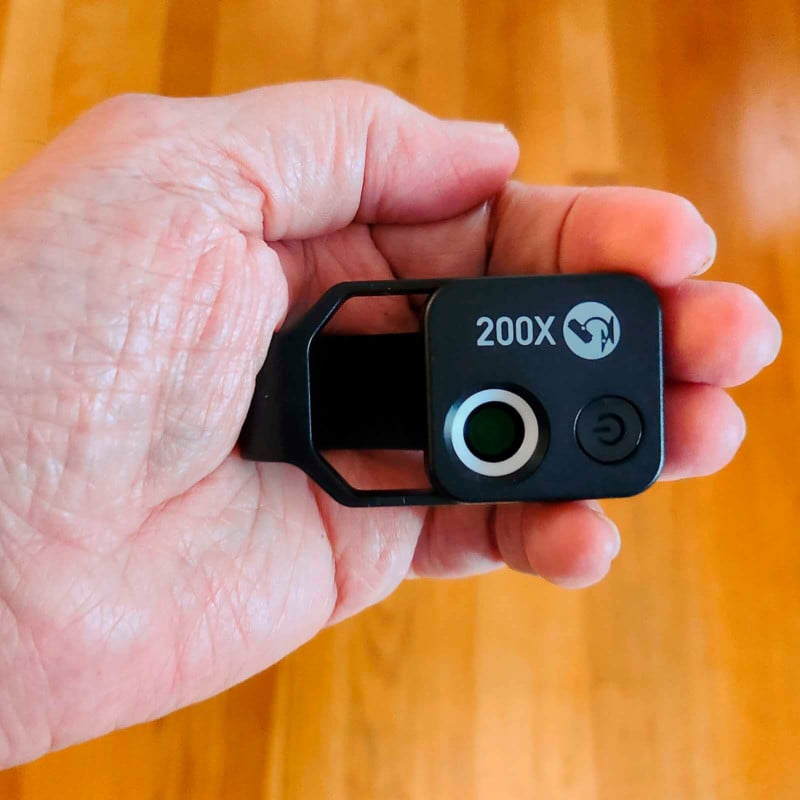
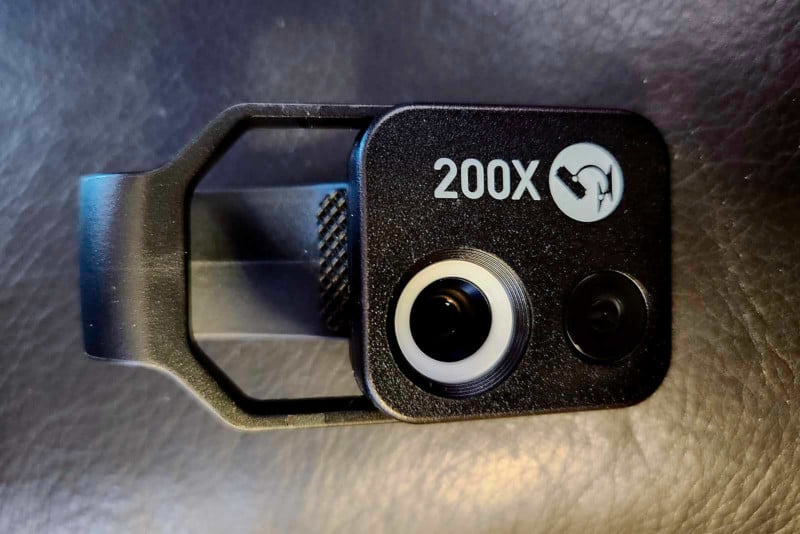
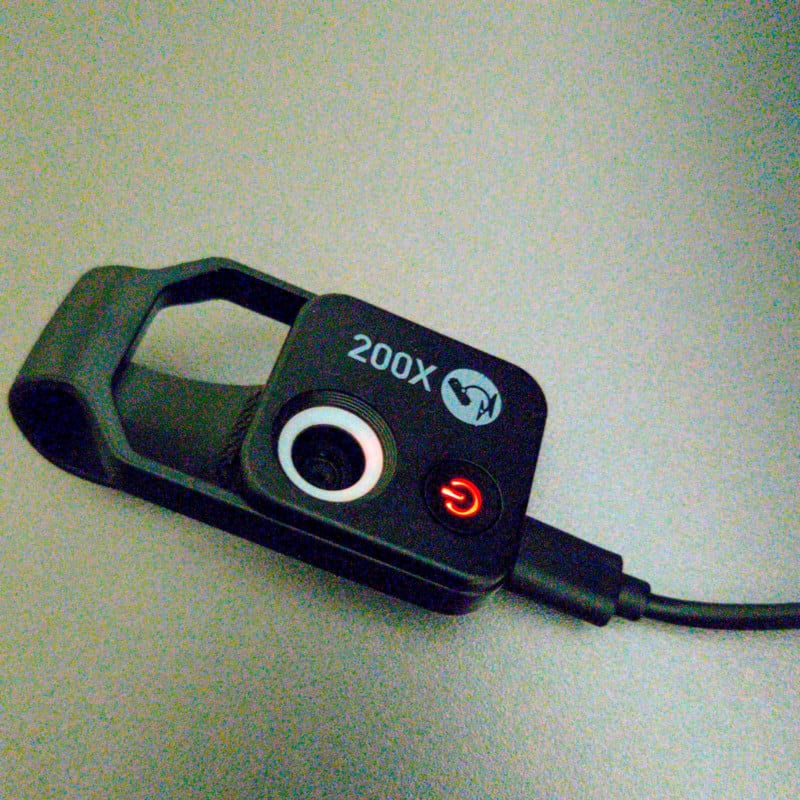
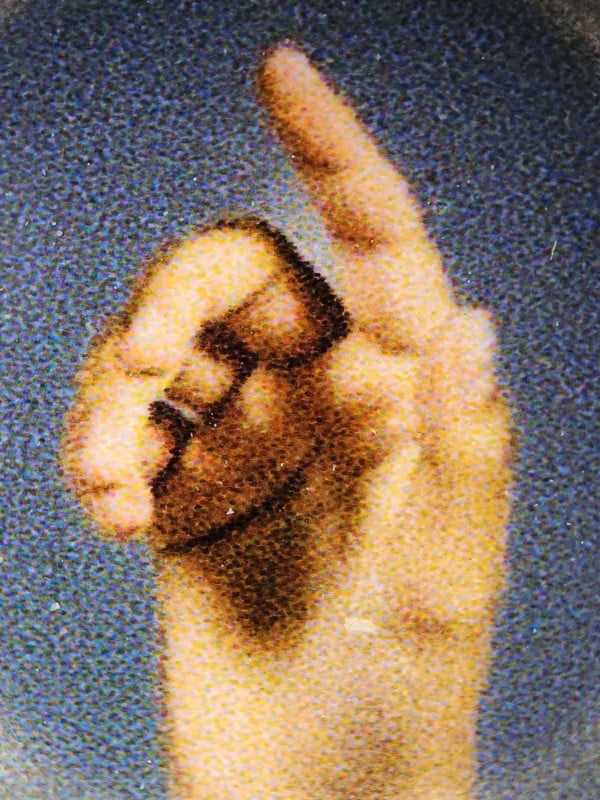
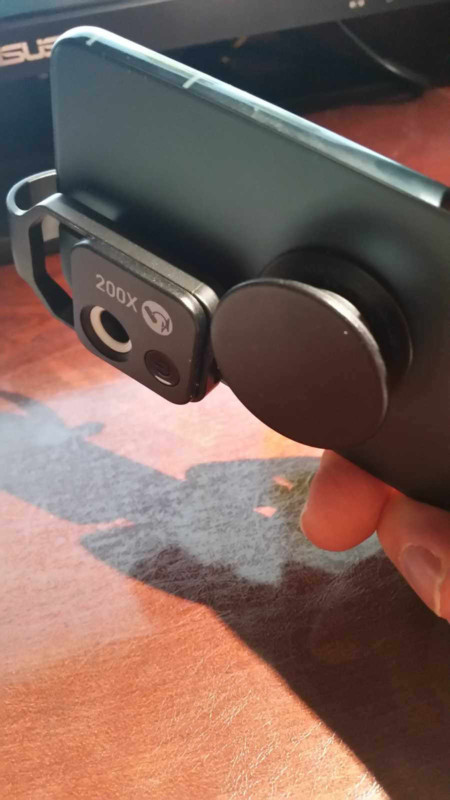
As you can see, the user manual is very small and hard to read. I scanned its English pages and created a PDF file for easier reading. After checking that all the pieces were intact, I handled the microscope to take a picture of it in my hand to give a sense of size. Here is that picture along with one that shows the attachment by itself.
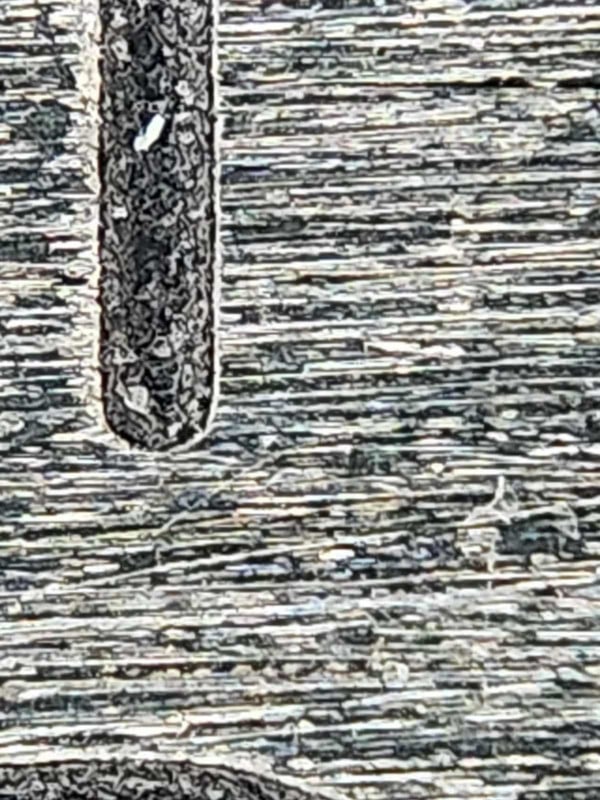
The urge to try it on the phone was strong, and I started pushing it against things nearby. Oh, my corduroy pants. How about my shirt? Oh, oh, my hairy fingers would be nice …
I quickly realized that this attachment would be a challenge to use. It moved on the phone as I tried to touch it to a subject, I had to zoom in at least a little to cover the full frame, and it favored flat subjects. My shaky hands were a part of the problem, but the setup was too unstable for me. I had to regroup and approach it differently.
Charging the Microscope Lens Light
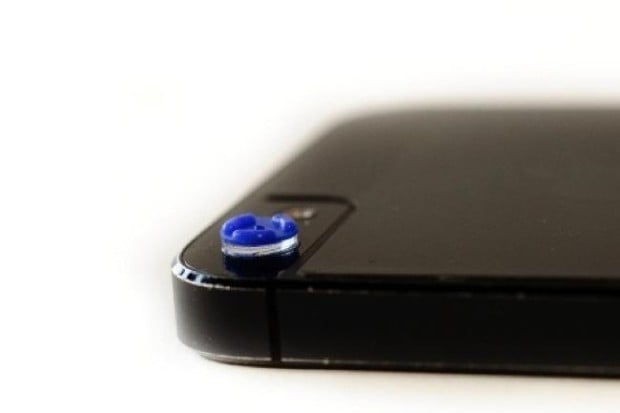
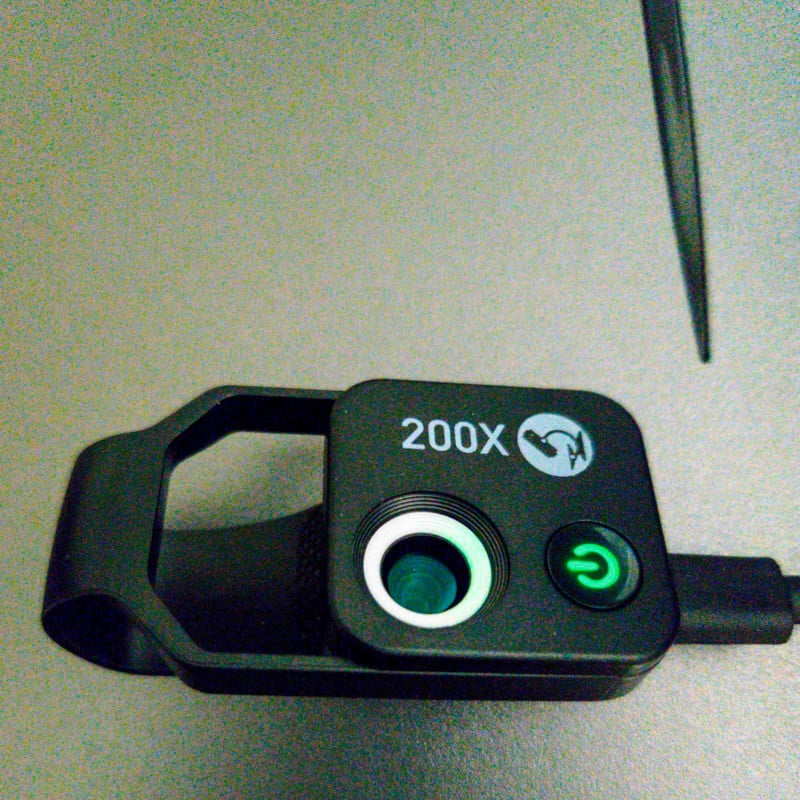
The 200X LED Microscope Lens has a tiny built-in LED light to illuminate the subject under it. It has a built-in battery that charges with a USB cord. The USB-C end goes into the lens and the USB-A end into the computer USB port or a plug-in charger port. You need to push it in until it snaps and the power button turns on. The light is red while it is charging and turns green when the battery is fully charged.
Lacking the Model With CPL
When they offered to send a sample for me to review, I asked for the model that had a circular polarizer built in. Unfortunately, they sent a review sample without that feature. I was interested in doing some cross-polarized lighting experiments.
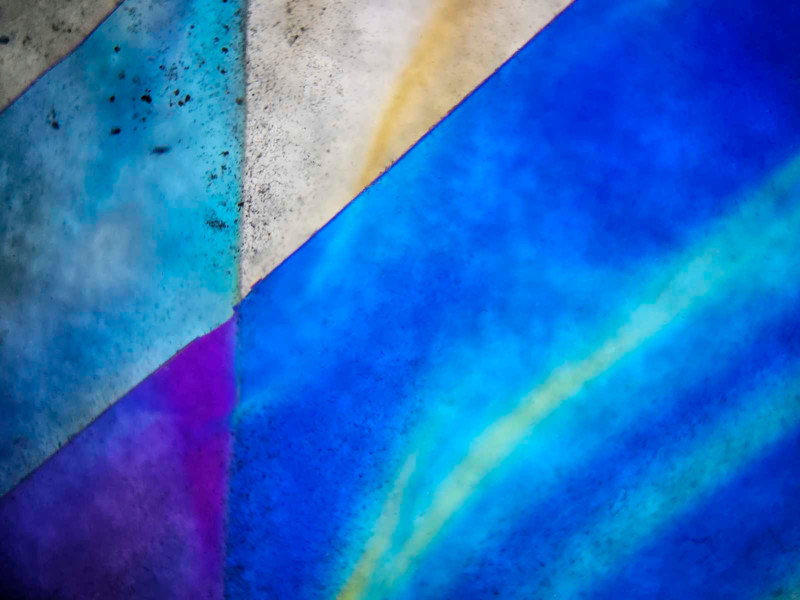
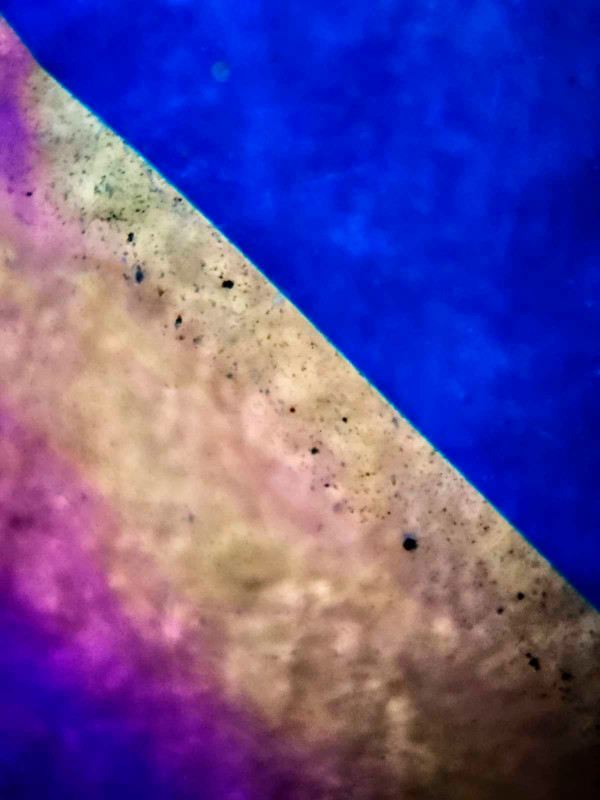
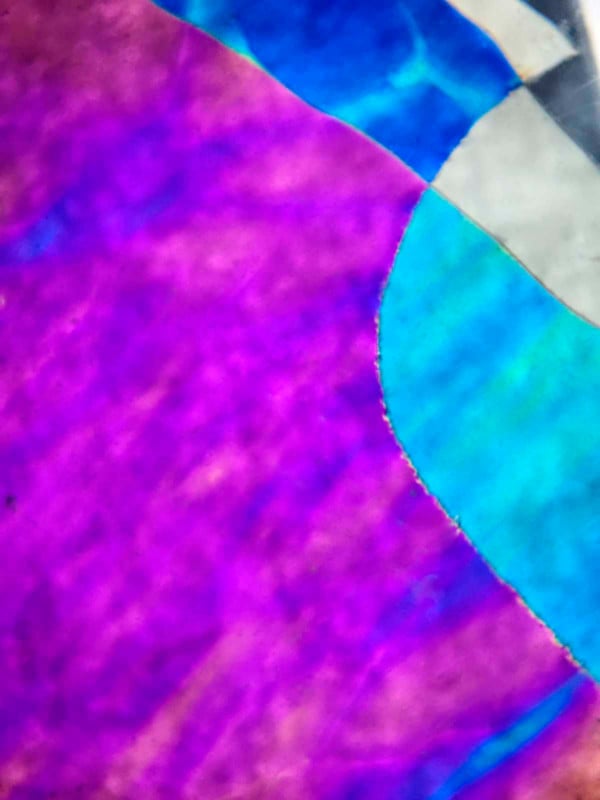
I dug up old plastic sheets of polarizers and started looking for cellophane. When placed between two such filters, cellophane layers create random colors that I wanted to photograph. We don’t use much cellophane these days and I had to open a very old package of cigarettes going back to 1990 when I quit smoking.
Next, I had to find a light source and I lucked out with a large LED lantern. I placed a paper napkin on the front glass to diffuse and reduce the light and began experimenting. The thickness of the polarizing plastic made focusing on the cellophane between two sheets almost impossible. But, I have some frames to share, mainly abstract creations rather than microscopic ones. Click on thumbnails to see large images.


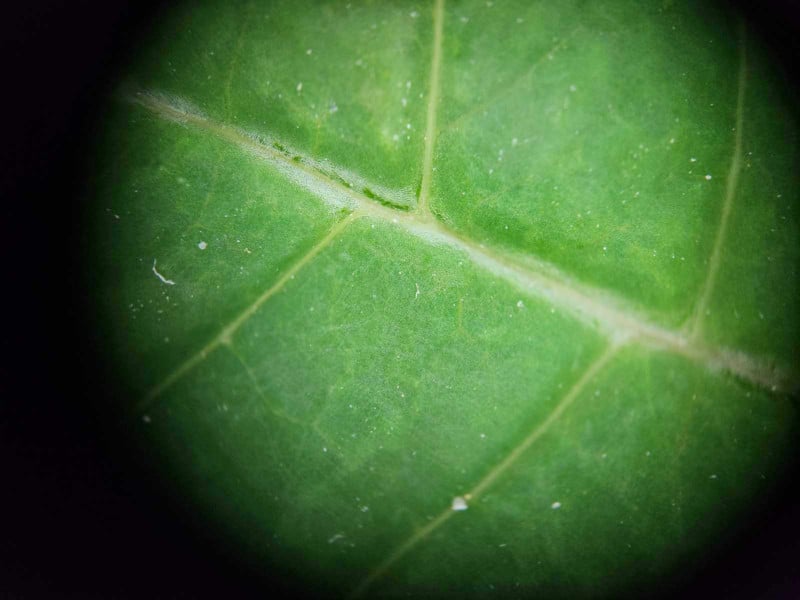
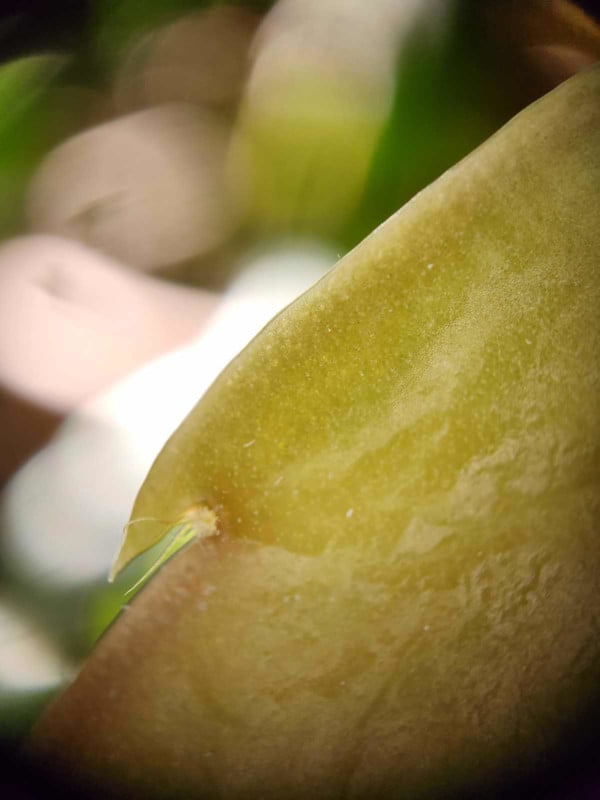
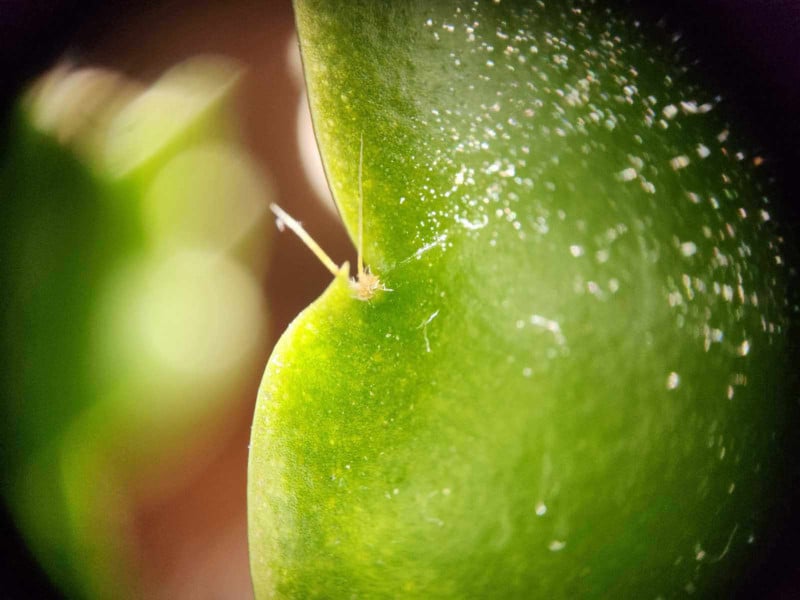
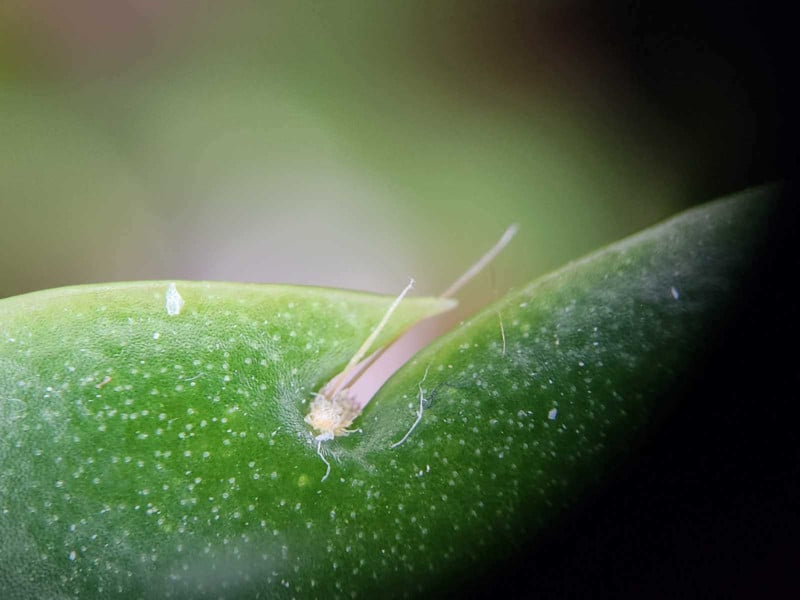
Find Some Flat Subjects
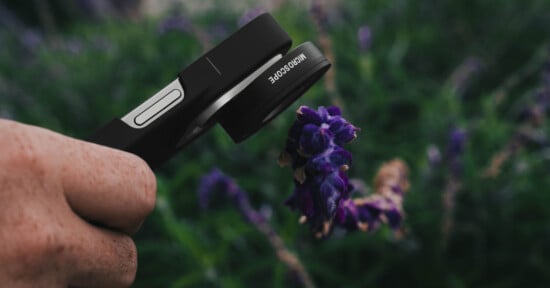
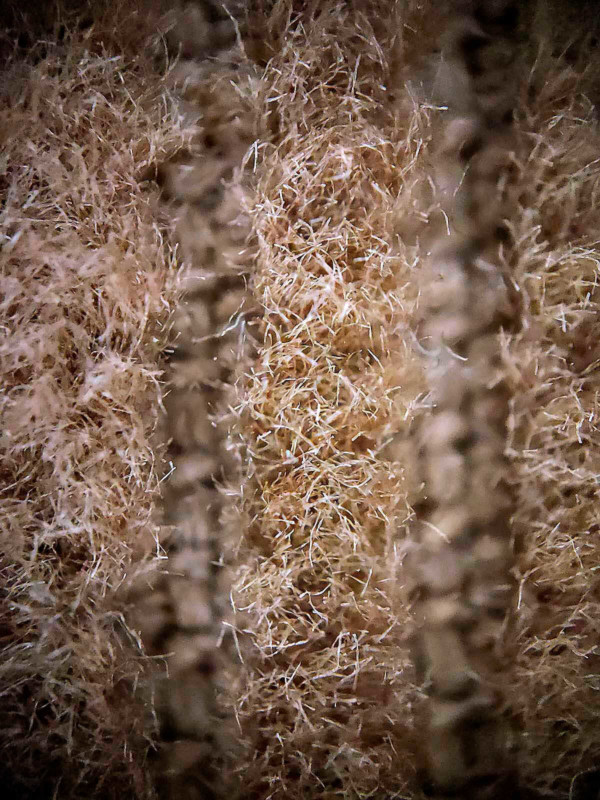
After these experiments, I needed to find some flat subjects like wood veneer, a leaf, or a compact flash card. If you watch other reviews and their videos, including those recommended by Apexel you will see that holding the subject in one hand and applying the phone with the microscope attachment on it is the preferred way of photographing. If your hands are not as shaky as mine, that is!
I found placing the subject on a flat surface and placing the phone on it. Even then, the movement of the phone and the microscope was unavoidable. The maximum angle of coverage seems to be an area of about a quarter inch square. After zooming in, it gets smaller. If you have multiple lenses for wide-angle or telephoto shots, zooming in or out too much may switch the lens leaving the microscope adaptor out of the picture, no pun intended.
Turn on the Light
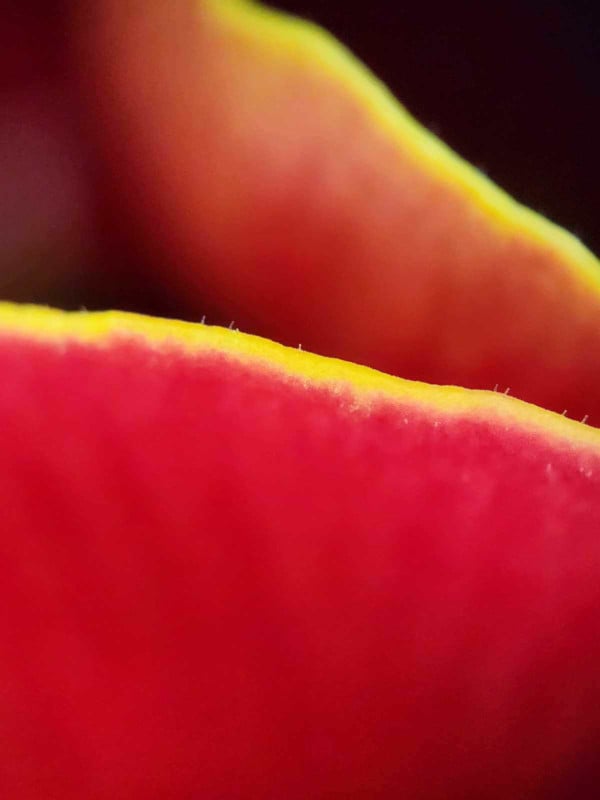
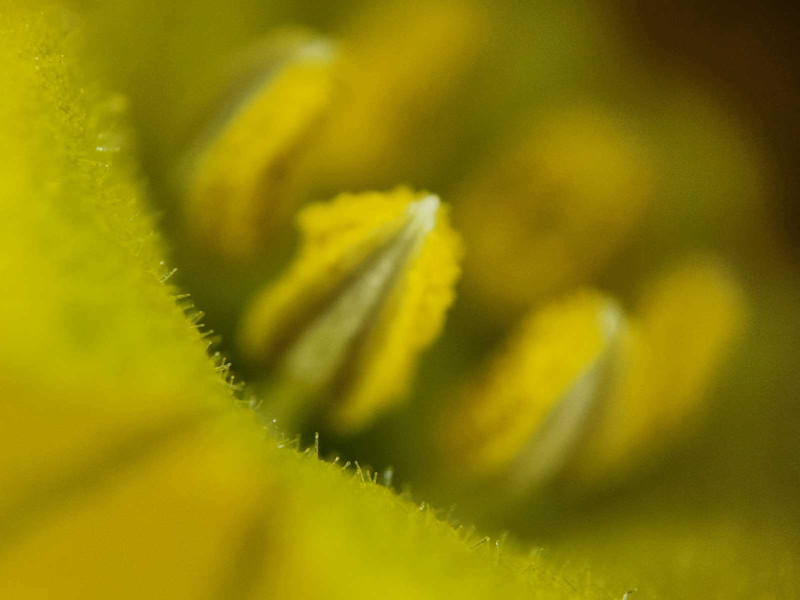
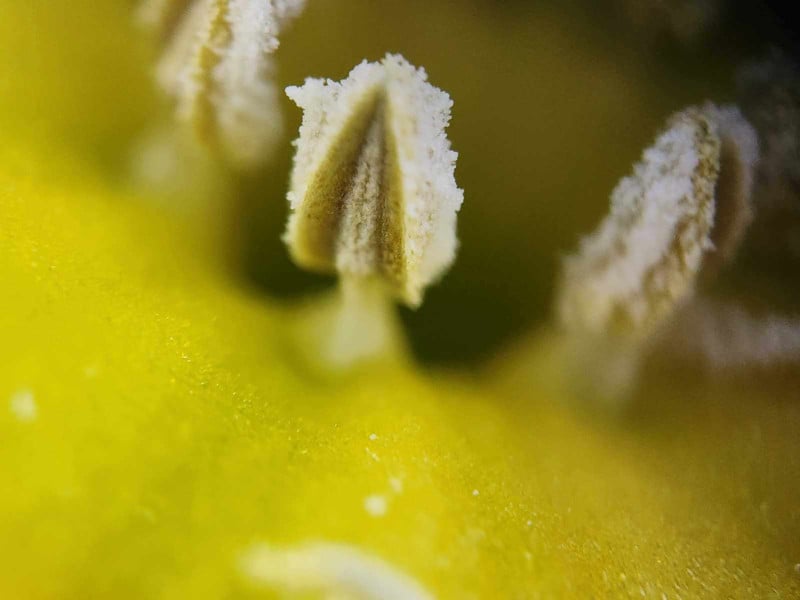
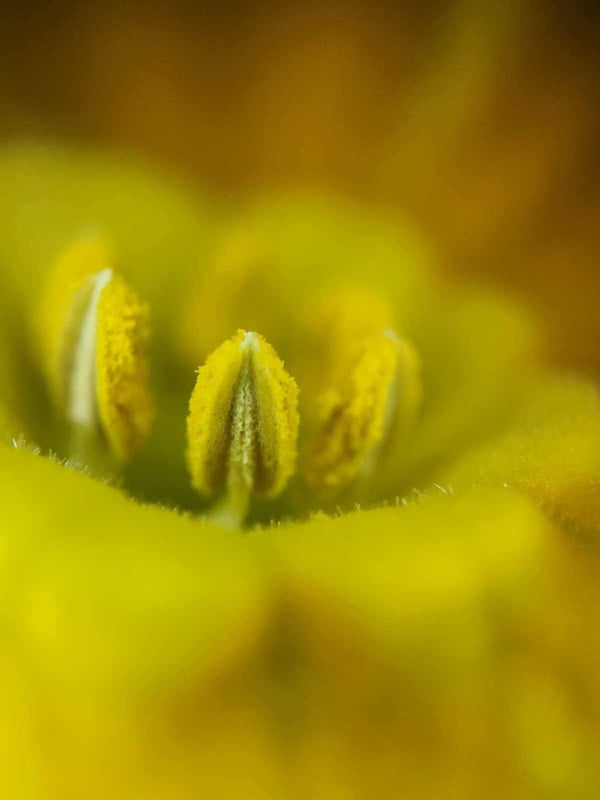
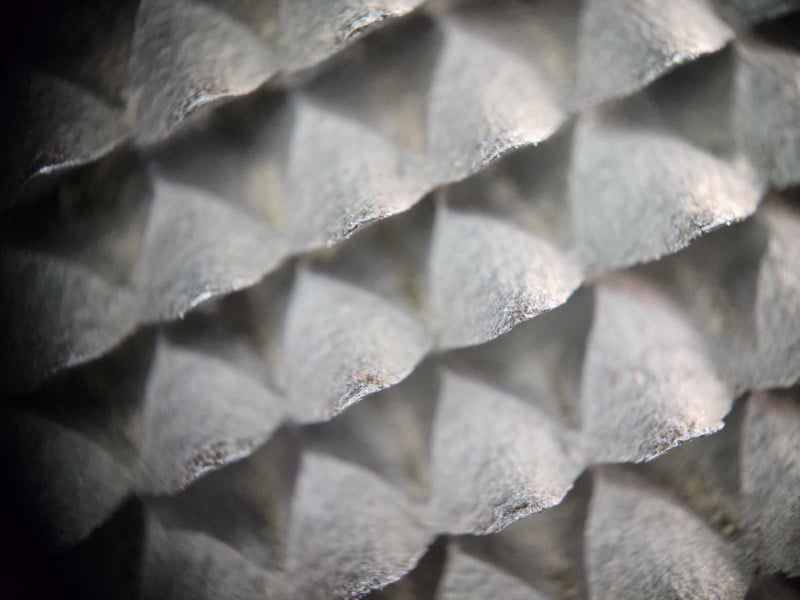
Before you engage the lens with the subject, press and hold the switch on the Apexel microscope attachment to turn on its tiny ring light, then bring the face of the microscope and touch the subject. If it is fluffy, like corduroy pants or a fading rose petal, any part that protrudes into the lens cavity will be out of focus. There is practically no depth of field on this microscope attachment.

Suggestions for Improvement
A few changes may make this attachment easier to use:
- I am not sure if this is possible, but if the attachment were a little thinner it would not need to touch the subject
- A thin sheet of rubber on the flat side that touches the lenses on the phone will make it steadier on the phone
- Ditto for a more rubbery clip that rests on the phone surface and a little larger surface of the clip touching the phone glass
- A locking mechanism once the proper position is obtained on the phone. I tried a rubber band but that did not work
- A built-in polarizer on all models
Summary
- Apexel 200X LED Microscope Lens is an interesting accessory if you want to see things up close, very close
- Upon receiving your lens, plug it in to charge the battery to have its tiny ring light ready
- Position the microscope lens in front of your phone’s standard camera lens and center it although I tried it with the telephoto lens and it works to yield different kinds of images
- If you see dark corners, you need to zoom in on the phone screen which will increase the magnification
- If you zoom in or out too much, your phone may shift to another lens and you will lose the image through the 200X microscope lens
- Try to use flat or close-to-flat subjects if you want sharp photographs
- Touch the Apexel lens to the subject to focus
- Dust off the subject, every piece of dust may look gigantic
- Try the attachment with and without the phone case to see which one gives you better focusing
- Steadier hands than mine will reduce some of the problems I experienced
A Second Pair of Eyes and Hands
After I finished working with the microscope attachment, I asked my friend Dennis to give it a try. He is a highly accomplished photographer and a very good problem solver in general. His engineering background and highly skilled hands earned him the nickname, MacGyver!
What follows are his observations — in his own words — and photographs he provided. And you can see his work on his Web site. I will put a link to one of my favorite photos of Dennis, you can move around from there.
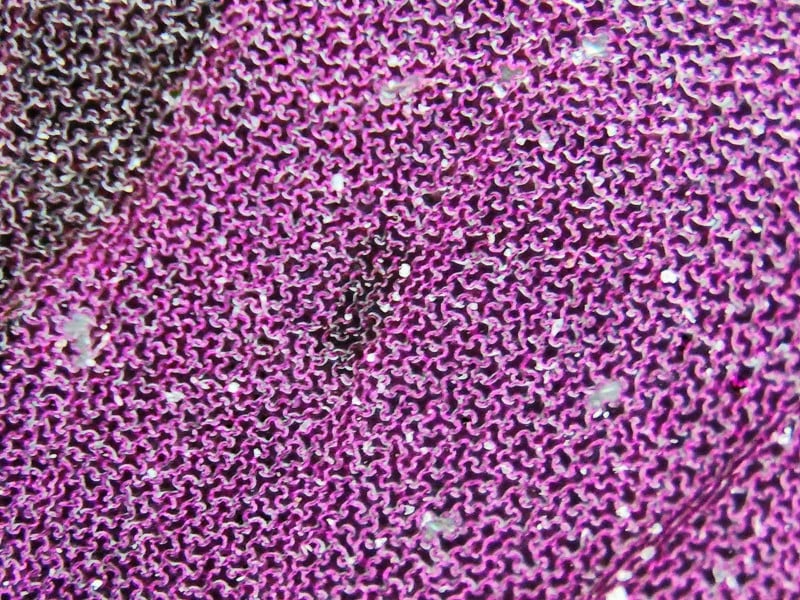
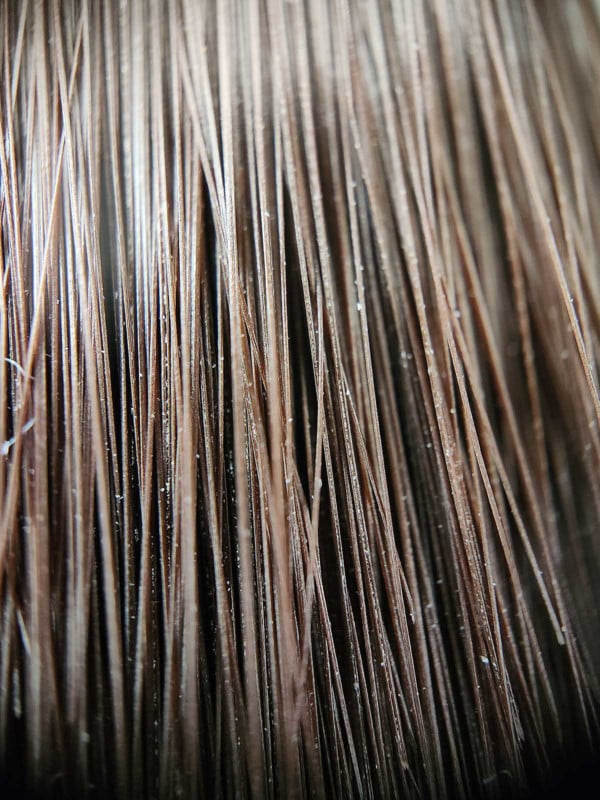
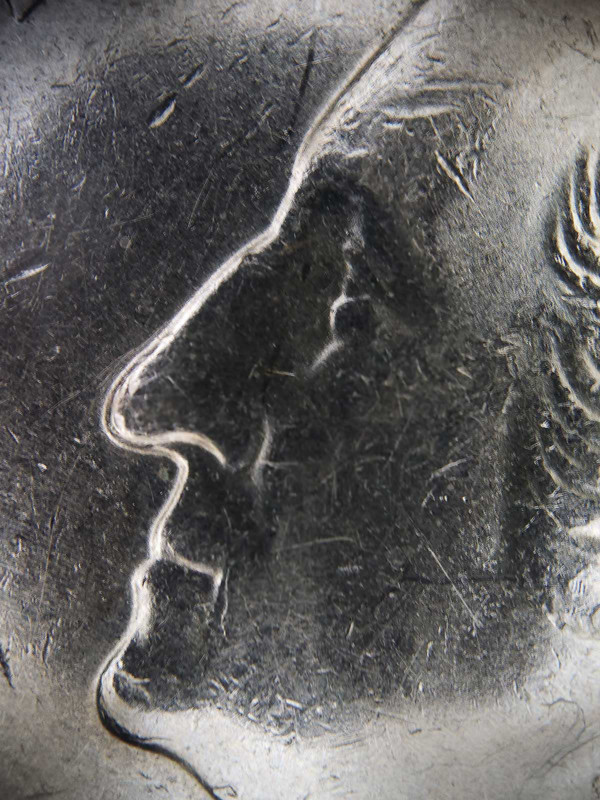
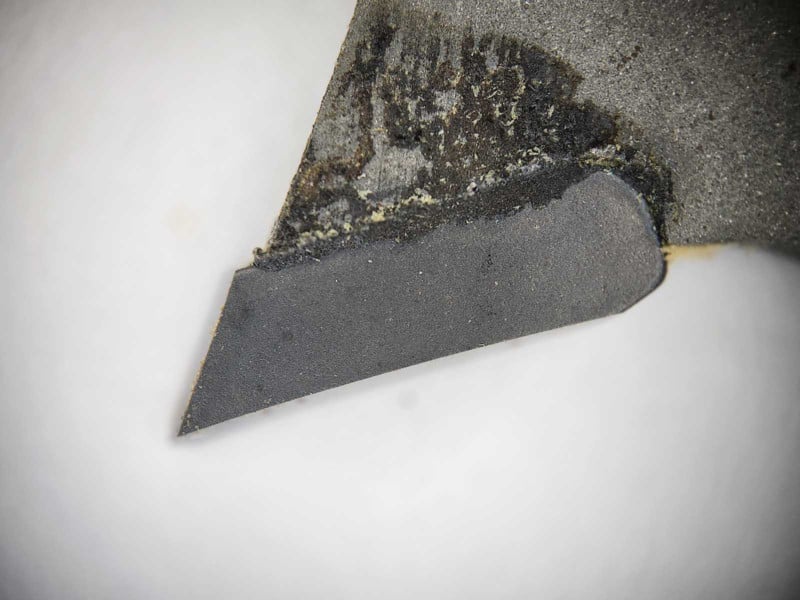
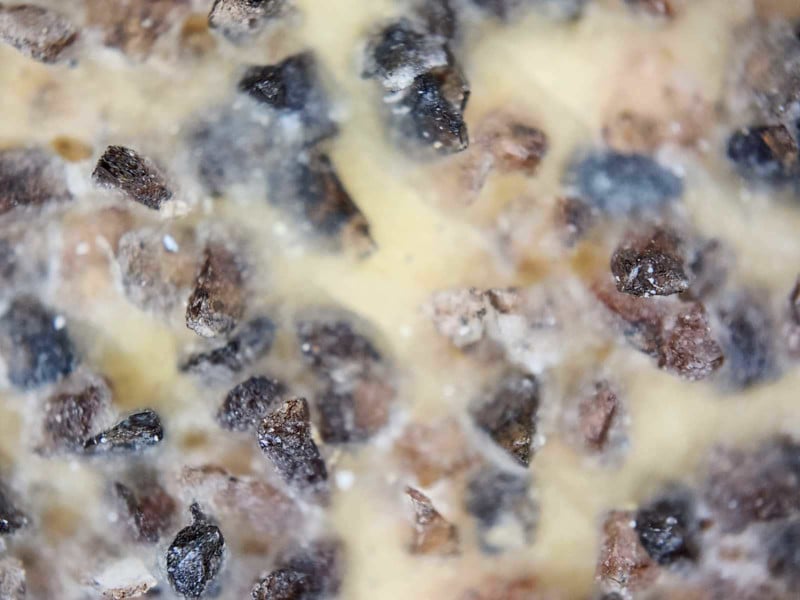
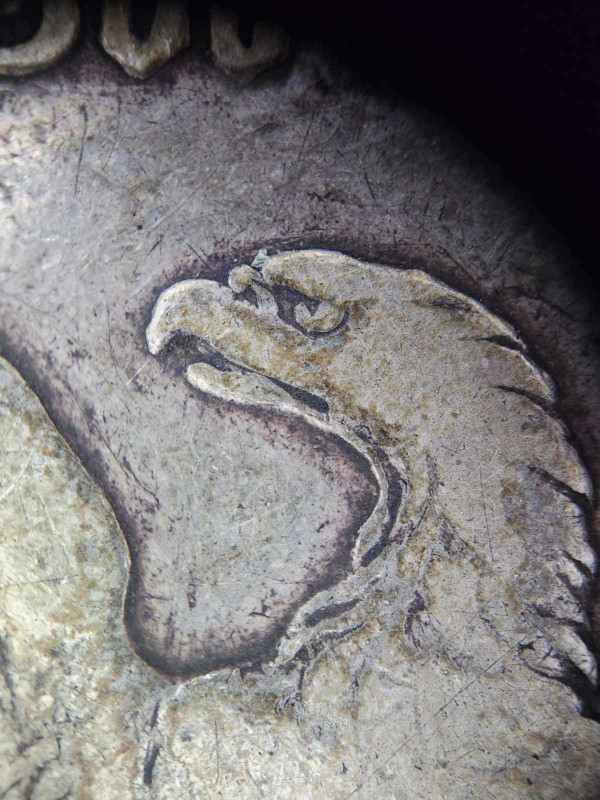
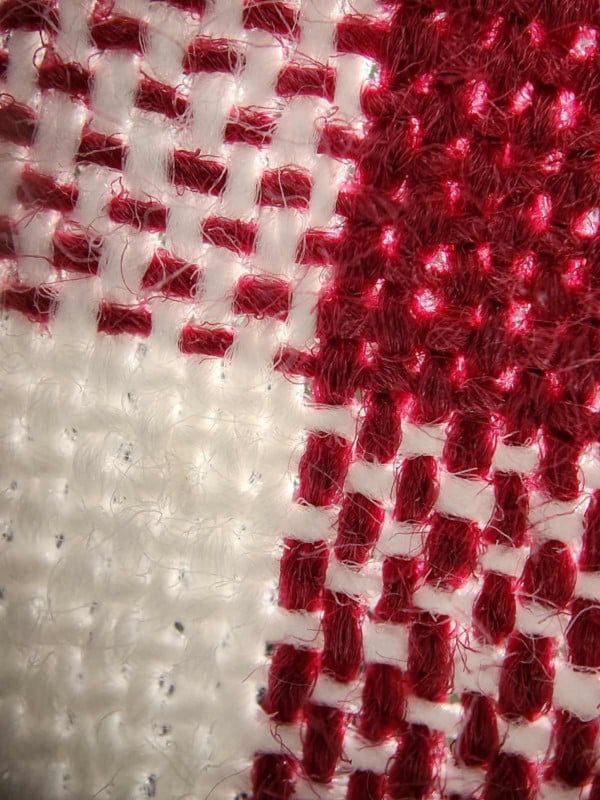
Initial Observations With Flat Subjects
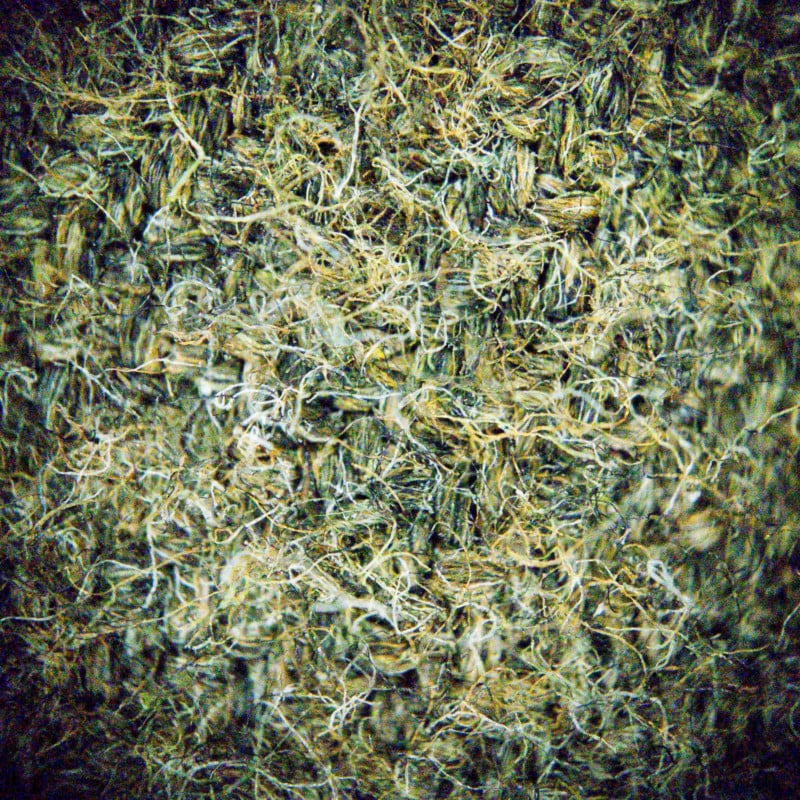
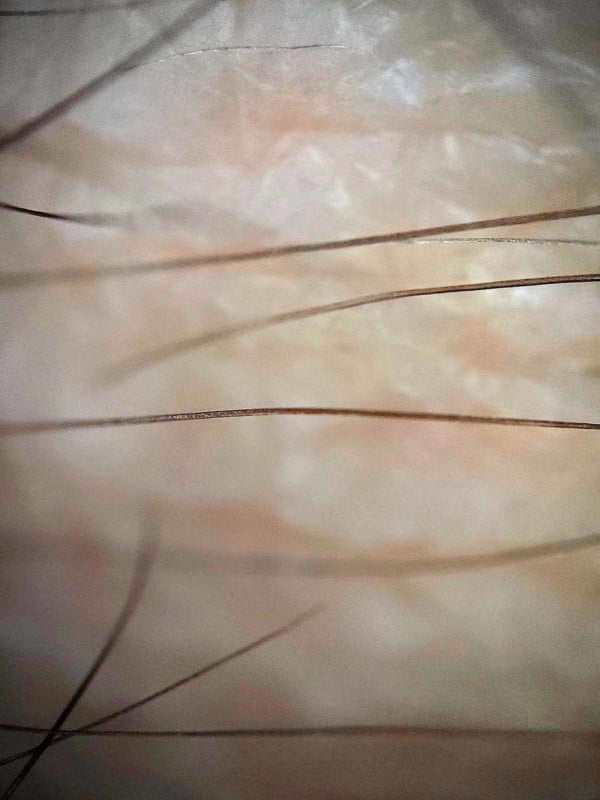
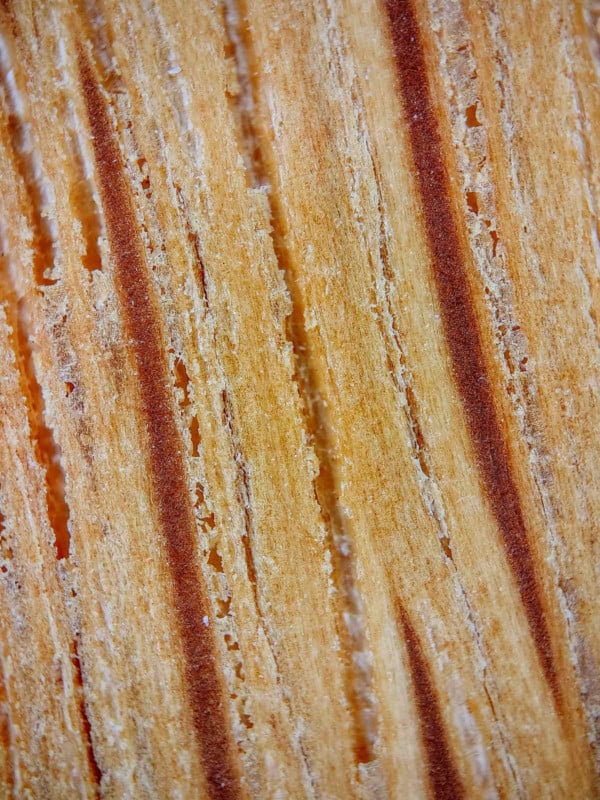
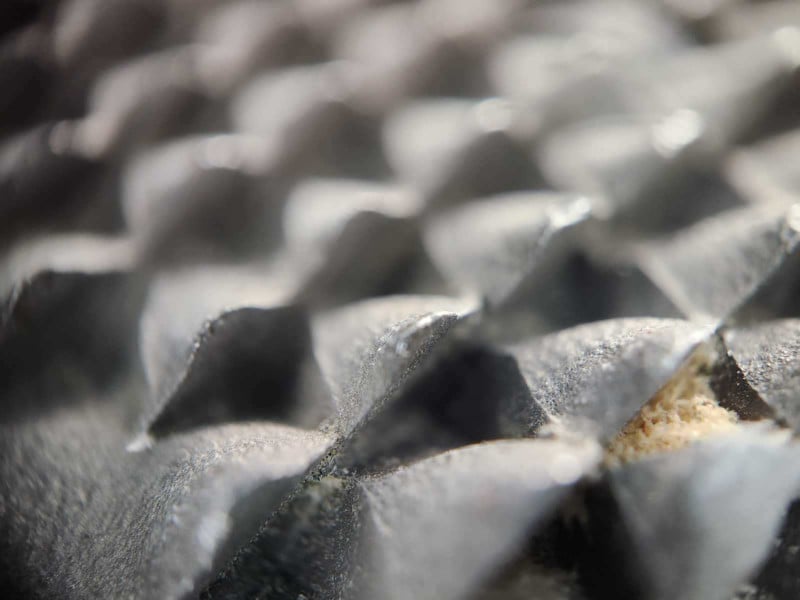
Having had the benefit of Cemal’s experience with the microscope attachment, I knew to have care when using the device on my phone as the lens is prone to misalignment. My first captures using the Apexel 200x Smartphone Microscope were flat subjects at hand, cloth, skin, and impossibly small print, and grew to include detail from coins and stamps and other objects in my workshop such as sandpaper and carbide saw tip. I also found that the phone grip I use offers a great advantage in holding the phone steady and also as a stand for photographing thin subjects on a flat surface.


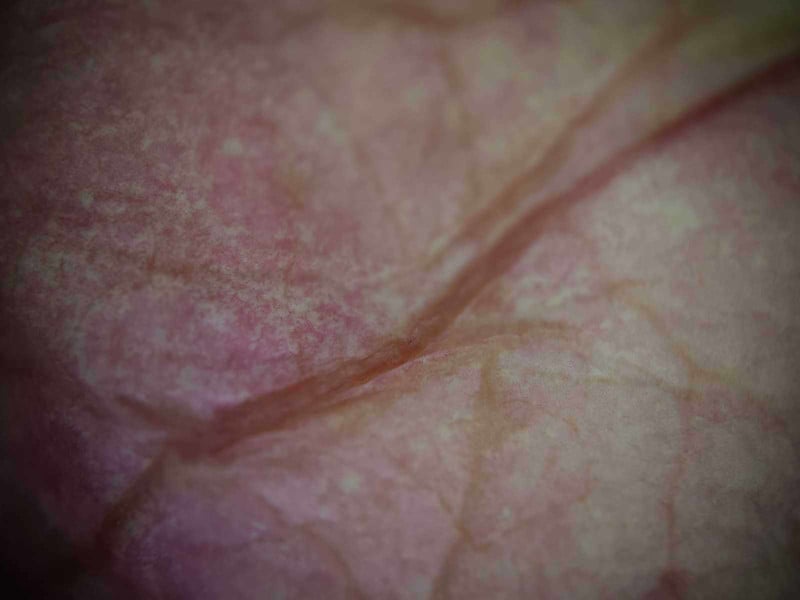
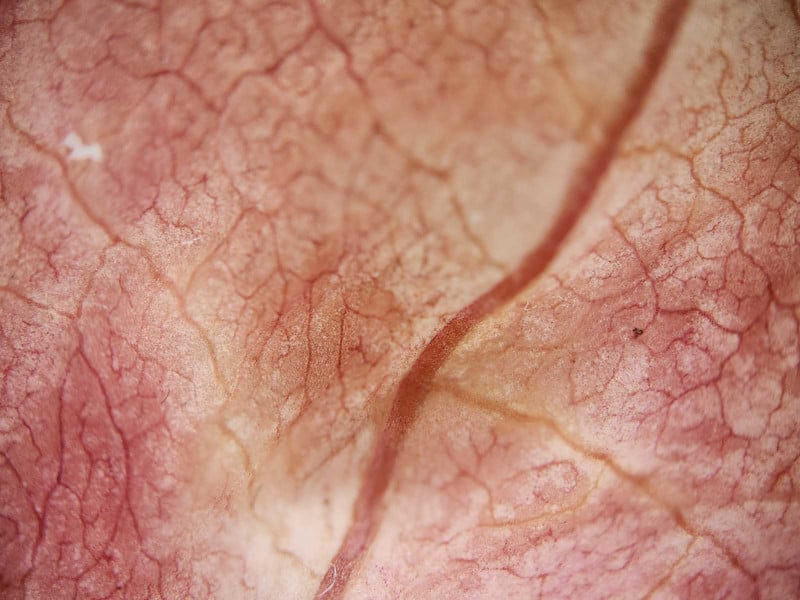
Three-Dimensional Subjects
Three-dimensional subjects pose challenges due to the very shallow depth of field, making it difficult to capture a part of the subject that has an interest. However, the out-of-focus parts of the image have a smooth soft look. While nearby portions are soft, enough of the character of the subject is displayed. Had these tests occurred at another time of year, there would be many natural subjects to try with the microscope adapter.

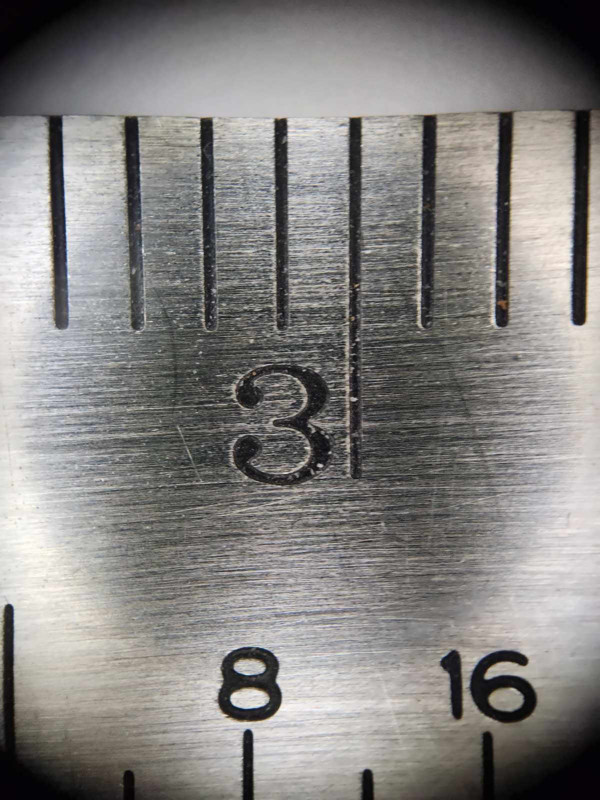
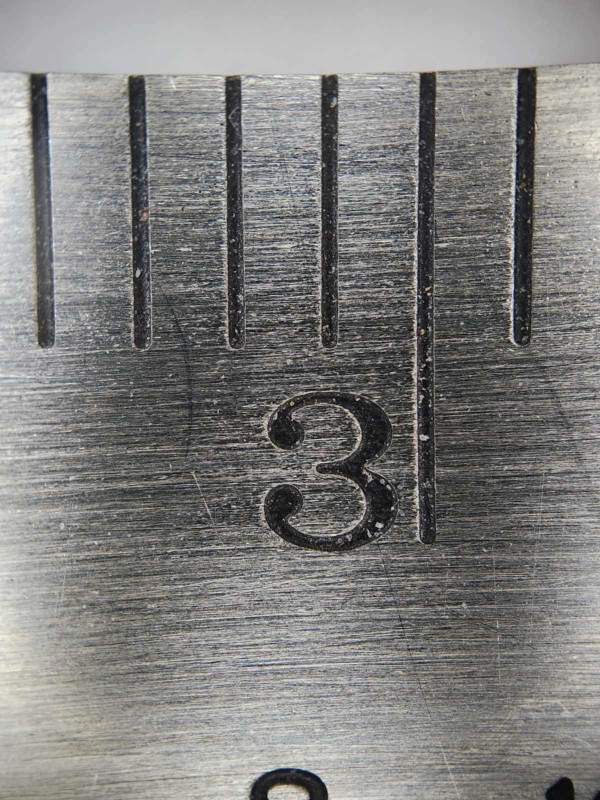
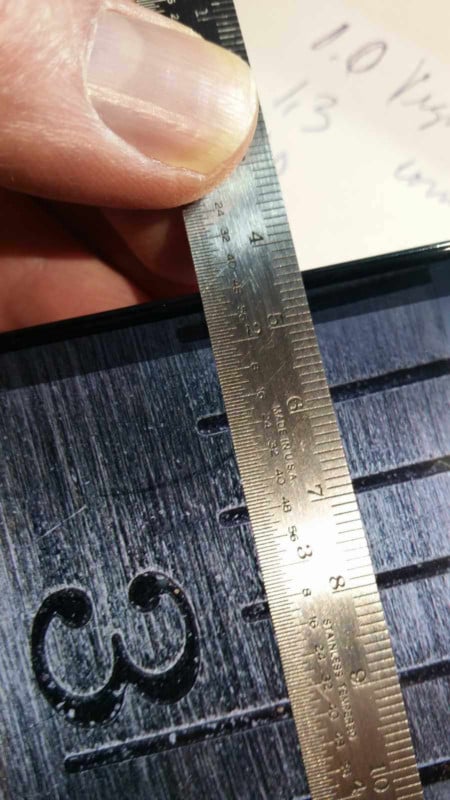
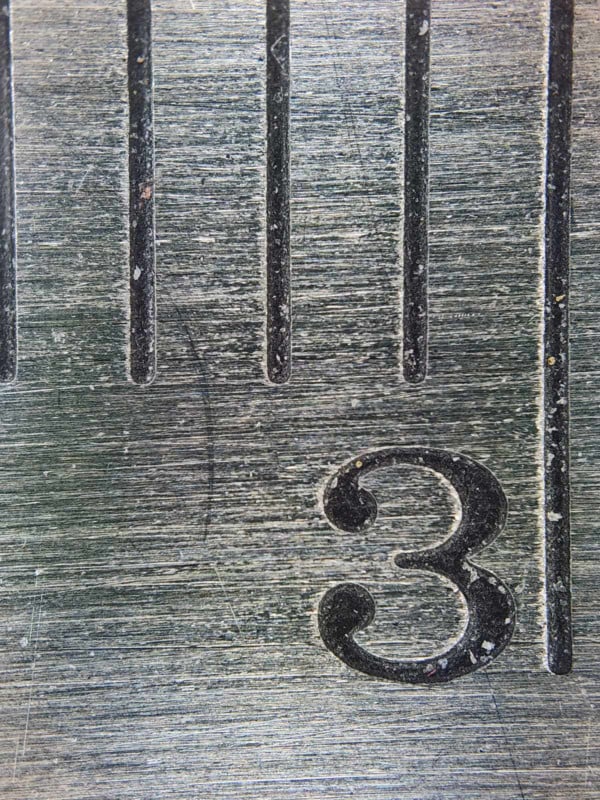
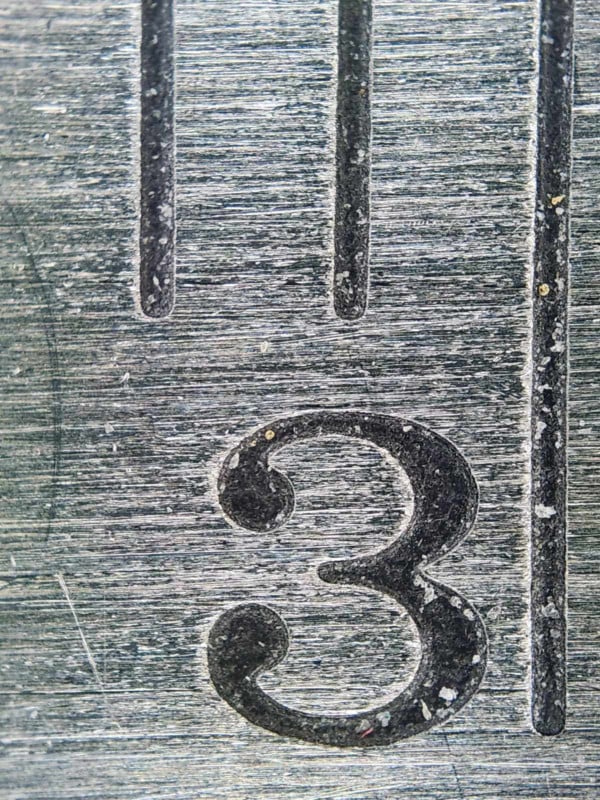
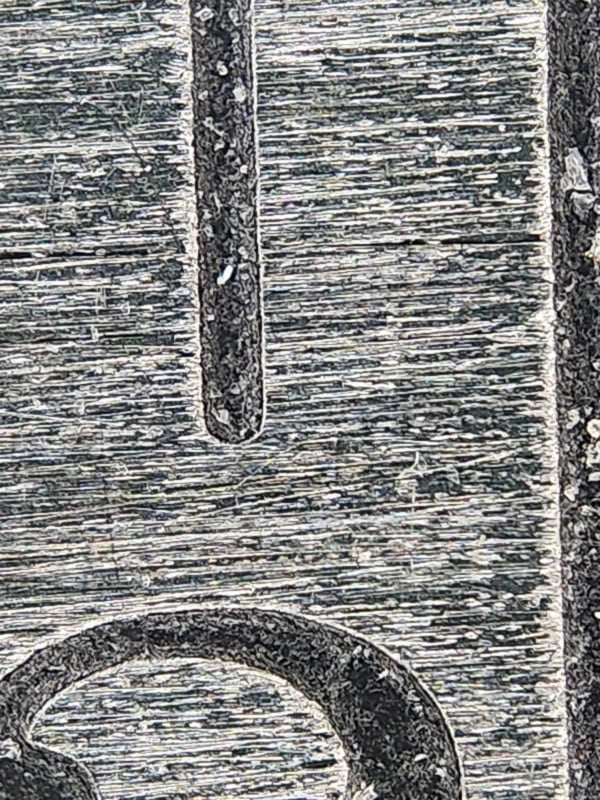
Magnification Tests
One detail was readily apparent; the magnified image was not close to 200X magnification. For a better appreciation of the achievable magnification, I captured images of a machinist’s scale and found the magnification is controlled by the zoom setting of the smartphone camera. I set the camera at a camera zoom setting of 1.0X there is some corner vignetting of the image on the screen. Adjusting the magnification to 1.2X eliminates the vignette. The image of the millimeter scale that was photographed was displayed on the screen and the scale was placed on top of it to show a magnification of approximately 10X. No measurement of the subsequent captures at 2.0x, 2.9X 5.1X, and 9.5X camera zoom settings. The images here provide a visual comparison of the magnification.
Summary
The Apexel 200x Smartphone Microscope is by no means a scientific instrument, nor would you expect it to be at the low advertised price. It is a novelty lens, and if you have subjects that are flat this can be a fun attachment to use.
However, if you have patience and want a challenge, this can also be a fun attachment to use in capturing three-dimensional subjects, keeping in mind that for this amount of magnification, the images exhibit a razor-thin depth of field, and at higher magnifications, positioning the subject properly will take plenty of patience and practice.
Cemal’s suggestion of a thin rubber backing on the lens component and a larger, more tactile foot on the clip component would be desired improvements.
About the author: A. Cemal Ekin is a photographer based in Warwick, Rhode Island who has been shooting for roughly 60 years. The opinions expressed in this article are solely those of the author. Ekin retired as a professor of marketing emeritus from Providence College in 2012 after 36 years of service there. Visit his website here. This article was also published here.