How to Choose the Best Lenses for Infrared Photography
Not all lenses perform well with infrared. A fantastic lens for normal visible light photography may be terrible for infrared (aka “IR”) photography. Choosing the right lens can be tricky.
Why is this true? Camera lenses are designed to be optimized for visible light so that they render as accurately as possible, how we see with our eyes. Infrared light is transmitted by lenses but normally focuses on a different plane than the camera’s sensor.
Although digital camera sensors are capable of “seeing” infrared and ultraviolet parts of the spectrum, camera manufacturers put filters in front of the sensor that filter most of this out. When you get your camera converted to infrared, the conversion company replaces these filters with ones that allow the sensor to see a specific part of the infrared spectrum and may also include part of the visible spectrum.
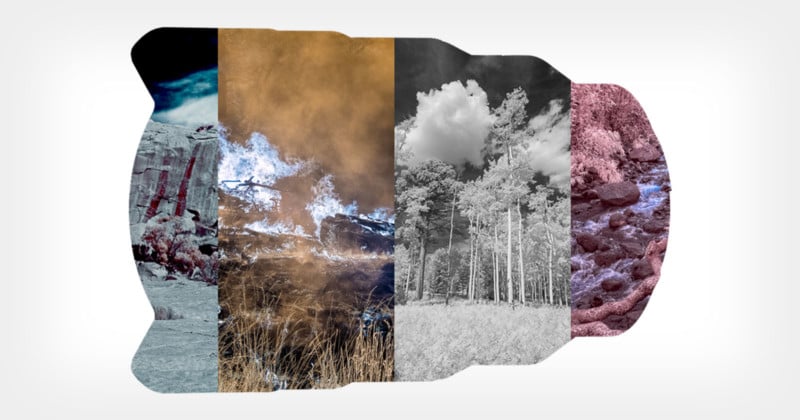
When you look at the choices offered, you can actually choose how much of the spectrum your converted camera will see. This offers a variety of looks from which you can choose. Because of the intricate and delicate nature of converting digital camera sensors for infrared, it is very important to choose a reputable and experienced conversion company.

Note: See here for a list of camera conversion companies I recommend.
Lens Issues That Show Up With Infrared
The most common issues or problems that show up with infrared that you won’t see in the same lens with visible light photography are “hot spots”, loss of acutance (sharpness), and sometimes excessive flare.
Hot spots are usually bright areas in the middle of the image and tend to get worse and more defined as you stop down. Some lenses don’t exhibit hot spots at all and thus are preferable for infrared. Or hot spots may not appear at wider apertures but show up as you stop down (example below.) With zoom lenses, you may get hot spots at some focal lengths and not others.

Something else I’ve noticed but isn’t widely reported is the loss of acutance with the same lens compared to its visible-light performance, especially as you go out from the center of the image. Because people use different terminology for resolution or acutance, for ease of explanation, let’s call it apparent sharpness.
It is not always strictly how well the lens resolves that leads to loss of apparent sharpness. It can also be lack of contrast, other optical factors, or a combination of these. For example, a subtle broad and gradual hot spot will cause a loss of apparent sharpness in the central area by reducing contrast there.
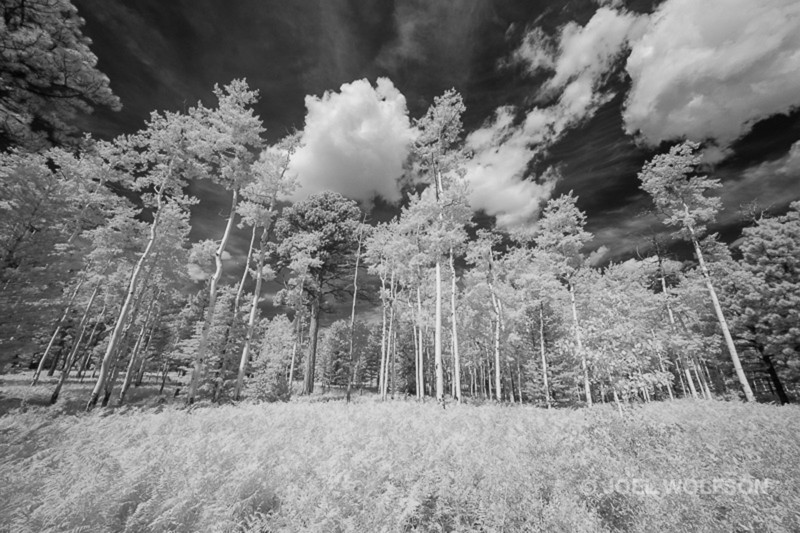
Many infrared shooters like the dreamy look of softer edges and don’t seek to have the same apparent sharpness they’d expect with visible light. With the infrared image that I used for my example below, I had good success getting sharpness comparable to visible light using Topaz Sharpen AI. I don’t show the sharpened results here because I want viewers to be able to see the infrared versus visible light difference. However, with such amazing tools available to us, it can now be an artistic choice.

Finally, the flare issue is highly variable and dependent on the situation much like visible light. In my experience, some lenses may be more prone to flare using infrared than with visible light. For me, it’s not a deal-breaker if the lens is otherwise good for infrared. I treat it as I would with visible light: I try to avoid shooting directly into the sun or other light sources. For those times I want a sun star I just try it and see if I get excessive flare or not.
Testing for Infrared
I’m rather compulsive about testing every lens I buy, both for visible light and infrared. There have been several times I’ve gone through 2 or 3 samples to get a really good one. I’ve got the visible light testing down as I’ve been doing that for decades. In recent years, I’ve figured out some good tests for infrared. Generally, the number one issue is hot spots.
With my studio being located in northern Arizona, more days than not, I have a clear blue north sky to shoot hot spot tests. I am able to test resolution using the same ISO 12233 targets as for visible light, in my studio. Because resolution can change with focus distance my studio test is limited to a practical range of about 3-18 feet (1-6 meters) so I will also do field tests to check lenses at greater distances. These are the controlled tests. I will also shoot various subjects in a less controlled way just to try different situations, sun angles, etc.
Situational Nature of Infrared
I have found that potential lens issues when shooting infrared are situational. By this I mean depending on the lighting, subject matter, and the specific conversion, issues with lenses may show up to a greater or lesser degree. For example, if you’re shooting a nature scene that has lots of trees in the center area of your image, you may not see a hot spot that might be visible if that same area was clear blue sky or with different lighting angles.
Hot spots, in particular, can be more or less prevalent depending on the lighting. And typically hot spots are less noticeable with black and white. Generally, hot spots are the worst with cameras converted to “pure” infrared in the 830nm-850nm range. So if you get a conversion with a lower number/frequency such as 590nm, it is possible you may not have problems or as many problems with a given lens. Additionally, you may encounter different results with a “full-spectrum” conversion.
Very Few Infrared Reviews Out There
While it’s quite easy to find multiple reviews for any given lens, they rarely cover infrared performance. For this reason, I have done a number of exacting tests myself on numerous lenses using infrared. In some cases, I have sought out third-party lenses when the manufacturer doesn’t have one in my desired focal length that works well in infrared. Sometimes I just end up buying a lens and trying it because I can’t find enough (or any) information about its infrared performance.
I have several recommendations (see My Recommended Lenses below) based on my tests and real-world use. I’ve also included a resource section for tests done by others.
Double Duty
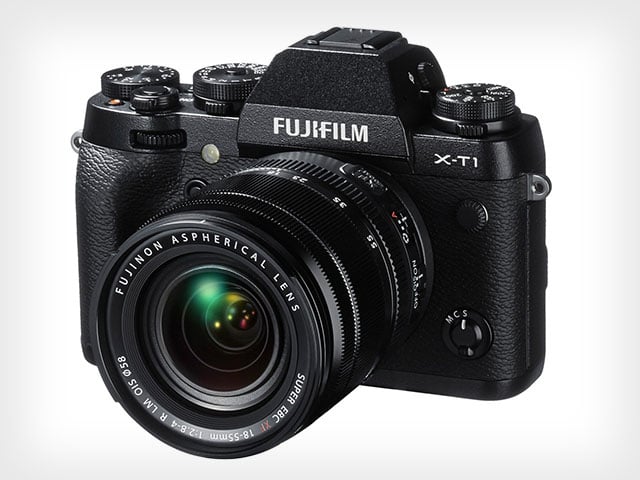
If you’re lucky, you find a lens that will work well for both visible light and infrared. For example the Sony 100-400mm f/4-5.6 GM is stellar for both as long as you don’t try to use the 1.4X teleconverter for infrared. For a lot of my photography (both visible and infrared), I like to have a walkabout lens that covers a broad range of focal lengths so I don’t miss shots while changing lenses. For my Fuji system I keep the Fuji XF 18-135mm on my infrared body and the Fuji XF 16-80mm on my visible light body. The XF 18-135mm happens to be superb for infrared.
In the case of the Sony full-frame system, I really like the FE 24-240mm. It’s certainly less than perfect for infrared but the range is so handy I just try to avoid focal lengths and apertures that are troublesome. Though it isn’t ideal, with the overlap of the Sony/Zeiss 35mm f/2.8 prime, 12-24mm, and 100-400mm I can cover most situations where the 24-240mm might fall short.
My Recommended Lenses
I’m including lenses I’ve formally tested as well as those I’ve found to work well for infrared but prior to implementing my more formal testing. I’ve used all of them in real-world shooting. The lenses I’ve formally tested are ones I purchased more recently for Fujifilm APS-C (XF mount) and Sony full-frame (FE mount) cameras. My tests were done with 665nm conversions for both. I’ve also included a few lenses for Micro 4/3 using a 590nm converted camera, that I have found to work well in real-world use.
Keep in mind that your results could be different, particularly with different camera models and IR conversions but this should be a good guideline. It is always best if you can try before you buy and if you can’t do that, then rent or make sure the store has a good return policy.
The list of lenses below are ones that range from partially useable to excellent for infrared. Please read the comments to guide you.
Note for the technically minded IR shooters: I think the 665nm conversion used in most of my tests is a useful one as it sits between the 590nm which tends to be more forgiving and the 830nm which tends to be more unforgiving regarding infrared issues.
Both formal testing and real world use for infrared
Fujifilm X-Mount
- Fujifilm XF 16-80mm f/4 OIS. No hot spots wide open through f/5.6 at 16-24mm. Good through f/8 at 35mm. 50-80mm good at all apertures.
- Fujifilm XF 18-135mm f/3.5-5.6 OIS. Good at all focal lengths and apertures.
- Fujifilm XF 27mm f/2.8 R WR 2nd gen. Only useable at f/2.8. No hot spot wide open but hot spot from f/4-f/16. More defined as you stop down. It is so well defined at the smallest apertures, it could be spotted out in many cases.
- Fujifilm XF 55-200mm f/3.5-4.8 OIS. Good at larger apertures, hot-spots may show at f/8 and smaller.
- Fujifilm XF 70-300mm f/4-5.6 OIS. Best at apertures below f/11 on the wider end and it gets better at 200-300mm.
- Laowa 9mm f/2.8 X-mount. No hotspots but sharpness falls off towards edges.
- Zeiss Touit 12mm f/2.8 X-mount. No hot spots wide open through f/8, very subtle hot spot at f/11.
- Viltrox AF 56mm f/1.4 X-mount. No hot spots wide open through f/5.6 with f/8 being quite usable most of the time.
Sony Full Frame E-mount
- Sony FE 12-24mm f/4 G. Good from wide open through f/8 at all focal lengths.
- Sony Sonnar T* FE 35mm f/2.8. No hot spots wide open through f/11.
- Sony FE 24-240mm f/3.5-6.3 OSS. Only good at some focal lengths and apertures but not others.
- Sony FE 100-400mm f/4.5-5.6 GM OSS. Excellent overall but 1.4X teleconverter not recommended.
Sony APS-C E-mount
- Sony E 18-135mm f/3.5-5.6 OSS. My top choice for Sony APS-C. Excellent overall with no hot spots at any aperture and tested focal lengths.
- Sony E 18-200mm f/3.5-6.3 OSS LE. Great for its absence of hot spots at all apertures and focal lengths but only moderate performance for sharpness, as one might expect for this range. Note: Sony makes two other 18-200mm APS-C lenses. I only tested this one, not the PZ or older non-LE models.
Real world use for infrared but without formal testing:
Micro Four-Thirds
- Olympus M.Zuiko Digital 12-40mm f/2.8 PRO. No issues, even at smaller apertures. Sharp to edges and good sun stars.
- Panasonic Lumix G Vario 100-300mm f/4-5.6 ver 1. Hot spots at 100mm but does well above 180mm. This version 1 lens is discontinued but may be available used.
- Panasonic Lumix G Vario 14-45mm f/3.5-5.6. Excellent throughout range of focal length and apertures. This lens is discontinued but you may find them used.
Resources
In addition to the testing that I’ve provided here, the links that follow are a decent starting point to further help you choose lenses. One of the links is specific to Fujifilm X-mount lenses. The other two include several brands. For the most part, they are all geared towards hot-spot performance. Simon Weir’s tests (Fuji mount only) provides some comments on sharpness too.
I recommend reading the notes and details for each of the lists.
- LifePixel hot spot testing database. The testing was done by LifePixel themselves, of various Canon, Nikon, Fujifilm, and Sony lenses
- Simon Weir’s tests of Fujifilm (XF) mount lenses. A useful resource for Fuji shooters. He has information for both hot spots and sharpness
- Kolari Vision hotspot database. This is a compilation database they put together of numerous major equipment brands and various third-party lenses.
The Big Picture
In the end, shooting infrared comes down to aesthetics and your personal preferences. Hot spots can be annoying but soft edges and/or a hazy feel are often considered part of the charm of infrared photography, especially in black and white. My aim for this article is to arm you with enough information to make informed choices based on the way you shoot or intend to shoot while participating in the amazing world of infrared photography.