Shooting with a 21-Year-Old Camera: The Fujifilm S1 Pro
I find it incredibly fun to use older, especially unique, digital cameras both as a challenge and for sheer enjoyment.
Conversely, when we have a Hasselblad in our hands, we may let go a bit in the unconscious belief that the camera can make up the difference for our lack of talent or effort. Of course, we all know it can’t.
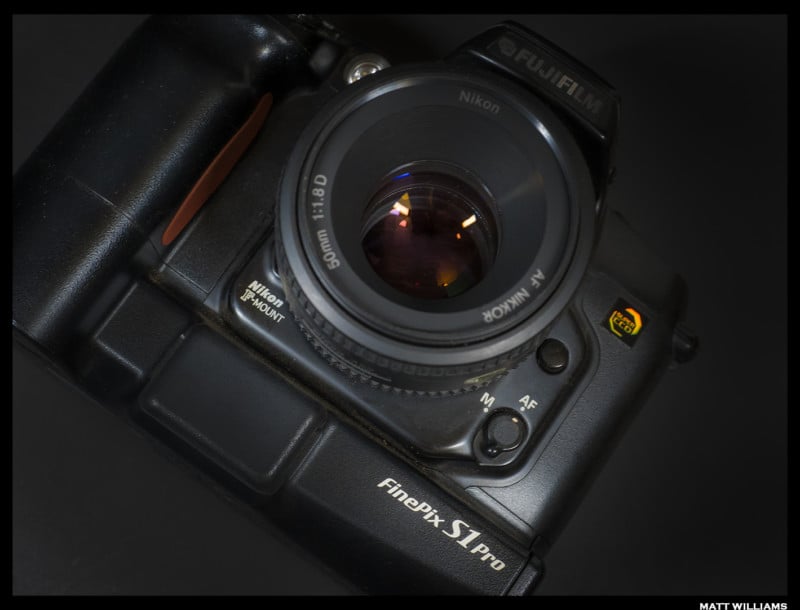
I won’t get into the boring history of why I own a lot of early to mid-2000s digital cameras, but at some point, I found myself the owner of a Fujifilm Finepix S1 Pro — the first in a five-model line of Fujifilm DSLRs that housed some incredibly unique sensor technology that it dubbed “SuperCCD.”
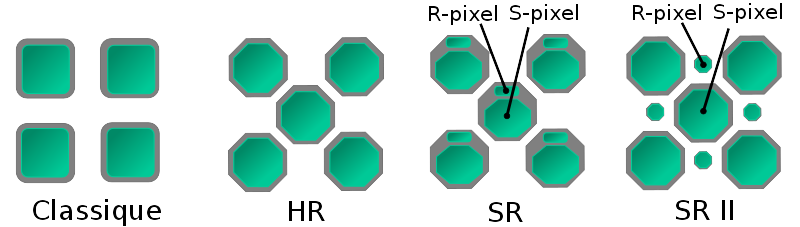
In the S1 Pro, the photodiodes of the 3.1-megapixel SuperCCD sensor took the form of a honeycomb tessellation, oriented in a zig-zag array rather than a simple vertical/horizontal mosaic. Because of this, the distance between cells is smaller, making for about 40% more (square root of 2 = 1.41) sensor cell rows horizontally and vertically than a regular Bayer sensor.
The camera then uses an interpolation algorithm that supposedly results in a resolution equivalent to a 6.2 megapixel Bayer sensor. The 45-degree orientation also allows for improved capture of horizontal and vertical detail. This is good because most of the world, thanks to gravity, exists in horizontal and vertical planes — however, this happens at the expense of diagonal resolution, which is where traditional sensor layouts excel.
Released in January 2000, the Fujifilm S1 Pro is based on the Nikon N60 (aka F60) film camera body (with modifications by Fuji). It logically sports a Nikon F mount and can use AI, AI-S, AI-P, AF, AF-D, or G type lens — however, only AF and AF-D lenses will autofocus. AI and AI-S lenses can only be used in manual exposure mode as there is no meter coupling.
Most of these photos were shot with either the Nikon AF-D 24-120/3.5-5.6 or Nikon AF-D 50/1.8. While the 24-120 is not a quality optic, it’s a more than sufficient match for this sensor, especially stopped down a bit — and you can stop down to your heart’s content without hitting diffraction on this camera.

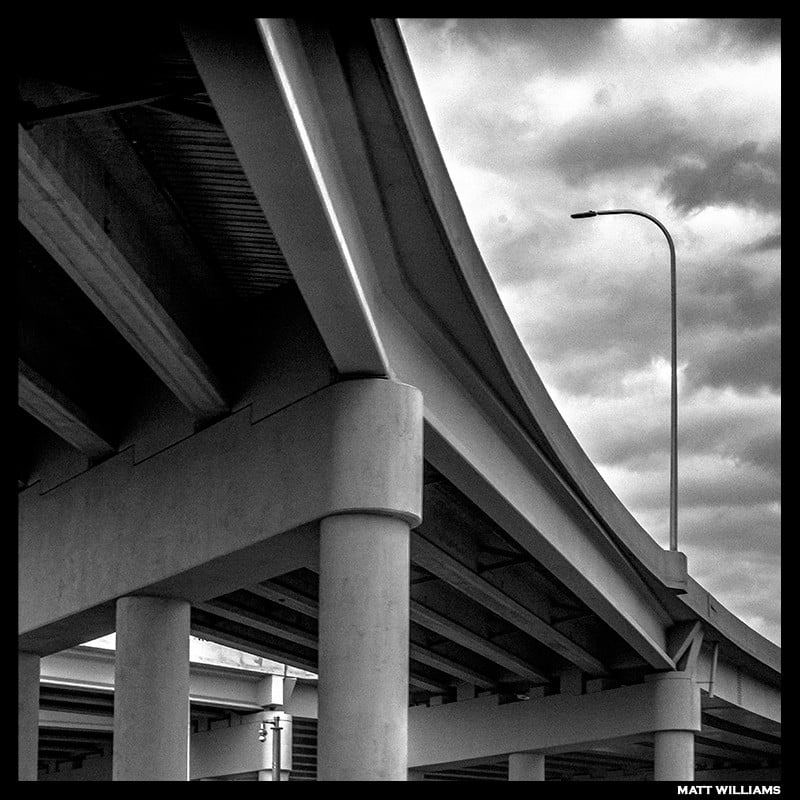
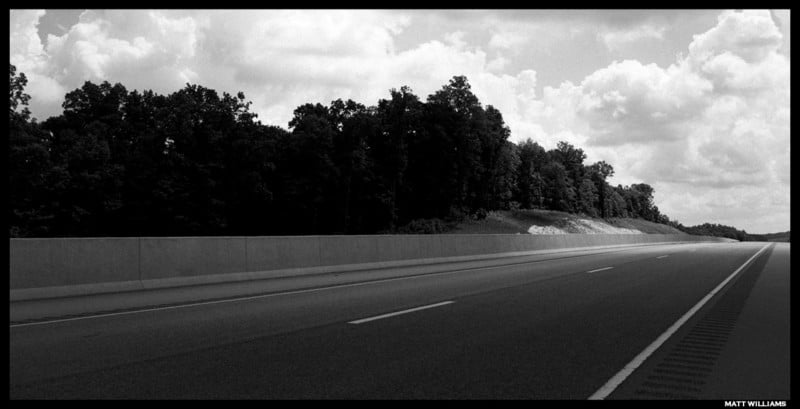
I had initially gone out shooting with some superior G-type lenses, however, accurate manual focusing is impossible for me through the straw-like OVF (wearing glasses doesn’t help either) and the focus confirmation dot is totally unreliable. Strangely, I had more issues manually focusing on distant objects stopped down than closer ones wide open — the photo above was manually focused with the Sigma Art 35mm wide open at f/1.4, yet the below photo (slightly out of focus) was at 24mm and f/8 with the Nikon 24-120mm f/4G VR.

Shutter speeds top out at 1/2000th. There are several metering modes (3D 6-zone, 6-zone, center-weight), a pop-up flash and hot-shoe (Nikon TTL compatible), and ISO options of 320, 400, 800, and 1600. There is no auto ISO function, and you have to menu dive each time you want to adjust it.
File choices are JPEG or TIFF only — no RAW, unfortunately — recorded to either CompactFlash or SmartMedia. The camera certainly did not accept my 64 or 128GB cards, but I was able to dig up an old 1GB card that can hold a whopping 56 TIFF files in the highest quality mode available (“Hi RGB TIFF”).
This is easily the slowest camera I have ever used. The menu is the antithesis of intuitive; it’s mostly just a collection of symbols and abbreviations and my hat is off to you if you can guess their meaning without reading the manual.
Forget chimping. Just murder that idea and bury it. It takes a solid 31 seconds (yes, I timed it) for an image to populate the screen. Once it does, just about the only thing you can confirm is that a photo was indeed taken, though a histogram is available for more accurate analysis. JPEGs, however, are significantly faster to review.
In a way, if you choose TIFF over JPEG, using the camera is akin to shooting a bulked-up Nikon N60 loaded with a roll and a half of film — no image review, roughly 55 maximum shots, and no quick adjustment of the ISO.
The S1 Pro allows you to choose between either 3.1MP or 6.2MP output. To produce a traditional image file — which exists in rows and columns — the camera must interpolate by using adjacent photosites to generate data between existing pixels. After all, the recorded file can’t exist in the same zig-zag honeycomb pattern as the sensor. After each line is read out and the missing data is filled, you end up with twice the spatial resolution (6.2MP).
Compared to the Nikon D40, which uses a 6.1-megapixel Bayer sensor, the S1 Pro doesn’t quite reach the same level of pixel acuity. However, side by side with the 4.1 megapixel Nikon D2Hs, there isn’t much in it between the two. So, I think the real Bayer-equivalent resolution sits somewhere in the middle of 3.1 and 6.2MP — around 4-4.5 megapixels. As it would happen, this is exactly in line with the roughly 40% increase in sensor cell rows (3.1 * 1.41 = 4.37). It also depends on the scene — some benefit from the unusual sensor design much more than others.
CCD sensors are not forgiving of sloppy exposure. Pushing or pulling can quickly result in blotchy chroma noise, severe color shifts, and compromised roll-off from the quartertones into the highlights. It is not unlike slide film in this way.
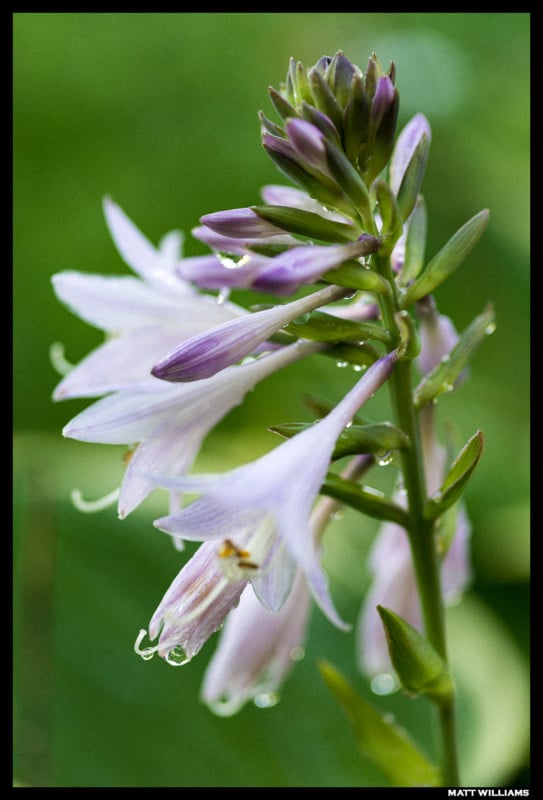
The colors are phenomenally accurate and neutral out of the camera. “ORG” tone and color produce a lovely, neutral file that’s perfect for editing, and “STD” (standard) tone and color make for a pleasingly usable straight-out-of-camera file. Even with color set to “HIGH” and tone set to “HARD,” the images aren’t bombastically oversaturated and Disneyland like we often see with the “Vivid” setting in modern cameras. In fact, High Color/Hard Tone photos exhibit only a very modest bump in saturation and contrast compared to Standard Color/Tone. One thing is perfectly clear: Fujifilm was producing cameras with beautiful color output long before X-Trans.
All the images here were shot at ISO 320, 800, or 1600. ISO 400 is completely pointless given that it’s a mere quarter stop gain over base. It would be easier to just dial in a third of a stop of exposure compensation rather than clicking through the menu. I really wish there was a lower base ISO of 160, as well as intermediate options like 640 and 1280.
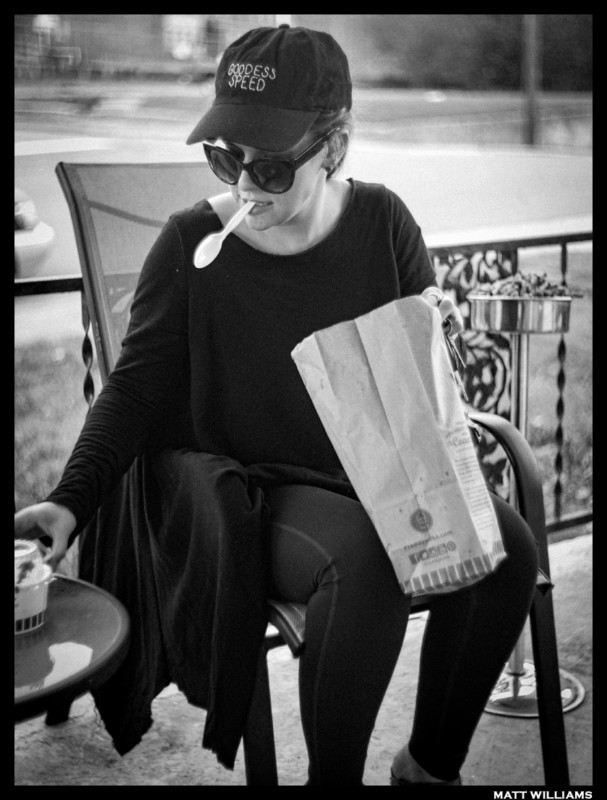
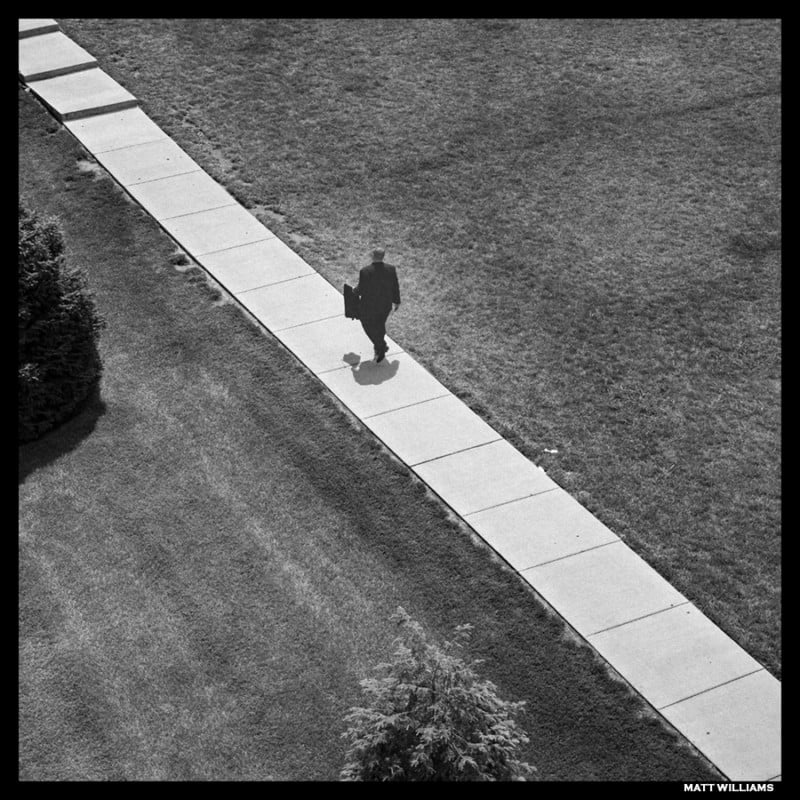
The camera’s high native sensitivity — combined with early CCD architecture — means that there is a noticeable level of noise even at base ISO. Thankfully, the noise is quite pleasing and mostly luminance up through ISO 800 — even 1600 has very minimal chroma noise straight out of the camera. Anecdotally, I’ve found this to be a running theme with CCD sensors — considerable noise even at base ISO, but the noise presents very favorably through most, if not all, of the sensitivity range depending on the camera. It also makes for astonishingly appealing black and white photos, especially given the finely grained texture from what is largely high-frequency noise. “Film-like” would be an apt descriptor for the results.
If you nail exposure in camera, ISO 1600 will produce remarkably great results with an unexpectedly low amount of noise for a sensor of this type and age — there isn’t much to speak of in terms of offensive noise and photos are completely usable without any noise reduction. However, at this point, you’ve lost a good bit of dynamic range and if you try to push the image in any way, blocked up patches of low-frequency chroma noise and banding immediately rear their head. There is essentially zero room for pushing the files at all if shot at ISO 800 or higher.
Quite impressively, there is almost nothing in terms of color shift throughout the entire sensitivity range — what is accurate or pleasing at base ISO will be accurate or pleasing at 1600. Again, this is something I have noticed on more than one occasion with CCD cameras — the Pentax 645D behaves almost identically throughout its ISO range.

While restrictive by modern standards, a highly usable ISO 1600 in an APS-C camera in the year 2000 was exceptionally good. Fujifilm claimed the SuperCCD cameras to have superior sensitivity performance — the honeycomb photosites allow for more pixels to be packed within a given area and their shape more closely mirrors the circular microlenses that sit above them. I think Fuji’s assertation bears out in practice.
I would estimate roughly 7.5-8 stops of usable dynamic range, which is up against what I presume is an 8-bit ADC (analog to digital converter). Given this, along with the unforgiving nature of CCD sensors and processing latitude further limited by the lack of RAW, you need to be very deliberate with your exposure choices. Even in a scene of moderate contrast, you will almost certainly have either crushed blacks or clipped highlights.
However, like most CCD cameras, you do start to lose dynamic range quickly once you boost the ISO by a couple of stops. There also isn’t much in the shadows — modern cameras (CMOS) tend to have a lot of their dynamic range bunched up in the shadows, allowing for some truly incredible detail recovery. CCD sensors do not work the same way, and even with a full-blown RAW file, I doubt you’d find much usable information at that end of the histogram. You can mitigate this somewhat via ETTR (“expose to the right”), but with what is already a suboptimal amount of dynamic range, you’ll only have a small amount of latitude for ETTR, if any.
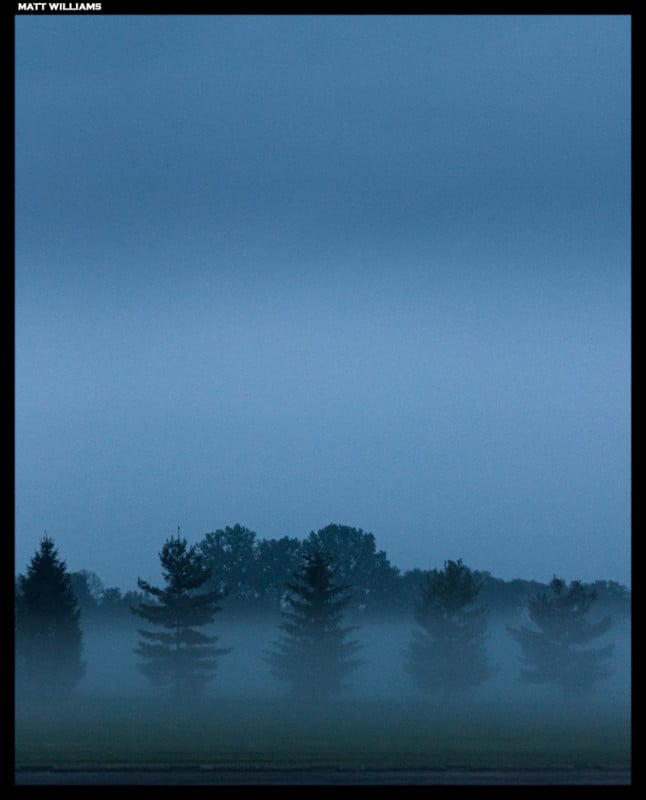
While the camera’s light meter, particularly the 3D 6-zone multipattern meter, is exceptionally adept at balancing exposure in difficult scenes, the auto white balance is a duality: it’s either one of the most accurate I have ever seen or it’s the worst. Almost all the photos I took required zero tint adjustment and usually only +1 to +4 temperature adjustment. However, on three occasions the images were off by so much I’m still baffled as to exactly why.
The most egregious were photos taken about two hours before sunset in the shade — they were rendered extremely blue and about half a stop underexposed. The white balance went so far off the map that most of a plain white T-shirt measured blue values from 240 on up to completely clipped! I assume the culprit for this error is a combination of the camera’s CCD light meter design and spectral response — the infrared filter may be causing issues in certain situations too. IR filters can strongly affect the blue channel and it’s possible there was a bit of Rayleigh scattering at work.
The major issue is that without a RAW file, your options are extremely limited — those botched files required +76 temperature to correct. Such a massive shift in an 8-bit TIFF file results in horrendous noise — especially bad because the blue channel is always the noisiest — and extreme spectral shifts across the entire image. Strangely, a separate shot of a red step ladder taken five feet away at the same time required only -3 tint and zero temperature adjustment.
Using the S1 Pro reminds me of shooting with the original 18-megapixel Leica M9 and Leica M Monochrom cameras — both with Kodak CCD designs. Neither those cameras nor the S1 Pro has any tolerance for “underexpose to protect the highlights” or similar approaches in the same way that CMOS sensors allow — not unlike how slide film doesn’t take kindly to push processing. People who worry about how a camera handles being pushed five stops will need to adjust — it’ll help them in the long run so they can finally learn to stop underexposing so much.
Ultimately, while the files from the S1 Pro don’t contain anywhere near the latitude of even modern JPEGs, let alone the power of RAW, my biggest takeaway while using this camera was how much I adore and value transparency as a starting point out of the camera. In a way, the naturality of colors and tones from this camera makes it even more aggravating that the files can’t stand up to much manipulation — I would absolutely LOVE results like this out of my Nikon Z7, and every other camera I have for that matter.
What I would love to see is a universal “Natural Color Solution” (to steal a term from Hasselblad) adopted by all manufacturers and implemented in their cameras as an option. If you want that “Natural Color” RAW file, you can have it. If you want the look that you’ve come to love from your manufacturer, you can pick that too. Aside from Hasselblad, I’m not sure what would be the risk for manufacturers to do this — other than that it would take some effort and time.
I would not call the Fujifilm S1 Pro a fun or pleasant camera to use at all. To be honest, I probably immediately deleted 99% of the photos I took while doing this review. And even among the ones you see here, there are more than a few that I am not happy with. Normally, I would not settle for posting simply passable images, but in this case, I think even the lesser photos here do have value by showing both the warts and the ornaments.
Have no doubt, this is a challenging camera to use. I’m sure my images would greatly improve with continued use, but how much I am not sure — I feel like you hit the ceiling quicker than you might imagine.
Perhaps I can follow this up with a retrospective review of 2005’s Fujifilm S3 Pro, which sports a new SuperCCD SR sensor with two photodiodes per photosite — one of normal sensitivity and a smaller one of lower sensitivity. Both are combined to produce enhanced dynamic range (and it works very, very well). The general principle behind such a design comes from the structure of the crystal coating in silver halide film. The S3 also has a 14-bit ADC and produces 14-bit RAW files! That’s just a few of the improvements, but I’ll tell you this much: the SuperCCD SR sensor does NOT disappoint.